DIY Play Kitchen Makeover: Upcycle a Thrift Store Find
DIY Play Kitchen Makeover: Upcycle a Thrift Store Find
That dated play kitchen at the thrift store? The one with the faded pink cabinets and peeling stickers? It’s about to become the most stylish piece in your playroom—for a fraction of the cost of buying new.
Play kitchen makeovers are one of the most satisfying DIY projects. You take something tired and transform it into a personalized, modern piece that looks like it cost hundreds. Your kids get a unique play space, you get the satisfaction of upcycling, and your wallet stays happy.
Here’s how to do it, step by step.
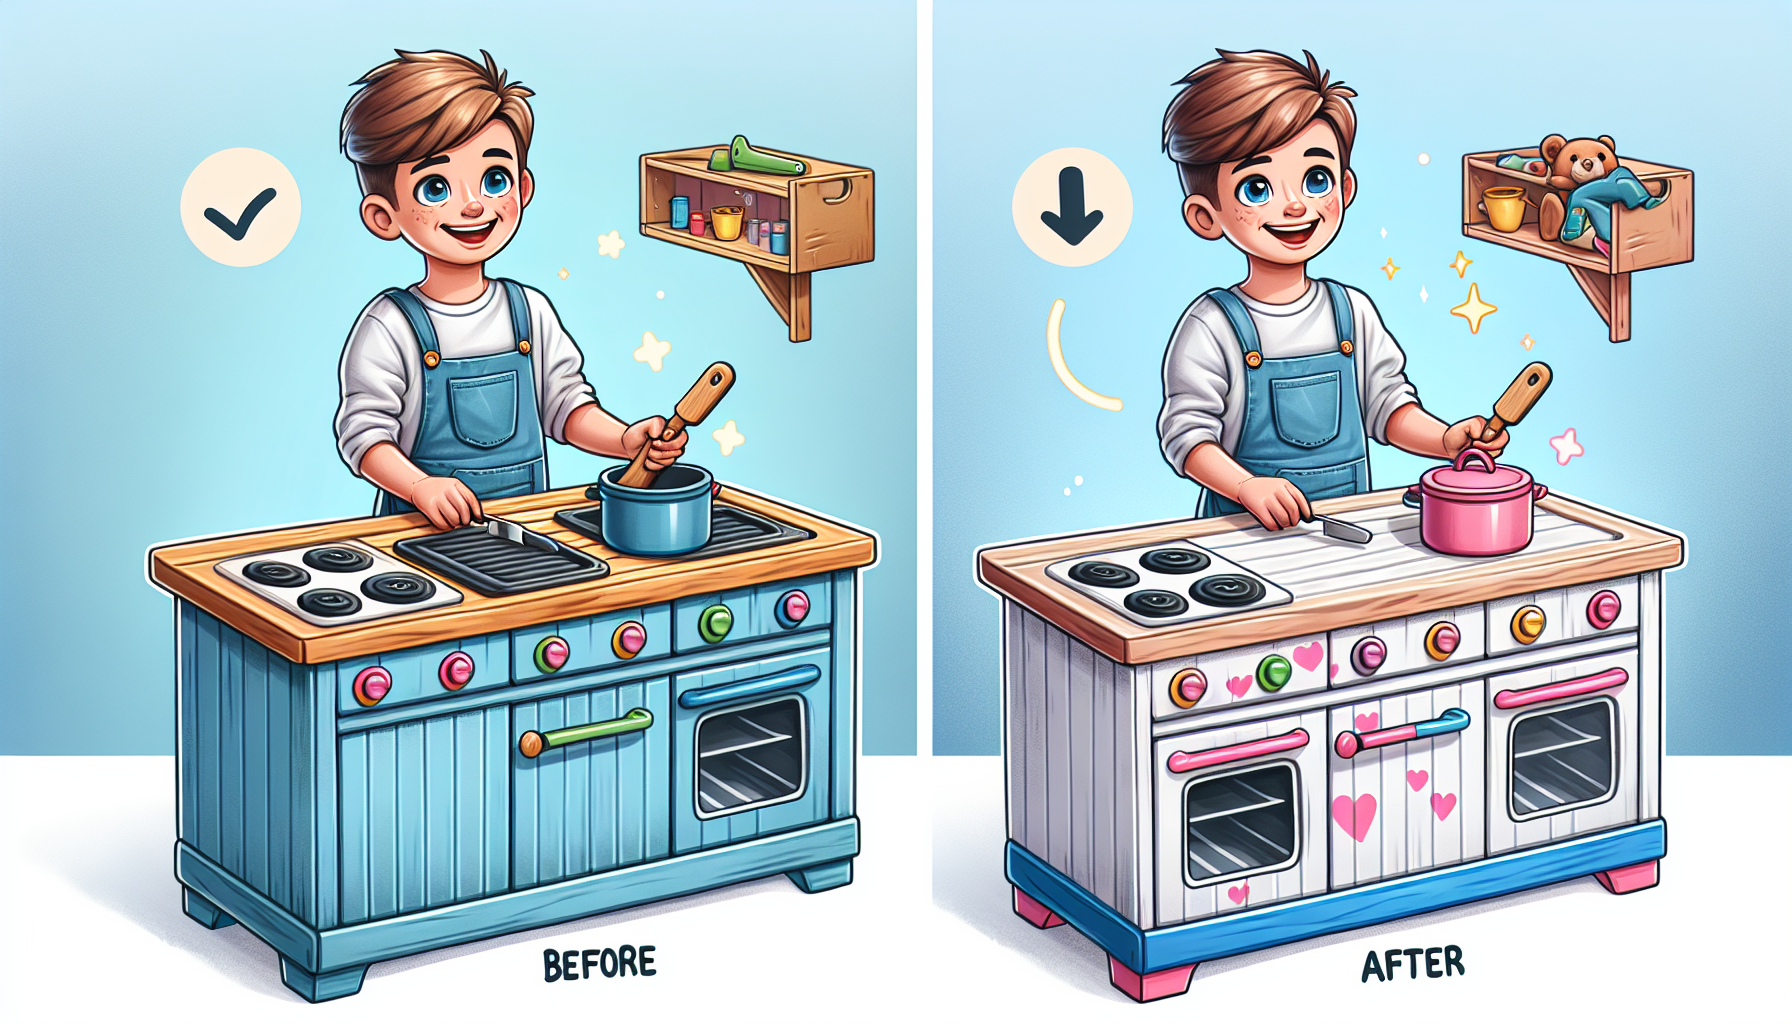
[Image placeholder: Before and after of play kitchen transformation, modern neutral colors]
Why Makeover Instead of Buy New
Cost comparison:
- New modern play kitchen: $150-400+
- Thrift store play kitchen: $15-40
- Makeover supplies: $20-50
- Total makeover cost: $35-90
Other benefits:
- Customized to your aesthetic
- More durable finish than original
- Sustainable (keeps toys out of landfills)
- Teaching moment about upcycling
- Unique conversation piece
Finding the Right Play Kitchen
Where to Look
- Thrift stores (Goodwill, Salvation Army, local)
- Facebook Marketplace
- Craigslist
- Neighborhood buy-nothing groups
- Garage sales
- Friends with older kids
What to Look For
Good candidates:
- Solid structure (not wobbly or cracked)
- All doors and drawers work
- Complete (or mostly complete)
- Simple design (easier to transform)
- Good size for your space and child
Avoid:
- Broken pieces you can’t fix
- Missing major components
- Warped or severely damaged plastic
- Too-small size for your child
Price guide: $15-40 is typical. Under $20 is ideal. Walk away over $50.
Common Play Kitchen Brands to Find
- Step2 (very common, transforms well)
- Little Tikes (sturdy, good bones)
- KidKraft (wooden, excellent for makeovers)
- IKEA DUKTIG (popular for hacks)
Supplies Needed
For Preparation
- Dish soap and water
- Magic Eraser
- Sandpaper (120-220 grit)
- Painter’s tape
- Drop cloths or plastic sheeting
- Screwdriver (to remove hardware)
For Painting
Paint options:
- Chalk paint (minimal prep, matte finish)
- Spray paint for plastic (Rust-Oleum makes excellent options)
- Acrylic latex paint with primer
- Cabinet paint (most durable)
Recommended: Rust-Oleum 2X Ultra Cover spray paint OR chalk paint brushed on. Both work well on plastic.
Other painting supplies:
- Primer (if not using chalk paint or paint+primer)
- Paintbrushes (if not spraying)
- Clear protective topcoat (Polycrylic, Mod Podge, or clear spray)
For Customization
- New hardware (knobs, handles)
- Contact paper (for backsplash)
- Adhesive vinyl (for decals/details)
- Accessories (hooks, towel bars, small shelf)
Related: IKEA Playroom Hacks
Step-by-Step Makeover
Step 1: Clean Thoroughly
- Remove all accessories and removable parts
- Remove knobs, handles, hardware
- Wash everything with soap and water
- Use Magic Eraser on stubborn marks
- Let dry completely (overnight ideal)
Why it matters: Paint won’t stick to dirt and grease. This step is crucial for durability.
Step 2: Prepare Surface
- Lightly sand all surfaces you’ll paint
- Focus on glossy areas (helps paint grip)
- Wipe away sanding dust
- Apply painter’s tape to protect areas you don’t want painted
For plastic: Light sanding + plastic-specific primer OR plastic spray paint
For wood: Sanding + primer OR chalk paint
Step 3: Prime (If Needed)
- Apply primer if using regular paint
- Let dry per product instructions
- Light sand between coats if doing multiple
Skip if: Using chalk paint or paint+primer combo
Step 4: Paint
For spray paint:
- Work outdoors or in well-ventilated area
- Apply thin, even coats
- Keep can moving (avoid drips)
- Wait 10-15 minutes between coats
- Apply 2-3 coats for full coverage
For brush-on paint:
- Use quality brush or small foam roller
- Apply thin coats
- Let dry between coats
- Apply 2-3 coats
- Light sand between coats for smoothest finish
Drying time: Follow paint instructions. Don’t rush!
[Image placeholder: Close-up of painting technique on play kitchen]
Step 5: Add Details
Contact paper backsplash:
- Measure backsplash area
- Cut contact paper to size
- Apply smoothly, pressing out bubbles
- Trim edges cleanly
Popular backsplash options:
- Subway tile pattern
- Marble look
- Herringbone pattern
- Solid color contrast
Replace hardware:
- Measure existing hole spacing
- Buy matching-size knobs or handles
- Install new hardware
Step 6: Seal and Protect
- Apply clear topcoat over all painted surfaces
- Polycrylic (brush-on) or clear spray sealer
- 2-3 coats for durability
- Let cure fully before use (24-48 hours)
Why it matters: Kids are hard on toys. Sealer prevents chips and wear.
Step 7: Accessorize
Simple additions:
- Small towel hook
- Chalkboard area for “menu”
- Small shelf for display
- Command hooks inside doors
Styling:
- Play food in baskets
- Small plants (real or faux)
- Tiny canisters or jars
- Mini kitchen tools
Color Palette Ideas
Modern Neutral
- White or cream base
- Natural wood details
- Black or brass hardware
- Marble-look backsplash
Farmhouse
- White base
- Black accents
- Brushed gold hardware
- Shiplap-pattern backsplash
Colorful Fun
- Pastel base (mint, blush, sky)
- White countertop
- Coordinating hardware
- Patterned backsplash
Bold Modern
- Deep color base (navy, forest green, charcoal)
- Gold hardware
- White or marble backsplash
- Sleek modern accessories
Related: Playroom Organization Ideas
Extra Upgrade Ideas
Replace Faucet
Swap plastic faucet for:
- Real thrifted faucet (non-functional is fine)
- Spray painted upgraded look
- New shiny hardware
Add Lighting
- Battery-operated LED puck lights inside oven
- Small fairy lights in cabinet
- LED strip above “stove”
Create Storage
- Hooks on sides
- Magnetic strips for utensils
- Baskets underneath
- Pot rack above
Working Details
- Turn original knobs (if they click, keep them!)
- Add chalkboard “menu” door
- Hang small pots and pans
Common Mistakes to Avoid
Skipping Prep Work
Problem: Paint peels within weeks.
Solution: Clean, sand, and prime properly. Don’t skip steps!
Thick Coats
Problem: Drips, uneven coverage, long drying time.
Solution: Multiple thin coats always beats one thick coat.
Not Sealing
Problem: Paint scratches and chips with use.
Solution: Clear topcoat is essential for durability.
Wrong Paint
Problem: Paint doesn’t stick to plastic, chips immediately.
Solution: Use plastic-specific paint or proper primer for plastic.
Rushing
Problem: Tacky finish, fingerprints, disappointing results.
Solution: Let each coat dry fully. Let final product cure before use.
FAQ
What’s the best paint for plastic play kitchens?
Rust-Oleum 2X Ultra Cover spray paint designed for plastic, or chalk paint with appropriate sealer. Both work well with proper prep.
Do I need to sand plastic?
Light sanding helps paint adhere better. It doesn’t need to be aggressive—just scuff the surface.
How long will the makeover last?
With proper prep, paint, and sealer, it should last years of play. Touch-ups may be needed eventually for high-wear areas.
Can my child help with the makeover?
Older kids can help with washing, taping, and choosing colors. Keep them away from paint fumes and let them help with final accessorizing.
The kitchen was free but damaged. Worth fixing?
Depends on damage. Wobbly structure, broken hinges, or missing large pieces may not be worth the effort. Cosmetic damage (stickers, fading) is perfect for makeover.
Conclusion
A DIY play kitchen makeover transforms thrift store finds into personalized, stylish play spaces for a fraction of buying new. With proper preparation, the right paint, and creative details, your upcycled kitchen will look like it came straight from a design magazine.
Find a play kitchen with good bones, gather your supplies, and get transforming. Your kids will have a unique play space, you’ll have a satisfying project complete, and that old toy gets a beautiful second life.
That’s a win-win-win.
Related: DIY Sensory Wall for Toddlers