
IKEA Playroom Hacks: Budget-Friendly Organization
Discover budget-friendly IKEA playroom hacks to transform basic furniture into personalized, functional storage. You'll learn how to customize Kallax and Trofast units for reading nooks, art stations, LEGO tables, and more.
- Identify versatile IKEA pieces like Kallax and Trofast for playroom organization.
- Transform your Kallax unit into a reading bench, art station, or dress-up area.
- Create a LEGO table or mobile art cart using the Trofast storage system.
- Personalize IKEA furniture with paint, baskets, and simple DIY additions.
Here are 15 IKEA playroom hacks built on Kallax, Trofast, Flisat, Raskog, Mosslanda, Skadis and Spontan. They include IKEA Kallax hacks, IKEA Trofast hacks and other IKEA toy storage hacks for kids. Each one has a rough budget, a suggested age and the steps to make it.
Safety comes first, so the anchoring, magnet and paint checks are right below. All prices are rough estimates, so check IKEA for current prices.
My calm take: the Kallax art station, the picture ledges and the pegboard wall are worth the effort. The Trofast LEGO table and the Flisat sensory station are the weakest, so skip them unless your kids will really use them. If a plain shelf does the job, buy the plain shelf.
In this article (12 sections)
- Playroom Safety: Do These Checks First
- IKEA Playroom Hacks at a Glance
- The Best IKEA Pieces for a Playroom
- Best IKEA Kallax Hacks for a Playroom
- IKEA Trofast Hacks for Toy Storage
- IKEA Flisat Hacks for Kids’ Tables and Books
- IKEA Raskog Cart Hacks for Art and Activities
- Wall-Mounted IKEA Hacks for Playrooms
- Combination Hack: Kallax and Trofast Play Wall
- Tips for IKEA Playroom Success
- Frequently Asked Questions
- Conclusion
Playroom Safety: Do These Checks First
Safety firstAnchor every unit that IKEA’s instructions say to anchor, and any unit a child could climb or pull on. That includes Kallax, Billy and Trofast. Use a wall stud or anchors suited to your wall type. Follow IKEA’s and CPSC’s anchoring guidance. Anchoring does not make furniture climb-proof, so teach kids not to climb it. Check IKEA and CPSC recall notices for anything you own or buy.
Safety firstWheeled carts are not designed to be wall-anchored, and a loaded cart can tip if a child climbs or pulls on it. Keep carts low and light, park them against a wall with the wheels locked, and never let kids ride them. Keep carts out of reach of toddlers, who can also pinch fingers in the wheels.
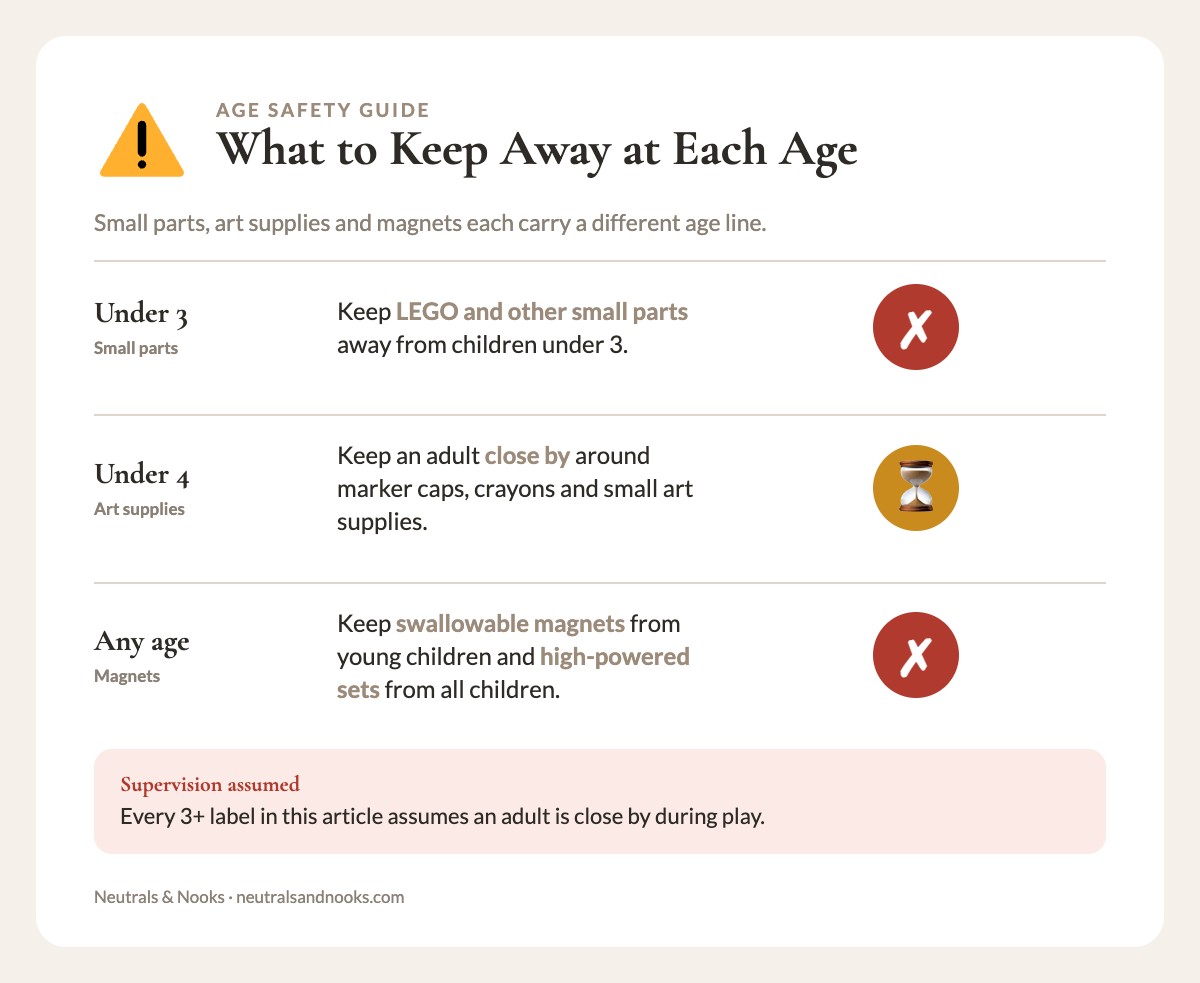
Safety firstKeep LEGO and other small parts away from children under 3. Under-4s need an adult close by around marker caps, crayons and small art supplies, and every 3+ label here assumes that supervision.
Magnets are a separate risk at any age. Keep loose magnets small enough to swallow away from young children, and keep high-powered hobby or building magnet sets away from all children.
Pre-build checklist:
- Find the wall studs and buy anchors or straps that suit your wall type
- Check that every wall-mount screw or anchor is rated for your wall type and the load it will carry
- Confirm the weight limits in the instructions for each unit
- Check IKEA and CPSC recall notices
- Ventilate the room and keep kids out while paint or glue cures
- Keep LEGO and other small parts away from under-3s
- Keep loose, swallowable magnets away from young children, and high-powered magnet sets away from all children
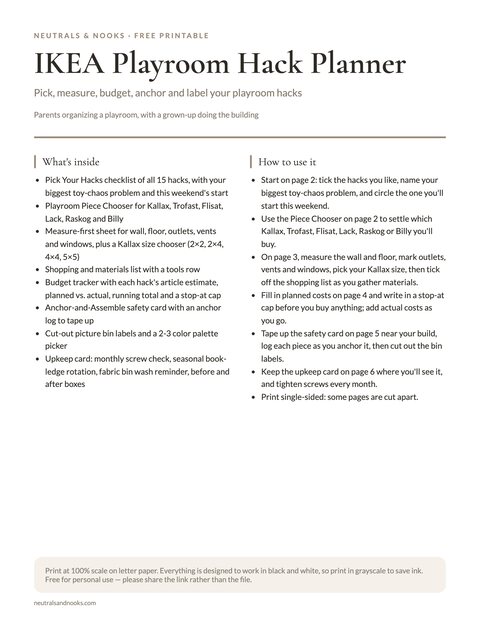
Free printable · 6 pages
IKEA Playroom Hack Planner
A checklist of all 15 IKEA playroom hacks, a piece chooser, a measure-first sheet with wall sketch, Kallax size chooser and bin color picker, a budget tracker, a shopping list, cut-out bin label cards, and a tape-up anchor-and-maintain safety card.
Free. Your download link appears right here. You'll also join the Monthly Home Reset. Unsubscribe anytime. Privacy
IKEA Playroom Hacks at a Glance
The ages below assume an adult does the build and stays nearby during play. “All ages, supervised” means the piece suits a family room once an adult has set it up. Babies and toddlers still need close supervision around tall units, open shelves and anything they could pull on.
| Hack | Base piece | Rough cost | Difficulty | Suggested ages | Wall anchor? |
|---|---|---|---|---|---|
| 1. Reading nook | Kallax | $90-150 | Medium | 3+ | Yes |
| 2. Art station | Kallax | $100-150 | Easy | 3+ (supervise under 4) | Yes |
| 3. Painted Kallax | Kallax | $70-120 | Medium | All ages, supervised | Yes |
| 4. Dress-up station | Kallax | ~$80 | Medium | 3+ | Yes |
| 5. Building table | Trofast | ~$65 | Medium | 4+ | Yes |
| 6. Art unit | Trofast | $50-75 | Easy | 3+ (supervise under 4) | Yes |
| 7. Double wall | Trofast | ~$100 | Medium | All ages, supervised | Yes |
| 8. Sensory station | Flisat | ~$55 | Medium | 4+, supervised | No (low table) |
| 9. Book display | Flisat | ~$50 | Easy | All ages, supervised | Follow IKEA’s instructions |
| 10. Art cart | Raskog | ~$35 | Easy | 3+ (supervise under 4) | No (not designed to be anchored) |
| 11. Activity carts | Raskog | $40-50 each | Easy | 3+ | No (not designed to be anchored) |
| 12. Picture ledges | Mosslanda | $30-40 | Easy | All ages, supervised | Mount to studs or rated anchors |
| 13. Pegboard wall | Skadis | $50-75 | Medium | 3+ | Mount to studs or rated anchors |
| 14. Magnetic wall | Spontan | $40-60 | Medium | 3+, large magnets only | Mount to studs or rated anchors |
| 15. Kallax + Trofast wall | Kallax, Trofast | $250-400 (check IKEA for current prices) | Harder | All ages, supervised | Yes |
The Best IKEA Pieces for a Playroom
These are the four base pieces most of the hacks start from. Each one has a trade-off worth knowing before you buy.
| Piece | Best for | Price range | Honest limitation |
|---|---|---|---|
| Kallax (cube shelving) | Toy and book storage, room dividers | ~$40-90 depending on size | Check IKEA’s weight limits and keep loads modest |
| Trofast (bin storage) | Toy storage at kid height | Frame ~$30, bins extra | Not a rated tabletop or seat |
| Flisat (kids line) | Kid-sized table and book display | ~$20-30 per piece (see the hack budgets) | Small, and kids outgrow it |
| Raskog (rolling cart) | Art supplies and rotating activities | ~$25-35 | Light, so keep it low and non-climbable |
Best IKEA Kallax Hacks for a Playroom
The Kallax is a simple cube shelf, which makes it easy to build on. Remember the trade-off: check IKEA’s weight limits for your unit and keep loads modest.
Hack 1: Kallax Reading Nook
Good to knowIKEA does not rate Kallax as seating, so in this version the shelf holds the books and the cushion sits on the floor in front of it. Kallax sizes vary, so measure the actual unit before you cut anything. Follow IKEA’s stated load limits, and anchor the unit to the wall as IKEA’s instructions describe.
What you need:
- Low Kallax shelf, set up in an orientation IKEA’s instructions allow (measure yours before buying)
- Wall-anchoring hardware suited to your wall type
- Plywood or MDF about ½ inch thick, cut to the cushion size you want (the length of the shelf is a good guide)
- Non-slip rug pad to go under the cushion
- 3″ foam padding
- Durable upholstery-weight fabric, enough to wrap the board and foam with a few inches to staple underneath
- Staple gun
How to do it:
- Set it low. Assemble the Kallax in a low, horizontal orientation that IKEA’s instructions allow. The cubbies should face the room, and the unit should sit flat and steady.
- Anchor it. Fix the unit to the wall as IKEA’s instructions describe, before you load it.
- Build the cushion. Cut the board to size and sand the edges. Add the foam, wrap it in fabric and staple the fabric underneath.
- Place it on the floor. Lay the non-slip rug pad in front of the shelf and set the cushion on top. If it still slides, use a larger pad.
- Set the rule. The cushion is the seat. The shelf is for books, not for sitting or climbing.
- Fill the cubbies. Use the cubbies for books and soft toys, with the heaviest books at the bottom. Keep the top clear, or use it for a few light things.
Budget: Kallax (~$40-90) + cushion materials (~$50) = ~$90-150
Hack 2: Kallax Art Station
What you need:
- Kallax 2×2 shelf
- Kallax drawer inserts or Drona boxes (these are made to fit Kallax cubbies)
- Paper roll holder (mounted on side)
- Bins for other cubbies
How to do it:
- Anchor the unit. Fix the Kallax to a wall stud before loading it.
- Add storage. Put drawer inserts or Drona boxes in the bottom cubbies for art supplies.
- Mount the roll. Attach the paper roll holder to the side.
- Fill the rest. Use remaining cubbies for paper and coloring books.
- Choose and place supplies. Pick art supplies labeled non-toxic, such as those with the AP seal. Keep scissors in an adult-only spot. Store marker caps and other small items out of reach of under-4s unless you are sitting with them.
- Set up the top. Keep heavy items in the lower cubbies. If the shelf bows, move load down.
Budget: ~$100-150 total, depending on the inserts you choose. In a neutral room, I would keep the inserts in one tone, such as white or natural wood, so the supplies do the colorful work.
Hack 3: Painted and Styled Kallax
What you need:
- Kallax in any size
- Low-VOC furniture paint that the maker labels as suitable for children’s furniture or toys (look for EN 71-3 or ASTM F963 on the label)
- Adhesion primer
- N95 mask for sanding
- Respirator rated for organic vapors, if you prime or paint indoors
- Decorative baskets/bins
How to do it:
- Prep. Open the windows or work outside. Wear an N95 mask and lightly sand the laminate. The mask is for sanding dust only and does not filter paint fumes.
- Prime and paint. Apply primer, then paint in your color.
- Cure. Follow the product label for cure time, often days to weeks. Keep children and anyone pregnant out of the room until the paint has cured and the smell has gone.
- Anchor and style. Anchor it to the wall, then mix baskets, bins and open display.
TipThe order is paint, cure, anchor, then load. Keep the unit empty and the kids out of the room until the cure time is up.
Good to knowASTM D-4236 is a labeling standard for art materials. It is not a toy-safety certification for painted furniture, so do not rely on it for this job. These steps are for new IKEA laminate. Do not sand an older painted piece of unknown age, because old paint can contain lead.
Budget: Kallax (~$40-90) + paint supplies (~$30) = ~$70-120
Hack 4: Kallax Dress-Up Station
What you need:
- Kallax 2×2
- Wall-mounted clothes rod or rail that screws into studs (not a tension rod)
- Shatterproof or wall-mounted mirror
- Bins for accessories
- Rounded or safety-style hooks
How to do it:
- Assemble and anchor. Build the Kallax with every divider in place, as IKEA’s instructions show. Then fix it to a wall stud.
- Hang the rod beside it. A single cubby is roughly 13 inches tall, so measure yours. That is too short for costumes, and the dividers need to stay in. Mount a separate rod on the wall beside the unit at kid height, screwed into studs, and stay within its weight limit.
- Add the mirror. Mount it to the wall beside the unit, not loose on top.
- Corral accessories. Use bins for small pieces.
- Add hooks. Fit rounded hooks into studs or proper anchors for bags and hats, within their weight limits.
Safety firstAvoid long cords and scarves on a rod or hook, because they are a strangulation risk. Use rounded, wide-profile hooks. Place them above or below face height, with no sharp or pointed pegs where a child could fall onto them.
Budget: ~$80 total
Related reading: Playroom Organization Ideas: How to Tame the Toy Chaos covers the zones and rules that make these builds work.
IKEA Trofast Hacks for Toy Storage
Trofast is made for toy storage at kid height. It is not a rated table or seat, so keep these hacks modest and anchor anything tall. If you are still deciding how many toys belong in the bins, start with the toy rotation system.
Hack 5: Trofast LEGO Table
What you need:
- Trofast frame with a flat, solid top
- LEGO base plates
- Low-VOC construction adhesive
- Trofast bins for storage below
How to do it:
- Check the top. If it is not flat and solid, skip this hack. Anchor the frame to the wall so it cannot be pulled over.
- Glue the plates. Use low-VOC adhesive in a ventilated room, and let it cure fully per the label. Keep kids out of the room until it has cured and the smell has gone.
- Sort below. Use bins to sort LEGO by color or type.
- Set the rule. Standard bricks are a choking hazard under age 3. I list this build as 4+ for that reason, and bricks should stay away from little siblings.
Safety firstTrofast is not a rated tabletop. Use this top only for light, low-effort building. It is never a seat or a climbing surface, and the frame must be anchored.
Budget: Trofast frame (~$30) + baseplates (~$20) + bins (~$15) = ~$65
Related reading: LEGO and building block storage for sorting systems that pair well with this build.
Hack 6: Low Trofast Art Unit
Trofast frames are not designed for casters, so I would keep this one stationary. If you want something that rolls, use a Raskog cart (Hack 10) instead.
What you need:
- Low Trofast frame
- Shallow bins for top rows
- Deep bins for bottom
- Label maker
How to do it:
- Place and anchor. Set the frame against a wall and anchor it.
- Sort by depth. Put paper in deep bins and markers and crayons in shallow ones.
- Keep sharp tools high. Store scissors and other sharp tools out of reach or in an adult-only spot.
- Choose supplies with care. Pick art supplies labeled non-toxic, such as those with the AP seal. Keep marker caps and other small items away from under-4s unless you are sitting with them.
- Label. Label each bin, with pictures for non-readers.
Budget: ~$50-75, depending on how many bins you add.
Hack 7: Double Trofast Wall
What you need:
- 2 floor-standing Trofast frames
- The anti-tip fittings supplied with each frame, plus screws or anchors suited to your wall type
- Coordinating bins
How to do it:
- Find the studs. Mark the studs behind the spot where each frame will stand.
- Stand them side by side. Set both frames on the floor against the wall, with the tops level and the fronts flush.
- Anchor each frame. Fix each one to the wall with its anti-tip fittings, into studs or properly rated anchors, before you load the bins.
- Keep bins consistent. Use matching bin colors for a clean look.
- Label. Use picture labels for non-readers.
Safety firstThese frames stand on the floor. Do not hang them on the wall, because loaded bins at kid height are heavy and children will pull on them. Keep the heaviest bins in the bottom rows.
Budget: ~$100 for two units with bins. Two matching frames read as one calm run of storage.
IKEA Flisat Hacks for Kids’ Tables and Books
The Flisat line is sized for kids. These upgrades make it more useful, but check current dimensions before you buy parts.
Hack 8: Flisat Table Sensory Station
What you need:
- Flisat children’s table
- Trofast boxes (some Flisat tables take them; check current dimensions before buying)
- Lightweight lids, sanded smooth
How to do it:
- Check the fit. Confirm your table and boxes match before you buy extras.
- Fill the boxes. Use sensory materials such as rice or kinetic sand, and stay with your child for every session. Skip water beads and small objects.
- Make safe lids. Use lightweight, sanded lids that cannot slam or pinch fingers. Put them on whenever the station is not in use.
- Swap. Change boxes for different activities.
Safety firstThis station is for ages 4+ only, with an adult present the whole time. Rice and kinetic sand are not for eating, and dry rice and small scoops are choking hazards for younger children. Do not use water beads or other small objects as fillers.
If a younger sibling shares the room, keep the lids on and the fillers stored out of reach between sessions. Keep kinetic sand away from sinks and drains.
Budget: Table (~$30) + boxes (~$10) + DIY lids (~$15) = ~$55
Hack 9: Flisat Book Display Upgrade
What you need:
- Flisat book display
- Low-VOC paint or stain that the maker labels as suitable for children’s furniture or toys (look for EN 71-3 or ASTM F963 on the label)
- Fabric or canvas bins for bottom
How to do it:
- Finish it. Paint or stain to match your decor in a ventilated space, and let it cure per the label before kids use it.
- Hide the clutter. Add fabric bins to the bottom shelf.
- Display favorites. Put current favorite books on the upper ledges.
- Rotate. Swap books regularly.
Budget: Display ($20) + paint (~$15) + bins (~$15) = ~$50
IKEA Raskog Cart Hacks for Art and Activities
Safety firstRolling carts are light and are not designed to be anchored to a wall. A loaded cart can tip if a child climbs it or pulls on it. Park it against a wall with the wheels locked if yours has locks, and keep it out of reach of toddlers.
Hack 10: Raskog Mobile Art Cart
What you need:
- Raskog utility cart
- Small containers and cups for supplies
- Labels
How to do it:
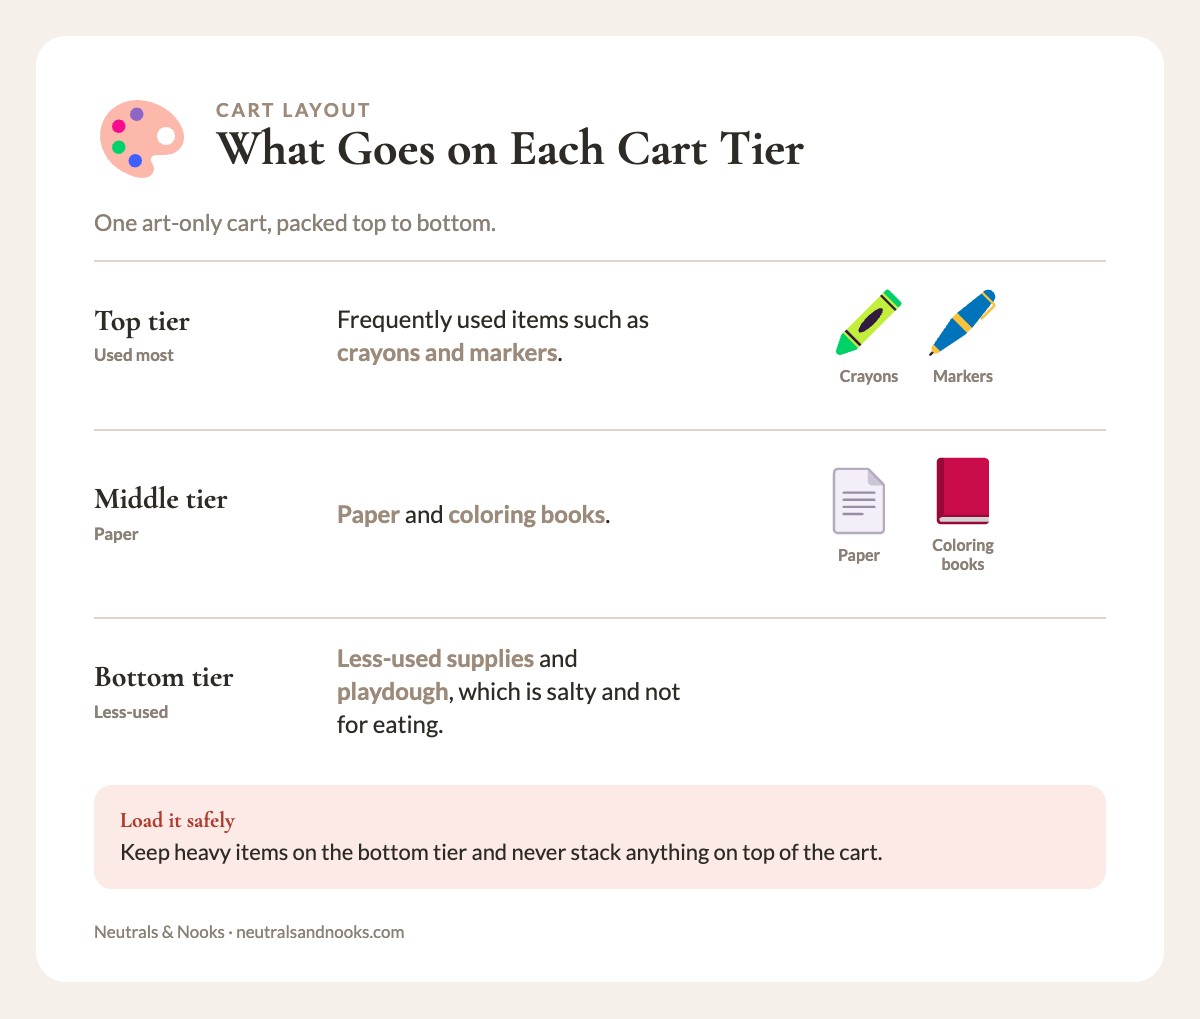
- Dedicate it. Make the cart art supplies only.
- Top tier. Keep frequently used items here, such as crayons and markers.
- Middle tier. Add paper and coloring books.
- Bottom tier. Store less-used supplies and playdough. Playdough is salty and not for eating.
- Keep scissors out. Store scissors and sharp tools high or adult-only.
- Choose supplies with care. Pick art supplies labeled non-toxic, such as those with the AP seal. Keep marker caps and other small items away from under-4s unless you are sitting with them.
- Load it safely. Keep heavy items on the bottom tier and never stack anything on top. Park the cart against a wall with the wheels locked if the model has locks.
Budget: ~$35 for cart + organizers
Hack 11: Activity Station Cart
What you need:
- Raskog cart
- Bins that fit the tiers
- Activity supplies
How to do it:
- Theme each cart. Try a science cart, a craft cart or a quiet-time cart.
- Pack only what fits. Keep one activity per cart. Leave out small parts, loose magnets, sharp tools and anything labeled for older children than yours.
- Store and roll. Keep carts in a closet and roll one out for specific play.
- Park it safely. Put heavier items on the bottom tier, never stack on top, and park the cart against a wall with the wheels locked if the model has locks.
Budget: ~$40-50 per cart
Wall-Mounted IKEA Hacks for Playrooms
Hack 12: Picture Ledge Book Wall
Lack shelves are shallow with no lip, so forward-facing books slide off. Use Mosslanda picture ledges instead, because they have a lip. In a calm, neutral room, a row of covers on a pale ledge doubles as art.
What you need:
- Mosslanda picture ledges
- Screws or anchors rated for the load
- Stud finder and level
How to do it:
- Find the studs. Mount into studs or properly rated anchors.
- Hang at child height. Place the ledges where small hands can reach them.
- Space them. Leave 8-12″ between rows.
- Face books out. Display covers forward, and rotate them seasonally.
Budget: ~$30-40 for 3-4 ledges. Check IKEA for current prices.
Hack 13: Pegboard Activity Wall
What you need:
- IKEA Skadis pegboard
- Pegboard accessories
- Rounded or safety-style hooks and containers
- Screws or anchors rated for the board plus its load
How to do it:
- Mount securely. Fix the board into studs or proper anchors, and check the weight limits in the instructions.
- Add hooks. Hang dress-up items and bags on rounded, wide-profile hooks placed above or below face height. Avoid sharp or pointed pegs where a child could fall onto them.
- Add containers. Use them for larger toys and art supplies.
- Check the small parts. Make sure small accessories are not loose around young children.
Budget: ~$50-75 depending on accessories
Hack 14: Magnetic Play Wall
What you need:
- IKEA Spontan magnetic boards (or sheet metal with deburred or capped edges)
- Large toy magnets (letters, cars), each too big to fit through a small-parts test cylinder, which is about 1.25 inches across
- Screws into studs, or heavy-duty anchors rated for the board’s weight
How to do it:
- Mount securely. Screw the board into studs or heavy-duty anchors rated for its weight. Do not use Command strips. They cannot safely hold a steel board that kids will pull on.
- Check the edges. Deburr or cap any sharp sheet-metal edges.
- Hang at kid height. Keep it low enough for independent play.
- Choose the magnets. Use only large toy magnets that comply with ASTM F963. Kids will pull them off the board, so check them often and throw away any that are cracked or have a loose magnet inside.
Safety firstAny swallowed magnet needs urgent medical attention, even if it is only one. Two or more magnets, or a magnet and another metal object, can attract each other through the intestinal walls and cause serious injury.
Keep hobby and building magnet sets (Buckyball-type) away from children entirely. Get emergency care right away if you think a magnet has been swallowed.
Budget: ~$40-60
Combination Hack: Kallax and Trofast Play Wall
Hack 15: The Ultimate Kallax + Trofast Play Wall
This is the biggest build here, so price your exact configuration at IKEA before committing.
What you need:
- Kallax 4×4 or 5×5
- Trofast frame
- Baskets, bins, fabric inserts
- Wall anchors or screws rated for a tall, loaded unit
- Optional: floor cushion (see Hack 1)
How to do it:
- Anchor the Kallax. Fix it to wall studs before you load it.
- Add the Trofast unit. Place it at one end, at the same height as the bottom Kallax row, and anchor it too.
- Mix storage. Combine baskets, bins and open cubbies.
- Add a reading spot. Put a floor cushion in front of the low end. Neither unit is rated as seating, so keep kids off the tops.
Budget: A Kallax 4×4 plus a Trofast frame and about 8 bins roughly lands at $250-400. Check IKEA for current prices before you commit.
| Item | Notes |
|---|---|
| Kallax 4×4 unit | The largest line item |
| Trofast frame | Sits at one end |
| About 8 bins and baskets | Keep to 2-3 colors |
| Anchors or screws | Rated for a tall, loaded unit |
| Optional floor cushion | Sits on the floor in front; the units are not seats |
| Total | Roughly $250-400 |
Tips for IKEA Playroom Success
- Plan around outlets and vents before you pick a wall, and decide on your configuration before assembly.
- Limit basket and bin colors to 2-3 so the room looks calm.
- Anchor every tall or loaded unit to the wall. Wheeled carts are the exception, so keep them low.
Neutral Nina
Neutral Nina is an interior design enthusiast and mom of three who proves that beautiful, organized spaces and family life can coexist. She shares practical strategies for creating calm, functional homes that work for kids and grown-ups alike.
Frequently Asked Questions
Is IKEA furniture sturdy enough for kids?
Generally, when assembled exactly as instructed and anchored to the wall. Use wall anchors on all tall furniture and avoid overloading shelves.
Check CPSC and IKEA recall notices. Anchoring does not make furniture safe to climb, so supervise young children.
Can I paint IKEA laminate furniture?
Yes. Work in a ventilated area, wear an N95 mask and lightly sand. Prime with adhesion primer.
Then paint with a low-VOC furniture paint that the maker labels as suitable for children’s furniture or toys (look for EN 71-3 or ASTM F963). If you paint indoors, ventilate well or wear a respirator rated for organic vapors.
Follow the product label for cure time, often days to weeks, before kids use the piece.
What if I don’t have IKEA near me?
Availability and shipping options vary by location, so check IKEA’s site. Similar alternatives exist at Target, Walmart, and Amazon.
How do I make IKEA look less… IKEA?
Paint the piece one calm color. Swap the pulls or knobs where the unit has them. Use baskets in a single tone, such as natural woven or linen. Mix in a vintage or non-IKEA piece nearby so the room does not read as one catalog.
Conclusion
If you only do three, make them the Kallax art station, the Mosslanda picture ledges and the Skadis pegboard wall. They solve real daily problems, stay low-cost and fit a calm, neutral room.
Start with one hack this weekend. The Kallax art station or the picture ledge wall are good first projects. Once you see how much better your space functions, you may want to try another.
Related reading: Budget Nursery Makeover: Designer Look for Less, shared kids room ideas, under-bed storage for kids and dress-up clothes organization.