How to Decorate a Toddler-Friendly Christmas Tree That Lasts
Learn how to anchor your tree to a wall stud and arrange ornaments by safe height zones to keep your toddler safe all season long.
- Anchor your tree to a wall stud or ceiling joist to prevent tipping.
- Decorate by height zones, keeping breakables above 54 inches.
- Place only shatterproof, soft items in the reachable toddler zone (12–42 in).
- Keep climbing hazards like stools, chairs, and sofas far away from the tree.
This post contains affiliate links. As an Amazon Associate I earn from qualifying purchases.
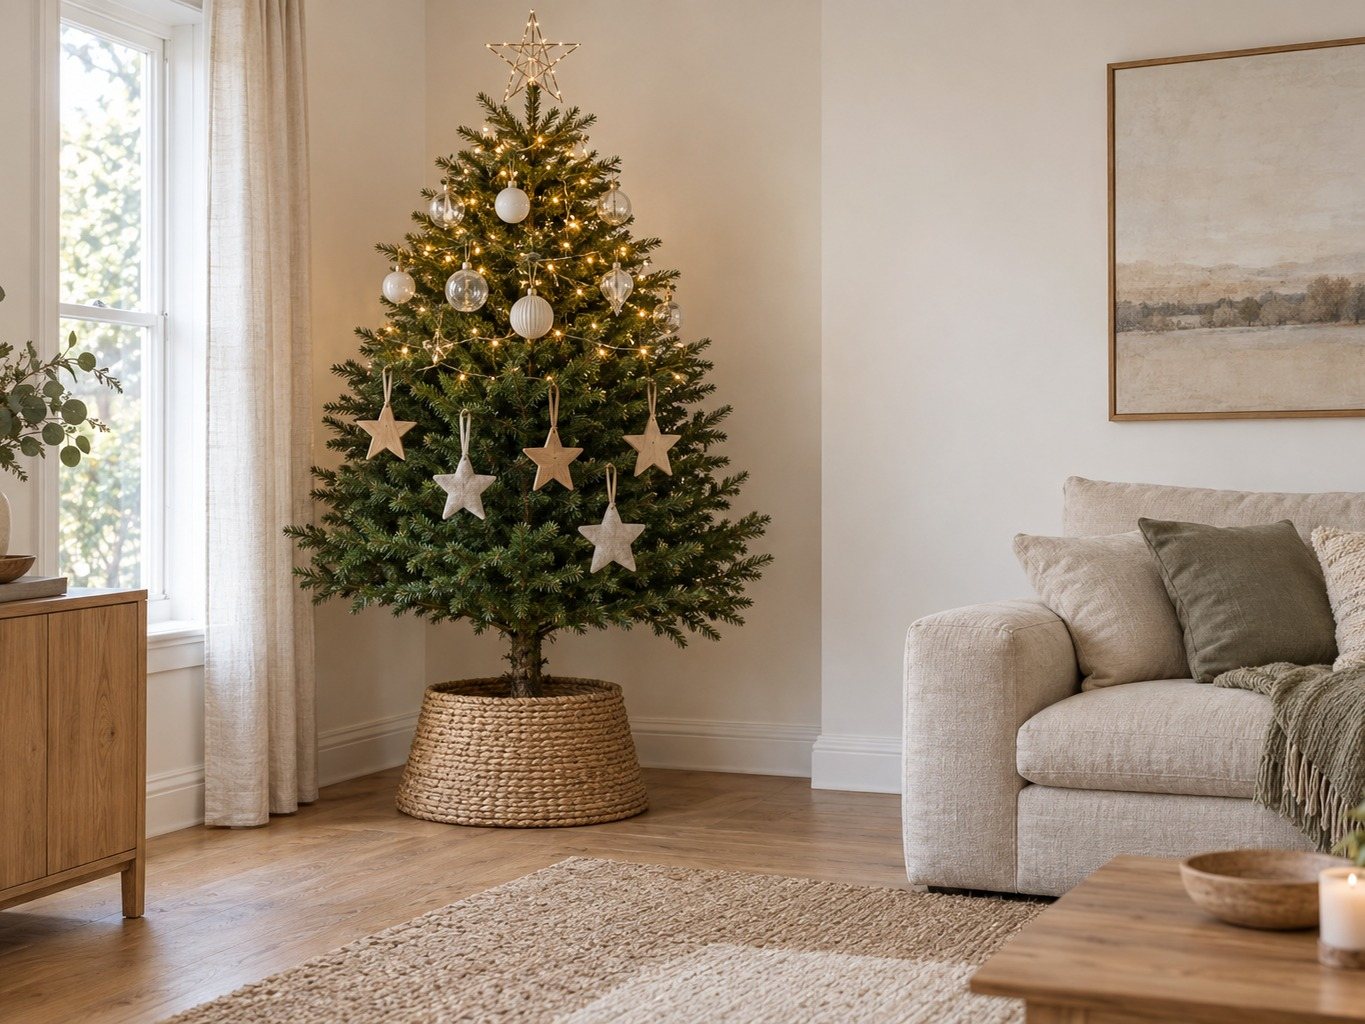
The first Christmas my daughter June could walk, I hung my grandmother’s glass ornaments on the lowest branches while she napped. She woke at 3:40 p.m., made a straight line for the shiniest one, and the tree leaned eight inches toward the sofa before I got there.
A toddler-friendly Christmas tree depends on two things: where the tree is secured and what hangs at which height. This guide covers anchoring, height zones, lights and cords, the water bowl, what to skip, and how to keep it all calm and neutral. Set up once, it lasts through January with a 60-second daily check.
In this article (12 sections)
- The Two Rules Behind Every Toddler-Proof Christmas Tree
- Choosing a Toddler-Friendly Christmas Tree and Where to Put It
- How to Anchor a Christmas Tree With a Toddler in the House
- The Stand, Water Bowl, and Skirt
- Toddler-Safe Ornaments by Height Zone
- Toddler-Safe Christmas Tree Lights, Cords, and Batteries
- What to Skip on a Toddler Christmas Tree
- Make a Toddler-Friendly Tree Look Calm and Neutral
- Daily Habits That Keep the Tree Safe All Season
- A Quick Toddler-Safe Tree Checklist
- Frequently Asked Questions
- Beautiful, Safe, and Still Standing in January
The Two Rules Behind Every Toddler-Proof Christmas Tree
Every toddler-proof Christmas tree rests on two ideas. If you only do two things, do these first, then work through lights and water.
- Anchor the tree to the wall or ceiling. An anchored tree is far less likely to fall on a child, spill its water, or shatter ornaments across the floor.
- Decorate by height zone. Unbreakable ornaments go where small hands reach. Breakables go where they can’t.
Most online ideas focus on looks. A perfectly curated low branch doesn’t help if the whole tree tips when your toddler leans back. Anchoring comes first, zones second, style third.
Here is the full picture in one place, so you can see how the pieces fit before we go through each one.
The height-zone diagram
| Zone | Height | What goes here | Rules |
|---|---|---|---|
| Zone 4 | 54 in and up | Heirlooms, glass, a lightweight wired-on topper | Out of reach for most toddlers standing on the floor. Climbers can go higher, so anchor the tree and keep stools and furniture away. |
| Zone 3 | 42-54 in | Felt, paper, light wood, thick-walled shatterproof balls | Reachable on tiptoe, so the same rules as Zone 2: unbreakable, no small parts. |
| Anchor point (inside Zone 3) | About 48 in | Wire or line from the trunk to a wall stud or ceiling joist | Hidden behind branches and tucked in so the line can’t be grabbed. |
| Zone 2 | 12-42 in | Big, soft, wooden, or fabric pieces | The toddler zone. Unbreakable only, nothing smaller than a toilet-paper tube. |
| Zone 1 | 0-12 in | Bare, or chunky soft items only | Wide stand, covered water bowl, cords hidden or blocked. |
Print this or screenshot it. When you’re decorating late at night, it’s easy to hang a “just one” glass ball low because it looks right. The diagram is your reminder.
The heights are approximate. A standing two-year-old usually reaches somewhere around 40 to 45 inches with an arm up, but that varies. The best measurement is your own child: have them stand next to the tree, reach up, and note where their fingertips land. Zone 2 is that reach. Zone 3 is the tiptoe stretch above it, so both zones follow the same unbreakable, no-small-parts rules.
Safety firstA toddler who climbs can reach well above 54 inches. Anchoring the tree and keeping sofas, stools, and console tables away from it matter more than height alone.
Choosing a Toddler-Friendly Christmas Tree and Where to Put It
Before anchoring or decorating, make two decisions: the tree itself and its spot.
Real vs. artificial for a toddler house
Both can work. The trade-offs are different.
| Factor | Real tree | Artificial tree |
|---|---|---|
| Stability | Heavy and top-heavy once the branches fill out; needs a wide, quality stand | Often lighter; many have narrow legs that tip easily |
| Anchor-ability | Easy to wrap line around the trunk | Anchor to the pole or a sturdy branch junction; check the manufacturer’s weight notes |
| Needles | Fall and can end up in mouths; sweep daily | Plastic needles shed less; bendable wire branches can poke |
| Water | Needs a reservoir, which means a hazard to cover | No water |
| Fire | Dries out; needs daily watering and distance from heat | Look for a flame-resistant label and skip older trees without one; keep distance from heat anyway |
| Size flexibility | Cut to height and thinned | Can buy slim or narrow models |
My own preference for the toddler years is a slightly smaller real tree (six feet rather than seven or eight) or a slim artificial one. A shorter tree is easier to anchor because the anchor point sits closer to the wall and the center of gravity is lower. In my house a shorter tree also made the ornament zones easier, since there is less top-heavy mass to worry about.
Pick the spot like a safety inspector
Spend ten minutes on placement. It does more than any ornament choice.
- Corner over center. A corner gives you two walls to anchor to and keeps the tree off the main walking path.
- Away from heat. Keep it at least a few feet from fireplaces, radiators, space heaters, and heating vents. Heat dries a real tree and makes it brittle.
- Away from climbable furniture. If the sofa, a bookshelf, or a console table sits next to the tree, a toddler can use it as a ladder. Move it or pick a different spot.
- Near an outlet. You want to plug in lights without stretching a cord across the floor where someone can trip.
- Clear sight line. You should be able to see the tree from the kitchen or wherever you spend most of your day.
- Outside a doorway. A tree blocking an exit is a hazard in an emergency.
If you’ve already gone through the rest of the house with a baby-proofing mindset, this will feel familiar. Our baby-proofing home guide walks through the same logic for outlets, furniture, and cords, and the tree is really just one more tall, tippy, tempting piece of furniture that happens to be covered in lights.
How to Anchor a Christmas Tree With a Toddler in the House
By 3:41 I was picking glass out of the rug. Nobody was hurt, but the stand was never designed for a person who pulls.
Anchoring is the step most people skip and the one that matters most. It is cheap, takes about ten minutes, and nearly disappears once the tree is decorated.
TipBraided picture-hanging wire holds better than fishing line. Wrap it with green floral tape so it blends into the branches.
What you need
- A screw eye (also called an eye hook) rated for more weight than your tree. Choose a sturdy metal one, not a tiny picture-frame hook.
- Clear fishing line (heavy test, such as 50 lb or higher) or braided picture-hanging wire. Wire holds up better to a determined pull; fishing line disappears better. Many people use wire wrapped with a little green floral tape.
- A stud finder, if you’re anchoring into a wall.
- A small drill or a screwdriver, plus a pilot-hole bit.
- A second hook at the tree, if you prefer to attach to a sturdy branch junction instead of the trunk.
The step-by-step
- Set the tree in its stand first, straight and fully tightened. Anchoring doesn’t replace a good stand; it backs it up.
- Find a stud behind the wall near the tree. Mark it.
- Decide the anchor height. Aim for about two-thirds of the way up the tree, roughly 48 inches on a six-foot tree. The zone table above marks this spot. Higher gives more leverage, but you must be able to reach the trunk or a sturdy branch junction there.
- Drill a pilot hole at the stud and screw in the eye hook until it is firmly seated. Give it a hard tug. It should not wiggle.
- Loop the line around the trunk (or around the main branch where it meets the trunk) and back to the eye hook. Braided picture-hanging wire is the better choice here; twist or crimp it firmly. If you use fishing line, tie a Palomar or uni knot, because bowlines and half hitches slip on monofilament. Trim the tail.
- Adjust for tension. The line should be snug, not tight enough to pull the tree off vertical. You want it to catch the tree if it starts to fall, not to hold it up all the time.
- Hide the line behind branches. You can also thread a second line the opposite way if the tree sits in a corner and you want two points of contact.
- Test. Give the tree a gentle but firm pull toward the room from about where a toddler would grab it. The tree may sway, but the line should stop it well before it tips. If it leans more than a few inches, shorten the line.
If you can’t drill into the wall
If you rent, there are alternatives.
- Ceiling hook. A ceiling hook screwed into a joist can hold a line running down to the trunk at the same anchor height, about two-thirds of the way up. Check that you’re hitting a joist, not drywall alone. Keep the line taut and tucked behind branches so there is no slack loop. The angled line is a little more visible, but in a dim room with the lights on it nearly vanishes.
- Built-in unit anchor. This is the weakest option. Use it only with a built-in unit that is itself fixed to wall studs, and tuck the line out of reach. Never tie to loose furniture, which a toddler can climb and a pulled tree can topple.
- Corner placement + wide base + weight. Not as secure as a true anchor, but it helps. Add sandbags or heavy flat weights on the stand legs under the skirt.
- A playpen or baby gate fence. An exercise pen or a ring of gates around the tree keeps toddlers away entirely. It’s not pretty, but it works, and some families use it just for the first few years. Make sure the fence is anchored or heavy enough that a child can’t pull it over.
A note on small holes: the eye hook leaves a small hole that two minutes of spackle fixes in January. That is a fair trade for a tree that stays up.
Artificial tree anchoring
Artificial trees can tip even more easily because their stands are often a three-legged metal cross. Anchor the pole or a primary branch junction with the same technique, and check the stand for wobble. Some people add a second set of base legs or weight the stand. If the tree is only held together by plug-in sections, anchor above the highest joint so the sections don’t separate under a pull.
The Stand, Water Bowl, and Skirt
Beyond anchoring, three items at floor level matter for toddlers.
The stand
Pick a stand with a wide base and a reservoir that holds at least a gallon of water (about 1 quart per inch of trunk diameter). Check the level every day, since a fresh tree can drink a lot in the first days and a dry stand raises the fire risk. Tighten the bolts or screws securely and check them again after a day, because a real tree settles as it hydrates. Skip decorative stands that look like barrels or baskets unless they’re clearly stable, because a toddler can lean on them or tip them.
The water bowl
Real trees need water every day, which means a bowl a toddler may want to splash in or drink from. The water often contains tree sap and any preservatives or additives you’ve used, and it grows bacteria over time. Keep it out of reach and out of mind:
- Use a stand with a narrow opening and a lid, or a stand with a cover.
- Place a tree collar or a rigid skirt (not a soft one that can be lifted) around the base, so the bowl isn’t visible or reachable.
- Use plain water only. Additives add a poison risk and aren’t needed. If your child drinks any tree water, call Poison Control (1-800-222-1222).
- Wipe up spills immediately, since wet floors plus a toddler who loves to run is its own hazard.
The skirt
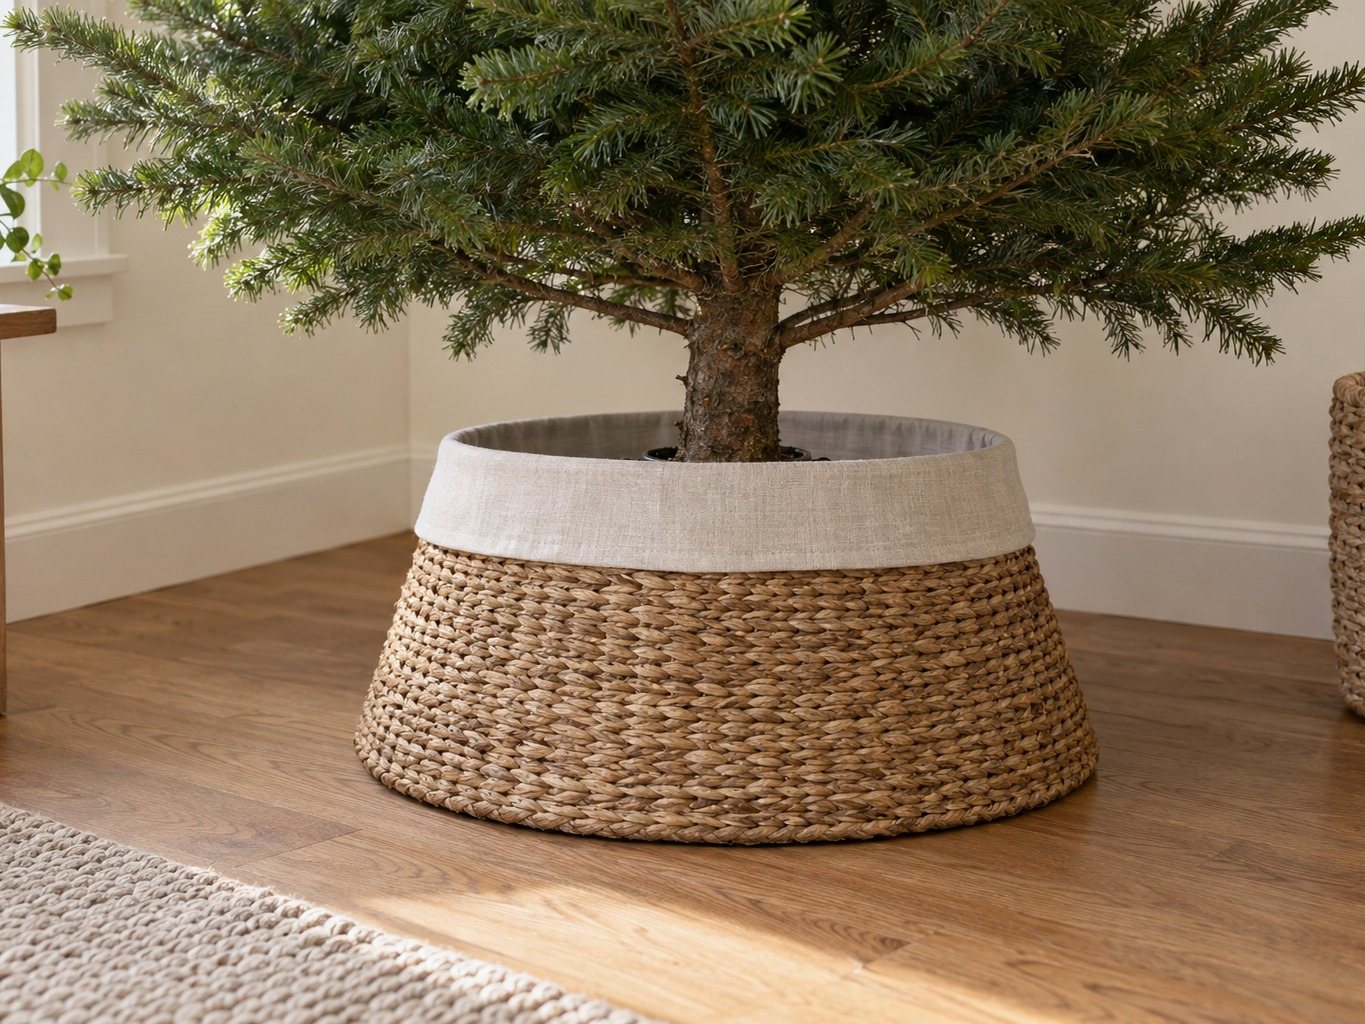
A soft fabric skirt is cozy, but it hides the base and bowl and invites a child to burrow under the tree. A rigid collar made of wood, woven material, or metal sits tight around the stand and keeps small hands out. If you want the soft look, use a rigid collar underneath and a thin skirt on top, tucked tight.
If your child is a crawler or an early walker, consider leaving the lowest branches completely bare and tucking the skirt well back. This leaves Zone 1 empty and gives you a neat visual “hem” at the bottom of the tree.
Toddler-Safe Ornaments by Height Zone
Now the fun part. We’ll go zone by zone, from the bottom up, matching the diagram.
Zone 1 (0 to 12 inches): bare or chunky and soft only
The lowest branches are the easiest for a toddler to reach, and they’re also where they can lie down and look up through the tree. Keep this zone mostly bare. If you want something there, use:
- A wide felt garland, firmly tucked into the branches with no loose or hanging ends
- Large knitted or crocheted ornaments (3 inches or bigger)
- Big wooden stars with no small parts
- A rigid collar to hide the base
Nothing should dangle on a thin string that could wrap around a finger or neck. Any ornament in this zone should be too large to fit in a toilet-paper tube. That is a rough and widely used choking-hazard guide for small parts.
Zone 2 (12 to 42 inches): unbreakable only
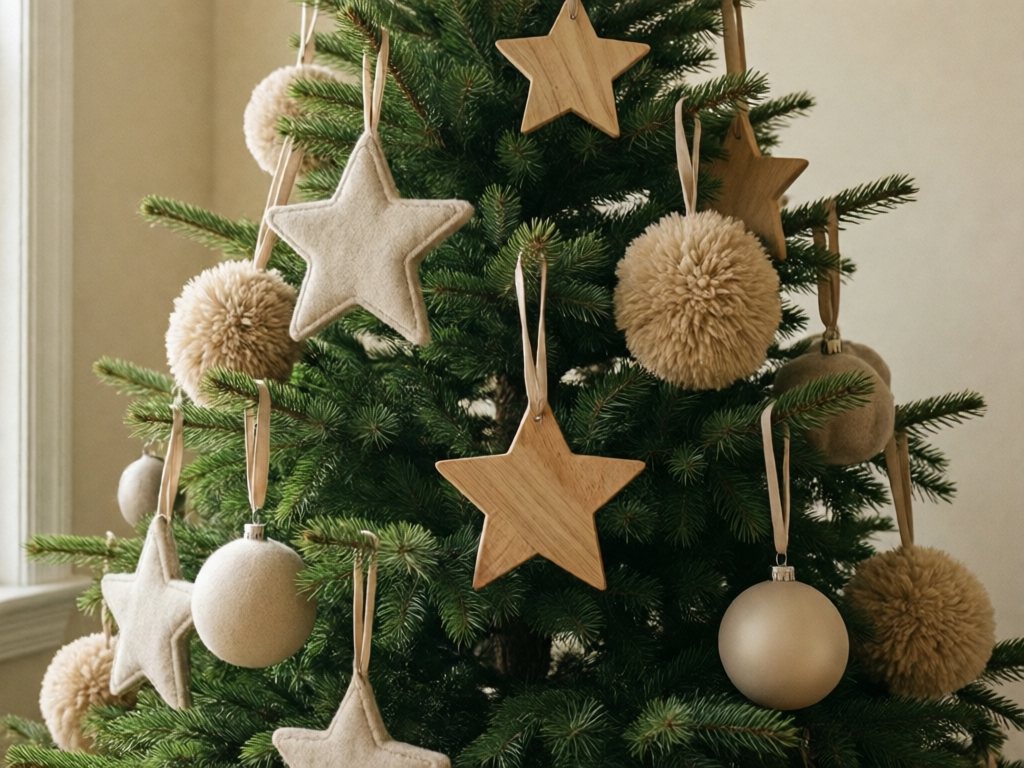
This is the toddler zone. It’s the height your child can reach from standing, so everything here must survive being yanked, thrown, licked, and carried to another room. The rules:
- Unbreakable. No glass, ceramic, thin plastic, or anything that cracks.
- No small parts. Nothing with small beads, buttons, bells, or tiny gems that can be picked off.
- No sharp edges or metal hooks that can scratch. Use ribbon loops or closed hooks.
- No edible ornaments. Popcorn, candy canes, and cookies are choking hazards for children under 4, and fallen pieces get eaten off the floor.
- No lights wrapped at the low branches unless the cords are fully out of reach. More on that below.
- Big, light, and soft is best.
Good Zone 2 ornament ideas:
| Ornament type | Why it works |
|---|---|
| Large wooden stars, trees, or beads | Durable, smooth, easy to hang on a loop |
| Felt shapes (stars, mittens, animals) | Soft, lightweight, forgiving if thrown |
| Large, tightly made wool pom-poms | Cozy and neutral, if firmly attached to the string. Check daily and remove any that shed or detach. |
| Large cotton rope shapes | Sturdy, textured, no sharp edges |
| Large, thick-walled shatterproof balls in matte finishes | Look like glass without the risk, if the caps can’t be pulled off. Inspect for cracks and replace any that crack. |
| Paper stars or woven paper ornaments | Cheap, replaceable, and pretty in neutrals |
| Knitted mini stockings | Hand-feel is lovely, and they can be re-hung |
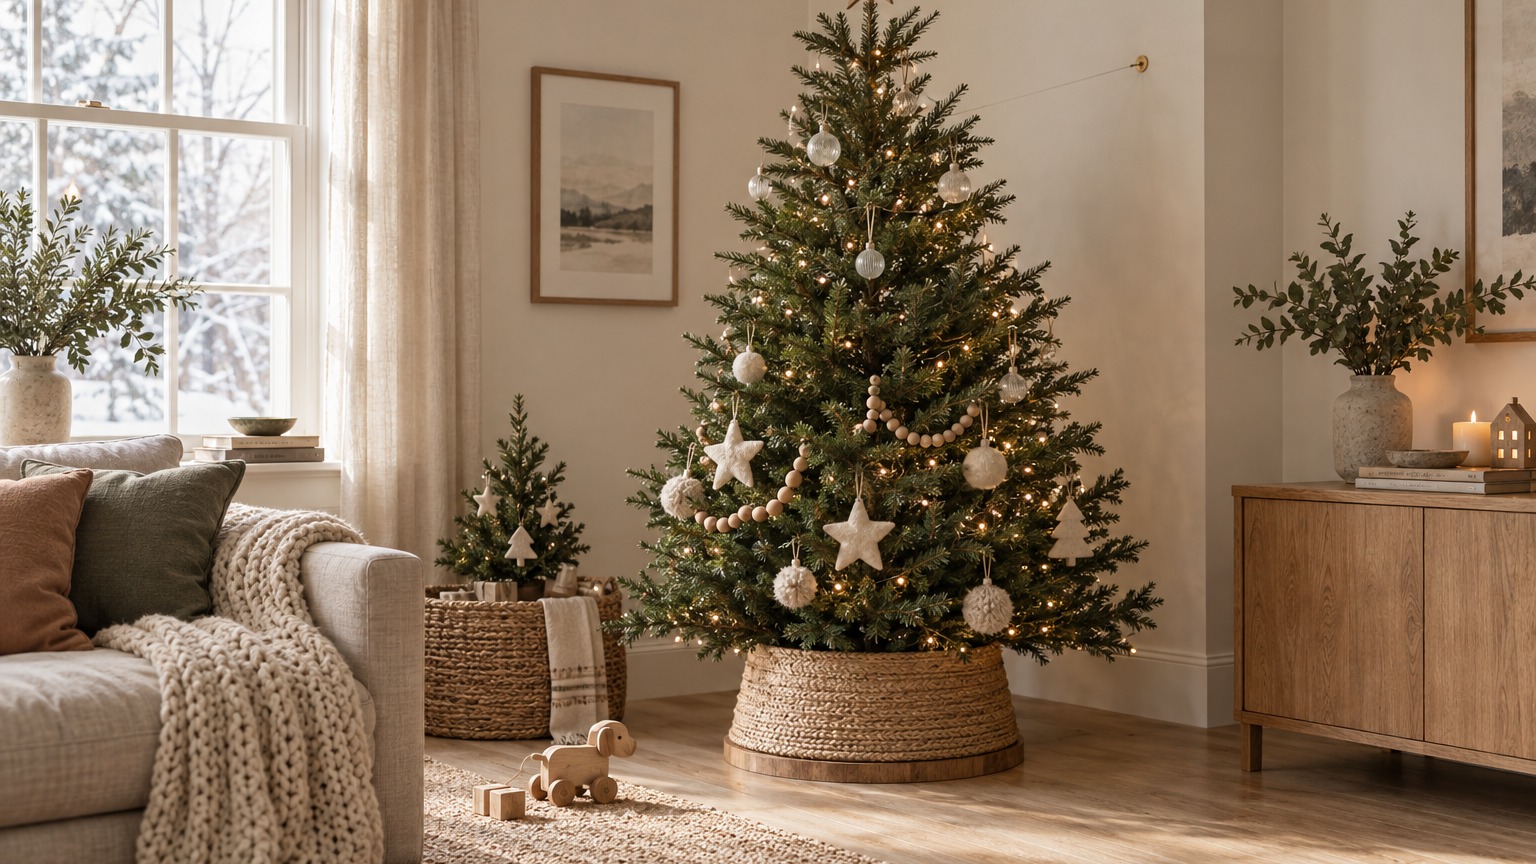
If you’re after a neutral palette, stick to cream, oatmeal, natural wood, soft white, and a dusty sage or terracotta accent. It looks intentional instead of “kid-proofed,” which matters to me and probably to you.
Zone 3 (42 to 54 inches): lightweight, shatterproof, no small parts
This is the “stretch zone.” A toddler on tiptoe, or one standing on a cushion, stool, or your lap, can reach it. Treat it like Zone 2: unbreakable, no small parts. You can just be a little more decorative:
- Lightweight shatterproof ornaments in more detailed finishes
- Paper and fabric ornaments with a bit more shape
- Wooden ornaments with painted details, as long as the paint is non-toxic and sealed
- Ribbon bows and garlands
- A few special pieces that you won’t mind losing if they’re pulled down
Think of it as a buffer. If something falls, it shouldn’t shatter or injure.
Zone 4 (54 inches and up): breakables and heirlooms
Here is where your grandmother’s glass ornaments, the ceramic pieces from a trip, or anything fragile belongs. This is also where you’d put:
- Delicate glass balls
- Antique or hand-painted heirlooms
- A lightweight, unbreakable topper, wired on securely
I like to keep the top third of the tree for the “grown-up” ornaments. The tree reads as classic from across the room, and the low half reads as cozy and handmade. I’ve come to prefer that look to a perfectly matched tree.
A simple rule for sorting ornaments
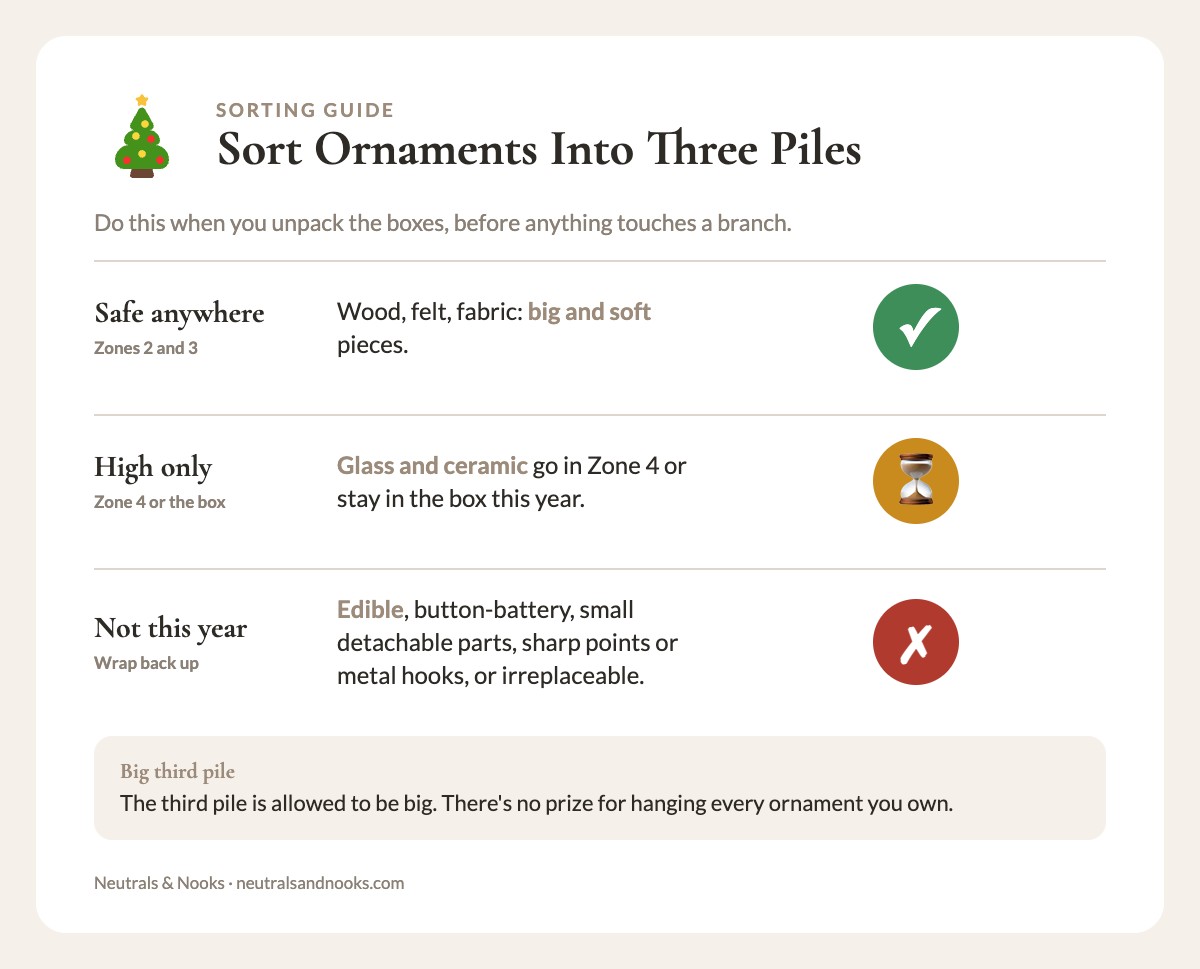
When I unpack the boxes, I sort into three piles:
- Safe anywhere. Wood, felt, fabric, big and soft. These go in Zones 2 and 3.
- High only. Glass and ceramic. These go in Zone 4 or stay in the box this year.
- Not this year. Edible, button-battery, small detachable parts, sharp points or metal hooks, or irreplaceable. Wrap them back up.
That third pile is allowed to be big. There’s no prize for hanging every ornament you own. If you’re planning your holiday timeline anyway, our Christmas planning checklist for families puts “decide which ornaments come out” in the right week so it doesn’t turn into a 9 p.m. scramble.
Toddler-Safe Christmas Tree Lights, Cords, and Batteries
Lights are the part of the tree that adds the most magic, and also the part with the most hidden hazards.
Choose the right lights
- Use LED lights where possible. They run cooler and use less power, so they’re less likely to overheat a dry tree.
- Check that the lights carry a safety certification (such as UL) and inspect each strand for frayed wire, broken sockets, and loose bulbs.
- Don’t overload a single outlet or extension cord. Follow the maximum number of strands printed on the packaging.
- Battery-operated lights are fine only if the pack uses AA/AAA batteries (never button or coin cells), has a screw-secured door, and sits behind the stand or in a closed box out of reach. Turn them off or remove the pack when no one is watching, and keep lights off the lowest branches.
Keep cords out of reach and out of sight
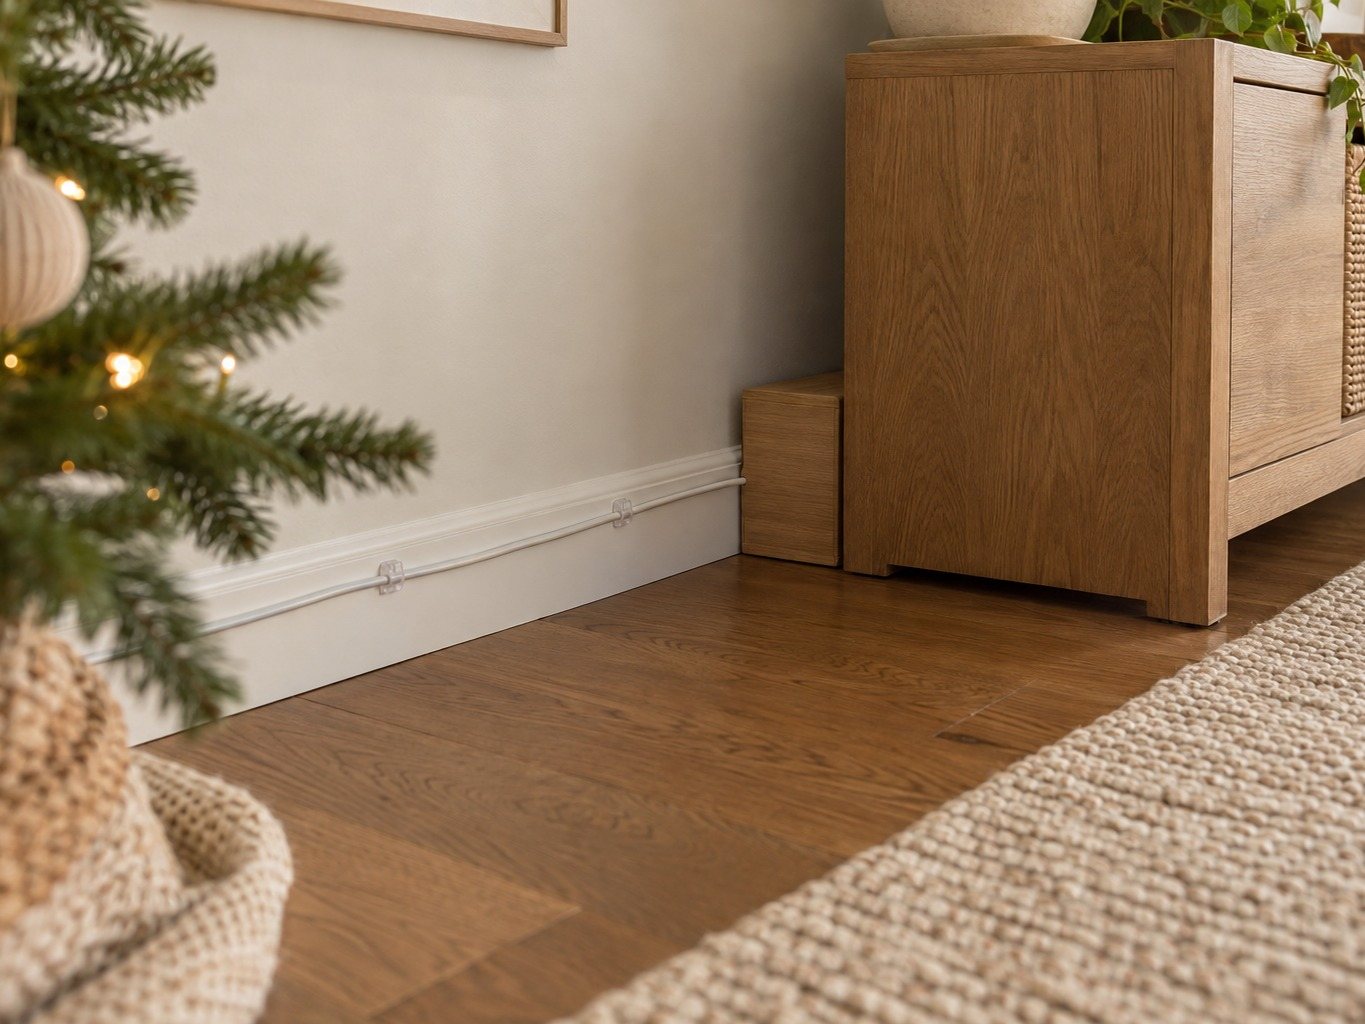
Cords are tempting to chew and pull. Here’s a quick routine:
- Plug in where the cord won’t cross a walkway. Position the outlet behind the tree, or use a short cord.
- Run cords along the wall and fix them with cord clips or cord covers.
- Hide the plug and any power strip in a cover box (or behind a heavy piece of furniture) so it can’t be pulled out.
- Unplug the tree when no one is watching it, such as at night or when you leave the house. A smart plug with a schedule makes this almost effortless.
Button batteries: a special warning
Light-up and musical ornaments, remote controls for tree lights, and some candles use button or coin lithium batteries. If a child swallows one, it can cause serious internal injury quickly. In a home with a toddler, leave button-battery ornaments and remotes off the tree.
Safety firstChoose decorations with screw-secured battery doors only, and keep remotes and spare batteries locked away. If you suspect a child has swallowed a button battery, go to the ER immediately. Don’t induce vomiting, and don’t let your child eat or drink first. Call the National Battery Ingestion Hotline (800-498-8666) or Poison Control (1-800-222-1222) on the way.
Candles and open flame
Skip real candles on or near the tree entirely. Use flameless LED candles on the mantel if you want the glow. Choose ones with screw-secured battery doors and keep the remotes out of reach.
What to Skip on a Toddler Christmas Tree
Some decorations just aren’t worth the risk at this age. You can bring them back when your child is older.
- Tinsel and icicles. Thin strands can be swallowed and cause blockages, and they’re a hazard for pets too.
- Glass ornaments below Zone 4. If a child pulls one, it breaks.
- Hooks with sharp points. Use ribbon, string loops, or safety-style hooks.
- Edible ornaments. Skip them entirely while you have a child under 4: popcorn strings, candy canes, cookies.
- Artificial snow spray or flocking you can’t wash off. It can be irritating if it ends up on hands and mouths.
- Mistletoe, holly berries, and poinsettia near the tree. Mistletoe and holly berries are toxic if eaten, so keep them out of the house or well out of reach. Poinsettia is a mild irritant. Call Poison Control (1-800-222-1222) if a child eats any of them.
- Heavy or glass toppers. Use a lightweight, unbreakable topper wired on securely, as described in Zone 4.
- Small figurines or nativity pieces on tables near the tree. These are choking hazards too.
When in doubt, ask: “Could this break, be swallowed, or be pulled down?” If the answer is yes for any of those, it goes in Zone 4 or back in the box.
For a wider look at which decorations suit homes with little ones, our guide to kid-safe Christmas decor covers the rest of the house, including mantels, tables, and front doors.
Make a Toddler-Friendly Tree Look Calm and Neutral
A few design choices make the tree read as intentional.
Limit the palette
Pick three to four colors and stick to them. Our tree is natural wood and cream, with oatmeal felt stars and wooden beads on the low branches and my grandmother’s glass up top. A neutral scheme works well because kid-friendly materials already come in these tones:
| Palette | Materials that fit |
|---|---|
| Natural wood + cream | Wooden beads, cotton rope, felt in oatmeal, wool pom-poms |
| Soft white + sage | White felt stars, sage velvet ribbon, matte frosted shatterproof balls |
| Terracotta + natural | Clay-colored felt, dried-orange-look wood slices, jute twine |
| Black + white + wood | Painted wooden ornaments, white paper stars, black-and-white ribbon |
Repeat shapes
When you hang ten of the same shape, such as ten large wooden stars across Zones 2 and 3, the tree looks designed. It’s also an easy way to replace anything that disappears or gets chewed.
Use texture instead of shine
Matte finishes, wool, cotton, linen, and wood look rich and calm. They’re also gentler than glass if they fall.
Let the top third shine
Put your most special, most fragile ornaments up high in Zone 4. The eye goes there first, and the room looks polished.
Add a “toddler’s tree”
Consider setting up a second, tiny tree at the child’s level, weighted and secured to a sturdy, low shelf. Stock it only with large unbreakable pieces and no lights, then let your child decorate and re-decorate it however they like. It gives them an outlet and tends to reduce the pull toward the big tree.
If you’re short on floor space, a small tree on a sturdy table in a corner works too. Weight the base, anchor the tree to the wall, and make sure the table can’t tip.
Daily Habits That Keep the Tree Safe All Season
Safety firstNever leave a toddler alone with the tree. Unplug the lights at nap time and bedtime, and fence the tree off if you can’t watch.
The setup isn’t the end. A real tree needs daily care, and a toddler needs daily guidance. These habits keep the tree safe through January.
The 60-second daily check
Each morning, before the day gets busy, do this quick pass:
- Check the anchor line. Is it still snug and attached?
- Check the water. Top it off if you have a real tree, and keep the bowl covered.
- Sweep fallen needles from the floor and the skirt area.
- Scan the low zones for anything pulled down, loose, or broken.
- Check the cords. Are any pulled out of the clips or frayed?
- Re-hang any ornaments that have drifted down to the toddler zone.
Teach “look, don’t touch” with a yes-space
Toddlers can’t resist a tree that’s off limits with no alternative. Give them a clear yes:
- “We touch the felt stars on the bottom branches.”
- “The shiny balls are for looking.”
- “This is your tree.” (the small one)
Keep your language short and consistent. Praise what they do right and gently redirect. Expect it to take a few days, and expect to repeat it a hundred times.
Rotate the low ornaments
Toddlers get curious when something changes. Once a week, swap two or three low ornaments for new ones. It keeps the tree interesting without adding new risk, and it gives them a “new” thing to find.
Supervise, always
No setup replaces supervision. A toddler should never be left alone with the tree, especially one with lights. Bedtimes, naps, and any time you leave the room, unplug the lights. If you can’t watch, fence it off.
Prep for January
When the season ends, remove the anchor, patch the hole, and take down the lights and ornaments from the bottom up. Store the high-value ornaments in labeled boxes with dividers, and keep the unbreakable ones in a separate bin. Our holiday decor storage guide shows how. That makes next year’s zone sorting almost automatic. If you’re thinking about trimming back toy clutter before the holidays pile on gifts, our pre-holiday toy purge checklist pairs nicely with putting the tree boxes away.
A Quick Toddler-Safe Tree Checklist
Here is the whole system in one scannable list.
Before you decorate
- Choose a corner spot away from heat and climbable furniture
- Choose a slightly smaller tree and a wide, sturdy stand
- Locate a wall stud or ceiling joist for the anchor
- Gather a screw eye, braided wire or fishing line, and a drill
Anchor and base
- Set the tree straight and tighten the stand
- Install the eye hook at about 48 inches
- Wrap and tie the line around the trunk, snug but not tight
- Test with a gentle pull
- Fill the stand with at least a gallon of water, cover the bowl, and add a rigid collar
Lights and cords
- Use LED lights with a safety certification
- Hide or cover all cords and plugs
- Put the lights on a timer or smart plug
- Leave button-battery ornaments and remotes off the tree
Ornaments by zone
- Zone 1: bare or chunky soft pieces
- Zones 2 and 3: unbreakable only, no small parts
- Zone 4: breakables and heirlooms
Daily
- Check the anchor, water level, needles, and low ornaments
- Unplug the lights when no one is watching
From our sister site Tiny Hands Create
Draw it together: easy Christmas drawings for kids
Simple step-by-step guides with a printable coloring page, made for little hands. A calm 15-minute activity for the holiday season.
Frequently Asked Questions
How do I anchor a Christmas tree if I rent and can’t drill into the wall?
Use a ceiling hook, or fence the tree instead. Screw the hook into a joist and run a line down to the trunk at about two-thirds of the tree’s height; the small hole patches easily. If you can’t drill at all, use a corner, a wide weighted stand, and a gate or exercise pen, as covered in the renter options above.
What’s the safest type of ornament for a toddler-friendly Christmas tree?
Large, soft, unbreakable ornaments are safest: felt shapes, big wooden stars, wool pom-poms, knitted pieces, and matte shatterproof balls. At toddler height, everything should be too big to fit in a toilet-paper tube, free of small parts, and hung on a ribbon loop or closed hook. Glass and ceramic go in Zone 4; button-battery and edible ornaments stay in the box.
How high up should I put breakable ornaments?
About 54 inches or higher, which is beyond most toddlers’ reach even on tiptoe. To check, have your toddler stand next to the tree with an arm raised and keep breakables well above their fingertips. A climber can reach much higher, so anchor the tree and keep stools and furniture away from it.
Is a real or artificial tree better for toddlers?
Either can be safe if it’s anchored and decorated by zone. A real tree is stable in a good stand but needs daily watering, sheds needles, and has a water bowl to cover. An artificial tree skips water and needles, but many have light, narrow stands that need anchoring and weight. Whichever you choose, a slightly smaller tree is easier to secure.
What about the tree water? Is it dangerous if my toddler drinks it?
It can be, so keep your toddler out of it. Tree water can contain sap, bacteria, and any additives you’ve used. Choose a stand with a narrow opening or a lid, plus a rigid collar. Use plain water only; additives add a poison risk and aren’t needed. If your child drinks any tree water, call Poison Control (1-800-222-1222).
My toddler keeps pulling ornaments off the low branches. What should I do?
Pulling is normal at this age, so first make sure everything within reach is safe to pull. Then give them a yes, such as their own small tree and a few big felt ornaments they can move. Add a simple phrase like “Look with eyes, touch the felt stars.” If it continues, leave Zone 1 bare, hang ornaments a little higher, or use a gate or exercise pen for a few weeks.
Do I still need to anchor a small tabletop tree?
Yes, if a toddler can reach it. A small tree on a table can be pulled onto a child or knocked off the edge, and the table itself can tip. Place it toward the back of a sturdy surface against a wall, weight the base, and use a line anchored to the wall. If the table is light or wobbly, set the tree on a higher shelf instead.
Beautiful, Safe, and Still Standing in January
The first year, I felt like I had to choose between a tree I loved and a tree that was safe. Three seasons later, I think that was a false choice. A tree that is anchored, zoned by height, and decorated in simple, tactile materials is calmer and prettier than the one I put up that first afternoon. At night the lights are on a timer or unplugged, the tree is anchored, and the gate is closed, so I can sleep.
Start with the anchor. Then sort your ornaments by zone. Take a moment on a weekend to run through the checklist, and be generous with what stays in the box this year. There will be plenty of Christmases for the glass ones.