Christmas Card Display Ideas That Survive a House With Kids
Learn how to build a kid-proof Christmas card display that hangs above reach, protects your paint, and packs away in five minutes.
- Hang your lowest card at 54 inches or higher (60 inches for climbers).
- Avoid displaying cards directly above climbable furniture like sofas or toy chests.
- Protect your paint by hanging cards from existing fixtures or tension rods.
- Design your display for a swift, five-minute takedown using a single storage bin.
This post contains affiliate links. As an Amazon Associate I earn from qualifying purchases.
A kid-proof Christmas card display keeps the lowest card at 54 inches or higher, leaves your paint alone, and comes down in five minutes. Below you’ll find a comparison table, ribbon lines, mantel and shelf options, DIY versions, renter-friendly wall ideas and a January sort plan.
The first year I displayed cards, I pinned thirty to a jute line across the dining room wall. By the next morning my two-year-old had discovered the bottom row was exactly her height.
Since then I’ve tried ribbon, clips, hoops, baskets, tension rods and frames. The ones that stayed pass three rules:
- Everything hangs above toddler reach.
- Nothing marks paint.
- Everything comes down in five minutes.
Pick one method, not five. The best Christmas card display is the one that’s still standing on December 24th.
In this article (16 sections)
- Three Rules for a Kid-Proof Christmas Card Display
- How to Measure Your Child’s Reach
- Comparison Table: Which Display Method Fits Your House?
- The Ribbon-and-Clip Line (Done the Toddler-Proof Way)
- No-Wall Options: Mantel, Ladder, and Shelf Displays
- Christmas Card Holder Display Ideas (Things You Can Buy or Repurpose)
- DIY Christmas Card Displays (Under 20 Minutes)
- Renter-Friendly Wall Displays That Don’t Damage Paint
- Simple Christmas Card Display Ideas for Small Spaces
- Styling a Neutral Christmas Card Display
- Removing Adhesive Without Peeling Paint
- What to Do With Christmas Cards in January
- A Simple December Card Display Timeline
- Christmas Card Display Mistakes to Avoid
- Frequently Asked Questions
- Final Thoughts: Choosing a Kid-Proof Christmas Card Display
Three Rules for a Kid-Proof Christmas Card Display
Run every display through this checklist before you hang anything. If it fails an item, I skip it.
- Lowest card or clip at 54 inches or higher (60 if your child climbs)
- Nothing climbable below the display
- No ribbon loops, and tails kept short and tucked away
- Cards screened for batteries, magnets and embellishments
- Any hook rated for the weight it holds
Rule 1: Above reach means above climbing reach
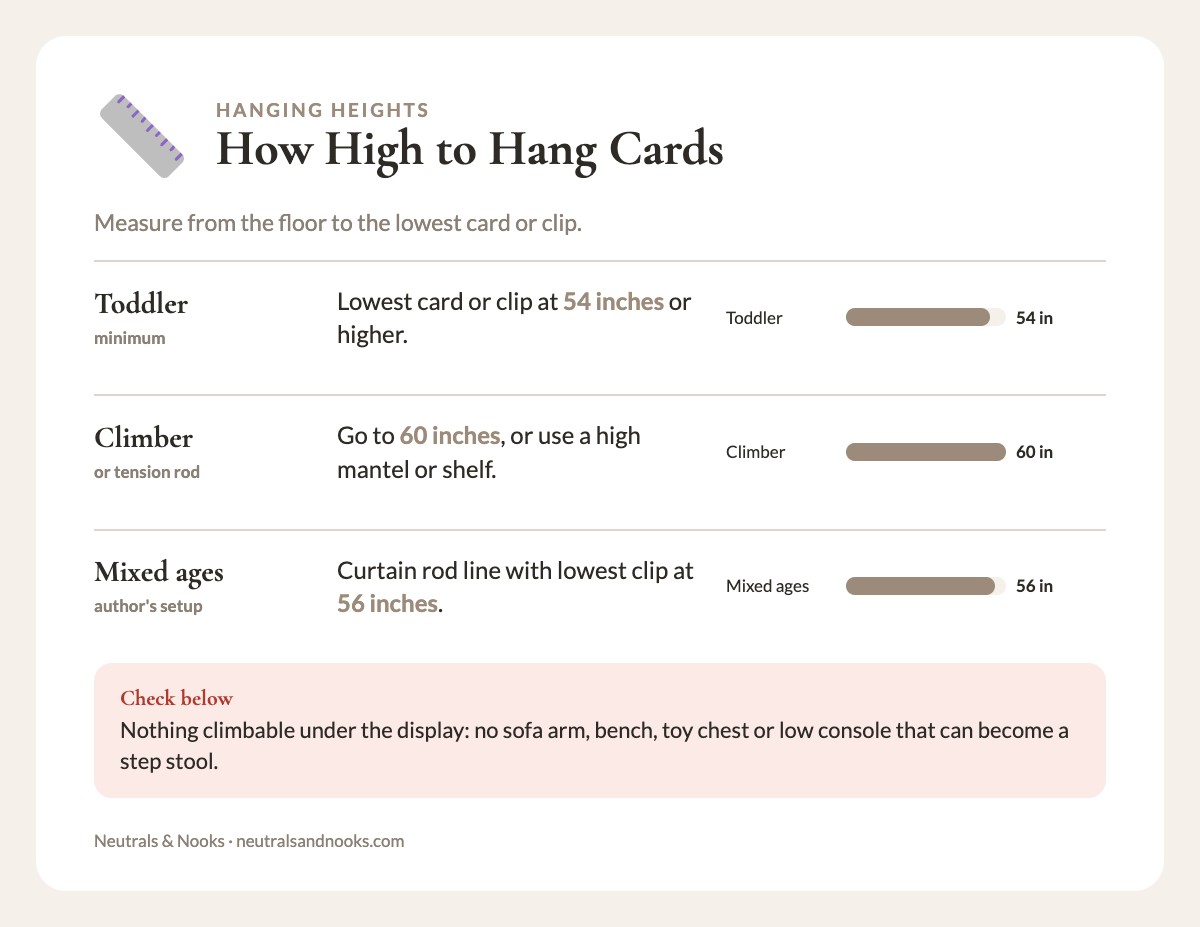
For roughly a 2-year-old, an arm stretched overhead often reaches the low-to-mid 40-inch range, but every child differs and preschoolers reach higher, so measure your own child (see the measuring section below). A toddler who drags a stool, a laundry basket, or the couch cushion over can reach much higher. So “above toddler reach” really means two things: high enough that a flat-footed stretch fails, and not directly above anything climbable.
My working numbers:
- Lowest card or clip: 54 inches from the floor or higher for a household with a toddler.
- Nothing directly over a sofa arm, a bench, a toy chest, or a low console that can become a step stool.
- If you have a climber (you know if you do), go to 60 inches or use a display that sits on a high mantel or shelf instead of the wall.
A quick check: stand at the spot and ask what your child could pull over to stand on. If the answer is “something,” shift the display two feet to the left.
Rule 2: Nothing that marks paint
Paint damage is the quiet cost of holiday decorating. Pushpins leave holes. Standard tape can lift paint. Adhesive hooks are fine on some finishes and awful on others, especially flat or recently painted walls.
The safest approaches, in order:
- Hang from something that’s already there. Picture rails, curtain rods, the top of a door frame, a mantel, a bookshelf, a window latch.
- Use tension. A spring tension rod wedged in a doorway or window frame needs no adhesive at all.
- Use removable adhesive correctly. If you must stick something to the wall, use removable strips, test a hidden spot first, and remove them slowly (more on that below).
- Skip the wall. Free-standing options like a ladder, a tray, or a basket put zero marks on anything.
Rule 3: Five-minute takedown
If your display takes a stepladder, a staple remover, and an hour to dismantle, it will still be up in March. I aim for a five-minute takedown. A good one comes down in one pass: unclip, lift, done. Everything goes into one box or one drawer, and the card pile goes straight into a “sort later” bin that takes thirty seconds.
How to Measure Your Child’s Reach
Rule 1 gives my working numbers. Here’s how to check them against your own child.
- Mark the stretch. Have your child stand flat-footed against a wall and reach straight up. Mark that spot with a small piece of painter’s tape, and remove it after.
- Add a margin. Allow generously for tiptoes, stools and growth spurts. That’s your no-go line. The minimum is 54 inches, so go higher if your number is higher.
- Hang above it. Put your lowest card or clip above that line.
- Check the floor. Look below the display for anything climbable.
For a household with a toddler, that usually lands between 54 and 60 inches. For older kids, you can lower the display or make it kid-friendly on purpose.
If your kids are older
With school-age kids, the above-reach rule loosens a little. They’ll leave cards alone if you ask. A wall grid or memo board at eye level is fine, and kids often love adding their own drawings next to the cards. Keep the toddler-safe height for the youngest, and you’ve covered everyone.
If you have a mix of ages
That two-year-old from my jute-line year is a preschooler now, and we also have a baby who’s just learning to pull up. We use one high display, the curtain rod line with the lowest clip at 56 inches. We also keep one kid-level basket of last year’s cards with a clear rule: these are for looking and holding, not tearing.
Photo cards are the ones kids love most. If your toddler adores pictures of cousins and grandparents, give them a way to see those faces without pulling anything down. A small stand-up frame at a safe height, or a low album with copies, lets them point and name. The touchable basket satisfies the curiosity, so the real display stays untouched.
Safety firstCheck every card before it goes in the kid-level basket. Remove musical or light-up cards (they hold button batteries), magnets, rhinestones, loose ribbon and any small detachable parts. Use copies or plain cards only, and supervise a baby.
Comparison Table: Which Display Method Fits Your House?
Here’s the quick-reference chart I wish I’d had that first year. “Lowest card” is the lowest point I’d place cards or clips with a toddler in the house.
| Display method | Typical cost | Wall damage | Cards it holds | Lowest card |
|---|---|---|---|---|
| Ribbon or twine on a curtain rod | Under $10 | None | 20-40 (with a second line) | 54″+ (rod at top of a window or door frame) |
| Tension rod in a doorway | $8-15 | None | 20-35 | 60″+ (rod high in the frame, retested daily) |
| Ribbon hung from removable hooks | $5-12 | Very low if removed slowly | 15-30 | 54″+ |
| Garland draped over a mantel | $15-40 | None | 10-25 | 54″+ (mantel height; cards on the back third) |
| Wooden ladder (leaning or hung) | $0 if you own one, $25-50 new | Low (needs a wall strap; child-free rooms only) | 15-30 | 54″+ (top rungs only) |
| Embroidery hoop or wreath form with clips | $6-15 | Low (one hook) | 8-12 (wreath form up to 20) | 54″+ |
| Card holder basket or tray on a high shelf | $12-35 | None | 15-40 (stacked) | 54″+ (shelf height) |
| Cork board or fabric memo board | $15-45 | Low to medium (needs a hook, sometimes a nail) | 25-50 | 54″+ |
| Frame with ribbon criss-cross | $10-30 | Low (one hook) | 15-25 | 54″+ |
| Window display with removable clips | $5-10 | None | 10-25 | 54″+ (top of the window) |
| Door display with over-the-door hooks | $6-14 | None | 15-30 | 54″+ (on a door that stays closed) |
A few quick reads from that table:
- Cheapest and fastest overall: ribbon on a curtain rod. You can do it with what’s in your wrapping drawer.
- Zero damage and zero tools: tension rod or mantel.
- Holds the most cards: a fabric memo board or a stacked basket.
- Best for renters: any method marked “None.”
The Ribbon-and-Clip Line (Done the Toddler-Proof Way)
This is the classic, and it earns its reputation. The difference between my failed jute-line year and the version I use now comes down to three small changes.
What changed
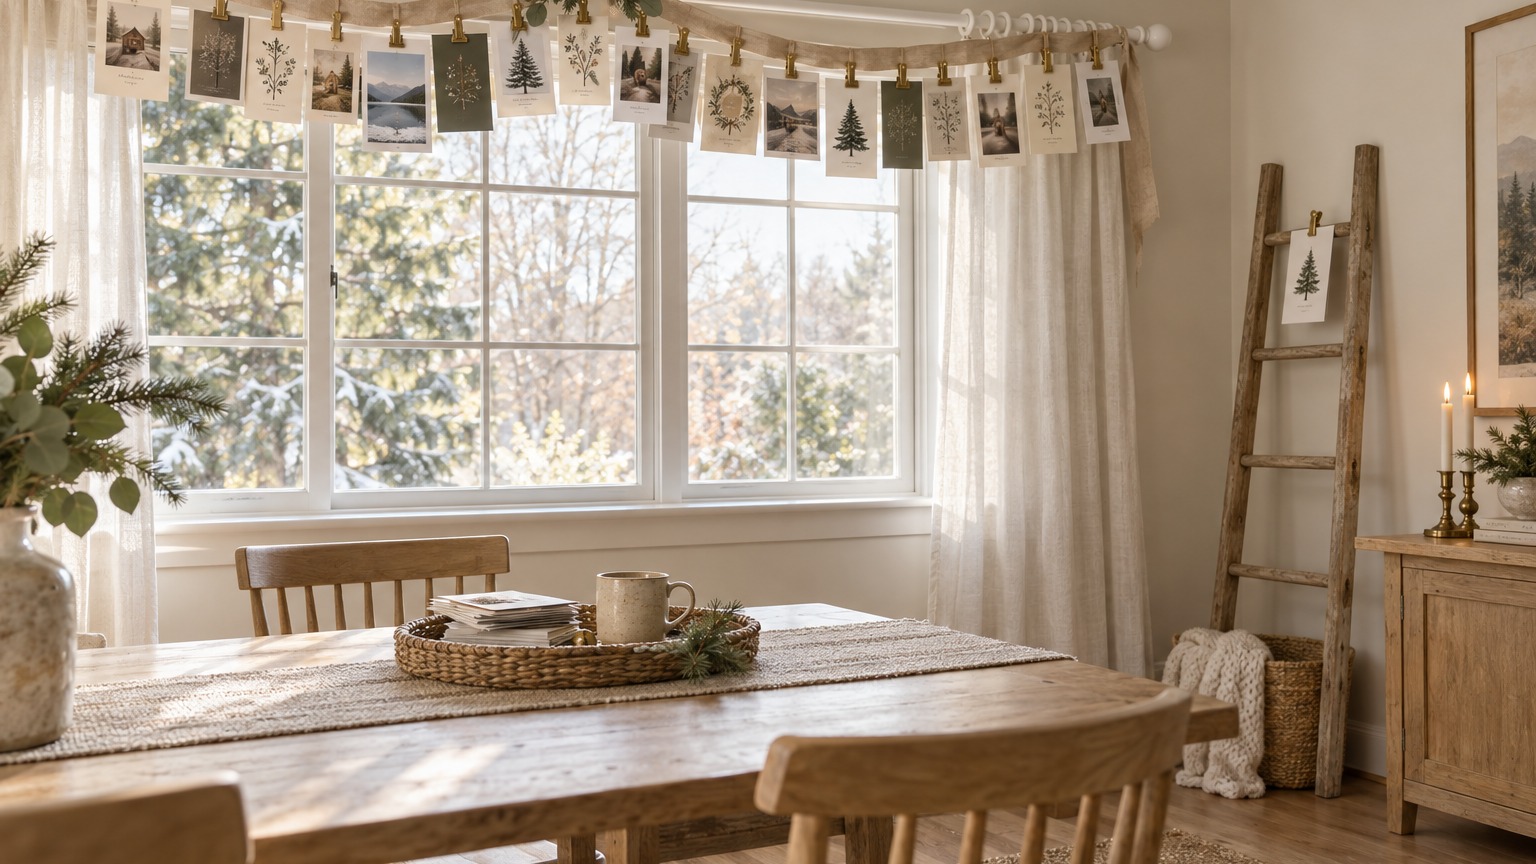
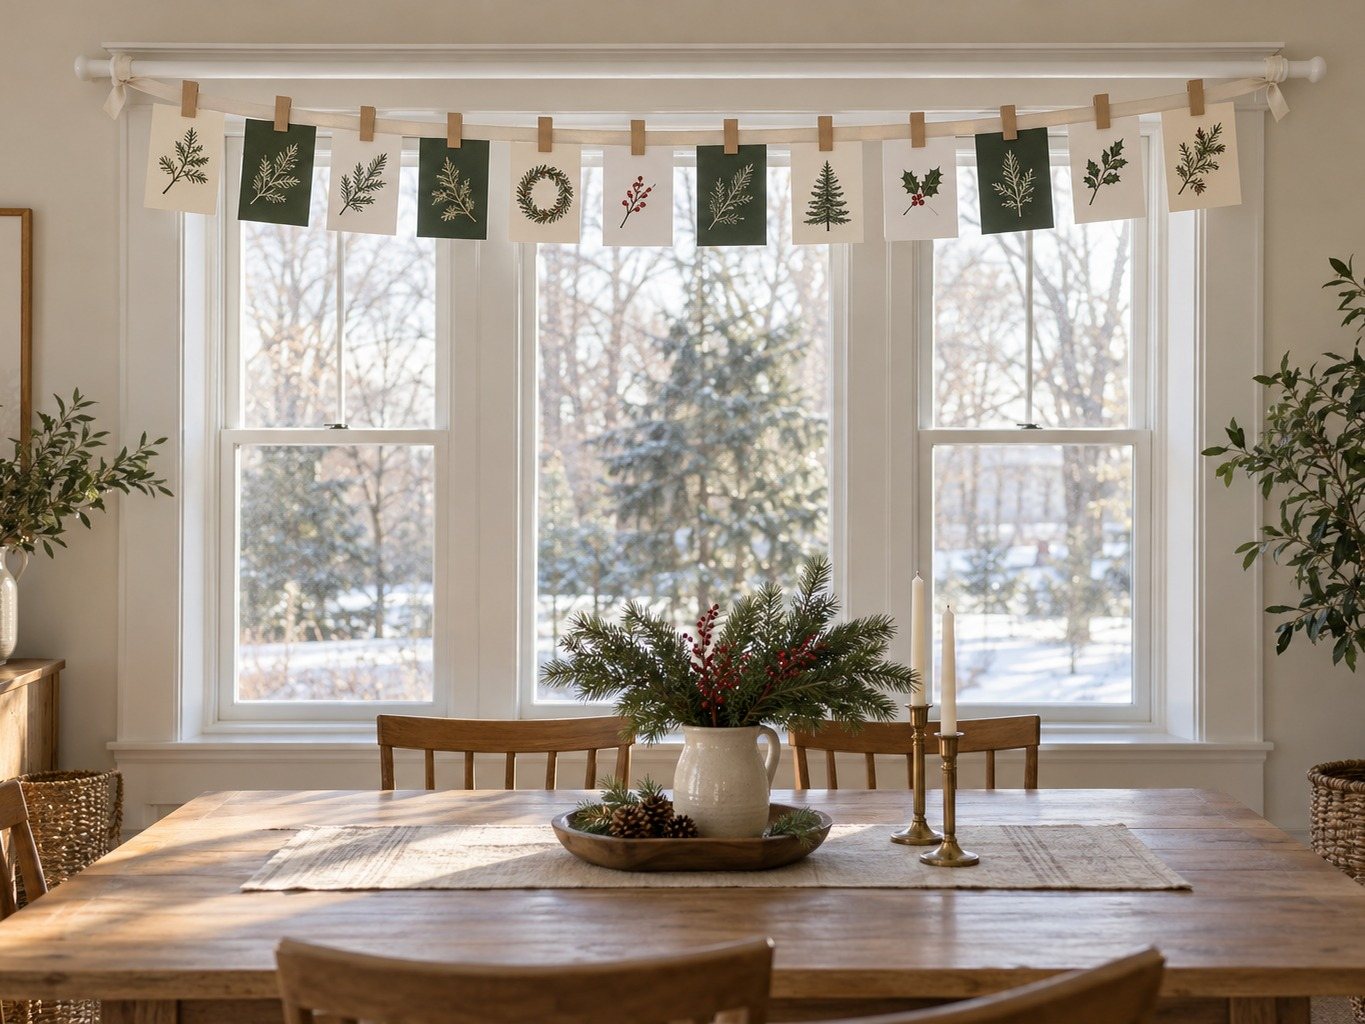
- Height. The line now hangs from a curtain rod above our dining window, so the lowest clip sits at about 56 inches.
- Clips. I swapped tiny wooden clothespins for wide, flat, one-piece clips that sit flush with the card. Little pins are a choking and swallowing hazard if they fall. Skip any clip that fits inside a toilet-paper tube, and keep every clip above reach.
- Spacing. Cards are spaced a hand’s width apart so a stray tug doesn’t bring down the whole line.
How to set it up in about ten minutes
- Measure the rod or span and cut a ribbon, twine, or lightweight garland a few inches longer than the span. Pull it taut and re-check the lowest clip height after hanging.
- Tie it to both ends of the rod with a plain knot, trim the tails to an inch or two, and tuck them behind the rod. No nails, no adhesive.
- Slide the line to the right height. Check the lowest clip against your 54-inch minimum.
- Clip cards by their top edge, not the center, so they hang straight and don’t flap.
- Spread the cards evenly, about 20 standard cards per ribbon. If the middle starts to sag, hang a second line instead of loading more onto one.
Why this method works for takedown
You untie two knots, slide the cards off in one stack, fold the ribbon, and you’re done. That’s about five minutes. I keep the ribbon rolled in the same bag as my gift wrap so it’s there every year.
Cords and ribbon
Safety firstRibbon, twine and loops are a strangulation hazard. Never hang them within a child’s reach, and never near a crib, bed, play yard or play area. Avoid loops, keep tails short and out of reach, and apply the same rule to the hoop and branch projects below.
Tuck the tails behind the rod so nothing dangles. If you want a bigger overview of what to keep high, low, and out of reach this season, my guide to kid-safe Christmas decor covers the rest of the house.
No-Wall Options: Mantel, Ladder, and Shelf Displays
If your walls are freshly painted, rented, or just precious to you, skip them completely. These three never touch drywall.
The mantel garland
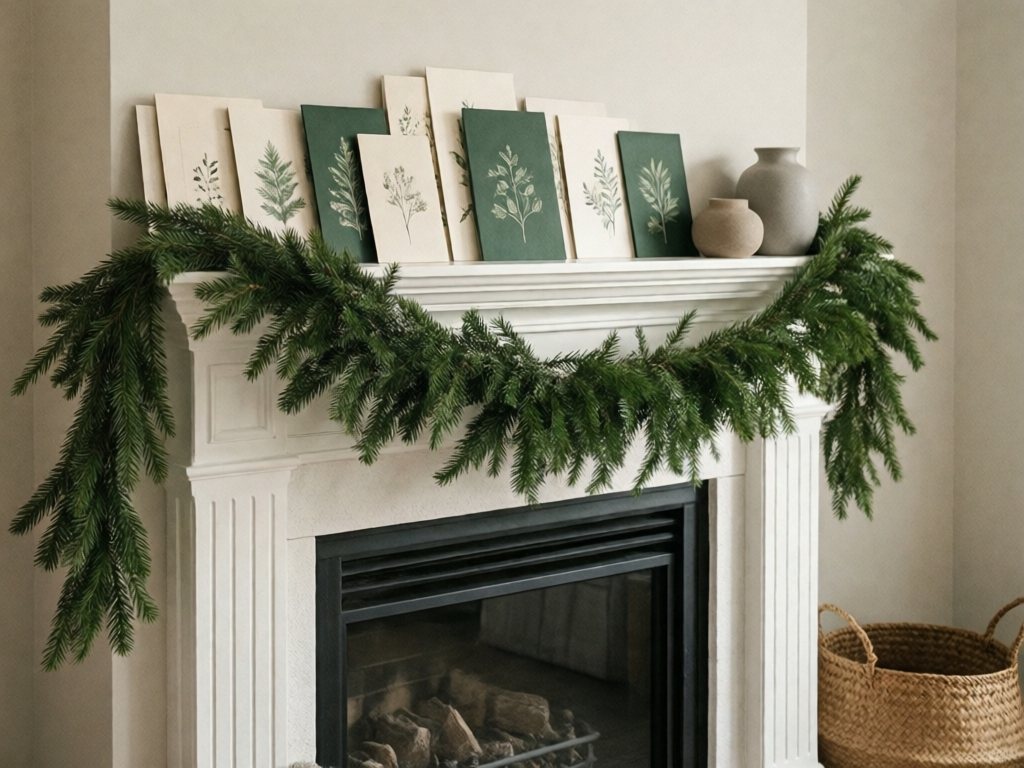
A mantel is the original card display. Lay a lightweight garland along the edge and tuck cards behind the greenery, or stand cards upright against the back so they lean on the wall.
- Best for: families with a mantel at 54 inches or higher. A lower mantel is within a climber’s reach, so use another method.
- Toddler note: keep cards on the back third of the mantel and anything glass or heavy off the front.
- Fireplace note: if the fireplace is in use, keep paper well away from heat and open flame, and never hang cards where they could drift near it. Many families skip the mantel if they actually burn fires, and that’s the right call.
The leaning ladder
A wooden decorative ladder leaned against a wall is a cute Christmas card display idea that looks intentional and a little farmhouse without trying. I’ve only used one in a room the kids couldn’t get into.
Safety firstA leaning ladder can tip and gets climbed, and its lower rungs act as steps. With a toddler or a pull-to-stand baby, skip it. Use it only in a room children can’t enter, or anchor it to the wall with a safety strap.
If a ladder suits your house, here is how:
- Place the ladder in a child-free room, anchored to the wall with a strap.
- Put cards only on rungs at least 54 inches from the floor, using wide flat clips rather than ribbon loops.
With a toddler or baby in the house, this is the one idea I’d skip.
The doorway tension rod
A spring tension rod wedged in a doorway needs no adhesive, but a child can pull it down, so treat it with care.
- Set the rod at 60 inches or higher and tighten it firmly.
- Retest it daily to make sure it hasn’t loosened.
- Follow the same cord rule for anything hung from it: short tails, no loops.
- Skip it if the doorway has a climbable threshold or anything to stand on nearby.
The high-shelf basket or tray
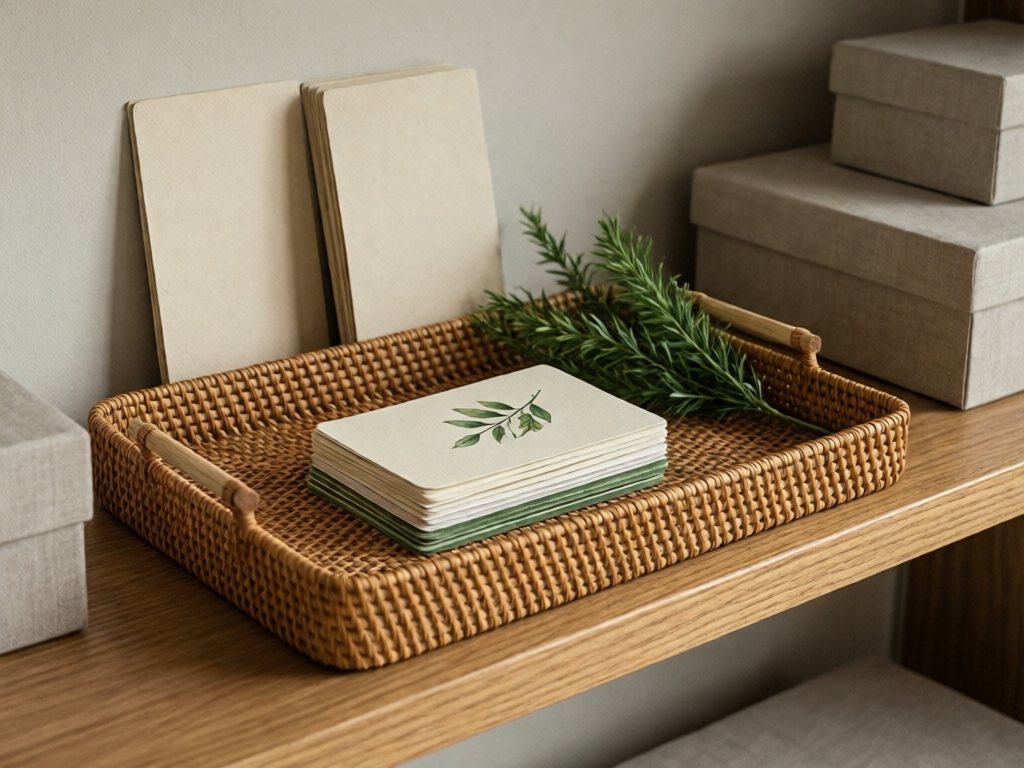
This is the least “decorated” option and the most practical. A shallow basket or wooden tray on a high shelf holds a stack of cards, and you simply rotate the newest one to the front.
- Place it on a shelf at or above 54 inches.
- Lean two or three favorite cards against the wall behind the tray as a mini display.
- Add a small sprig of faux greenery for texture. Skip glass votives, or keep them at the back of the shelf, well out of reach.
It’s less showy than a wall of cards. It holds a big stack, though, and takes ten seconds to put away. If you get forty cards, this is the one that won’t overwhelm your space. A neutral wooden or woven tray suits a calm home.
Christmas Card Holder Display Ideas (Things You Can Buy or Repurpose)
If you want a holder that lives in a drawer between seasons, these are the ones worth considering.
Repurposed holders from around your home
You may already own a few of these:
- Mail sorter or letter organizer. A wooden or metal desktop sorter stands up on a high shelf and holds cards upright like a tiny filing system.
- Toast rack. Yes, really. The slots hold five or six cards neatly.
- Plate stand or tiered tray. Place a small card on each tier. Keep it high.
- Photo ledge or picture shelf. If you have a ledge at 54 inches, cards lean right along it.
- Wine crate or small wooden box. Cards stand on end inside, spines up, easy to flip through.
Purchased holders worth the money
Look for:
- Weighted or wide bases so they can’t tip.
- Matte, natural finishes like wood, linen, or metal in warm brass or black.
- Flat storage so they pack away with the other seasonal items.
If you collect a lot of cards, a hanging fabric organizer with pockets (the kind used for classroom or closet storage) can hang from a high hook and hold dozens. Just keep it above the line we discussed.
What I’d avoid
- Open bowls of cards at coffee-table height. They’re irresistible.
- Sharp metal clips or spring mechanisms that can pinch small fingers. Any clip you use stays above reach.
- Tiny decorative pegs, which are easy to lose and easy to swallow.
DIY Christmas Card Displays (Under 20 Minutes)
These are the DIY versions of everything above. None need power tools, paint, or nails.
1. The embroidery hoop
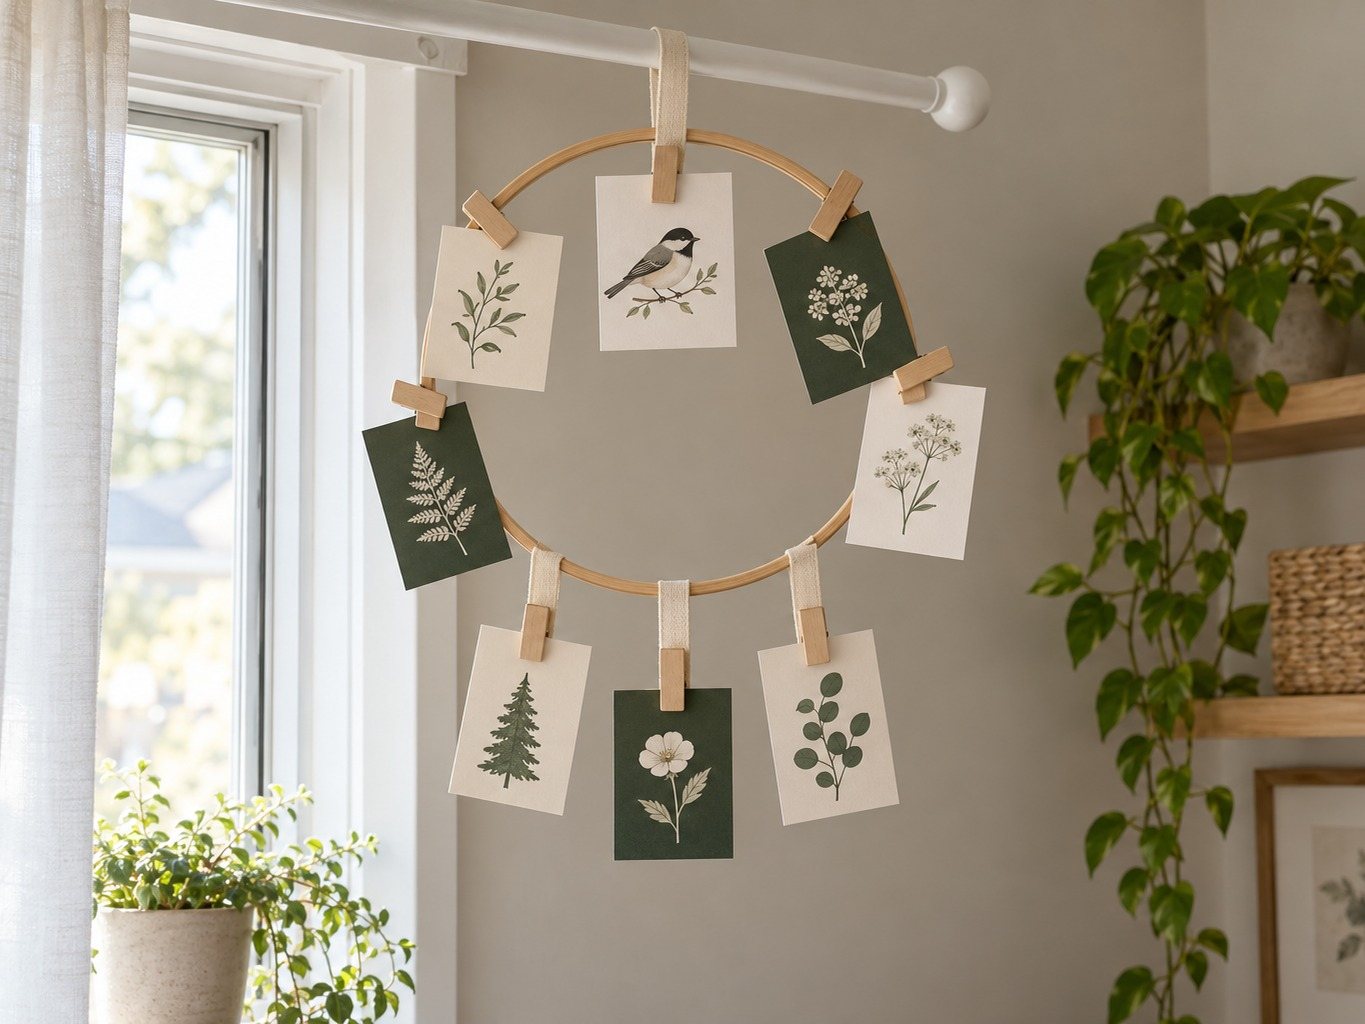
You need: an embroidery hoop (6-10 inches), ribbon, and flat card clips.
- Pull the inner ring out and set it aside, or leave both rings together for a sturdier loop.
- Tie three or four short lengths of ribbon to the hoop, with no loops and no long tails. The lowest card must stay above 54 inches.
- Clip a card to the end of each ribbon and the rest around the hoop itself.
- Hang the whole hoop from a curtain rod, or from a removable hook rated for more than the hoop and cards weigh.
It looks a bit like a mobile. The cards spin gently, so choose a spot away from drafts. A hoop holds about eight to twelve cards, and a larger wreath form up to about twenty.
2. The branch
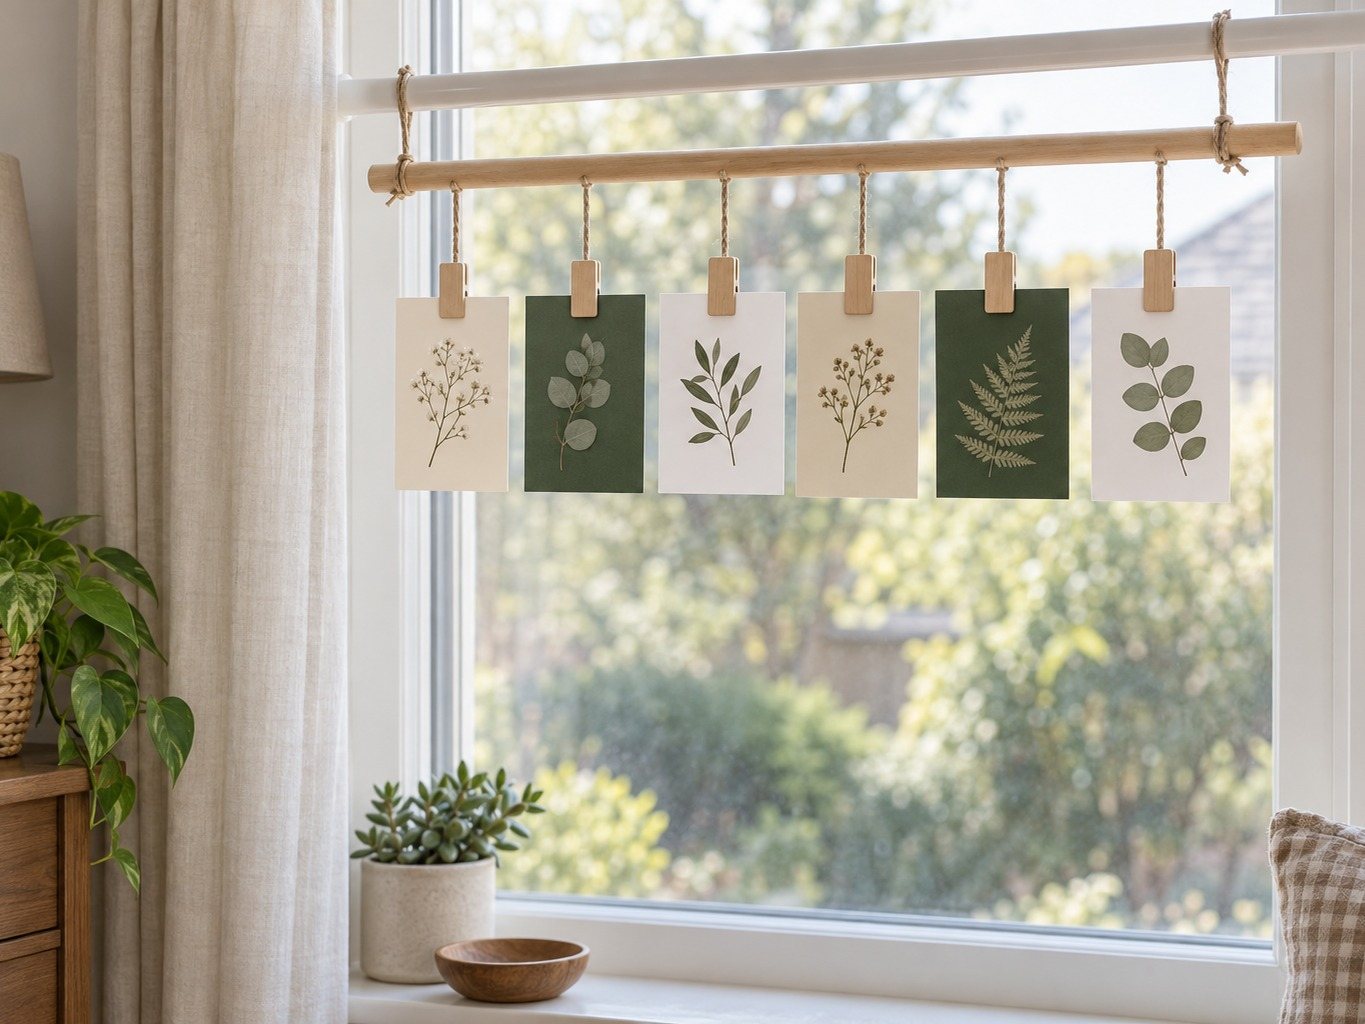
You need: a smooth sanded dowel (or a branch, see below), twine, and wide flat clips. The same cord rule applies: short tails, nothing within reach.
- Use a smooth, sanded dowel as the default. If you prefer a branch, choose one from a known non-toxic tree, sand any splintery or sharp ends, and keep it high.
- Tie twine to both ends so the branch hangs horizontally.
- Hang cards from shorter lengths of twine clipped along the branch.
This is the cheapest way to get a natural, neutral look. It’s also the most forgiving: no one expects a branch to be perfectly straight. Hang it from a curtain rod or a high hook.
3. The window garland
You need: ribbon and removable window clips or small suction hooks.
- Run ribbon across the top of a window, with the lowest card above 54 inches. Keep it well away from blind and curtain cords.
- Clip cards along it so the light shines through the paper edges.
- Leave the lower half of the window clear.
Windows are great for tiny households because they don’t use any wall space at all.
4. The door display
You need: over-the-door hooks and ribbon.
- Choose a door that stays closed, like a closet or an unused room. Hook two over-the-door hooks onto its top edge, one at each side, and check every day that they haven’t shifted.
- Tie one taut ribbon between them, with short tails and no loops, and clip cards along it.
- Add more rows only if they stay high, with no loops and short tails.
This one comes down in under two minutes and leaves no mark. Keep the hooks and ribbon above 54 inches.
5. The “mini tree” of cards
You need: a sturdy cardboard cone and a few wide flat clips.
- Stand the cardboard cone on a high shelf or mantel, 54 inches or higher.
- Clip or tuck small cards into the cone in a spiral.
- Top with a small star or sprig of greenery.
It makes a tidy holiday focal point for a high mantel, floating shelf or closed cabinet top above reach. Don’t put it on a console table, which is low enough to climb.
Renter-Friendly Wall Displays That Don’t Damage Paint
If you really want a wall display, you have options beyond a thousand tacks. The goal is a “gallery” feel with minimal commitment.
The grid with removable strips
- Lay your cards on the floor in the shape you want, and take a quick photo so you remember the layout.
- Apply removable adhesive strips to the back corners of each card (or to a small mat behind it).
- Stick the cards on the wall in your grid. Keep the whole grid above 54 inches and not over anything climbable. If a strip or card falls, pick it up right away.
Cautions:
- Test a small hidden patch first. Some paints don’t love any adhesive, and flat or matte finishes can be the most fragile.
- Don’t use this on freshly painted walls. Paint can take up to a month to cure, so check the paint can and the strip manufacturer’s instructions.
- To take it down, follow the removal steps in the adhesive section below.
The framed ribbon board
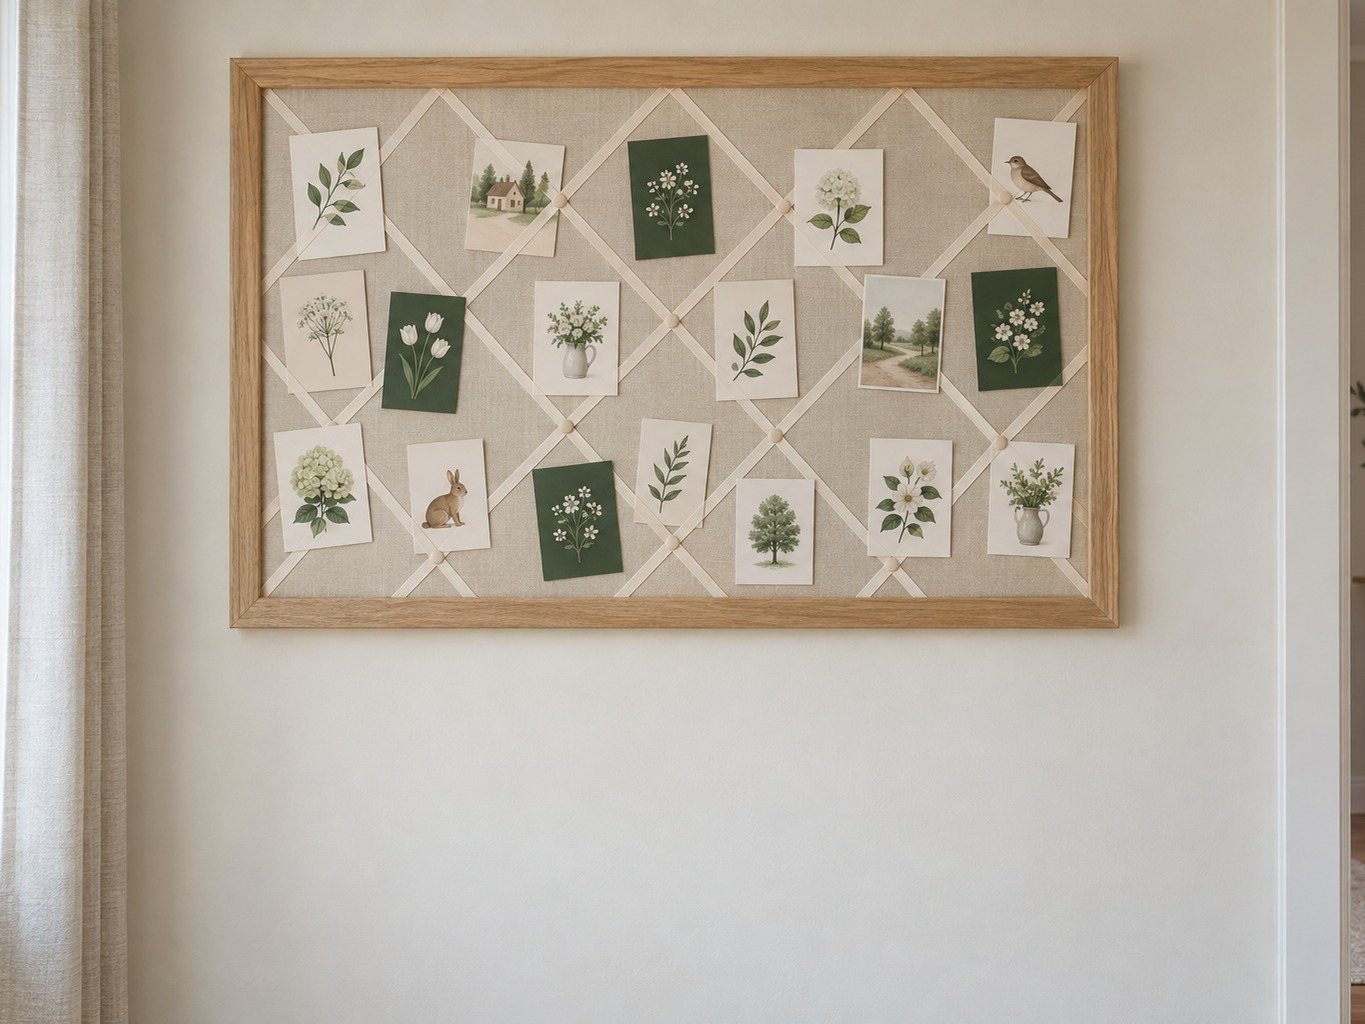
A large empty frame with ribbon criss-crossed behind the glass (or backing) turns into a holder. Tuck the card corners under the ribbon. It looks polished and holds about fifteen to twenty-five cards.
- Use a frame with acrylic or no glass. If it has glass, have an adult remove it while the kids are elsewhere, wrap it, and dispose of it right away.
- Fix the ribbon in a diamond pattern with tape or glue, leaving no exposed staples, and check the finished frame for anything sharp.
- Tuck cards under the intersections.
- Hang it above reach on a hook rated for its weight, or at two points if it’s heavy. Never hang it over a crib, bed or seating.
The memo board or fabric board
A linen-covered board with ribbon strips holds the largest number of cards. It’s also reusable, and you can leave it up year-round for school notices and invitations.
It does need to be hung securely above reach, and never over a crib, bed or seating. Use a heavy-duty removable hook rated for its weight if your wall can handle it.
This board is the one exception to my no-marks rule. If a removable hook won’t hold it, a standard hook and a small nail will, and the hole is small and quick to patch. If your goal is truly zero wall damage, skip this one.
If your family also battles the pile of school papers and kid art that accumulates around this time of year, a memo board does double duty. I wrote about how to keep that stream manageable in my kids’ artwork and school papers organization system, and the same principles apply to cards: a defined space, a limit, and a regular purge.
Simple Christmas Card Display Ideas for Small Spaces
Sometimes you don’t want a project. You want cards that are visible, out of reach, and not a to-do item. Here are the lowest-effort options.
- Prop a few cards on a high bookshelf. Three or four favorites stand on the shelf in front of books. That’s the whole display.
- Use the top of the refrigerator, but only if your child can’t climb in the kitchen and it’s away from the stove and other heat. Otherwise skip it.
- Stand cards in a row on a plate rail or picture ledge.
- Keep a basket of cards on a high shelf at 54 inches or higher, away from the stove and other heat, and bring it to the table to flip through together at dinner. Screen it first for battery cards, magnets and embellishments.
- Clip cards to the curtain line with a wide flat clip as they arrive, one at a time.
A “just enough” display is totally legitimate. You don’t need to show every card to honor the people who sent them. I’ve started displaying only the photo cards (they’re the most fun to look at) and keeping the rest in a basket.
What to do with an overwhelming number of cards
If you receive 60 cards, you don’t have 60 slots. Try this:
- Display your favorite 15-25.
- Put the rest in a basket on the shelf or in the drawer, newest on top.
- Swap a few from the basket into the display every week or so, so the whole collection gets its moment.
Styling a Neutral Christmas Card Display
If you want a little extra charm, here are the touches that make a plain ribbon line feel designed.
- Mix card sizes and types. Alternate square and tall cards, and photo and illustrated ones, for rhythm.
- Add tiny greenery. Tuck a sprig of faux eucalyptus or pine into every third clip. Use faux greenery only, since real holiday greenery can be toxic.
- Use neutral ribbon. Linen, cream velvet, and natural jute fit with a calm home palette. A single pop of red or forest green keeps it seasonal.
- Write names on the back. Not a decorating tip, but a memory one. Write the family name and year in pencil on the back so you can sort and keep later.
Removing Adhesive Without Peeling Paint
Even if you use the gentlest method, you’ll eventually need to remove something. Here’s the routine.
- Find the pull tab on the removable strip.
- Pull it slowly and straight down, parallel to the wall, stretching the strip until it releases. Do not yank it toward you.
- If it resists, warm it up, but only if the strip manufacturer allows it. Use a hair dryer on low for 20-30 seconds while the kids are elsewhere, keeping it moving. Unplug it and let the strip cool before pulling. Put the dryer away right after, out of reach and away from water.
- Wipe any residue with a soft cloth dampened with mild soap and water.
- For painted walls that look dull afterward, gently dab, don’t scrub.
TipTest a hidden patch first, and always pull the strip tab slowly, parallel to the wall.
If you rent, take a photo of the wall before you put anything up, so you have a “before” in case it matters later.
What to Do With Christmas Cards in January
Most card guides skip this part, which is why a pile of cards lingers on the counter until spring. Here’s my decision framework. The takedown takes five minutes and the sort about fifteen, with a cup of tea and a bin nearby.
Step 1: The takedown (five minutes)
- Take down the display in one pass. Unclip or untie everything and stack the cards in the order they came down.
- Put your ribbon, clips, hoop, or holder in one labeled bag or box for next December, ideally with the rest of your holiday decor storage.
- Set the stack of cards on a table in good light.
Step 2: Sort into three piles
| Pile | What goes in it | What to do |
|---|---|---|
| Keep | Photo cards of family and friends, cards with handwritten notes you love, anything from someone who’s no longer with us, kids’ homemade cards | Store in a labeled box or scan, see below |
| Use again | Blank-inside cards, cards with lovely illustrations you can cut into gift tags | Cut into tags, postcards, or craft supplies |
| Recycle or trash | Cards with glitter, foil, plastic, or heavy embellishments; duplicates; cards with no personal message | See recycling notes below |
Step 3: Decide what “keep” means
You don’t need to save every card. My household’s rule is one small box, and when it’s full, something goes. A few ways to keep what matters:
- Photo cards: take a photo of the front and back, or scan them, then store the physical card or recycle it. A single folder on your phone labeled by year takes up almost no room.
- Handwritten notes: save the note, recycle the envelope and card if you like.
- Kid-made cards: these belong in a keepsake box, not the display pile. They go in the same system I use for kids’ artwork and school papers.
- A “year in cards” page: some families clip the best photo cards into a simple album or binder. One page per year is plenty.
Step 4: Recycle responsibly
Not every card is recyclable curbside, and rules differ by town, so check your local guidelines. General principles:
- Plain paper cards with a matte finish can usually go in paper recycling.
- Glitter, foil, metallic coatings, and plastic windows often can’t be recycled in standard paper streams. Many households put these in the trash.
- Remove batteries, ribbons, and any attached ornaments or magnets before recycling. Musical cards contain button batteries: remove them promptly, tape over the battery, dispose of it right away, and keep batteries and magnets away from children.
- Envelopes are generally recyclable, but check for plastic windows.
- Photo cards printed on photo paper typically aren’t accepted in paper recycling, but check local rules. Keep them, repurpose them, or trash them.
- Reuse before you recycle. Cut the front panel from a card to make a gift tag, a bookmark, or a layer in a collage. Kids love doing this, and it’s a gentle way to say goodbye to the season.
- Some schools and community art programs accept used cards for craft projects. Contact them first to confirm they take them.
Step 5: Close the loop
Write down the three or four names whose addresses you want to update or whose cards made you smile, and keep that list with your holiday supplies. It makes next year’s mailing a lot easier.
A Simple December Card Display Timeline
If you like having a plan, here’s how this fits into a typical holiday season. It’s light on purpose.
- Late November: choose your method, gather supplies (usually ribbon and clips), and decide where it goes. Check your height. If you’re also doing the larger seasonal reset, the pre-holiday toy purge checklist is a good companion for clearing room before the decor goes up.
- First week of December: hang the display. Add cards as they arrive, one at a time. It takes seconds.
- Mid-December: swap out cards from the basket if you have too many. Straighten anything that’s drooped.
- Between Christmas and New Year’s: do a quick scan for stray clips or ribbon bits on the floor, which matters most with small children.
- First weekend of January: do the five-minute takedown and fifteen-minute sort.
Christmas Card Display Mistakes to Avoid
After a few years of trial and error, here’s what I’d tell a friend.
- Hanging at “my” eye level. Great for adults, terrible for toddlers. Always start from the child-reach line.
- Using tiny clips or pins. They go missing, and small objects and small kids don’t mix.
- Overloading a single ribbon. Heavy cards sag the line and may pull it down. Two ribbons are better than one overloaded one.
- Placing the display above a bench, toy chest, or sofa. It makes a climbing route.
- Forgetting the takedown. If it’s hard to remove, it will linger. Choose the simpler method.
- Trying to display every single card. A curated selection looks better and is easier to manage.
- Skipping a test patch. One hidden square inch of wall saves you from visible damage.
From our sister site Tiny Hands Create
Draw it together: easy Christmas drawings for kids
Simple step-by-step guides with a printable coloring page, made for little hands. A calm 15-minute activity for the holiday season.
Frequently Asked Questions
What’s the easiest Christmas card display idea if I only have ten minutes?
A ribbon or twine line tied to a curtain rod, with wide flat clips. You tie two knots, clip the cards on, and check that the lowest card is at least 54 inches off the floor. No nails, no adhesive, and it comes down just as fast. If you don’t even have ten minutes, stand a few favorites on a high shelf and keep the rest in a basket.
How high should I hang Christmas cards if I have a toddler?
I recommend the lowest card or clip sit at 54 inches or higher, and 60 inches if your child climbs. A standing toddler can often reach somewhere in the low-to-mid 40s with an arm stretched up, but a stool, basket, or couch cushion adds a lot of height. Also avoid placing the display directly above anything climbable, like a bench or toy chest.
How do I display Christmas cards without damaging paint?
Hang from things that are already there, such as a curtain rod, mantel, door frame, or bookshelf, or use a spring tension rod in a doorway. If you do use removable adhesive strips, test a hidden spot first, avoid freshly painted walls, and remove strips slowly by pulling the tab straight down along the wall. If the strip manufacturer allows it, a hair dryer on low heat can soften stubborn adhesive. Free-standing options like baskets, trays, and mantel garlands leave no marks at all.
How many cards can a typical display hold?
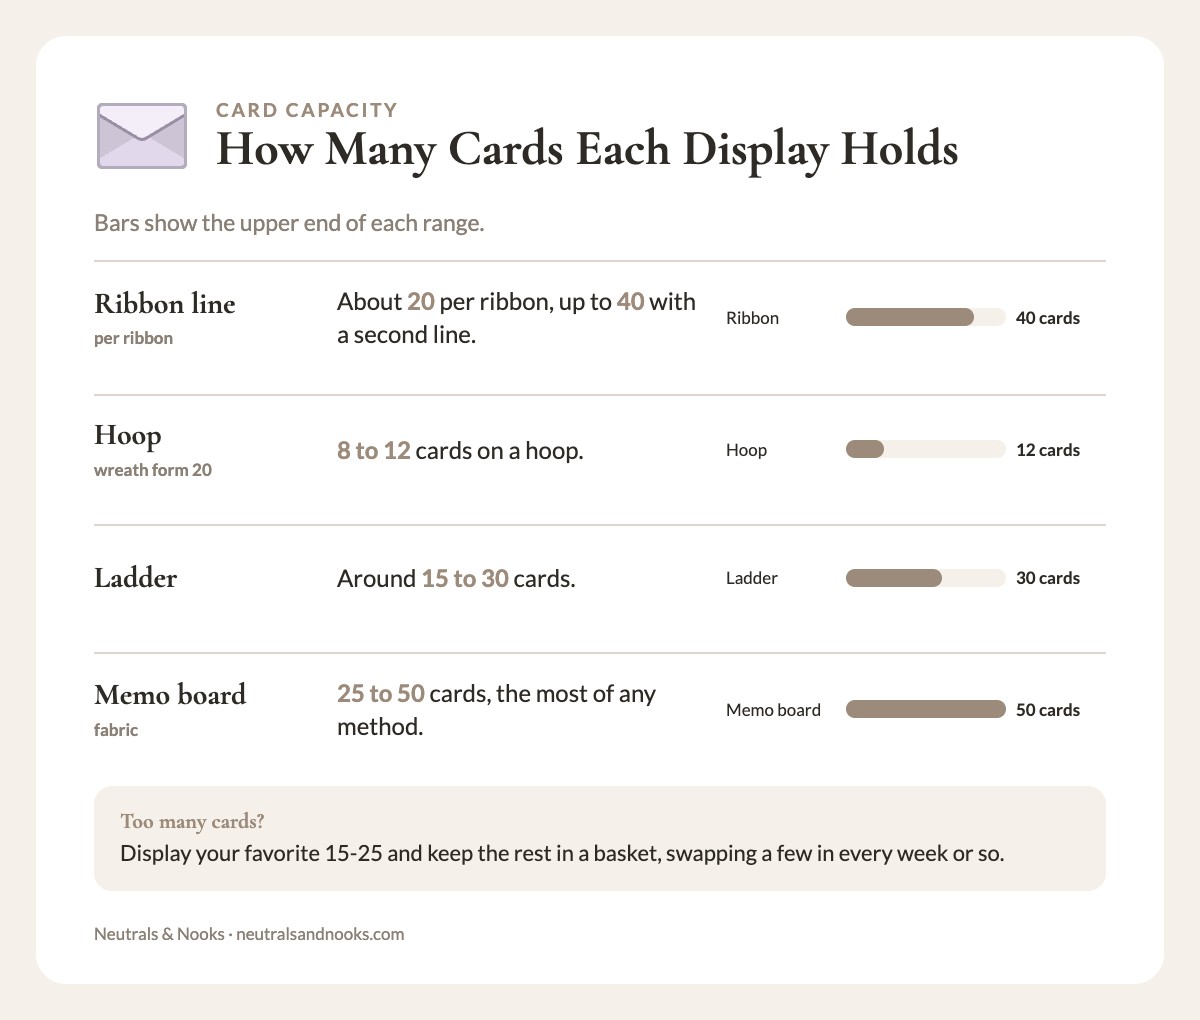
It depends on the method. A ribbon line on a curtain rod holds about 20 per ribbon, or up to 40 with a second line. A hoop holds 8 to 12 (a wreath form up to about 20), a ladder around 15 to 30, and a fabric memo board 25 to 50. A basket or tray on a high shelf also holds a big stack, though you only see the top few. If you receive more cards than your display holds, show your favorites and rotate the rest in from a basket.
What should I do with Christmas cards in January?
Do a quick three-pile sort: keep, reuse, and recycle. Keep photo cards and handwritten notes you love, ideally by scanning or photographing them so the physical stack stays small. Reuse pretty front panels as gift tags or craft material. Recycle plain paper cards, but check local rules, since glitter, foil, plastic, and photo-paper cards usually can’t go in paper recycling. The whole sort takes about fifteen minutes.
Are Christmas card display ideas with clothespins safe around small children?
Small wooden clothespins can be a choking hazard if they fall and a baby or toddler finds them, and some spring clips can pinch fingers. If you have little ones, use wider flat clips, keep every clip above their reach, and do a floor check each evening during December. Another option is to skip clips entirely and use a ribbon-and-pocket organizer or a basket on a high shelf.
Can I let my kids be part of the card display?
Yes, and it helps. Set up one kid-level spot with last year’s cards or copies that they’re allowed to hold and look at, like a low basket or a small album. Let older kids choose which photo cards go up, or tape their own drawings next to the display at their eye level. Keeping the real display high and giving them a “yes” spot lower down usually cuts down on grabbing.
Final Thoughts: Choosing a Kid-Proof Christmas Card Display
A Christmas card display doesn’t need to be elaborate to feel like the holidays. It just needs to hold the faces and notes from people you love, stay out of small hands, and disappear without a fuss when the season is over.
Pick the method from the table that matches your walls and your toddler’s climbing skills, hang it above reach, and let the cards trickle in. When January comes, give yourself five minutes to take it down and fifteen to sort. You’ll start the new year with a clean wall and a small box of the cards worth keeping.