
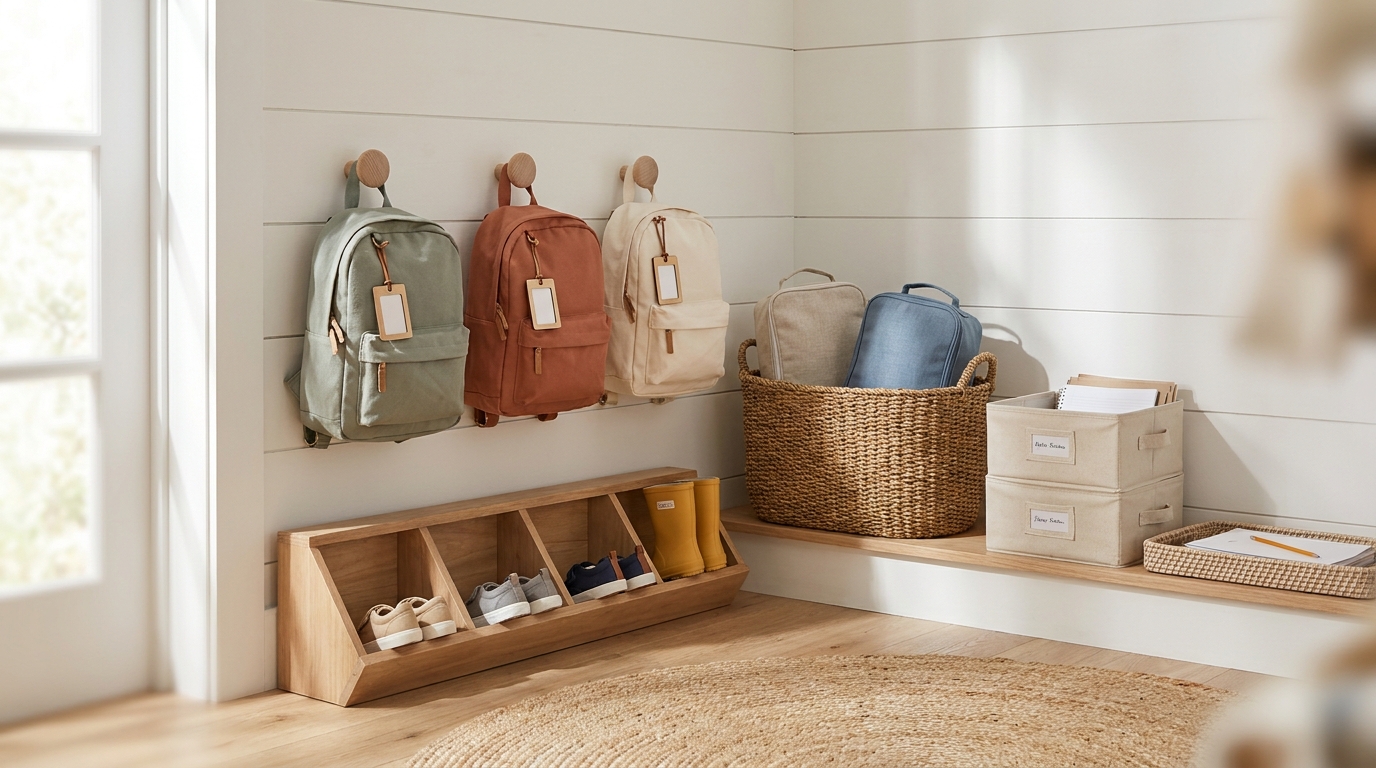
The Back-to-School Drop Zone: Organizing Backpacks, Shoes, and Lunchboxes for Smooth Mornings
Create a dedicated back-to-school drop zone to organize your kids' backpacks, shoes, and lunchboxes, specifically addressing morning chaos and common bottlenecks. You'll learn how to design a functional system that works for real families.
- Focus your drop zone on backpacks, shoes, and lunchboxes for school mornings.
- Design your system around where each item goes, per kid, for daily use.
- Ensure all storage is at kid height; if they can't reach it, they won't use it.
- Place your drop zone near the door your kids actually use to leave for school.
- Observe your family's specific morning bottlenecks before you start organizing.
Last September, I stood in my own driveway at 7:52 a.m. patting down my kids like airport security, asking the same three questions I ask every single school morning: “Do you have your library book? Where’s your other shoe? Whose lunchbox is this — this isn’t yours.” We were four minutes from the bell. One kid was holding one shoe. Nobody could find the folder with the field trip form that was due that day. It wasn’t a bad morning. It was a completely normal one, and that was the problem.
That morning is the reason my entryway looks nothing like it did in July. Somewhere between the last day of school and the first, I stopped treating our front hall like a generic catch-all and started treating it like infrastructure — a system built specifically around the three things that leave the house every morning and come back every afternoon: backpacks, shoes, and lunchboxes. Not a “mudroom makeover.” A drop zone with a job to do.
If your entryway is currently a pile of shoes, a hook with four backpacks stacked on it like a landfill, and a lunchbox situation that involves the bottom of the pantry, this is for you. Here’s how to build a back-to-school drop zone that actually survives real mornings with real kids — not the styled version you see in a catalog.
Why a Mudroom Isn’t Enough for Back-to-School
Most entryway advice is written for a general mudroom: a bench, some hooks, a basket for mail. That works fine for adults coming and going once or twice a day. School mornings are a different animal entirely. You’ve got multiple kids, multiple bags, multiple shoe sizes, a hard deadline, and everyone needs their own stuff, fast, without an adult acting as air traffic control.
A back-to-school drop zone is narrower and more specific than a mudroom. It’s built around three questions that repeat every single day:
- Where does this kid’s backpack go the second they walk in, and where does it live the second before they walk out?
- Where do school shoes live so they’re never the reason someone is late?
- Where does a lunchbox go to get washed, refilled, and grabbed again — without a trip to three different rooms?
Answer those three questions with a physical spot for each, per kid, and you’ve solved 90% of morning chaos. This is also the moment to be honest about your particular family’s failure points. Some households lose fifteen minutes to shoes. Others lose it to “I can’t find my folder.” Watch your own mornings for a week before you organize anything — you’re solving your bottleneck, not a Pinterest-board bottleneck. If your evenings tend to unravel too, pairing this with The 15-Minute Evening Reset closes the loop on both ends of the day.
The One Rule That Matters More Than Any Product
Before you buy a single bin, adopt this rule: everything that leaves the house has exactly one home, and that home is at kid height. Not your height. Not “wherever it fits.” A six-year-old cannot hang a backpack on a hook that’s five and a half feet up, and if they can’t do it, they won’t do it, and it lands on the floor. Every product recommendation below is in service of that one rule.
Finding (or Faking) the Space for a Drop Zone
You don’t need a mudroom to build this. You need roughly 3 to 4 feet of wall or floor space near whatever door your kids actually use to leave for school — which, in a lot of homes, is not the pretty front door. It’s the garage door, the side door, or the door off the kitchen. Build the drop zone there, even if it’s less photogenic. Function beats symmetry every time on this one.
If you’re working with a real mudroom already, this list will feel familiar territory — you may already have covered some of this ground with The Family Mudroom Reset. The difference here is specificity: a mudroom reset organizes the whole entry; a back-to-school drop zone carves out a dedicated sub-section just for the school routine, even inside a mudroom that already exists.
No dedicated entryway at all? Here’s where families actually build drop zones when there’s no mudroom to speak of:
| Space Type | Where the Drop Zone Goes | What Makes It Work |
|---|---|---|
| Small apartment | Inside a coat closet, door left open during the school year | Slim shoe rack + adhesive hooks on the closet’s inner wall |
| Garage entry | Wall next to the door into the house | Weather doesn’t matter here, so this is ideal for wet shoes |
| Kitchen nook | End of a peninsula or unused wall segment | Puts lunchboxes closest to the fridge and dishwasher |
| Bedroom hallway | A stretch of hallway wall outside kid bedrooms | Works if kids get ready in their rooms rather than downstairs |
| Under the stairs | The often-wasted triangle of space | Needs custom shelving, but reclaims dead square footage |
Whatever spot you pick, measure it before you buy anything. A tape measure and five minutes now saves you a return trip to the store later — write the width, height, and depth on a sticky note and keep it in your phone’s notes app while you shop.
The Backpack Station: Hooks, Cubbies, and Kid-Height Everything
Backpacks are the anchor of the whole system, because a backpack is really a container for a dozen other things — homework, library books, water bottles, permission slips. Get the backpack home right and a lot of smaller problems solve themselves.
One Hook or Cubby Per Kid, Labeled
Resist the shared-hook-row temptation. A shared row of hooks turns into a pile the first week, because kids will hang their bag on whichever hook is closest, not “theirs.” Instead:
- Mount one hook (or assign one cubby) per child, spaced far enough apart that bags don’t overlap and squash each other.
- Label each spot with the kid’s name or photo, not just a generic tag — young readers respond better to a picture than a word.
- Hang hooks at a height where the child’s own arm can reach comfortably, which for most elementary-age kids is 28 to 34 inches off the floor.
- If you have more than one kid close in age, use different-colored labels or hook types so there’s zero ambiguity about whose is whose.
Backpack Hook Height by Age (Rough Guide)
| Age Range | Approximate Hook Height | Notes |
|---|---|---|
| 3-5 years | 22-26 inches | Pair with a floor basket as backup — little arms tire fast |
| 6-8 years | 28-32 inches | Standard double hooks work well here |
| 9-12 years | 34-40 inches | Kids this age can also manage a cubby shelf |
| Teens | Adult height is fine | Often prefer a floor hook or bench-side spot |
A double hook (one prong for the backpack, one lower for a jacket) solves the “coat ends up on the floor under the backpack” problem without adding another piece of furniture. If wall-mounting isn’t an option — renters, I see you — an over-the-door hook rack or a freestanding coat tree with a wide, stable base does the same job without a single screw.
What Goes Inside the Backpack Cubby
If you have the depth for a cubby rather than just a hook, use the extra space intentionally instead of letting it become a junk shelf:
- A shallow bin for the current week’s take-home folders
- A small basket for spare masks, hand sanitizer, or seasonal extras (mittens in winter, sunscreen in early fall)
- A hook specifically for a gym bag or instrument case on sports/music days
Keep this cubby shallow on purpose. A deep cubby invites stuff to get shoved to the back and forgotten; a shallow one keeps everything visible at a glance.
Shoe Management That Survives Real Kids
Shoes are the item most likely to derail a school morning, mostly because they multiply — sneakers, rain boots, cleats, the “special occasion” shoes that somehow end up by the door too. The goal isn’t a magazine-worthy shoe wall. It’s a system where a kid can find a matching pair without your help, every single morning.
Choose a Shoe System That Matches Your Actual Shoe Volume
| Shoe Volume | Best System | Why |
|---|---|---|
| 2-3 kids, 1-2 pairs each | Slanted shoe rack, one shelf per kid | Shoes are visible and self-draining for wet days |
| 3+ kids or lots of activity shoes | Labeled bins or cubbies, one per kid | Contains overflow (cleats, boots) without spreading out |
| Very tight entryway | Over-the-door shoe organizer | Zero floor footprint, good for apartments |
| Muddy/rainy climate | Boot tray + rack combo, near the door | Tray catches drips before they hit flooring |
Whatever you choose, put it at the entry point kids actually use, not tucked in a closet down the hall — a shoe rack a child has to walk past their room to reach will get ignored in favor of just kicking shoes off wherever they’re standing.
The “Shoes Live Here, Period” Habit
The rack only works if there’s a genuine habit behind it, and habits are built with friction removal, not willpower. A few things that make the habit stick:
- Put the rack directly in the path between the door and the rest of the house, so putting shoes away is easier than walking around it.
- Keep exactly one pair of “everyday school shoes” per kid in the rack during the week, and store off-season or special-occasion pairs elsewhere — fewer choices means faster mornings.
- For kids who struggle with laces in the morning rush, consider a second, slightly easier pair (velcro or slip-on) kept in the same spot as a backup for genuinely late days. Removing the shoe-tying bottleneck on your worst mornings is worth more than principle here.
- If your seasonal shoe rotation overlaps with clothing, this is a natural pairing with Seasonal Clothing Storage for Kids — swap boots and sneakers on the same schedule you swap coats and sweaters.
The Lunchbox Landing Pad: Before and After School
Lunchboxes have a two-step problem most systems ignore: they need a spot when they’re being packed the night before or morning of, and a different spot when they come home dirty and need to get washed. Solve both, and lunches stop being a daily scramble.
Set Up Two Distinct Lunchbox Zones
Zone 1 — The Packing Spot. This should be near the kitchen, ideally right by the fridge or pantry, at a height kids can reach if they’re old enough to help pack their own lunch. A designated shelf or a couple of stacked bins labeled by kid keeps lunchboxes from disappearing into random cabinets.
Zone 2 — The Landing Spot. This is where a lunchbox goes the second it comes home, before anyone forgets about it. A small bin by the door (not on the kitchen counter, where it competes with mail and homework) works well — the rule is simply “empty it here first, then it goes to the sink.” A few things that keep this zone functional:
- A hook or hanging strap holder if your family uses insulated lunch bags with straps, so they’re not sitting in a heap
- A “empty containers here” tray right next to the sink, so the transition from backpack to dishwasher takes ten seconds, not a search
- If ice packs are part of your routine, a small designated freezer bin keeps them from getting buried behind actual food
A Simple Lunchbox Flow That Removes the Evening Scramble
- Lunchbox comes home, gets set in the landing bin by the door — not carried through the house.
- Containers get emptied into the sink or dishwasher that same evening, ideally as part of a broader tidy-up routine.
- Clean lunchbox moves back to the packing zone by the fridge.
- Lunch gets packed the night before (or morning of) and set directly on top of the backpack, so it’s impossible to walk out the door without it.
That last step is the one families skip and then wonder why lunch gets left behind three times a month. Physically stacking the lunchbox on the backpack — or hanging it from the same hook — removes the need to remember two separate items.
Managing the Paper Trail: Permission Slips, Forms, and Folders
Backpacks aren’t just carrying shoes and lunch anymore — they’re carrying an entire administrative system of forms, fundraiser flyers, and permission slips that are, without fail, due tomorrow. A drop zone that only handles physical objects and ignores paper will still leave you scrambling.
The Two-Basket Paper System
Set up two small baskets or trays right at the drop zone, not in a home office three rooms away:
- “To Sign” basket — anything that needs a parent signature or response goes here the moment it comes out of the backpack, every single day, no exceptions.
- “To Keep” basket — school calendars, class lists, anything you’ll need to reference later but doesn’t require action.
Check the “To Sign” basket once a day, ideally at the same time you’re doing evening backpack prep. Anything signed goes straight back into the backpack that night, not “in the morning” — morning is not for finding pens.
If your household already runs a family command center for mail and calendars, tie this paper system directly into it rather than creating a competing pile — see Family Command Center Ideas for how to structure that hub so school papers have one clear destination instead of drifting between the kitchen counter and the car.
Building the Morning Routine Around the Drop Zone
A well-organized drop zone still needs a routine wrapped around it, or it becomes a nice-looking spot everyone ignores under pressure. The goal is to move as much decision-making as possible to the night before, when nobody’s watching a clock.
The Night-Before Sequence
- Backpacks get checked, repacked, and hung on their hook — not left in a heap by the couch.
- Lunchboxes get packed and set on top of or right next to the backpack.
- Shoes for tomorrow get set on the rack, in the labeled spot, especially if it’s picture day or the one day cleats are needed.
- Any signed forms go back inside the backpack, in the same pocket every time, so kids (and you) know exactly where to look.
The Morning Sequence
By the time the routine above is solid, morning should really only involve three motions per kid: grab shoes, grab backpack (with lunchbox already attached), walk out. If you’re finding that mornings are still chaotic even with the physical system in place, the bottleneck is usually timing, not organization — try shifting the “get shoes on” step five minutes earlier in your routine and see if that alone buys back the friction.
A Simple Morning Checklist by Drop-Zone Station
| Station | What Should Already Be There | Morning Action |
|---|---|---|
| Backpack hook | Packed bag with signed forms inside | Grab and go |
| Shoe rack | Weather-appropriate pair, labeled spot | Put on, no searching |
| Lunchbox landing spot | Packed lunch, attached to backpack | Already moving with the bag |
| Paper basket | Empty (cleared the night before) | Nothing needed — it’s a non-event |
When the checklist has nothing left to do in the morning, that’s the sign the system is working.
Budget-Friendly Drop Zone Ideas for Renters and Tight Entryways
You don’t need built-in cubbies to make any of this work. Some of the most functional back-to-school drop zones I’ve seen cost under $60 total.
- Adhesive hooks rated for at least 5 pounds — no drilling required, and they hold a backpack and jacket combo just fine for renters.
- A basic over-the-door shoe organizer — the fabric pocket kind works for shoes, but also doubles as lunchbox or small-supply storage if shoe volume is low.
- A single tension rod inside a coat closet, hung low — instant kid-height hook space without any wall damage.
- Dollar-store bins labeled with a paint pen — functionally identical to the pricier labeled versions, and just as effective for young kids who respond to color-coding.
- A repurposed bookshelf turned on its side — creates instant cubby compartments for a fraction of the cost of a built-in mudroom system.
The system matters more than the materials. A $12 basket that’s actually used every day beats a beautiful built-in that nobody bothers to open because it’s in the wrong spot.
Seasonal Adjustments to Keep the Drop Zone Working All Year
A back-to-school drop zone set up in August needs small tweaks as the year goes on, or it quietly stops matching what your family actually needs.
- Early fall: Add a spot for a light jacket or rain gear as weather shifts, since September mornings can swing from warm to wet within a week.
- Winter: Swap in space for mittens, hats, and boots — this is often when the original system gets overwhelmed, because winter gear takes up roughly triple the space of fall gear. This is also a natural moment to revisit Kids’ Closet Organization so outerwear storage and the drop zone are working together instead of competing for the same hooks.
- Spring: Scale back down as heavy coats come out of rotation, and reassess whether shoe volume has grown — kids’ feet don’t pause for the school calendar.
- Summer transition: Before the next school year starts, do a full reset: check that hooks are still at the right height (kids grow fast), that labels still match names and interests, and that nothing from last year is still occupying a spot that a new grade level needs.
Maintaining the Drop Zone: The Weekly Reset
Even a well-designed system drifts without a light maintenance habit. Once a week — Sunday evening works well for most families — spend five minutes doing a quick pass:
- Clear out the “To Keep” paper basket of anything outdated (last week’s lunch menu, an event that already happened).
- Check the shoe rack for a stray single shoe that migrated elsewhere in the house.
- Wipe down the lunchbox landing bin, especially if anyone’s lunchbox has been leaking a little.
- Confirm every hook still has exactly one backpack, not two stacked on top of each other because someone’s is “somewhere else.”
This weekly reset is a much smaller cousin of a full seasonal cleanout, more like the quick daily habit described in The 15-Minute Evening Reset — the point isn’t a deep clean, it’s just enough attention to catch small problems before they turn into a Tuesday-morning meltdown.
Frequently Asked Questions
What’s the difference between a mudroom and a back-to-school drop zone?
A mudroom is a general entry space for coats, shoes, and mail for the whole family. A back-to-school drop zone is a more specific setup inside or near that space, built around three items that need to leave and return every school day: backpacks, shoes, and lunchboxes. You can absolutely build a drop zone inside an existing mudroom — it’s about function within the space, not the size of the space itself.
What if I don’t have room for a mudroom or dedicated entryway at all?
You don’t need one. A coat closet with the door left open during the school year, a stretch of hallway wall, or even a corner of the kitchen can work as a drop zone as long as it’s near the door kids actually use to leave for school. Adhesive hooks and a slim shoe rack can create a functional drop zone in as little as 2 feet of wall space.
How high should backpack hooks be for young kids?
Aim for a height your child can reach without help — generally 22 to 26 inches for preschoolers, 28 to 32 inches for early elementary kids, and 34 to 40 inches for upper elementary and older. If a hook is above a child’s shoulder height, they’ll likely drop the bag on the floor instead of hanging it up.
How do I stop lunchboxes from getting left in backpacks over the weekend?
Create a dedicated “landing spot” bin right by the door where lunchboxes go the moment kids walk in — separate from the backpack hook. Make emptying it part of your evening routine rather than something that happens “eventually,” and the habit of checking that one bin daily prevents the classic Monday-morning discovery of a forgotten Friday lunch.
What’s the best way to handle permission slips and school forms so they don’t get lost?
Set up two small baskets at the drop zone: one labeled “To Sign” for anything needing a parent’s attention, and one labeled “To Keep” for reference materials like calendars. Check the “To Sign” basket at the same time every evening, and put signed forms straight back into the backpack that night rather than leaving it for the morning.
How many pairs of shoes should actually live in the drop zone during the school year?
Keep it to one everyday pair per kid, plus one weather-specific backup (rain boots or winter boots, depending on season). Store off-season shoes and special-occasion pairs elsewhere. Too many shoe options in the drop zone slows kids down in the morning instead of speeding them up.
How often should I reorganize or adjust the drop zone?
Plan on a light check-in each season, since kids grow and gear volume shifts (winter gear alone can nearly triple the space fall gear needs). Do a full reset each August before the new school year, checking hook heights, labels, and whether last year’s system still fits this year’s kids.
A Calmer Morning Is Closer Than It Feels
You don’t need a renovation to fix chaotic school mornings — you need three specific spots that do three specific jobs, sized for the kids actually using them. Start with just one station this week, whether that’s finally giving each kid their own hook or setting up that lunchbox landing bin you’ve been meaning to add. The rest can follow once you see how much quieter the first small change makes your mornings.