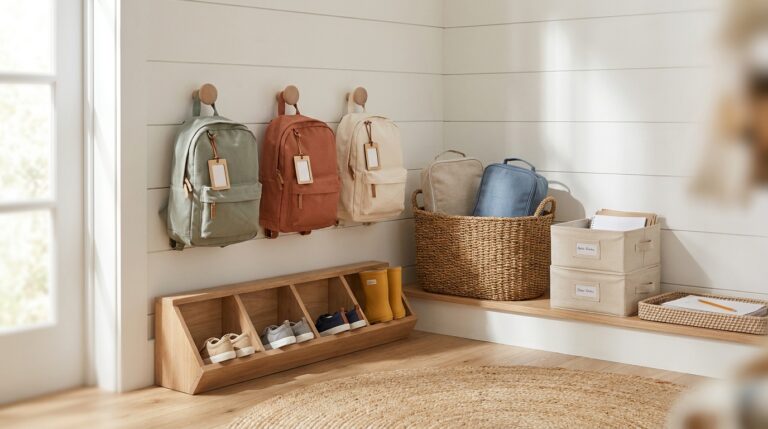

LEGO and Building Block Storage Solutions Kids Will Actually Use
Stop stepping on LEGOs! This article reveals why common building block storage fails and guides you through creating a room-by-room system with distinct zones that your kids will actually use.
- Avoid the 'dump and dig' by ditching the single giant catch-all bin.
- Design a sorting system simple enough for your child to maintain independently.
- Keep storage connected to building surfaces to prevent transportation issues.
- Designate a specific zone for in-progress builds to protect them.
- Choose a storage system that can expand as your block collection grows.
I stepped on a dark gray 1×1 plate at 11:40 on a Tuesday night. Our giant catch-all bin, so reasonable at Christmas, had become an archaeology dig by February.
Short version: sort basic bricks by piece, keep big sets intact, and put bins within a few steps of where kids build. This guide is for parents of Duplo-to-Technic builders.
The free LEGO & Building Block Storage Kit adds a zone map, a sorting sheet and a weekly reset checklist.
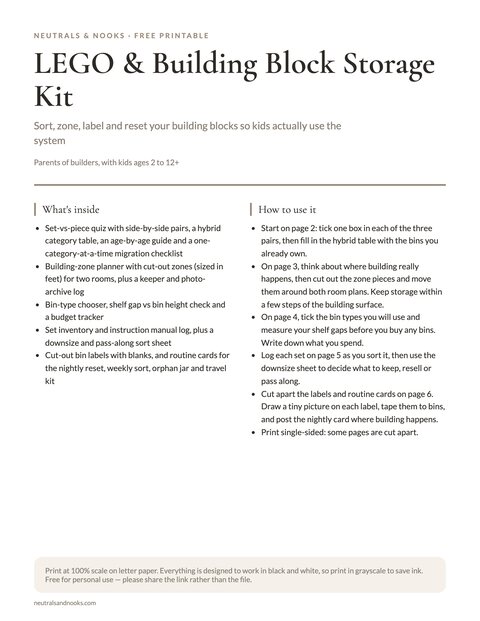
Free printable · 6 pages
LEGO & Building Block Storage Kit
A set-vs-piece sort decider, a four-zone planner with a to-scale floor plan, a bin and shelf-fit worksheet with budget tracker, a set and manual log, display and keeper trackers, routine cards, and an age-by-age chart with a downsizing checklist.
Free. Your download link appears right here. You'll also join the Monthly Home Reset. Unsubscribe anytime. Privacy
Safety firstSmall bricks and minifigure accessories are choking hazards. Keep them high or latched around toddlers and any child who still mouths objects. Full rules: LEGO Safety by Age, below.
In this article (13 sections)
- Why Most LEGO Storage Systems Fail
- LEGO Safety by Age
- How to Sort LEGO: By Set or By Piece
- Building Zones: Where LEGO Storage Goes and How to Set It Up
- Bins, Trays, and Containers That Actually Hold Up
- Displaying Finished Builds Without Losing Floor Space
- Managing Instruction Manuals and Small Specialty Pieces
- Age-by-Age: How the System Should Evolve
- The Weekly Reset Routine
- Travel LEGO Kit Ideas for Car and Trips
- When to Downsize or Pass Along a LEGO Collection
- Frequently Asked Questions
- LEGO Storage That Grows With Your Kids
Why Most LEGO Storage Systems Fail
Most of us have tried something already and it didn’t stick. These are the five usual reasons:
| Failure point | What goes wrong | One-line fix |
|---|---|---|
| The single giant bin | Sizes and colors mix, every build becomes a dig, and kids quit mid-project. | Sort into a few clear groups. |
| An over-complicated system | A 40-drawer cabinet takes more thought to use than building does, so a six-year-old won’t put anything back. | Keep it simple enough for the kid who uses it. |
| Storage far from the building surface | Hauling bins across the house ends in “just leave it out.” | Keep bins within a few steps of where building happens. |
| No in-progress zone | Half-built models end up on the floor, or get swept into a bin. | Give builds a shelf, tray or baseplate landing spot. |
| No room to grow | A setup for three small sets breaks at a thousand-piece Technic collection. | Buy a little bigger and let categories expand. |
The fix isn’t one perfect bin. It’s four homes for four jobs.
- Raw pieces: sorted bins beside the building surface.
- In-progress builds: a tray, shelf corner or baseplate.
- Finished builds: one display shelf.
- Specialty parts and manuals: a divided box and a binder.
LEGO Safety by Age
Settle the safety rules before you sort a single brick. They decide which pieces sit low and which stay up high.
Safety firstStandard LEGO sets are labeled 4+ or older and contain small parts. The 4+ label is a minimum, so a child who still mouths objects should wait, whatever their age.
Small bricks, 1×1 pieces and minifigure accessories are choking hazards. If a toddler lives in or visits your home, keep those pieces high or latched. Duplo is sold for ages 1.5 to 5 and gets its own bin, with no standard bricks mixed in.
Sets with button batteries, light bricks or magnets stay on the high shelf. A swallowed magnet or button battery is an emergency, so seek urgent medical care right away.
Anchor tall shelves and drawer stacks to the wall.
How to Sort LEGO: By Set or By Piece
This is the biggest decision in the system. The right answer depends on how your kids play.
Sorting by set keeps each set’s pieces and instructions together. Sorting by piece groups all plates, wheels and 1×2 bricks by type and color.
| Sort by set | Sort by piece | |
|---|---|---|
| Best for | Kids who rebuild the same models, and licensed sets you want to keep intact. | Free-builders who mix pieces across sets. |
| Typical ages (rough guide) | About 4-7. | About 8 and up. |
| Works while | The collection is small. My rule of thumb is under 15-20 sets. | The collection has outgrown “one set = one bin.” |
| Downside | Sprawls into dozens of containers. | Sorting takes time, though some kids enjoy it. |
Treat those ages and set counts as a rough guide, and go by how your kid builds.
In my experience, a kid who keeps building ends up with a hybrid. Plan for it from the start.
| Keep as sets | Sort by piece |
|---|---|
| Licensed or themed display sets (Star Wars, Harry Potter), in labeled bins. | Basic bricks, plates and duplicated pieces, by color or size. |
| Large Technic sets, which are too specialized to mix. | Minifigures and accessories, in their own bin by character or theme. |
| Duplo and larger blocks for younger siblings, in a separate zone. | Specialty pieces (wheels, hinges, clear and curved pieces), in labeled compartments. |
In a hybrid, preserved sets stay in their own labeled bins. That’s good for rebuilding and for resale value if you ever pass sets along.
The loose parts are usually the bulk of an active collection. Sort them by piece type into a modular bin or drawer system.
This scales as a kid moves from set-rebuilder to free-builder. You aren’t re-sorting everything, just shifting the ratio between the two systems.
First-pass sort for a big mixed pile
If you’re starting from one giant bin, don’t try to identify every piece. Work in this order.
- Pull the minifigures. Figures and their accessories go into one divided box.
- Pull the Duplo. Large blocks go into their own lidless bin.
- Rescue the themed sets. Anything clearly part of a set you want to keep goes into a pouch with its manual.
- Split the rest into four groups. Bricks, plates, wheels and specialty pieces each get a drawer.
- Refine by color later. Do it in short weekly sessions, not one sitting.
Building Zones: Where LEGO Storage Goes and How to Set It Up
Pick the zones first, then fit out the main one.
Choose your zones
Before you buy a container, map where building really happens. Go by the last month, not by where you’d like it to happen. It’s often two or three zones, not one.
| Zone | Where it lives | What it holds | Key rule |
|---|---|---|---|
| Primary building zone | A playroom, a bedroom corner or part of the family room. | The main sorted collection. | The building surface and the main bins share one spot. |
| Travel zone | A bag by the door or in the car. | A small, self-contained kit. | It stays separate so nobody raids the main collection. |
| Bedroom overflow zone | A shared kids’ room where both kids build. | Each kid’s own bins, plus one shared bin. | Each kid gets a defined footprint. Shared pieces live in neutral territory. |
If you already have a dedicated play space like the ones in The Spring Playroom Reset, anchor LEGO storage there. Don’t make it compete for floor space.
In a shared room, storage is a boundary question as much as an organizing one. The zoning ideas in Shared Kids’ Bedroom Organization apply directly.
My one firm rule: keep the building surface and the bins within a few steps of each other. A kid who has to leave the room for pieces will build with whatever is loose on the floor. Then the sorted system stops being used.
Surface and floor
A dedicated building surface, even a small one. It doesn’t need to be a full table. A baseplate mounted to a low shelf, a lap desk kept in the storage area, or a folding table against a wall all work. What matters is that it’s always available, not something to clear off or set up first.
Floor protection that doubles as a play surface. A soft rug or foam mat under the zone is comfortable to kneel on while sorting a fresh dump of pieces. A printed pattern makes dropped pieces easier to spot.
Shelving and lighting
Low, open shelving for daily-access bins. For builders aged 4 and up, the bins used most often (general parts, minifigures, current sets) should sit low enough to reach without help. Anything that needs an adult to retrieve becomes something kids stop asking for.
A “high shelf” for adult-managed items. Not everything needs to be kid-accessible. If a toddler is around, this is where the small pieces from the safety note above live. Rare sets, battery or magnet sets and anything mid-resale-research go there too.
Good lighting. Sorting small colored pieces under dim overhead light is tedious. A clip lamp or under-shelf LED strip aimed at the sorting surface makes sorting easier. Keep cords short and out of toddler reach, or tuck them away.
- Choose a building surface that’s always clear and ready.
- Lay a rug or mat under the zone.
- Set low bins for builders aged 4 and up.
- Keep a high shelf for small pieces and adult-managed sets.
- Add a task light with a short cord.
- Give in-progress builds a tray or baseplate.
- Anchor shelving and tall drawer stacks to the wall.
Bins, Trays, and Containers That Actually Hold Up
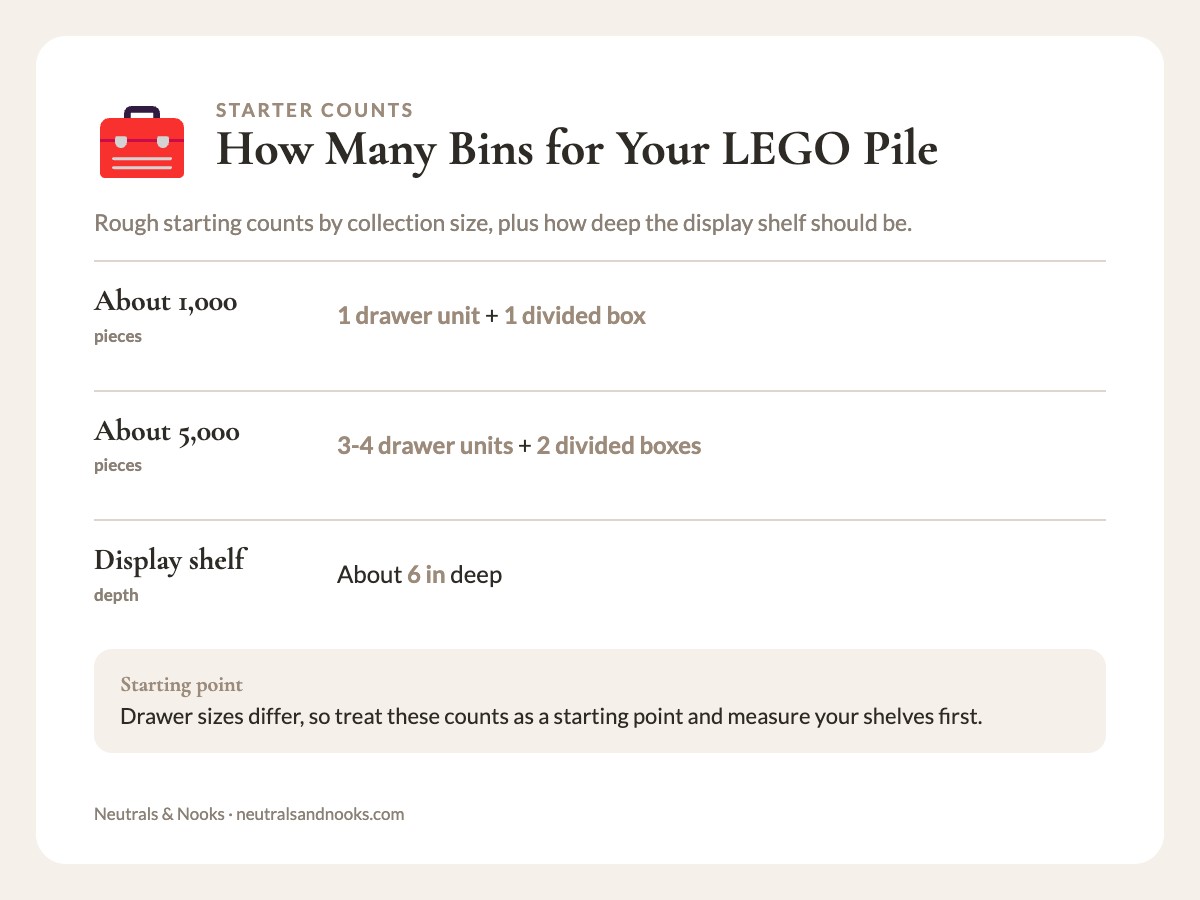
Each container below does one job. Start with these rough counts.
Treat them as a starting point, since drawer sizes differ. Prices vary by store, so measure your shelves first and compare by unit.
| Container type | Best for | Why it works |
|---|---|---|
| Stackable drawer units (3-6 drawers, clear front) | Loose pieces sorted by size or color. | Kids see the contents, and the units stack to save floor space. |
| Divided compartment boxes (adjustable dividers) | Minifigures, wheels and specialty pieces. | Compartments resize as the collection grows. |
| Zippered clear pouches | One set per pouch. | See-through and stackable, and a whole set can travel. |
| Low, wide bins without lids | Duplo and large blocks. | No lid means a toddler can put things back alone. |
Two extras cover special cases. A rolling cart suits a collection that lives in a shared family room, because it rolls out of the way. Lidded shoebox-size bins keep dust off sets stored long-term on a high shelf.
Four rules before you buy:
- Skip anything without some transparency. Opaque bins hide everything, and the whole point here is finding one piece fast. Clear or mesh-front containers cut search time.
- Avoid tiny, uniform compartments for a big collection. A 48-compartment tackle-box organizer looks ideal. With thousands of pieces, there are too many drawers to check and each holds too little. Use them for specialty pieces (curved parts, hinges, rare colors), not as the primary system.
- Buy slightly bigger than you think you need. Birthdays and holidays keep adding sets, so a system sized exactly to today’s collection will overflow. Pick modular units you can add to as it grows.
- Match container height to shelf depth. Bins taller than the shelf gap get pulled out at an angle and eventually end up on the floor. Measure the gap first.
A starter shopping list for a mid-size collection:
- 2-3 clear stackable drawer units for loose pieces.
- 1 divided box for minifigures and specialty parts.
- Zippered pouches, one per set you’re keeping intact.
- 1 lidless bin for Duplo.
- 1 tray or baseplate for the in-progress build.
- A tape measure for shelf depth and height, used before you buy.
Displaying Finished Builds Without Losing Floor Space
The other half of the storage problem is what happens after something gets built. A finished LEGO city or Technic car represents real time and pride. Breaking it down right away to “put it away” teaches kids that finishing something means losing it. But finished builds can’t pile up on every flat surface either.
Four approaches balance pride with practicality:
- A dedicated display shelf, not a display room. Even a single 6-inch-deep floating shelf for “current finished builds” gives kids a place to show off work. When it’s full, something comes down before something new goes up.
- Rotating display, photographed archive. For prolific builders, photograph each finished build before it comes apart. A simple photo album, physical or digital, becomes a portfolio of everything they’ve made. That softens the sting of breaking a build down.
- “Keeper” bins for a few permanent builds. Let each kid pick three to five builds that never get broken down. Store them in labeled bins or on a dedicated shelf, away from the loose-piece system.
- Vertical wall-mounted baseplates. A baseplate mounted at kid height turns unused wall into display space. It works especially well for flat, scene-style builds.
Display needs a boundary, the same way storage does. Without one, “finished” builds become floor clutter, indistinguishable from works in progress.
TipHold the line at one shelf and three to five keepers, and photograph every build before it comes apart.
Managing Instruction Manuals and Small Specialty Pieces
Two small categories cause a lot of LEGO stress: paper instruction manuals and tiny specialty pieces. Each needs its own system.
Instruction manuals
Manuals get destroyed fast when loose in a bin with hard plastic pieces. A few options that protect them:
- A slim binder with plastic sleeves, one manual per sleeve, organized by set. This is the most durable option.
- A labeled accordion folder, if binder maintenance feels like too much upkeep.
- Digital backup: LEGO’s official site hosts PDF instructions for most current and many older sets by set number. A lost manual can often be reprinted or pulled up on a tablet.
Whichever method, keep manuals physically separate from the piece bins. A manual mixed in with bricks gets torn, and a torn manual for a discontinued set may be hard to replace.
Small specialty pieces and the orphan jar
Minifigure accessories, tiny 1×1 round pieces, clips and hinges are the pieces most likely to get vacuumed up or lost. Give them a dedicated small-parts organizer with a dozen or more compartments. Keep it up high if a toddler, or any child who still mouths objects, is around.
The same compartment-box approach works for craft supplies too; see kids’ craft supply organization.
Keep a small “orphan pieces” jar for strays that turn up in laundry, under furniture or in the car. Nothing gets thrown away in the moment, and you sort the whole jar at the weekly reset.
Age-by-Age: How the System Should Evolve
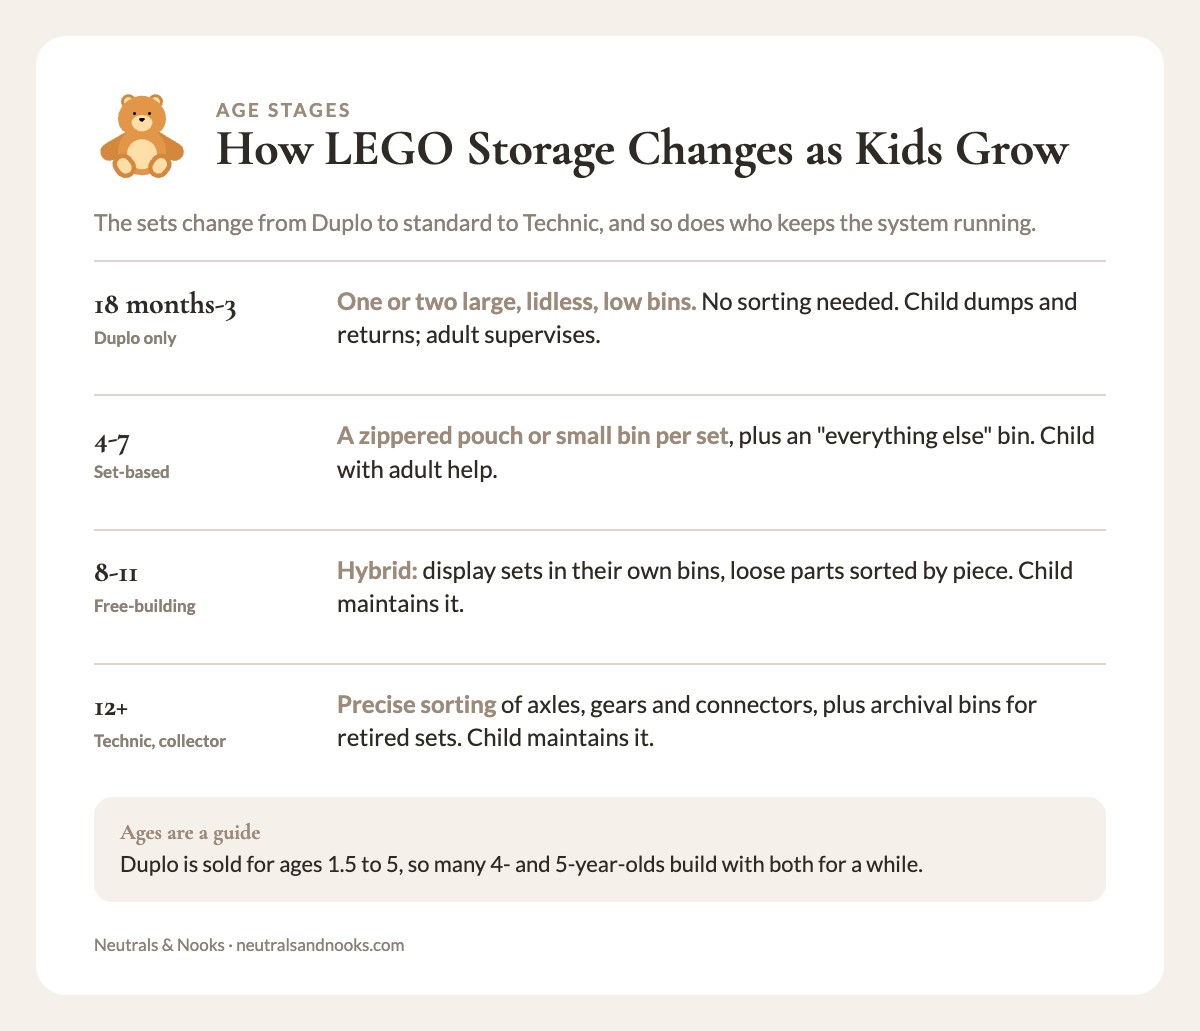
LEGO storage isn’t set-it-and-forget-it. It changes as kids grow, because the sets change (Duplo to standard LEGO to Technic) and so does their ability to maintain a system.
| Age | Bricks | Storage setup | Who maintains it |
|---|---|---|---|
| 18 months-3 | Duplo and large blocks only. Keep standard bricks and small pieces out of reach. | One or two large, lidless, low bins. No sorting needed. | Child dumps and returns; adult supervises. |
| 4-7 | Standard LEGO, mostly set-based building, once a child no longer mouths objects. Duplo often stays in play until about 5. Store small pieces out of reach of any younger sibling. | A zippered pouch or small bin per set, plus an “everything else” bin. | Child with adult help. |
| 8-11 | Free-building takes over, and collections grow fast. | Hybrid: display sets in their own bins, loose parts sorted by piece. | Child, especially if they helped set it up. |
| 12+ | Technic, complex builds, collector mentality. | Precise sorting of axles, gears and connectors. Archival bins for retired sets. | Child. |
The ages are a rough guide. Duplo is sold for ages 1.5 to 5, so many 4- and 5-year-olds build with both for a while. Standard sets start at 4+, and that label is a minimum.
A transition tip: don’t overhaul the whole system in one sitting. When a kid ages into a new phase, migrate one category at a time over a few weekends. Start with Technic pieces, then minifigures, then loose bricks.
The Weekly Reset Routine
Even a good system drifts without light maintenance. LEGO cleanup doesn’t need its own ritual. If your family already runs something like The 15-Minute Evening Reset, add these steps to it. The first three are nightly and the fourth is weekly.
- Loose pieces to the catch tray. Takes 2-3 minutes. Don’t sort precisely; just get pieces off the floor and into the “unsorted” tray.
- In-progress builds to their landing spot. Takes 30 seconds. A shelf corner, labeled tray or carryable baseplate works, as long as it isn’t the floor.
- Manuals back in the binder. Do this if any were pulled out mid-build.
- Do the weekly real sort. Takes 10-15 minutes and can be shared. Distribute the catch tray into color and type compartments. Skip it for more than two or three weeks and the system starts to feel too big to fix, which is when families abandon it.
Do the weekly sort with a kid rather than for them. In my experience, kids around 5 to 9 like it because it’s puzzle-like and low-stakes. It also gives them ownership of the system.
TipWhen it falls apart, say a sorted bin gets dumped or siblings fight over pieces, don’t scold. Sweep everything into the catch tray and do one re-sort together that weekend. For shared rooms, mark each kid’s bins and keep one neutral shared bin.
Travel LEGO Kit Ideas for Car and Trips
If you travel, or spend a lot of time at grandparents’ houses, waiting rooms or restaurants, build a separate small kit. It stops everyone raiding the main collection before each trip.
A good travel kit includes:
- One or two small, self-contained sets that build into something specific. These travel better than loose pieces because there’s a clear finish line.
- A compact zippered case with a hard shell, ideally one that opens flat so pieces don’t spill.
- A small baseplate sized to the case, so building works on a wobbly car tray or restaurant booth.
- A rotating selection. Swap the sets in the travel kit every month or two so it stays fresh.
Store the travel kit separately from the main system, in a small bag by the door or in a car organizer. A cubby like the ones in mudroom cubbies for multiple kids works well. That keeps it grab-and-go instead of something you assemble from the main collection each time.
When to Downsize or Pass Along a LEGO Collection
LEGO collections only grow. Eventually there are more bins than shelf space and more sets than any one kid plays with. The same logic as how many toys to keep out at once applies here. A toy rotation system can hold the sets you’re not ready to part with. Signs it’s time to thin things out:
- Sets untouched for over a year that aren’t tied to a sentimental milestone.
- Far more duplicate basic pieces than any build needs. A bin that’s 80% plain 2×4 bricks in one color can be trimmed.
- Sets a kid has outgrown. Keep Duplo, though, if a younger sibling is coming.
- Incomplete sets that can’t realistically be rebuilt. Move these into the loose-piece free-build bin instead of keeping them in “set” storage.
Some sets, especially complete, retired ones in good condition, can hold resale value. Check sold listings before deciding. Before passing anything along, wash the bricks and throw out cracked or broken pieces, since small sharp fragments are a hazard.
For everything else, donation centers, local Buy Nothing groups and school art rooms are good homes for excess pieces.
Frequently Asked Questions
What’s the best way to sort LEGO pieces if I have a huge mixed collection with no idea what belongs to what set?
Start with a rough first pass instead of identifying every piece. Pull out minifigures, Duplo and any themed sets you want to keep, then split the rest into bricks, plates, wheels and specialty pieces. Refine by color in short weekly sessions.
Should I keep every LEGO instruction manual, even for sets we’ve had for years?
Keep the manual if the set is still intact and stored together. If the set has been absorbed into the loose-piece bins, the manual can go. LEGO’s official site hosts digital instructions for most sets by set number, so you have a backup.
How do I stop myself from stepping on LEGO pieces at night without banning building from common areas?
Quick answer: a boundary rug plus a 2-3 minute nightly sweep into a catch tray. Give building a hard edge, such as a rug, a baseplate or a defined section of floor. Banning LEGO from common areas moves building away from family life, so a contained zone works better.
My kids share a room — how do we handle LEGO storage without constant fighting over pieces?
Give each kid their own labeled bins for the sets and pieces they consider “theirs.” Add one neutral shared bin for extra bricks, plates and basics that don’t belong to any set. Keep each kid’s bins in their own area of the room, as in Shared Kids’ Bedroom Organization.
Is it worth buying an expensive dedicated LEGO storage system, or can I build one from regular storage bins?
No. Regular bins work just as well and usually cost less. Clear stackable drawers, divided organizer boxes and zippered pouches from any storage or craft aisle do the job. What matters is transparency, stackability, adjustable dividers and a fit for your shelving.
How often should we actually do a full LEGO sort versus just a quick daily pickup?
Do a quick pickup daily and a full sort weekly. The daily pass takes 2-3 minutes and only moves pieces into the catch tray. The weekly sort takes 10-15 minutes, as laid out in the weekly reset routine above.
What do we do with LEGO sets our kids have completely outgrown?
Sell or pass along complete sets, and donate the rest. Donation centers, local parent groups and school maker programs take incomplete sets. The downsizing section above covers resale checks and cleaning.
LEGO Storage That Grows With Your Kids
LEGO storage shifts as your kids do, from Duplo bins a toddler can dump to color-sorted drawers a ten-year-old maintains. Start with one step this week: pick the building zone, or give the minifigures their own bin.