Halloween Candy Storage Ideas to Keep Your Kitchen Neutral
Learn how to manage your kids' Halloween candy haul with five specific storage solutions and a sorting system. You'll get actionable steps for pre-sorting, daily portions, and long-term storage to keep your kitchen calm.
- Utilize five specific storage spots for different candy types.
- Implement a night-of plan to decide rules before candy enters the house.
- Establish clear categories, homes, rules, and end dates for candy.
- Store the main candy stash in a high, opaque container, accessible only by adults.
- Prepare a small, daily portion container for kids, handed out by a parent.
This post contains affiliate links. As an Amazon Associate I earn from qualifying purchases.
The first November after my daughter started trick-or-treating, I found a fun-size Snickers in my coat pocket and a lollipop stuck under the couch cushion. The plastic pumpkin bucket on the pantry floor had become the most visited spot in the house.
That bucket taught me the container is the smaller half of the problem. Candy arrives with no home, no rules, and no end date.
This guide fixes both. You’ll get five storage spots that keep the kitchen calm, a keep/trade/donate sorting checklist, and a trade-in reward tracker for the weeks after Halloween.
Free printable · 6 pages
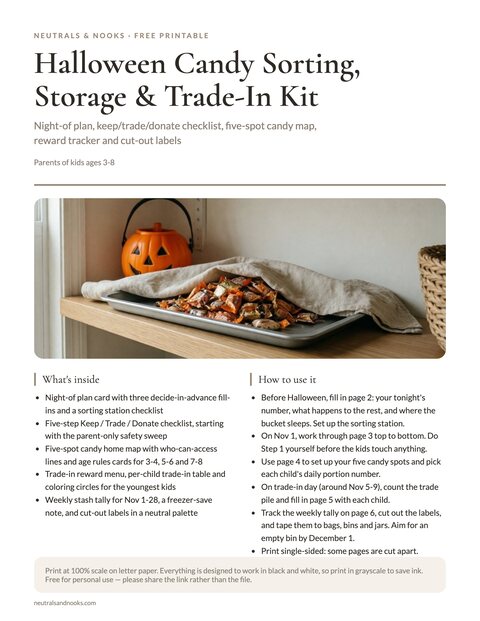
Halloween Candy Sorting & Trade-In Kit
A night-of plan card with a sorting station checklist, a five-step keep/trade/donate safety checklist, a five-spot candy home map with age rules, a trade-in reward tracker with a weekly stash tally, a Halloween-to-December-1 timeline, and cut-out neutral labels.
Free. Your download link appears right here. You'll also join the Monthly Home Reset. Unsubscribe anytime. Privacy
It’s written for kids roughly 3 to 8, and none of it requires buying a single thing. A paper bag, a tin, and a high shelf will do.
In this article (13 sections)
- Where to Store Halloween Candy (Quick Answer)
- Why Candy Takes Over the Kitchen (and It’s Not a Willpower Problem)
- The Night-Of Plan: What to Do Before the Bucket Hits the Counter
- The Keep / Trade / Donate Sorting Checklist
- Container Ideas That Keep the Kitchen Looking Neutral
- Halloween Candy Rules by Age (3 to 8)
- The Trade-In Reward Tracker
- Keeping the Kitchen Neutral During the Candy Weeks
- Dealing With Leftover Candy: Ideas Beyond Eating It
- A Week-by-Week Plan for the Candy Season
- What I’d Skip
- Frequently Asked Questions
- Wrap-Up: Keep Candy Contained Until December
Where to Store Halloween Candy (Quick Answer)
If you only have a minute, here is the setup I’d use for a house with young kids:
- One opaque lidded container holds the “keep” candy. It lives on a high pantry shelf or in a cabinet kids can’t open on their own.
- One small tin or shatterproof jar holds today’s portion only. It lives in a cabinet or drawer and comes out only when a parent hands it over. Under age 5, it holds plain soft chocolate only.
- One zip bag or paper bag holds the “trade” candy, kept separate so it doesn’t blend back into the keep pile.
- One labeled bag by the front door holds the “donate” candy, so it leaves the house instead of lingering.
- The freezer holds anything you want to save past mid-November, especially chocolate.
That’s it. Five spots, each with a job.
Here is the quick-reference version:
| Candy status | Where it lives | Who can access it |
|---|---|---|
| Today’s portion | Small tin or shatterproof jar, kept in a cabinet or drawer | A parent hands it over at every age; ages 7 to 8 then pace the pieces themselves |
| Keep (rest of the stash) | Opaque lidded bin, high shelf | Parent hands out portions |
| Trade-in pile | High shelf, visible but out of reach | Waiting for the trade-in event |
| Donate | Bag by the front door | Goes out within the week |
| Long-term save | Freezer, sealed container | Parent only |
Why Candy Takes Over the Kitchen (and It’s Not a Willpower Problem)
A Halloween haul has no category, so it collects on the counter, the top of the fridge, or the bottom of a backpack. The pieces are small, so “just one” four times a day hides a big total. To a child it’s treasure, and nobody has set an end date.
The fix is the same for all of it: give the candy a category, a home, a rule, and a date. The sorting checklist below does the first three. The trade-in tracker handles the last one.
If your pantry already has a clear system, candy slots in easily. If it doesn’t, my guide to family pantry organization walks through zones and bins. They make a “treats” shelf feel like a natural part of the layout.
The Night-Of Plan: What to Do Before the Bucket Hits the Counter
The sorting works best when you decide the rules before the kids come home. It takes about ten minutes of thinking and saves a lot of in-the-moment negotiation.
Decide three things in advance
- How much can they eat tonight? Pick a number your child can hear and understand. A clear number works better than a vague promise of “a few” pieces. One to three pieces suits ages 3 to 8, and the age table further down gives the number for each age. Under age 5, plain soft chocolate only.
- What happens to the rest? Say it out loud and keep it positive: “Tomorrow we’ll sort it together and pick your favorites to keep.”
- Where will it sleep tonight? Have a spot ready. A tall cabinet, a lidded bin on top of the fridge, a closet shelf. If the bucket spends the night in the child’s room, you’ve already lost the first round.
Set up a sorting station
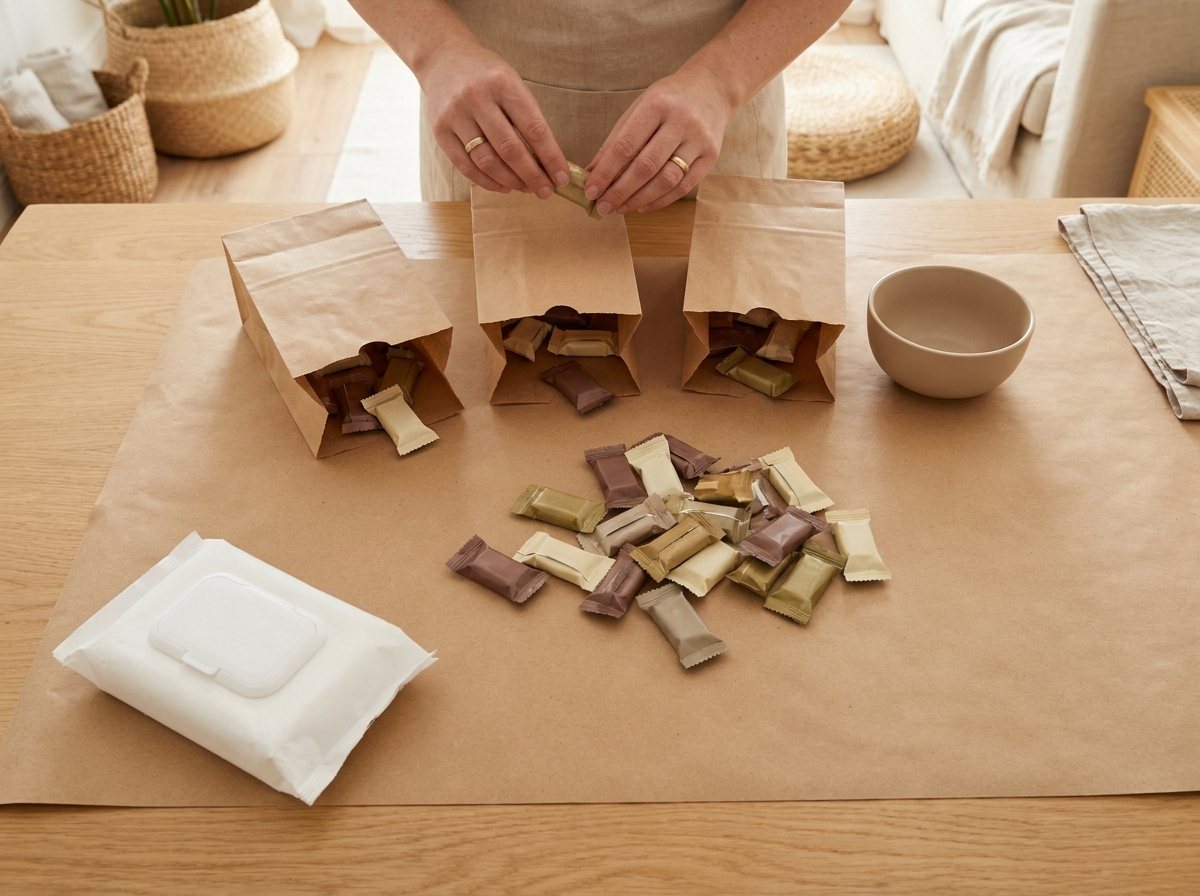
Clear a section of the kitchen table or counter and set out four things:
- Three shallow containers or paper bags, labeled Keep, Trade, and Donate.
- A small bowl for Trash (broken wrappers, opened items, anything questionable).
- A sheet of paper or a bowl for Favorites (more on this below).
- Wipes, because sticky is inevitable.
Paper lunch bags and a marker are entirely enough. The point is for each pile to be visible and separate, so the child can see where each piece goes.
The Keep / Trade / Donate Sorting Checklist
This is the core of the system. You can copy it into your notes app or write it on a sticky note. Work through it top to bottom, one step at a time.
Step 1: The safety sweep (parent only, kids wait)
Do this part yourself before the kids touch anything. It takes a few minutes.
Safety firstDo this check before any candy reaches a child.
- Hard candy, gum, lollipops, gummies, jelly candy, caramels, whole nuts and popcorn are choking hazards for children under 4.
- This guide waits until about age 5 for all of them.
- From age 5, they are eaten seated, with an adult nearby, chewing fully.
- Under age 5, offer plain soft chocolate only. That means smooth, nut-free milk chocolate with no caramel, crisp, or hard center, broken into small pieces.
Read the allergen label on every piece, including fun-size versions. At every age, kids eat candy sitting down, never while walking, running, or playing.
- Put anything unwrapped, torn, or with a broken seal in the Trash bowl.
- Put anything homemade or from an unknown source in the Trash bowl too, unless you know the giver.
- Move the choking-risk candy listed above into a separate closed “older-kid” container on a high shelf. Candy with nuts, popcorn balls, and hard marshmallow treats go in with it. It waits there until about age 5, away from younger siblings.
- Check for allergens if anyone in your house has a food allergy. Put that candy in its own sealed bag labeled Allergen hold, out of reach. It never goes in the Trade bag. It leaves the house only as sealed originals with the label intact, or it gets discarded.
- Set aside anything with small toys or non-food items, and keep it out of reach of a younger sibling.
If every child is under 5: most of the haul may land in the “older-kid” container, and that’s fine. You have three choices for it.
- Donate it sealed with the Donate pile in Step 4.
- Let your child trade it. They choose pieces by the wrapper, and each one counts as a point in Step 3. A short menu of 5 to 10 points is plenty at this age.
- Save a few sealed favorites in the high container until about age 5.
With an older sibling in the house, the container simply becomes that child’s supply.
Good to knowThe Teal Pumpkin Project is a Food Allergy Research & Education (FARE) campaign that promotes non-food treats for trick-or-treaters. If you keep a separate stash of safe treats for your own child, store it away from the shared candy so there’s no mix-up.
Step 2: The favorites pass (kids)
This is the step most guides skip, and it’s the one that makes the rest work.
- Ask each child to pick their top favorites from what’s left after the safety sweep.
- For a rough count, try five pieces for ages 3 to 4, seven for ages 5 to 6, and ten for ages 7 to 8.
- Favorites are the keep pile, not the daily amount. The daily portion stays at the 1 to 3 pieces in the age table.
- Put these in the Keep container. They are now protected: nobody trades or donates them.
- Let the child hold, count, and arrange them. This is the moment of ownership, and it makes the next steps feel fair.
Step 3: The trade pile
- Everything remaining that the child likes but doesn’t love goes in the Trade bag.
- Explain that this candy can be traded in for something non-candy, using the tracker later in this article.
- Seal the bag and put it on a high shelf, visible but out of reach.
- Keep anything from the Allergen hold bag out of this bag.
- Candy in the “older-kid” container stays there until trade-in day, even if your under-5 is trading it for points.
Step 4: The donate pile
- Anything the child doesn’t care about, extra duplicates, and flavors nobody will eat goes in the Donate bag.
- Let the child place the pieces in the bag. Younger kids often enjoy this, especially when you frame it as “sharing.”
- Put the bag by the front door so it leaves the house within the week.
Donation options vary a lot by community. Some dentists run buy-back programs, some local food banks accept sealed candy, and some programs send candy to troops overseas. Availability and rules change year to year, so check with the organization before you drop anything off. If you can’t find a good option, a shared bowl at a workplace or a neighbor with older kids works fine too.
Whatever you give away, give only sealed pieces in their original wrappers with the label intact. That includes anything from the Allergen hold bag or the “older-kid” container, so the next family can read what’s inside.
Step 5: Close out
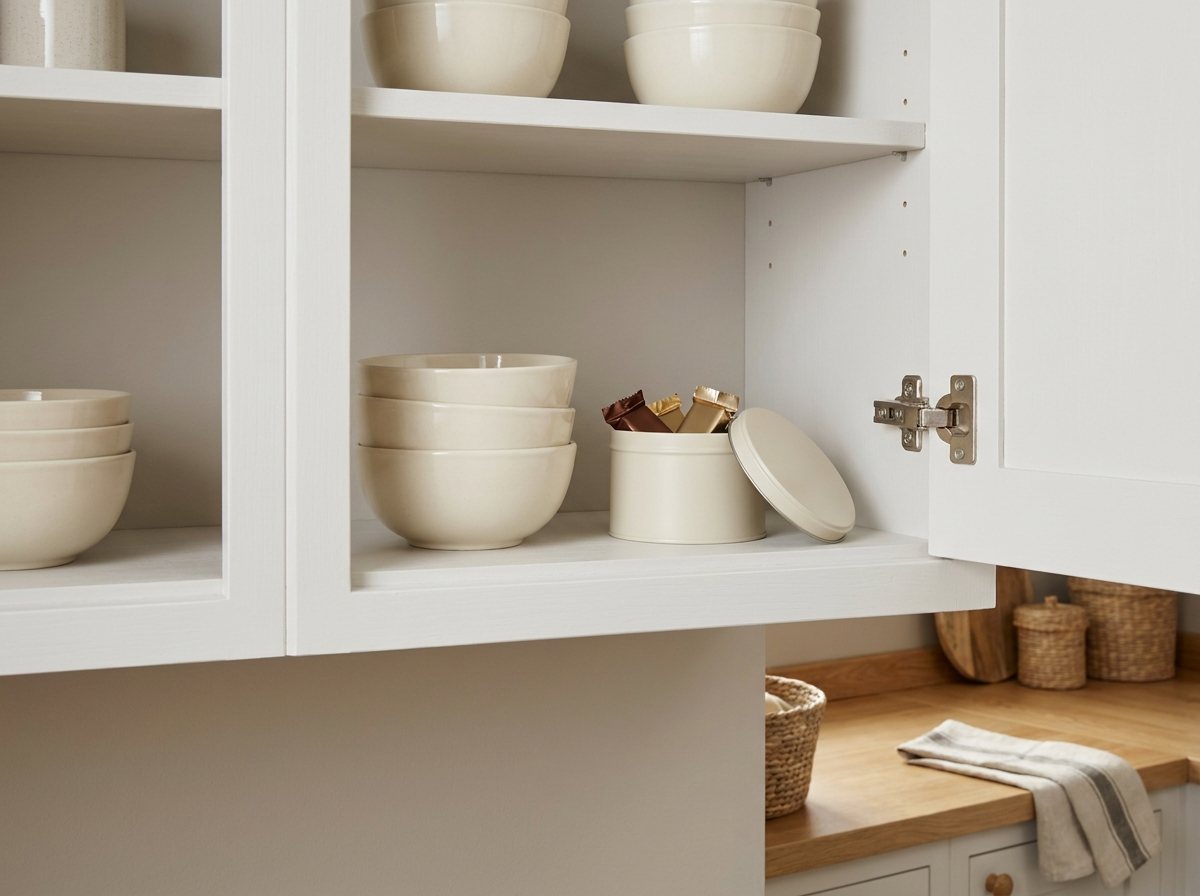
- Wipe the table and put the Keep bin on its high shelf.
- Fill the small today’s portion tin or shatterproof jar with the agreed amount, then put it away in its cabinet or drawer.
- Write the trade-in date on the calendar (suggestions below).
- Take a quick photo of the sorted piles if your kid likes a record.
Here’s the same checklist in a compact table:
| Step | Who | What happens | Done |
|---|---|---|---|
| 1. Safety sweep | Parent | Remove unwrapped, unknown, allergen, and choking-risk candy | ☐ |
| 2. Favorites pass | Child | Choose top picks for the Keep bin | ☐ |
| 3. Trade pile | Child + parent | Sort “fine but not favorite” into the Trade bag | ☐ |
| 4. Donate pile | Child + parent | Sort the rest into the Donate bag | ☐ |
| 5. Close out | Parent | Store bins, fill today’s tin or jar and put it away, mark trade-in date | ☐ |
Container Ideas That Keep the Kitchen Looking Neutral
Now the bins. The aesthetic goal is simple: when someone walks into your kitchen on November 5th, the candy should be invisible unless you want it seen. That means opaque, calm-colored, easy to reach for you and hard to reach for them.
Safety firstThe portion tin or shatterproof jar lives in a cabinet or drawer and comes out only when a parent hands it over. It is never left on the counter or within a child’s reach.
The best container types, compared
| Container | Best for | Pros | Cons |
|---|---|---|---|
| Opaque lidded bin (matte white, beige, or woven with a lid) | The main Keep stash | Hides the candy visually, stacks, easy to label | Needs a shelf up high |
| Lidded woven basket with liner | Pantry shelf display | Looks like decor, blends with neutral palettes | Not airtight; best for wrapped candy only |
| Shatterproof jar with a tight lid | Today’s portion at any age | Easy to see the exact amount, light, easy to wash | Contents are visible, so it has to stay in a cabinet or drawer |
| Small tin with a lid | Today’s portion for ages 3 to 6 | Light, durable, hides contents | Can’t see the amount at a glance |
| Paper lunch bags | Sorting piles (Keep/Trade/Donate) | Free, labelable, disposable | Not for storage beyond a week or two |
| Zip-top freezer bags | Trade pile and long-term freezer storage | Cheap, flat, airtight | Not pretty; keep out of sight |
| Airtight plastic or glass food storage | Freezer storage and chocolate | Protects against freezer odors and moisture | Takes up shelf space |
| Divided tray or egg carton | Favorites display per child | Kids can arrange and count | Short-term only |
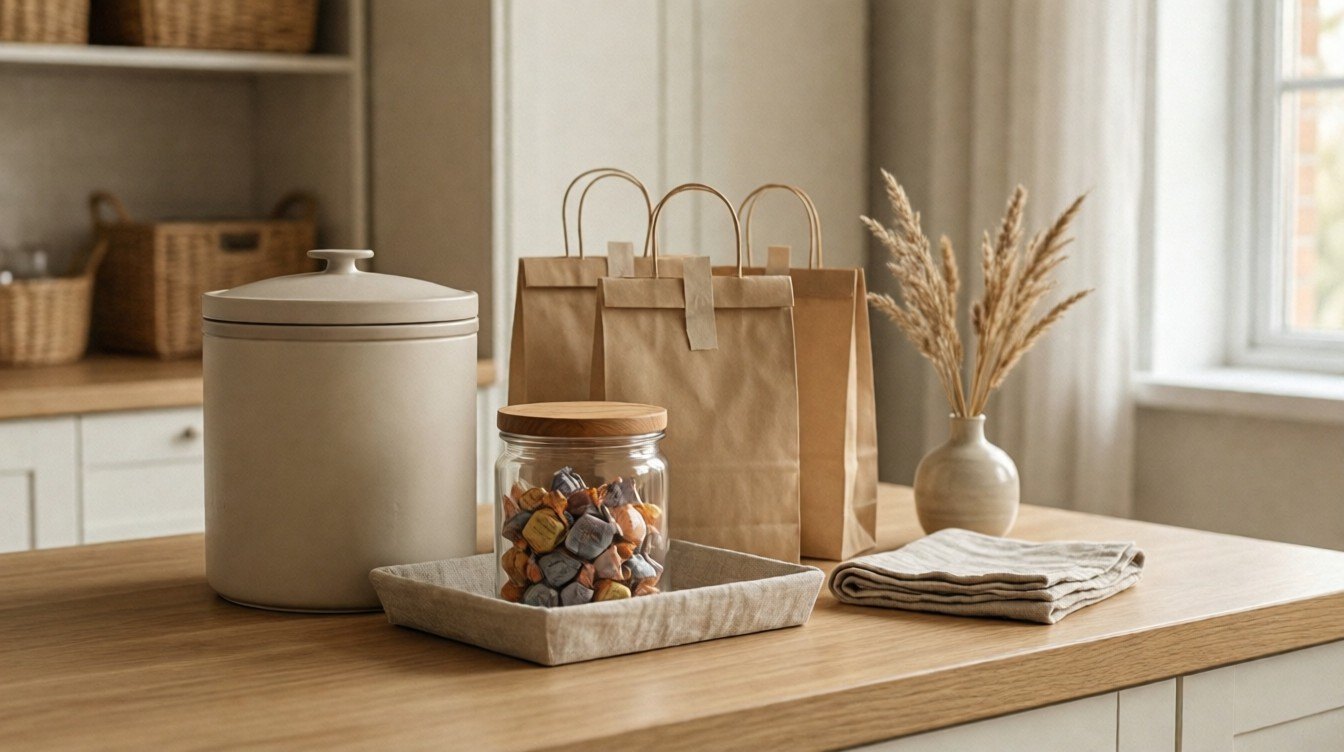
Decant only what’s visible. Fill the portion tin or jar with wrapped pieces, and keep it to a size that holds the daily number plus a little room. For a display shelf, or for homes where every child is 5 or older, you can use a clear glass jar with a wooden or ceramic lid. Set it on a small tray so it has a visual boundary, and put it away after the portion window.
Label softly. Use a small tag, a piece of masking tape, or a linen label in a simple typeface. If you’d rather print than hand-write, my pantry label system has matching labels for the rest of the shelves.
My three favorite neutral setups
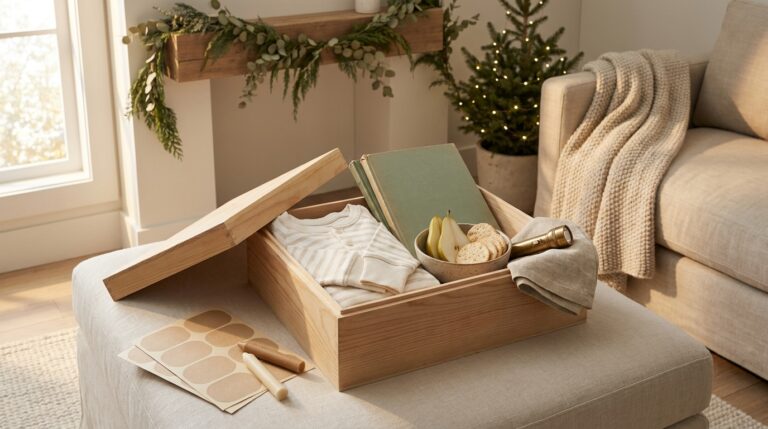
1. The pantry-shelf bin. If you have a pantry shelf at adult eye level or above, one lidded bin is all you need. Choose a matte finish in white, oatmeal, or natural wicker.
Label the front with a simple “treats” tag rather than “candy,” which keeps the visual calm and the temptation low. This is the setup I use most years.
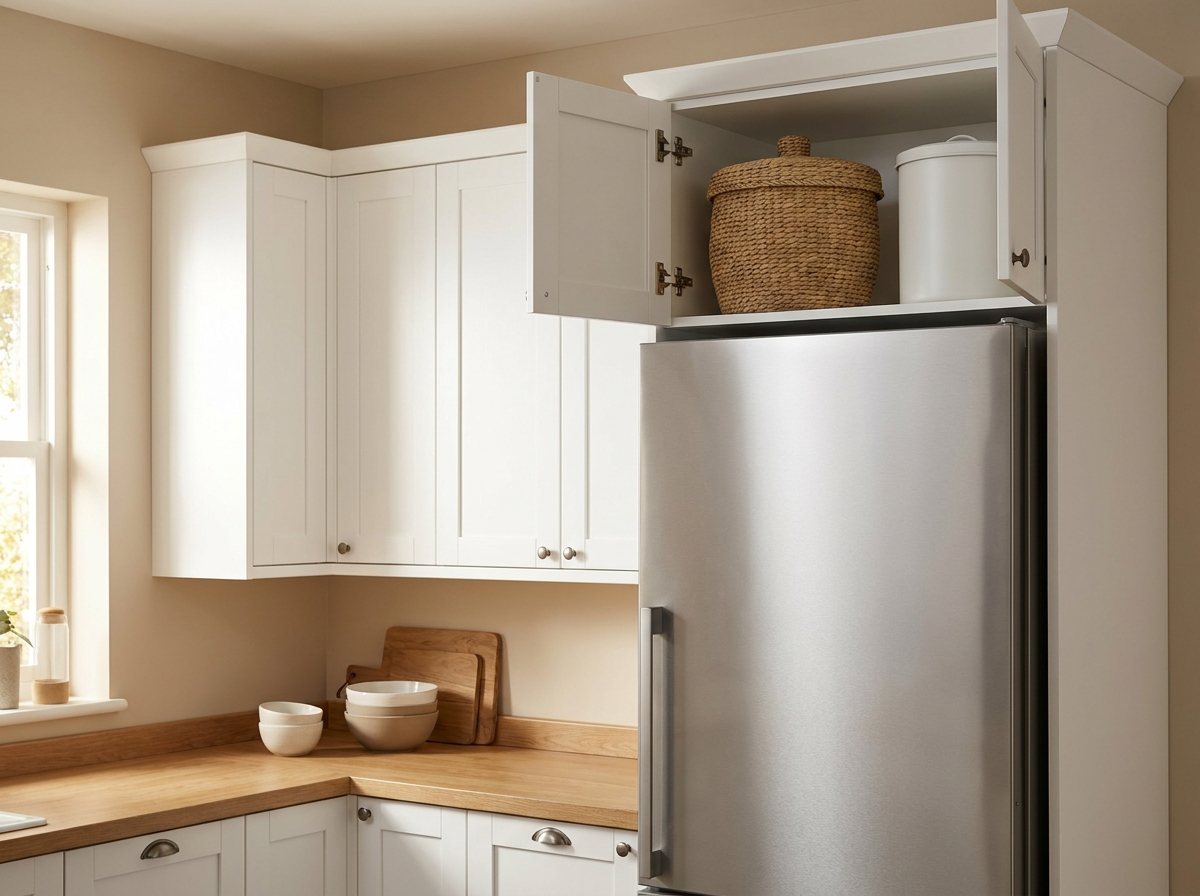
2. The cabinet-above-the-fridge approach. The cabinet above the refrigerator is out of sight and out of easy reach for most young kids, but you can still grab it easily. Put the Keep bin and the Trade bag there, and nothing else.
Heat from the back of some refrigerators can warm that space, which isn’t great for chocolate in October’s warm spells. If your fridge top feels warm, use it for the Trade bag and move the chocolate elsewhere.
Add a child-proof latch if you can, and don’t let kids climb stools or furniture to reach it. For childproofing the rest of the house, see my baby proofing home guide.
3. The “candy drawer” for older kids. For kids 7 and 8 who are ready for a little autonomy, give the daily portion tin its own shallow drawer. A parent fills the tin and hands it over at the agreed time, and the child paces the pieces. It’s a quiet way to practice self-regulation, because the amount is already decided.
Younger children shouldn’t have this access, particularly if they have younger siblings or if choking hazards remain in the mix.
What not to do
- Don’t leave the original bucket out. The plastic pumpkin is an attention magnet. Empty it on night one and retire it to the costume bin, or to wherever you keep your holiday decor storage.
- Don’t spread candy across multiple spots. The more places it lives, the more places a child can find it, and the harder it is for you to track how much has been eaten.
- Don’t use clear containers for the main stash. Visibility invites asking. Opaque removes the cue.
- Don’t store candy in the car, the diaper bag, or a backpack “just in case.” It melts, gets lost, and teaches that candy is an anytime food. If candy is a deliberate part of an outing, take a single portion.
- Don’t keep candy in a child’s room. Candy in a bedroom is unsupervised candy. If you want a favorites display, keep it in a common room during daytime hours.
- Don’t leave the portion tin or jar on the counter. It comes out when a parent hands it over and goes back in its cabinet or drawer afterward.
The pantry shelf
The pantry is the natural home, but it works only if the candy has a defined shelf. Pick one shelf above the kids’ reach and make it the treats zone. No pantry? My small kitchen organization guide has ideas for carving out one cabinet shelf instead.
My pantry label system approach pairs naturally with this. A “treats” label on the bin tells everyone, including grandparents and babysitters, what that bin is and isn’t.
The freezer
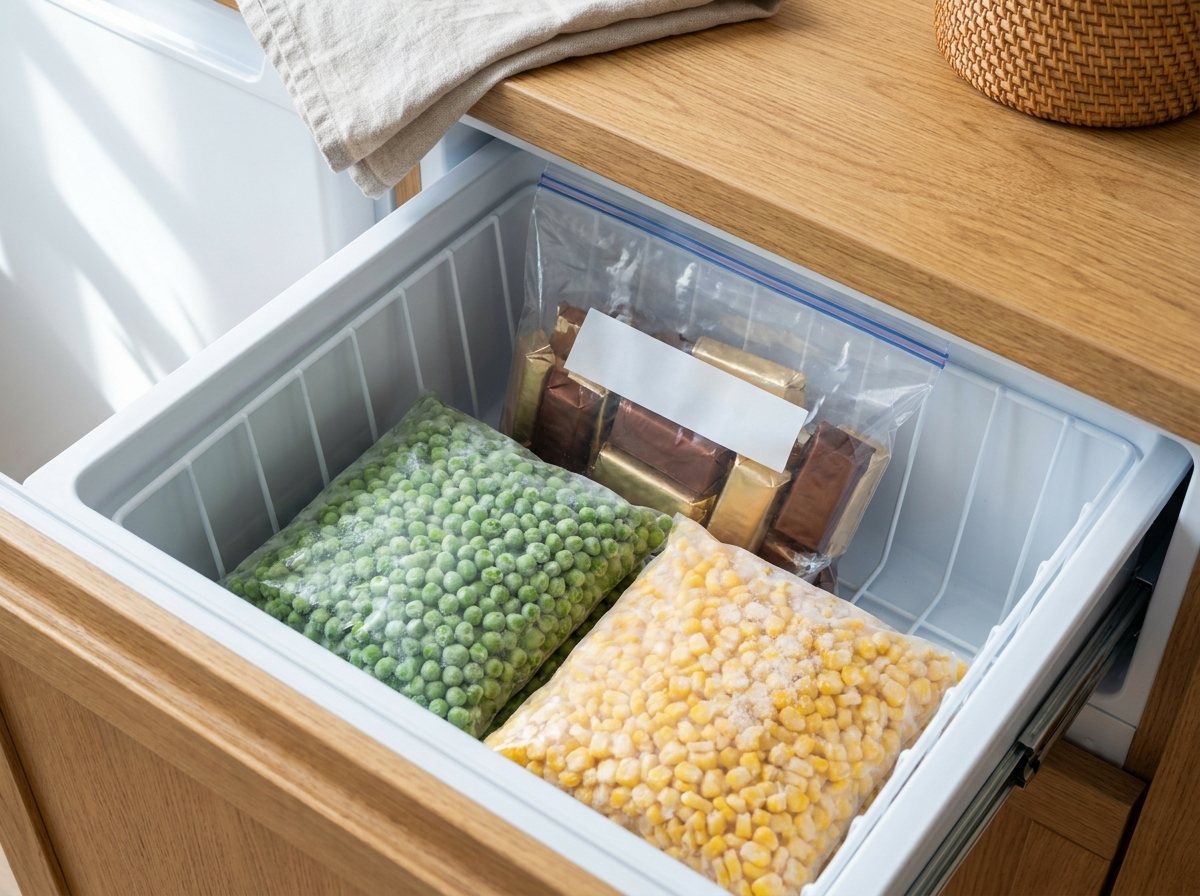
If you want chocolate to last past mid-November, freeze it. Chocolate bars, the candy that melts easily, are the best candidates. Peanut butter cups freeze well too, but they are for children 5 and older, eaten seated with an adult nearby, and never in a household with a nut allergy. Seal it in an airtight container to protect it from freezer odors and moisture, and label it with the date. Thaw it unopened to limit condensation and bloom. Chewy and hard candies keep fine at room temperature, so there is no need to freeze them.
A bonus: the freezer keeps the chocolate parent-controlled. Let chocolate thaw fully, still sealed, before giving it to a young child. Never hand over hard frozen pieces.
If your freezer is already packed, my family fridge and freezer organization guide can help you free up a bin-sized corner. That’s all you need for one container of chocolate.
Halloween Candy Rules by Age (3 to 8)
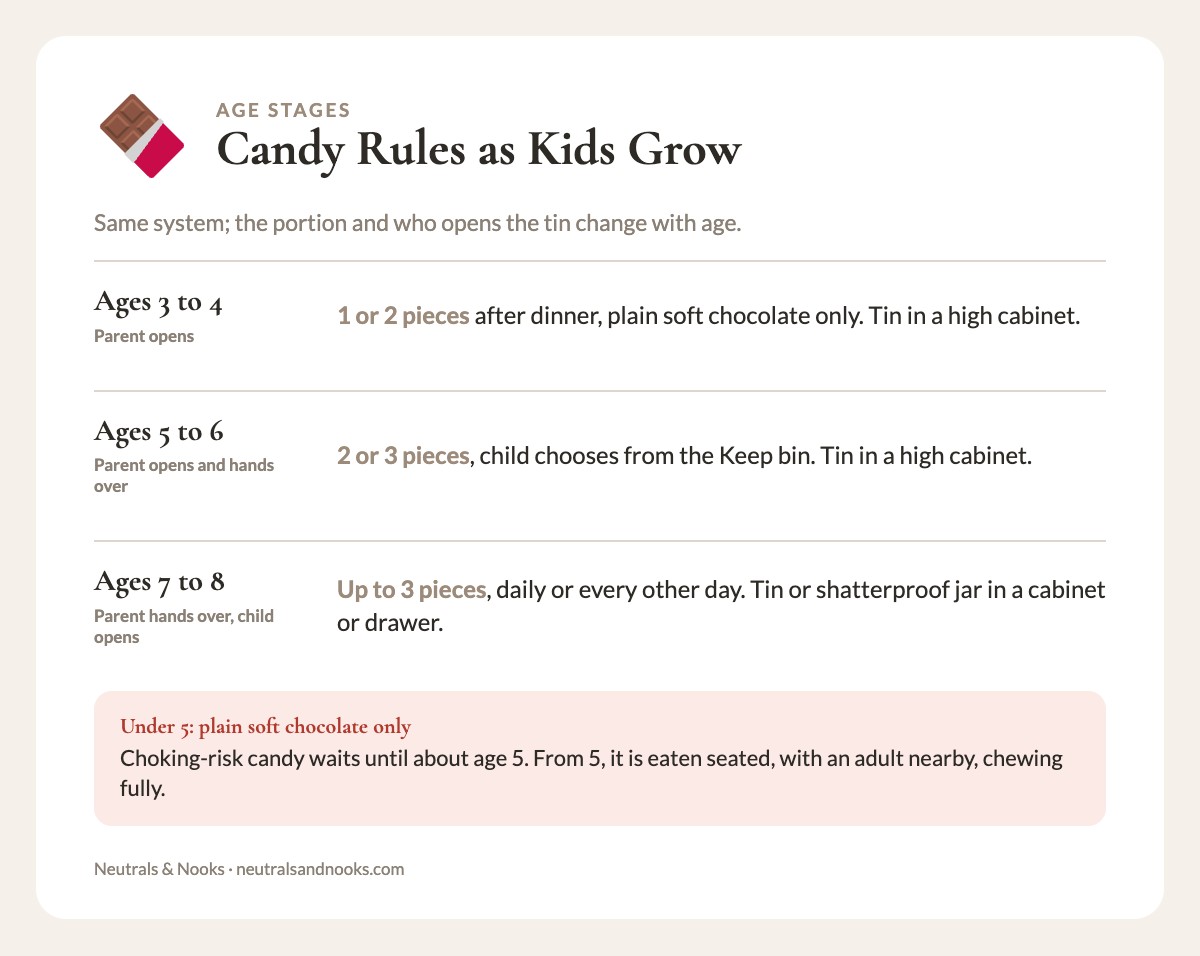
Systems fail when the rules are fuzzy. Here are rules phrased for different ages, so the same system flexes as kids grow.
| Age band | Portion | Who opens the container | Where it lives |
|---|---|---|---|
| 3 to 4 | One or two pieces after dinner. Plain soft chocolate only. | Parent | Tin in a high cabinet |
| 5 to 6 | Two or three pieces, child chooses from the Keep bin. Choking-risk candy only seated, with an adult nearby. | Parent opens it and hands it over | Tin in a high cabinet |
| 7 to 8 | Up to three pieces, daily or every other day. Choking-risk candy only seated, with an adult nearby. | Child, once a parent hands it over | Tin or shatterproof jar in a cabinet or drawer |
A few notes for each age band:
- Ages 3 to 4: Tape a picture of the tin on the pantry door and repeat one line: “Candy lives in the high bin. We visit it together.” The goal is predictability, not education. A toddler who knows candy comes after dinner, in the same spot, tends to ask less.
- Ages 5 to 6: Keep the choice simple: “Today you may pick two. Tomorrow you may pick two.” Your child can help count pieces into the tin each morning before you put it away. Make trading visible too: “These ones are going to the trade-in on Saturday.”
- Ages 7 to 8: Let them choose when to eat each piece of their portion, and allow some saving. Many kids this age enjoy rationing, and it’s a safe place to practice. Give them a role in the trade-in tracker, including adding up points.
For a parent, the biggest lesson is consistency. The specific number matters less than the fact that it doesn’t change by day or by mood.
The Trade-In Reward Tracker
Here’s the second half of the system. The trade pile is worthless unless there’s something satisfying on the other side of it. Done right, kids will give up a bag of candy happily because the trade feels like a win.
How it works
- Pick a trade-in day, ideally a weekend around Nov 5 to 9. Write it on the calendar.
- Each piece of trade candy is worth a point. You can use a simple tally, or count the pieces together.
- Kids trade their points for rewards from a short menu you set in advance.
- Any candy that isn’t traded goes to the Donate pile or the freezer.
Keep the menu small and non-candy. Experiences and small items work better than toys, which add clutter. If you want rewards that don’t add to the pile, my notes on how many toys to keep out at once explain why less is easier to manage. The same logic applies here.
A sample trade-in menu
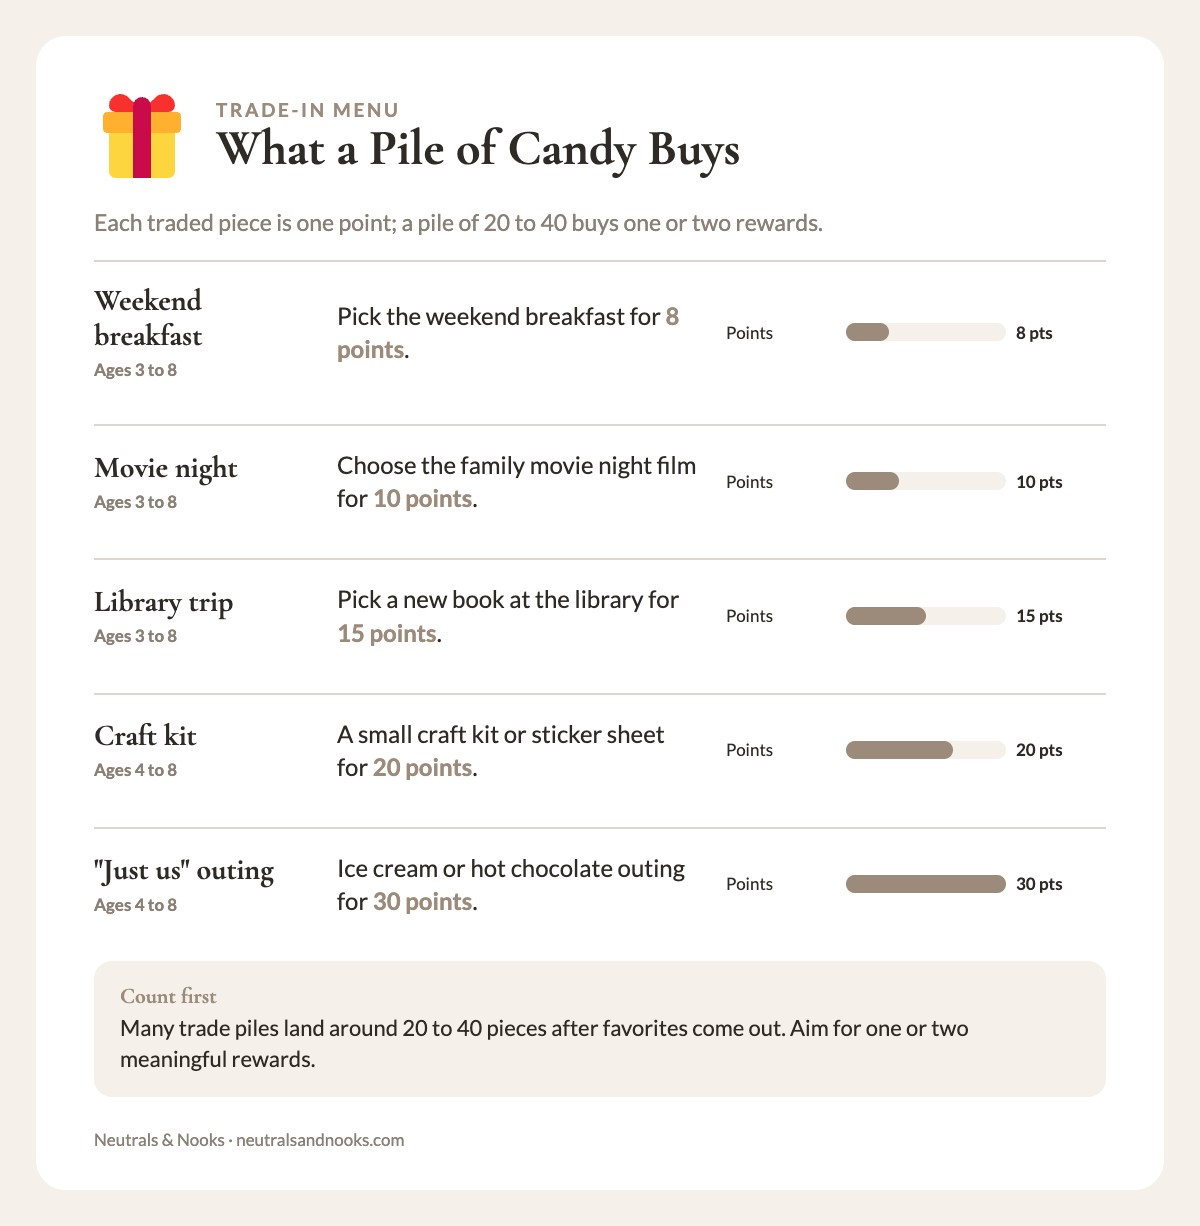
Adjust the point values to match your haul. After favorites come out, many trade piles land somewhere around 20 to 40 pieces, so count yours first. The aim is a pile that buys one or two meaningful rewards.
| Reward | Points | Good for ages |
|---|---|---|
| Choose the family movie night film | 10 | 3 to 8 |
| Pick dinner (from a short list) | 10 | 4 to 8 |
| 15 extra minutes of one-on-one play with a parent | 15 | 3 to 8 |
| A trip to the library to pick a new book | 15 | 3 to 8 |
| Pick the weekend breakfast | 8 | 3 to 8 |
| A small craft kit or sticker sheet | 20 | 4 to 8 |
| A trip to the park or playground of their choice | 20 | 3 to 8 |
| Stay up 15 minutes later on a weekend night | 15 | 5 to 8 |
| Special “just us” outing (ice cream, hot chocolate) | 30 | 4 to 8 |
The tracker itself
Copy this table into a notes app or write it on paper. Fill it in with your child on trade-in day.
| Name | Trade-in date | Pieces traded | Points earned | Reward chosen | Reward done |
|---|---|---|---|---|---|
| ☐ | |||||
| ☐ | |||||
| ☐ |
And a running weekly tally for the weeks after Halloween, if you’d like to keep the stash visible and finite:
| Week | Portions eaten (days) | Pieces left in Keep bin | Notes |
|---|---|---|---|
| Week 1 (Nov 1 to 7) | |||
| Week 2 (Nov 8 to 14) | |||
| Week 3 (Nov 15 to 21) | |||
| Week 4 (Nov 22 to 28) |
A quick tip: for the youngest kids, replace the numbers with a row of circles to color in. A three-year-old doesn’t need math; they need to see the circles fill up.
Handling the objections
“But I want to keep ALL of it.” That’s normal, and it’s the reason the favorites pass exists. Because they already protected their top picks, the rest feels less precious. If a child truly can’t part with anything, let them keep more favorites and trade fewer pieces. A smaller trade still teaches the idea.
“I changed my mind, I want it back.” Decide in advance whether trades are final. For younger kids, I’d make it final once the bag is sealed. For older kids, a “one swap” rule can work: they may pull back one piece before trade-in day.
“My kid doesn’t care about rewards.” Then make the trade about something they do care about. Sometimes it’s a person, like time with a grandparent or a playdate. Sometimes it’s a responsibility, like choosing the family playlist for the car.
Keeping the Kitchen Neutral During the Candy Weeks
Bright wrappers can make a calm kitchen look chaotic quickly. Two small decisions keep the visual noise down.
Keep the palette consistent
If you use a bin, choose one in a color that matches your kitchen: warm white, sand, oatmeal, black. Skip anything with Halloween graphics unless it’s the one seasonal accent you’re allowing. If you’re working on the rest of the seasonal decor, my notes on neutral Halloween decor can help you stay in the same family of colors. That way the candy storage looks like part of the plan.
Hide the wrappers
Set a small lidded bin or a paper bag in the kitchen for wrappers. A pile of crinkled foil on the counter is the fastest way to undo a calm kitchen.
Dealing With Leftover Candy: Ideas Beyond Eating It
By mid-November, you’ll likely have a pile that nobody wants. Rather than letting it sit, here are useful ways to move it along.
- Baking. Chopped chocolate bars work in cookies and brownies. Peanut butter cups bake into muffins or blondies for children 5 and older, eaten seated with an adult nearby, and never in a household with a nut allergy. Only use this with candy you’ve confirmed is safe for everyone eating the final product.
- Gingerbread house decorating. Save a small container of colorful wrapped candy for a December gingerbread project. Hard candies and gumdrops are classic choices for kids 5 and up. Keep them off the table whenever a child under 5 is in the room. Give the youngest graham crackers or plain soft chocolate to decorate with instead, and supervise older kids directly.
- Math and sorting games. For kids 5 to 6, sorting wrapped candy from the Keep bin by color or size is a free learning activity. Stay right beside them, then return it to the bin. For children under 5, sort empty wrappers or large plastic counters instead.
- Stocking stuffers. A handful of chocolate from the freezer works as a small stocking filler. If you’re already working through a Christmas planning timeline, “use leftover chocolate in stockings” is an easy line item. My other seasonal guides are on the Neutrals & Nooks home page.
- Neighbor and teacher gifts. Small bags of unopened treats can go to a neighbor or a classroom helper. Keep the original labels visible, give only items with intact ingredient labels, and avoid nut-containing candy for classrooms. Check with teachers about food policies first.
- Trash it. It’s okay. Candy that nobody wants, that is stale or old, can go in the bin. Wasted food is a real thing, but a pile of unwanted sugar taking up space isn’t doing anyone a favor.
A Week-by-Week Plan for the Candy Season
If you like a timeline, here’s the full flow in one place.
| When | What to do |
|---|---|
| Before Halloween | Pick your nightly number. Set up the sorting station. Clear a high shelf. Fill out the trade-in menu |
| Halloween night | Empty the bucket. Do the safety sweep. Let kids eat their agreed number. Put the rest away |
| Nov 1 | Sort together: favorites, trade, donate. Set up the daily tin or jar. Mark the trade-in date |
| Nov 2 to 4 | Daily portion from the tin or jar. Donate bag leaves the house this week |
| Trade-in day (around Nov 5 to 9) | Count the trade pile. Choose rewards. Close out the bag |
| Mid-November | Move any chocolate you want to save to the freezer. Check the Keep bin |
| Late November | Pull a last small batch for baking or gingerbread. Donate or discard the rest |
| December 1 | The bin is empty. Return it to its usual storage |
Having an end date is the single most underrated part. When kids know there’s a trade-in day and a “last day” for the bin, the candy stops feeling endless. It starts feeling like a seasonal event.
If your week is already stretched, remember that this doesn’t need to be a big project. The ten-minute approach from my 10-minute tidy guide applies: set a timer, sort what you can, and stop when it rings. You can finish the rest tomorrow.
What I’d Skip
A few popular ideas that I don’t think are worth the effort for families of young kids:
- Candy “buy-back” with cash. I find it feels transactional and creates more to manage. The reward menu is simpler and gentler.
- The Switch Witch story, if your child is skeptical. Some families love it. If your child is the type to question the logic, a straightforward trade-in works better.
- Elaborate candy organizers. Multi-compartment trays and stacking tiers look charming in a photo and become one more thing to store. One bin and one tin are enough.
- Hiding the candy from the kids and never mentioning it. Secrecy can make candy more exciting. In my experience, clear rules work better.
Frequently Asked Questions
Where is the best place to store Halloween candy at home?
The best spot is a high pantry shelf or a cabinet kids can’t open on their own, with the stash in an opaque lidded bin. Keep only a small daily portion in a tin or shatterproof jar. It stays in a cabinet or drawer and comes out when a parent hands it over. Keep chocolate you want to save in the freezer in an airtight container. Avoid keeping candy in kids’ bedrooms, backpacks, or the car, since those spots make it hard to track how much is being eaten.
How much Halloween candy should a young child eat each day?
There’s no single right number, and it depends on your child’s age, your family’s eating habits, and any health considerations. Many parents choose a small, fixed portion, such as one to three pieces after a meal, and keep it consistent from day to day. Under age 5, that portion is plain soft chocolate only. If you have questions about sugar intake for your child, your pediatrician is a good person to ask.
Which Halloween candies are choking hazards for toddlers and preschoolers?
Hard candy, gum, lollipops, gummies, jelly candy, caramels, whole nuts and popcorn are choking hazards for children under 4. This guide waits until about age 5 for all of them. From age 5, they are eaten seated, with an adult nearby, chewing fully. Candy with nuts, popcorn balls, hard marshmallow treats, and other small, firm, or sticky sweets belong on the same list. Before age 5, stay with plain soft chocolate that is smooth and nut-free, with no caramel, crisp, or hard center, broken into small pieces.
Sort these out during the safety sweep and keep them away from younger siblings, even if an older child is allowed to keep them. When in doubt, check guidance from your pediatrician or a pediatric safety organization.
How do I get my kids to trade or donate candy without a meltdown?
Let them choose their favorites first, so the most precious pieces are protected before any sorting happens. Then frame the rest as “trade” or “share” rather than “take away,” and give them something specific to look forward to, like a reward from the menu. Plan the trade-in day ahead of time and put it on the calendar so it feels like a known event, not a surprise.
Can you freeze Halloween candy, and which kinds freeze best?
Yes. Chocolate bars and similar chocolate-based candies freeze well when sealed in an airtight container. Chewy and hard candies keep fine at room temperature, so there is no need to freeze them. Label the container with the date so it doesn’t get forgotten, and let it thaw sealed before opening to limit condensation. Give young children only fully thawed chocolate, never hard frozen pieces, and skip nut-containing chocolate for children under 5.
What should I do with candy my child is allergic to?
Keep it completely separate from the safe stash, in a sealed bag or container labeled clearly, and never add it to the trade pile at home. Donate it only in its sealed original wrapper with the label intact, or discard it. Read labels on every piece, including fun-size versions, because ingredients and manufacturing warnings can differ from full-size products. If your child has a serious allergy, talk to your allergist about how to handle trick-or-treating and candy sorting safely.
How long does Halloween candy stay good?
Most sealed, commercially wrapped candy keeps for months when stored in a cool, dry place, though the best flavor and texture are usually within the first few weeks. Chocolate can develop a pale film if it gets warm, which is cosmetic but can affect quality. When candy looks, smells, or tastes off, or when the wrapper is damaged, it’s time to toss it.
Wrap-Up: Keep Candy Contained Until December
Halloween candy doesn’t have to take over your kitchen, your evenings, or your patience. Give it a category, give it a home, give it a rule, and give it an end date. The sorting checklist handles the first three. The trade-in tracker handles the last one, and gives your kids something to look forward to besides the next piece of chocolate.
You don’t need perfect containers or a perfect plan. A paper bag, a tin, a high shelf, and a calendar date will carry you through. By December, the pumpkin bucket will be back in the costume bin, the counters will be clear, and the kitchen will feel like yours again.