Family Command Center Ideas: Create a Hub That Actually Keeps You Organized
Learn how to design a family command center, a central hub for schedules, paperwork, keys, and communication, to eliminate daily chaos and keep your household running smoothly.
- Design a central command center for schedules, papers, keys, and family communication.
- Leverage location habits and visibility to keep crucial family info accessible.
- Audit your family's unique chaos points to tailor your command center's design.
- Choose a visible, high-traffic area like your kitchen or entryway for easy access.
It’s Monday morning, a permission slip is due, the car keys are missing, and nobody knows whose turn it is to feed the dog.
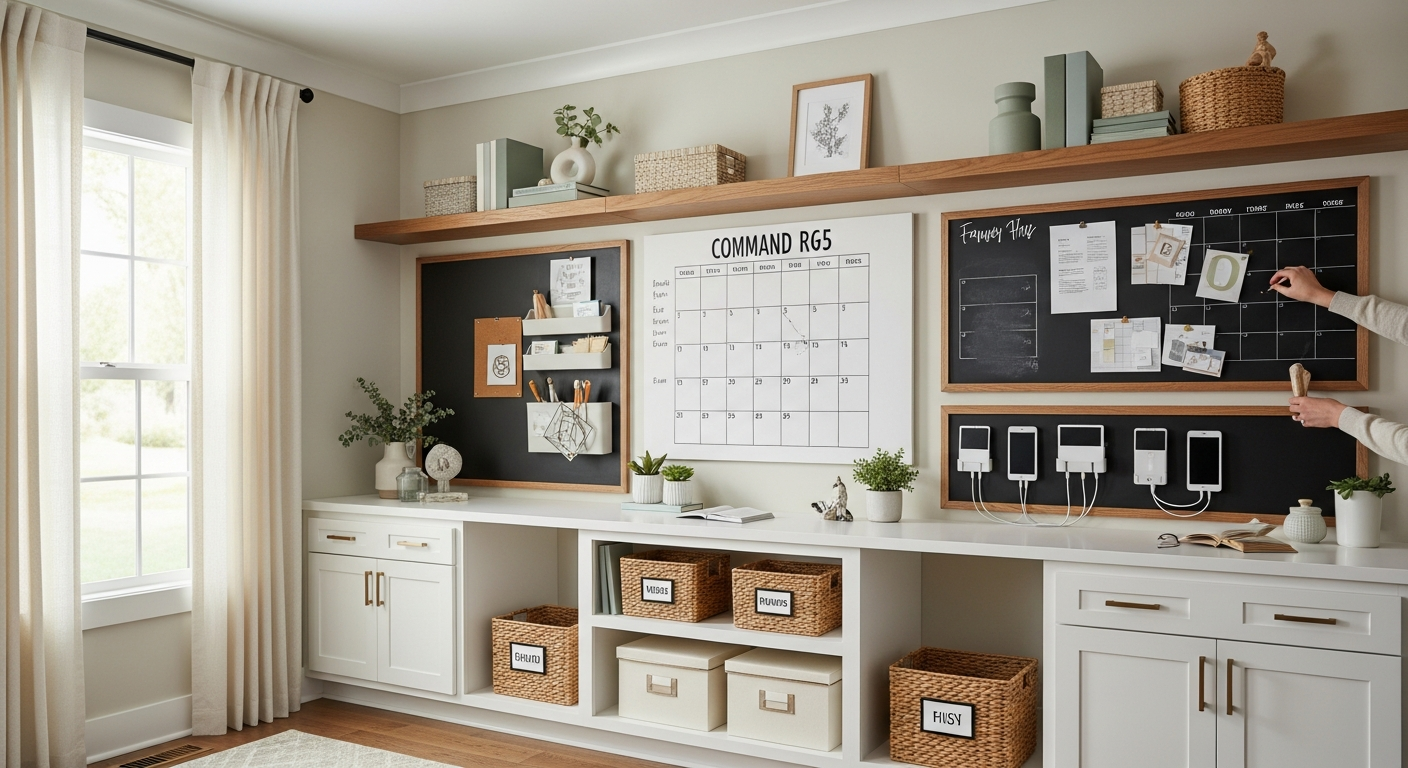
A family command center is one landing zone where the calendar, paper, keys and messages live together. This guide covers each piece, kid-safe placement, ideas from a $20 DIY board to built-ins, and a 4-week plan to get everyone using it. The Family Command Center Setup Kit below pairs with it.
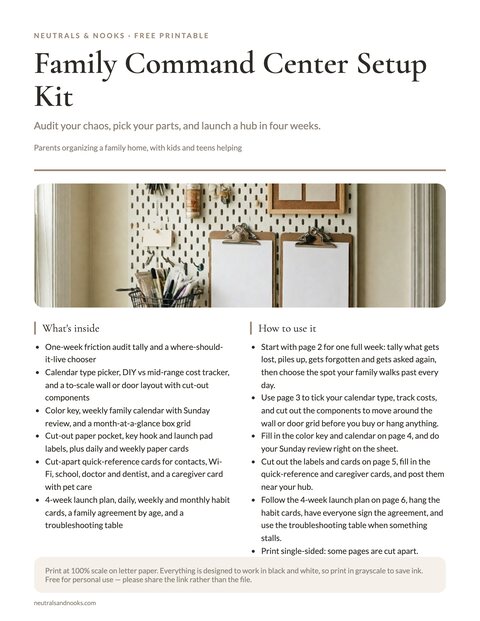
Free printable · 6 pages
Family Command Center Setup Kit
A one-week friction tally, a where-should-it-live chooser, a calendar picker with a cost tracker and to-scale wall and door planner, a weekly calendar with color key and month grid, cut-apart pocket, hook and launch pad labels, daily, weekly and monthly habit cards, a sitter reference sheet, a 4-week launch checklist and a family agreement with age-based jobs.
Free. Your download link appears right here. You'll also join the Monthly Home Reset. Unsubscribe anytime. Privacy
I care about how this looks as much as how it works. I lean toward a restrained palette, matching bins and frames, and one wall rather than three. I’d rather have three pieces everyone uses than ten that only look good in a photo.
In this article (11 sections)
- What Is a Family Command Center?
- Where to Put a Family Command Center: Kitchen, Entry or Small Space
- Command Center Components: Calendar, Paper, Keys and More
- Family Command Center Wall Layout Example
- Family Command Center Ideas by Age and Family Type
- Command Center Ideas on a Budget (DIY from $20)
- How to Set Up Your Command Center in 4 Weeks
- Troubleshooting Common Problems
- Command Center Add-Ons: Meal Plans, Bills and Seasonal Swaps
- Frequently Asked Questions
- Family Command Center: Where to Start
What Is a Family Command Center?
It replaces the calendar on the fridge, keys by the door and mail on the counter with one shared spot. Most setups hold five things.
- A shared family calendar
- An in-and-out paper system
- Key and accessory hooks
- A message spot
- Quick reference info
Each piece gets one home, so it is easy to put back and hard to forget. It also moves family knowledge out of one person’s head (usually mom’s) and onto the wall.
Where to Put a Family Command Center: Kitchen, Entry or Small Space
For most families, a kitchen wall is the best home, because everyone passes it several times a day. Choose the entry instead if lost keys and bags are your real problem. In a small home, a door or cabinet door of about 2 square feet is enough.
| Space | Best setup | Why it works |
|---|---|---|
| Kitchen wall | Calendar, wall file and key hooks on one wall | It is on everyone’s daily route, so the calendar actually gets read. |
| Entry or mudroom | Hooks, a tray and a launch pad bin | It catches keys and bags the moment they come in. |
| Small apartment | Over-door organizer or inside of a cabinet door | It uses hidden vertical space and still keeps everything in one place. |
Skip spots you walk past without noticing. If you use a cabinet door, choose one you open every day, since out of sight soon means out of mind. If your entry is the trouble spot, see our guides to mudroom cubbies for multiple kids and entryway organization for families.
Watch for a Week, Then Start Small
Spend a week noting what gets lost and which questions come up daily. That is Week 1 of the 4-week plan below. Then begin with the calendar, one paper pocket per person and key hooks, and add more only when you miss it.
Command Center Components: Calendar, Paper, Keys and More
1. The Calendar System
This is the heart of the setup, where everyone’s schedule lives in one visible place. Go big: a month grid of about 17×22 inches or larger leaves room to write. Hang it at the height in the layout table below.
| Calendar type | Pros | Cons | Best for | Rough cost |
|---|---|---|---|---|
| Large wall calendar | Highly visible and easy to update. | Little room for detail or future months. | Simple schedules, tight budgets | Low |
| Dry-erase board | Reusable, with a clean look. | Shows one month at a time and smudges easily. | Aesthetic-minded families | Low to medium |
| Digital display | Syncs with phones and holds unlimited detail. | Needs power and upkeep. | Complex schedules, tech-savvy families | Higher |
| Hybrid | Paper overview plus phone details. | Two places to update. | Most families | Low to medium |
For most families I’d choose the hybrid, with a paper month hung where the kids can see it. Dry-erase boards can ghost over time, and screens are easy to stop checking. Whichever you pick, tie it to the Sunday update in the routines below.
Good to knowGive each family member one color so you can see who has what at a glance. I stick to muted pen colors so the wall still feels calm.
2. The Paper Management System
Paper arrives every day, so give it a clear path through the system.
| Paper category | Where it goes | When you process it |
|---|---|---|
| Action required | Front pocket or top clipboard | In the daily sort. |
| To file or keep | Second pocket, then a binder or box | In the Sunday sweep. |
| To review, not urgent | Third pocket | In the Sunday sweep. |
| Outgoing (return, mail, bring) | Tray or hook by the door | The night before, with the launch pad. |
A wall file with 4-6 clear, labeled pockets keeps everything visible. Stackable trays suit a counter or shelf but turn into piles without regular processing.
Clipboards on the wall work well for permission slips and bills because they’re a visual nudge to act. Magazine files handle larger items you can sort by person.
What keeps it working is a 5-minute paper sort each day and a 15-minute sweep on Sunday. In my experience, the action pocket overflows first, so that is the one the daily sort protects. For school papers specifically, see our artwork and school papers system.
3. Key and Essential Item Storage
Everything that leaves the house daily needs one home. A simple hook rack is the easiest and most visible choice. Plan one hook per person plus two spare, placed and spaced as in the height table below.
If you prefer a calmer look, a shallow drawer with compartments, a small dish or a wall-mounted key cabinet hides the clutter.
- Keys on a labeled hook
- Wallet and purse hooks
- Sunglasses holder
- Badge or lanyard hook, above toddler reach
- Reusable bag holder
When you’re home, these items live here, not in pockets or purses. Hang them up as you walk in, before you put anything else down.
Safety firstMount pegboards, key cabinets and wall files into studs or with anchors rated for the weight. Anchor any freestanding organizer or entryway furniture to the wall with anti-tip straps.
Anything a toddler can reach should be fixed into a stud and tug-tested. At that height, skip loose pegboard hooks, shelves and bins, since a child can pull them out. Keep heavy items off low shelves.
Use breakaway lanyards, and keep cords off hooks toddlers can reach.
4. Communication Central
A small dry-erase or chalkboard panel handles quick notes and grocery list additions. Individual message slots, one per person, keep non-urgent notes from getting lost. A tablet with a shared family app also works, but only if someone keeps it charged and checked. The message board tends to be the first piece that gets ignored, so start it small.
5. Quick Reference Information
Keep the things people need in a hurry in one clear pocket sleeve on the wall. A sitter should be able to find them in seconds.
- Emergency contacts
- Doctor and dentist numbers
- School phone numbers
- Pet and sitter notes
- Medication times only, nothing sensitive
Medicines themselves never live here. Keep them, and any hand sanitizer by the door, locked up or out of children’s reach.
TipKeep sensitive details out of sight of doors and windows, or in a binder or app. That includes the custody schedule, school info and Wi-Fi password. Never post alarm codes.
6. Launch Pad Zone
Give backpacks, lunch bags, sports bags and work bags a hook or bin each. Add one spot for items to return, like library books, and one for items to bring, like signed forms and project materials.
Stage everything the night before, so the morning is about leaving rather than searching. Tomorrow’s outfit can go here too if mornings are a struggle.
Family Command Center Wall Layout Example
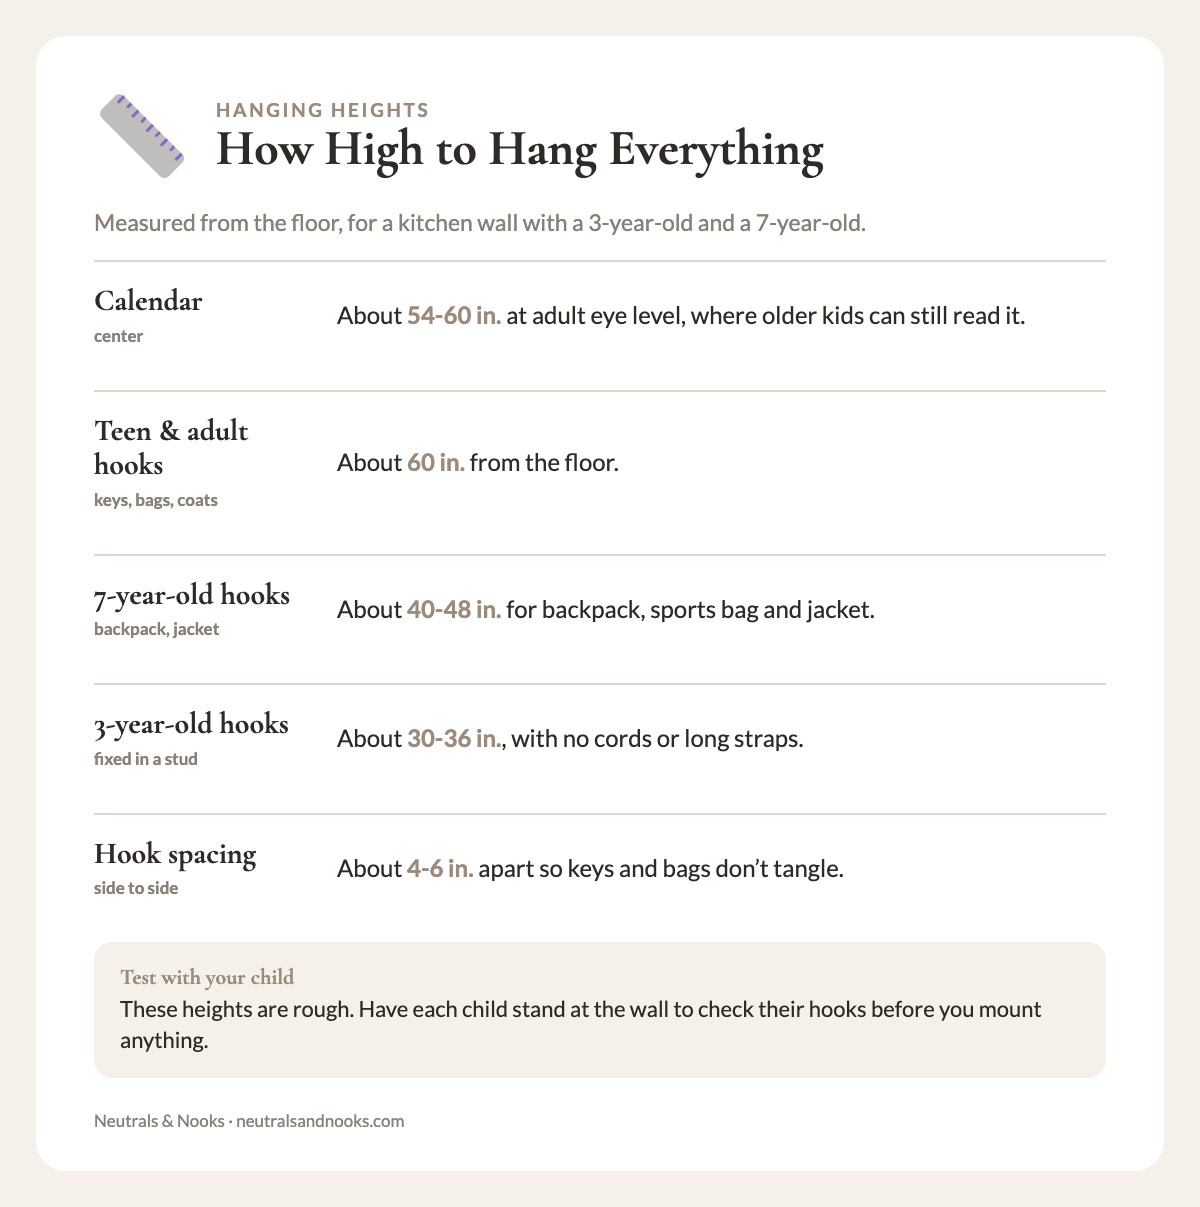
Here is one layout to copy, then adjust for your kids’ ages. Picture a 4-foot-wide kitchen wall for a family with a 3-year-old and a 7-year-old.
- Hang the calendar. Center the month grid (about 17×22 in.) at adult eye level in the middle of the wall.
- Add adult key hooks. Put one row above or beside the calendar.
- Mount the wall file. Give each person a pocket, plus one “action” pocket for adults.
- Add low kid hooks. Hang two sturdy hooks for each child at the heights in the table below. Fix them into a stud and tug-test each one.
- Finish the edges. Add one reference sleeve and a small tray for outgoing items.
| What | Height from floor | Notes |
|---|---|---|
| Calendar (center) | About 54-60 in. | Adult eye level, where older kids can still read it. |
| Teen and adult hooks | About 60 in. | Keys, work bags and coats. |
| Hooks for a 7-year-old | About 40-48 in. | Backpack, sports bag and jacket. |
| Hooks for a 3-year-old | About 30-36 in. | Backpack and jacket, with no cords or long straps. Use fixed hooks in a stud, not loose pegboard pieces. |
| Hook spacing | About 4-6 in. apart | So keys and bags don’t tangle. |
These heights are rough, so test them with your child. For a tight kitchen, see our small kitchen organization guide.
Family Command Center Ideas by Age and Family Type
For Families with Young Children
Put hooks at kid height (see the height table above) and use icons, not just words. Little hands will touch everything, so choose durable pieces. A picture routine board, a rotating artwork clip and a pictured chore chart are enough to start. For the rest of the house, see our baby-proofing guide.
Safety firstKeep button-cell batteries and magnets out of reach of all young children, and of any child who still mouths objects. The risk doesn’t end at age 4, and an older sibling’s things often land within a little one’s reach. Use only gadgets with a screw-secured battery compartment, and store spare and dead batteries out of reach too.
A swallowed button battery or magnet is an emergency. Go to the ER or call Poison Control (1-800-222-1222) right away. For a battery, you can also call the National Battery Ingestion Hotline at 800-498-8666.
Pins, thumbtacks and anything that fits through a toilet paper tube stay out of reach of children under 4. Binder clips and loose markers go up high too.
At child height, use only large, secured pieces such as wide fabric pockets, big wooden pegs and sturdy hooks. Fix them into a stud and tug-test them. Anchor wall units and furniture.
Ideas for Older Kids, Teens, Working Parents and Blended Families
Older kids and busier households need different things from the same wall. Pick the row that fits and add only that.
| Family type | Top priority | What to add | One tip |
|---|---|---|---|
| School-age kids | Room for several schedules and school paper | Checklists per child, activity schedules, a lunch money spot | Link it to the homework station so papers land together. |
| Teens | Communication that respects privacy | A shared calendar app on a display, a car key hook, a work schedule | Let them manage their own section. |
| Busy working parents | Low upkeep and a caregiver-friendly layout | A sitter instruction sheet, a meal plan, a pickup schedule | Keep emergency contacts in one clear sleeve. |
| Blended families | Custody schedule visibility | A color-coded calendar, packing checklists for each home, contacts for both homes | Place the custody calendar out of sight of doors and windows. |
Command Center Ideas on a Budget (DIY from $20)
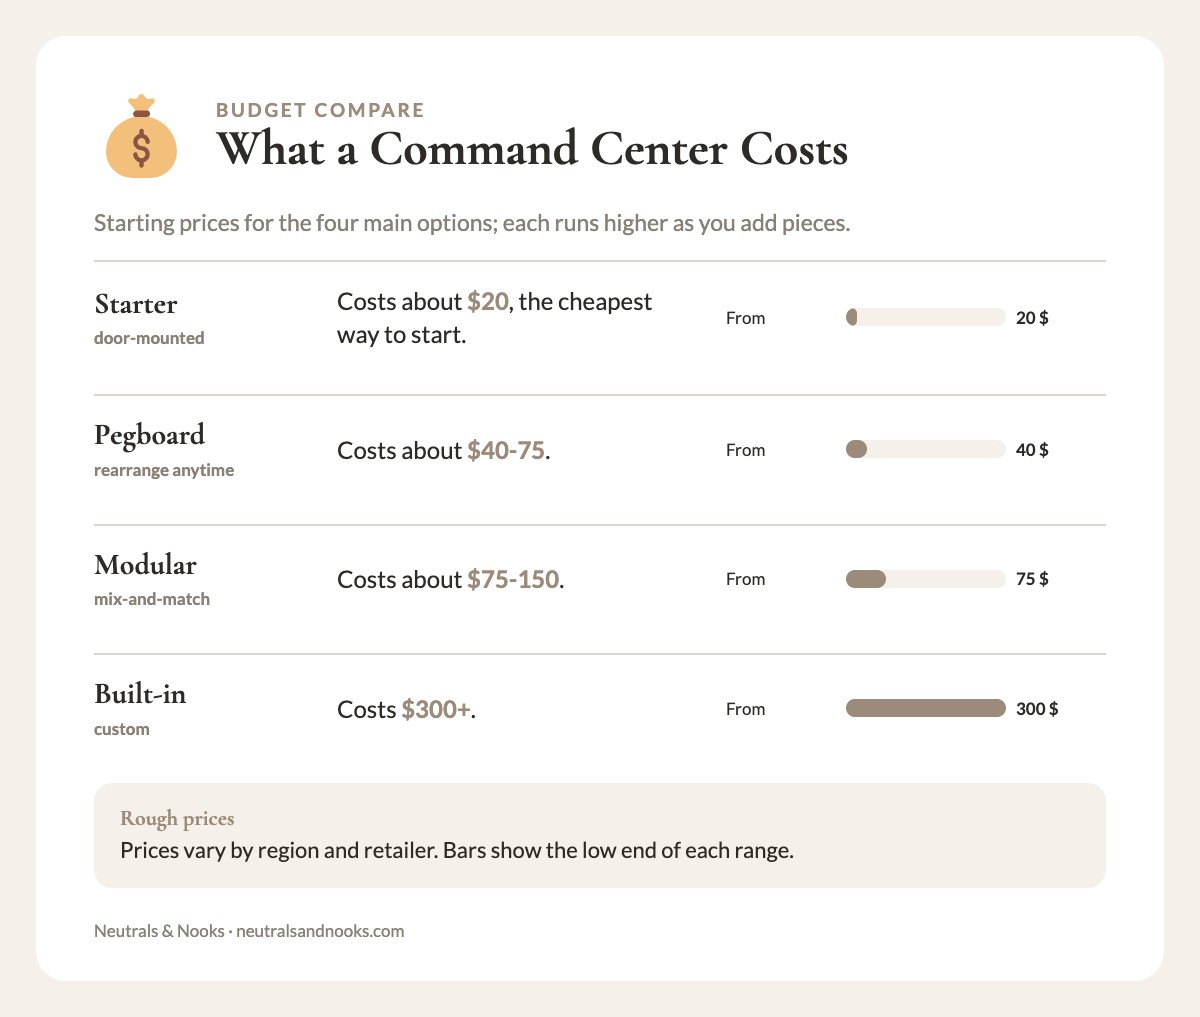
You can start for about $20 and add pieces as the habits stick. Here is how the main options compare.
Budget DIY Options
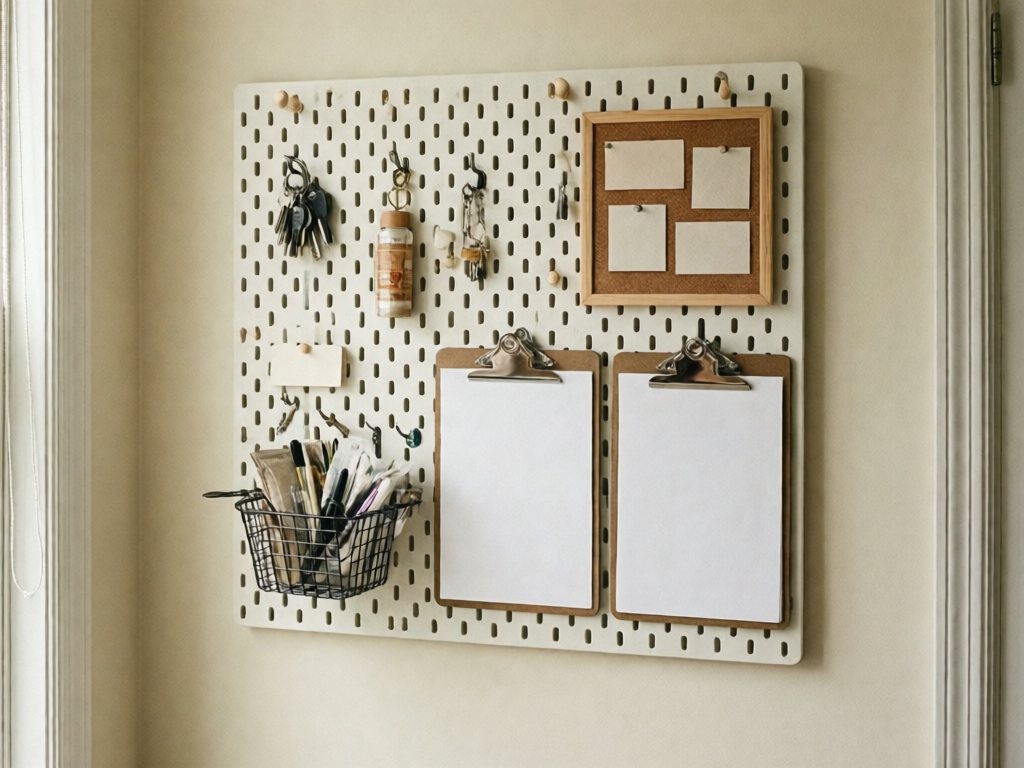
Prices are rough and vary by region and retailer. Where a board holds pins, hang it above the reach of children under 4, or use wooden peg clips instead. Pegboard hooks, shelves and bins can lift out, so keep those above toddler reach too.
| Option | What you get | Rough cost | Time to set up |
|---|---|---|---|
| Door-mounted (the $20 starter) | Over-door organizer or pockets, clear paper pockets and key hooks. | $20-40 | 30 minutes |
| Clipboard wall | One clipboard per category, so paper is easy to change out. | $15-30 | 30 minutes |
| Cork board | Board (about $15-30) plus peg clips or pins and a few paper organizers (about $15-20). | $30-50 | 1 hour |
| Pegboard | Panel (about $15-30) plus hooks, shelves and bins (about $25-45). Very customizable. | $40-75 | 1-2 hours |
Bigger Investments
| Option | What you get | Rough cost | Time to set up |
|---|---|---|---|
| Modular wall system (IKEA SKADIS or similar) | Mix-and-match pieces that are easy to reconfigure. | $75-150 | 1-2 hours |
| Entryway furniture | All-in-one organizer with calendar, hooks and shelf. Anchor it to the wall. | $100-200 | 1-2 hours |
| Smart display | Digital calendar plus app connectivity. | $200-500+ | 1-2 hours |
| Custom built-in | Designed for your exact space, and permanent. | $300-1000+ | Days to weeks |
If you want a tidy look on a budget, hide the clutter instead. A shallow closet door or the inside of a cabinet door works well with matching bins and a neutral palette. For more budget ideas, see cheap organization that looks expensive.
How to Set Up Your Command Center in 4 Weeks
The Launch Process
- Week 1: Observe. Note what gets lost, where paper lands, and pick a location (about 10 minutes a day).
- Week 2: Plan and gather. Sketch the layout on paper, involve the family in choices, and buy only what the sketch needs (about 1-2 hours).
- Week 3: Install and label. Mount everything securely, label each pocket and hook, and check that every family member can reach their part (about 1-2 hours).
- Week 4: Train and adjust. Walk everyone through it, practice the routines together, and fix what isn’t working (about 15 minutes a day).
Install Day: Mark, Mount, Label
Week 3 goes quickest in this order. I pencil everything before I drill, since a pencil mark is easier to move than a hole.
- Mark the wall. Find the studs, then pencil in each piece at the heights in the layout table above. Have each child stand at the wall so you can check their hooks.
- Mount and tug-test. Fix each piece into a stud, or use anchors rated for the weight. Anything a toddler can reach goes into a stud. Pull firmly on every hook, especially the low ones.
- Label everything. Name each pocket and hook, and add an icon for kids who can’t read yet.
Establishing Routines
The wall stays useful only if a few small habits keep it current. Here are the three I’d start with.
| When | Task | Time |
|---|---|---|
| Daily | Check the calendar and hang up keys. Sort paper into action, file or trash. Stage tomorrow’s bags and forms. | 5 minutes |
| Weekly (Sunday) | Update the calendar and clear the paper backlog. Restock pens and notepads, then tidy the area. | 15 minutes |
| Monthly | Clear expired items and update reference info. Adjust what isn’t working. | 15 minutes |
Getting Family Buy-In
The most common reason these fail is setting one up and expecting everyone to use it on their own. Bring the family in early, and celebrate small wins, like two weeks without lost keys.
| Who | What works | First step |
|---|---|---|
| Everyone | Involve them in design choices and solve their problems. Model the habit yourself. | Point out the payoff. Found keys and a charged phone mean a calm exit. |
| Partners | Focus on what helps them most, and notice what they do well. | Start with key hooks, which are an easy way in. |
| Kids | Make it visual and let them shape their own section. | Connect it to independence. Add a streak counter if they like games. |
Troubleshooting Common Problems
| Problem | Likely cause | Quick fix |
|---|---|---|
| “Nobody uses it but me” | Bad location, too complicated, family not involved in setup, or competing systems | Move it to a busier spot and simplify. Hold a short family meeting. |
| “Paper still piles up” | No set sorting time, unclear categories, or overflow | Keep the 5-minute daily sort and the 15-minute Sunday sweep. Cut categories to the essentials, and go digital where you can. |
| “The calendar is never updated” | Too fiddly to update, two competing calendars, or no weekly ritual | Commit to one calendar and set a weekly update time. Share the job. |
TipGive a new setup two weeks before you judge it. If nobody uses it by then, move it somewhere busier and strip it back to the keys and the calendar.
Command Center Add-Ons: Meal Plans, Bills and Seasonal Swaps
Once the core habits hold, add one thing at a time. Try a weekly meal plan with a running grocery list, or a bill due-date calendar. Seasonal swaps work too, such as a holiday countdown or a sports schedule.
For a bigger tidy-up, our kids’ closet guide pairs well with it. If the school-year rush is your pain point, our back-to-school drop zone guide is a natural next step. When the whole setup needs a refresh, our 20-minute command center reset walks through it.
Neutral Nina
Neutral Nina is an interior design enthusiast and mom of three who proves that beautiful, organized spaces and family life can coexist. She shares practical strategies for creating calm, functional homes that work for kids and grown-ups alike.
Frequently Asked Questions
How much space do I really need for a command center?
About 2 square feet is enough to start. A single wall organizer with a calendar, file pockets and key hooks covers the basics. Add more only when your family is using what is already there.
What if we don’t have wall space?
Back of doors, inside cabinet doors, a standing furniture piece, or a binder on the counter can all work, which also suits a small home. Use vertical space where you can. The “center” is about consolidation, not wall mounting.
Should I go digital or paper for the calendar?
Most families do best with a hybrid. Keep a paper month on the wall for the overview and put the details in phones.
How do I handle a partner who won’t use the system?
Start with a problem they actually care about, like lost keys, and show them where those now live. Some people never fully adopt a system, so build around what they will do.
What age can kids start participating?
Even toddlers can put their backpack on a sturdy low hook, as long as cords and long straps stay off it. Preschoolers can check visual schedules, elementary kids can write on the calendar and teens can run their own sections.
How often should I update or overhaul the system?
Do a deeper review at natural transition points, such as the start of the school year or after the holidays. Make small fixes anytime something isn’t working, and avoid constant overhauls.
How do I maintain the command center without adding another chore?
Attach it to routines you already have: sort paper while the coffee brews, check the calendar at breakfast and reset on Sunday.
Family Command Center: Where to Start
Pick the one pain point that costs your mornings the most. This weekend, set up only the key hooks and the calendar, and use the Family Command Center Setup Kit to plan what comes next.
The goal is a Monday morning when the permission slip is where it belongs, the keys are on their hook, and the dog has been fed.