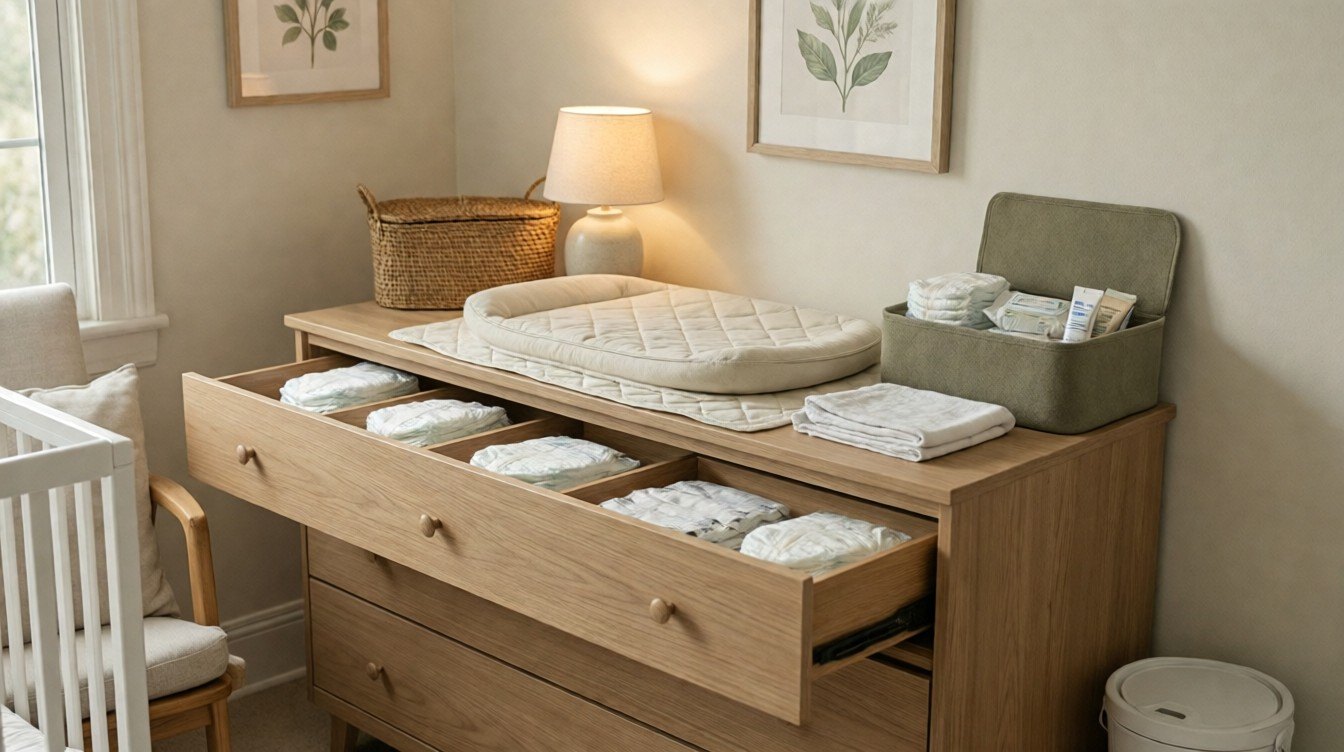
Changing Table Organization Ideas for a Small Nursery
Optimize your small nursery's changing station with a dresser-topper setup. This guide shows you how to organize essentials for safety and convenience, ensuring everything is reachable while keeping a hand on your baby.
- Keep all changing essentials within arm's reach while one hand stays on your baby.
- Opt for a dresser with a changing topper to save space in a small nursery.
- Prioritize safety: anchor your dresser to the wall and secure the topper.
- Ensure your dresser's height is ergonomic for you, around elbow level with the topper.
- Choose a topper with a raised rim, safety strap, and secure mounting to your dresser.
This post contains affiliate links. As an Amazon Associate I earn from qualifying purchases.
At 3:40 a.m. in our second week home, I stood in a nursery the size of a walk-in closet with one hand on a squirming newborn. The wipes were in a drawer, the diapers were in a floor basket, and the clean sleeper was in the closet.
That night taught me the only rule of changing table organization that matters: everything you need has to be reachable without taking your hand off the baby. This guide shows how to build that around a dresser and changing topper in a small nursery. It covers safety, a five-zone caddy map, drawers, baskets, stocking amounts, night changes and layouts.
In this article (15 sections)
- Why a Dresser-Topper Changing Setup Works in a Small Nursery
- Safety First, Before You Buy a Single Basket
- The Caddy Zone Map for a Dresser-Topper Changing Setup
- Choosing a Changing Table Organizer for a Dresser
- Changing Table Organization Baskets: Which Ones, Where, and How Many
- Drawer Systems: Making the Dresser Do the Heavy Lifting
- What to Stock: A Realistic Newborn List
- Night Changes: The Dim, Quiet Version of Your Station
- Layouts for Tiny Rooms: Where the Dresser Goes
- The Restocking Routine That Keeps the System Alive
- Common Mistakes (and Easy Fixes)
- A Sample Setup, Start to Finish
- Making It Look as Good as It Works
- Frequently Asked Questions
- You Don’t Need a Bigger Nursery, Just a Better Arm’s Reach
Why a Dresser-Topper Changing Setup Works in a Small Nursery
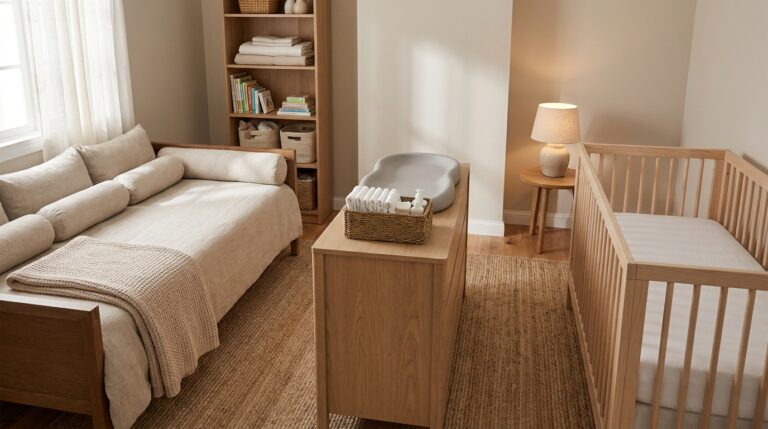
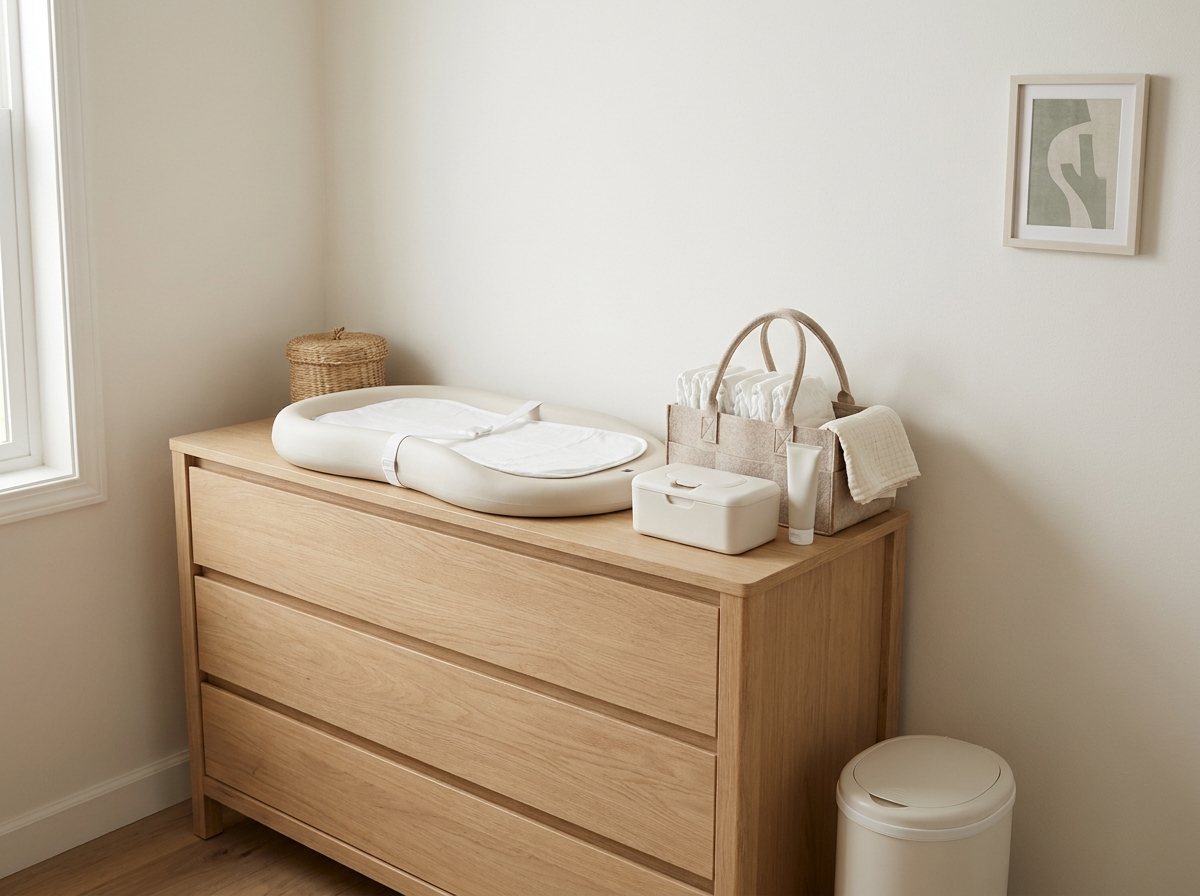
A standalone changing table usually takes up roughly two feet by three feet of floor and stores very little. A dresser topper uses the footprint of furniture you already need, adds a changing surface on top, and gives you drawers underneath for storage. In a small nursery, that math is hard to argue with. If you’re still planning the whole room, our guide to small nursery ideas walks through layouts where the dresser, crib, and a chair all share one wall.
Here’s how the two options compare in a tiny room:
| Feature | Dedicated changing table | Dresser + changing topper |
|---|---|---|
| Floor space used | About 6 square feet | None beyond the dresser you already need |
| Storage | Typically 2 open shelves | Full drawers, often 3 to 6 |
| Lifespan | Only until changes move off the elevated surface | Long-term dresser once the topper comes off |
| Cost | Added furniture purchase | Topper only, typically much cheaper |
| Organization difficulty | Easy, shelves built in | Needs a deliberate system |
| Surface height | Usually designed for changing | Depends on your dresser |
That last row is the one to check before you commit. Stand at the dresser and let your arms hang naturally. The changing surface should land around your elbow or slightly below, so you aren’t hunching over.
Measure the total height with the topper on, since toppers usually add 2 to 4 inches. Dressers around 34 to 38 inches often suit adults before the topper, but go by your own body. If your back protests after a week of changes, a taller or shorter piece will solve more than any organizer could.
What a good dresser topper needs
- A raised rim or contour on all four sides of the pad. Look for a topper or pad that meets the current ASTM safety standard for baby changing products.
- A safety strap you will actually use every time, as a backup only. It never replaces your hand on the baby.
- A footprint that fits the dresser without overhanging. If it’s larger than the dresser top, it’s the wrong topper.
- Mounting brackets or safety straps that screw into the dresser’s back or frame, following the maker’s instructions. A pad that only sits on the dresser is not secured. Check that it is firmly attached before every use.
- A wipe-clean pad cover, with at least two spares in rotation.
Safety First, Before You Buy a Single Basket
This is the unglamorous part, and I’d rather you read it now than skim past it later. Organization should never create risk.
Safety firstAnchor the dresser to the wall. A dresser with a topper, a caddy and a wriggling baby carries a lot of weight up high. Use the anti-tip kit that came with it, or buy one. Anchor into a stud where you can, or use anchors rated for your wall type if not. Renters should ask the landlord first, since many allow small anti-tip holes. Re-check the anchor every few months. Then secure the topper to the dresser so it can’t slide.
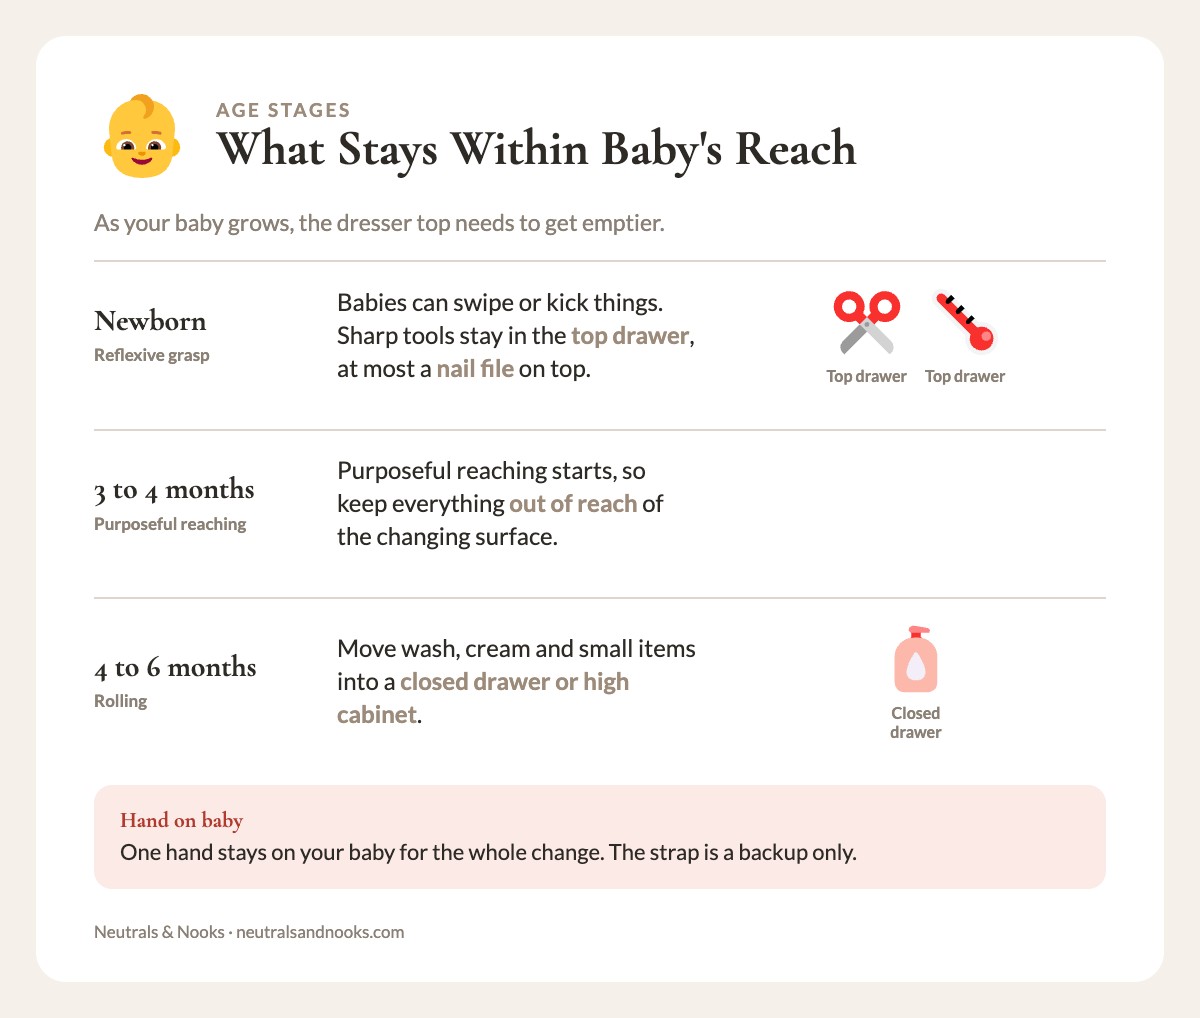
Hand on baby, alwaysOne hand stays on your baby for the whole change. The strap is a backup only. Never open a drawer or turn away with your baby on the pad, and never leave them there, even for a second. Babies can roll earlier than people expect. If you forgot something, pick the baby up and take them with you.
Know when to stopEvery changing pad and topper has a weight limit, so check yours. Stop using the elevated pad once your baby reaches that limit or is rolling, squirming or climbing too much to change safely. After that, change them on a floor pad or another low, flat surface.
Keep supplies out of reachNewborns have a reflexive grasp and can swipe or kick things, and purposeful reaching starts around 3 to 4 months. Keep scissors, clippers, the thermometer and the aspirator in the top drawer, with at most a nail file on top. Once your baby is rolling (around 4 to 6 months), move wash, cream and small items into a closed drawer or high cabinet.
Cords and lampsKeep all cords at least 3 feet from the crib and out of reach of the changing surface, and never put a corded lamp on the changing dresser. For the rest of the room, see our baby proofing guide.
Mind the weight. Check the weight limit on your caddy, topper, and any shelf organizers. Heavy items like a full box of wipes belong low, in a drawer, rather than high on the dresser top.
Don’t hang things over the changing area. Mobiles, shelves, and framed art directly above the changing surface can fall. Keep that wall space plain, and hang decor on a side wall instead.
The Caddy Zone Map for a Dresser-Topper Changing Setup
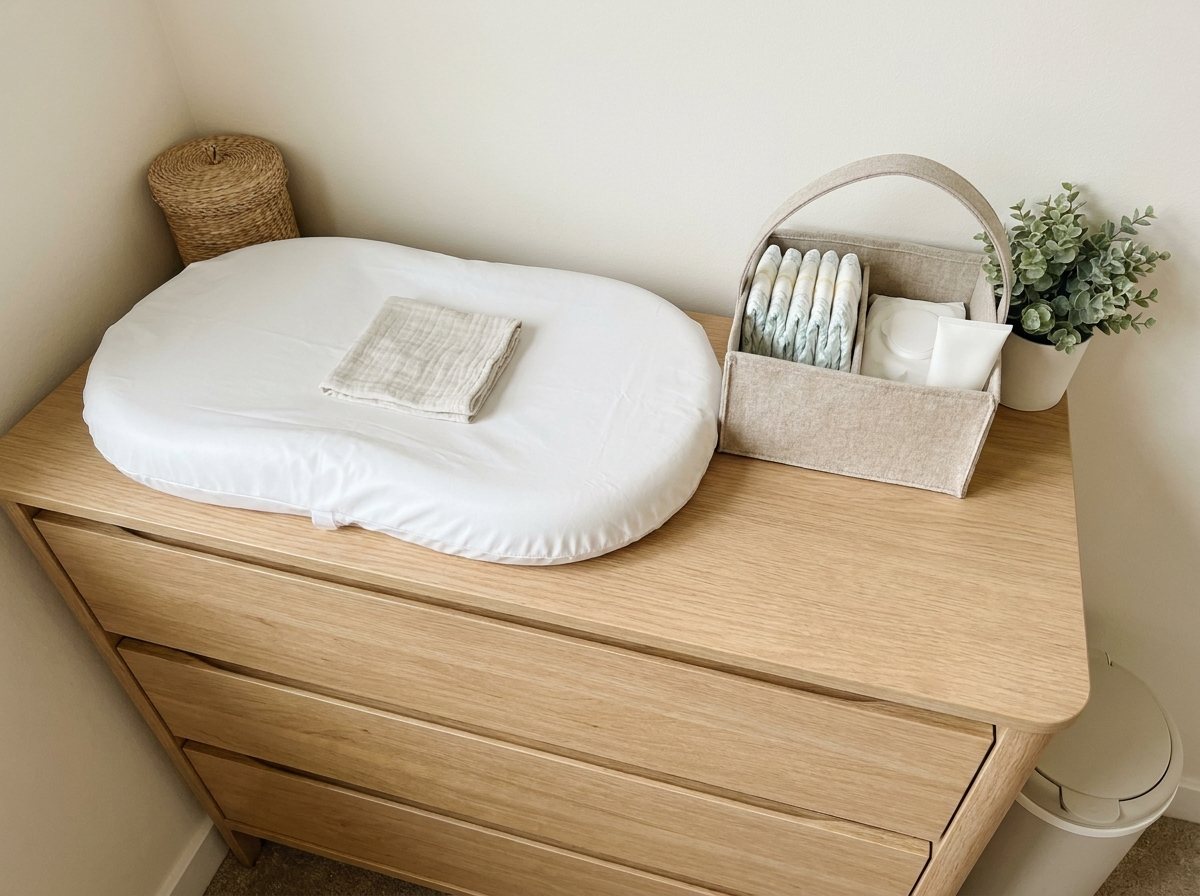
Here is the heart of the system. Instead of thinking “where do I put things,” think in zones, each defined by how often you reach for something and which hand you reach with.
Picture the dresser top from above, with the baby’s head to your non-dominant side and the baby’s feet toward your dominant hand. (If you’re right-handed, the baby’s head points to your left.) Your dominant hand is your working hand: it does the wiping, the tabs, the fastening. Your non-dominant hand stays on the baby.
| Position | Non-dominant side (baby’s head) | Dominant side (baby’s feet) |
|---|---|---|
| Back of dresser, by the wall | Zone 4: backup corner | Zone 5: display, far end |
| On the dresser top | Changing pad (Zone 1, your hand on baby) | Zone 2: main caddy |
| Below, where you stand | Zone 3: top drawer, directly under the pad | |
Read this as if you are standing at the front of the dresser. If you are left-handed, flip the left and right columns.
The Dresser-Topper Changing Station Kit on this page has these zones as a printable you can keep by the dresser.
Quick key: Zone 1 hand on baby, Zone 2 daily caddy, Zone 3 top drawer, Zone 4 back corner, Zone 5 side wall.
And here is what lives in each zone:
| Zone | Location | What goes here | Why it’s here |
|---|---|---|---|
| Zone 1: Hand-on-baby | Pad surface and the edge nearest your non-dominant hand | Nothing stored. A single clean cloth or muslin square folded on the pad. | One hand stays on the baby for the whole change, including while you reach. This zone is for the baby, not for stuff. |
| Zone 2: Main caddy | Dominant-hand side of the dresser top, within a single forearm reach | 4 to 6 clean diapers, a wipes dispenser or pop-up pack, diaper cream, a small trash or “dirty diaper” option | Used on every single change. Must be reachable in one motion. |
| Zone 3: Drawer one | Top drawer, directly under the pad | Backup diapers, extra wipes, spare pad covers, disposable changing pads, a few changes of clothes in the smallest size | Used often but not every change. Restock between changes, never mid-change. |
| Zone 4: Back-corner backup | Rear corner of the dresser top, well away from the baby | Light items you grab occasionally: a spare tube of cream and a small lidded basket with a nail file. Move these into a closed drawer once your baby is rolling. | Occasional use. Out of the way, still visible. |
| Zone 5: Display and calm | A side wall, or the far end of the dresser | Lightweight art on the side wall, or a small faux plant at the far end. No lamps or cords. | Not functional. Keeps the area from feeling like a supply closet. |
The golden rule of the zone map: Zone 2 is the only zone that should ever feel full. Everything else should have breathing room. If you catch yourself cramming more into Zone 2, something in there belongs in Zone 3.
How to test your zone map
Do a dry run before the baby arrives. Use a doll or a rolled-up towel with some weight to it. Practice a “full change” start to finish, and note every time you reach, turn, or hesitate:
- Place the towel on the pad, keep one hand on it, and fasten the strap as a backup.
- Open the dirty diaper.
- Wipe.
- Slide the new diaper under.
- Apply cream.
- Fasten.
- Drop the dirty diaper in the bin without moving your feet.
One hand stays on the towel throughout. Every hesitation is a signal. If you needed a drawer at step five, the cream belongs in Zone 2. In real life, you would pick the baby up and take them with you. If you couldn’t reach the bin with one hand or a foot pedal without moving your feet, the bin is too far.
Choosing a Changing Table Organizer for a Dresser
Most changing table organizers are built for a standalone changing table, not a dresser. Here’s how the main types behave on a dresser in a small nursery.
| Organizer type | Best for | Watch out for |
|---|---|---|
| Open caddy with handle (fabric or felt) | Zone 2 on the dresser top. Portable, easy to carry to a night-changing spot. | Flimsy bases that tip when one side is heavy. Look for a stiff, flat bottom. |
| Wooden or bamboo tray caddy | A calm, neutral look. Sturdy and easy to wipe. | Can be heavy and take up more room than a fabric option. |
| Hanging side organizer | Dressers where a topper has a lip or frame that allows hooking. Only if it hangs outside the baby’s reach and stays still. | Not every topper allows hooking. Check before you buy. It may sway or be pulled, so skip it if it hangs beside the pad. |
| Stacked tiered shelf | Vertical storage in the back corner (Zone 4). | Tall shelves can be tippy. Keep light items only, and keep it out of baby’s reach. |
| Drawer dividers | Inside the top drawer. | Fixed-width dividers often don’t fit. Adjustable ones win. |
| Over-the-door or wall-mounted pockets | Walls next to the dresser. | Keep them away from the changing surface and out of reach of a mobile baby. |
Hanging organizers must be firmly attached with no loose straps or loops. Remove them once your baby is mobile.
My honest pick for most small nurseries is a sturdy open caddy for Zone 2 plus adjustable drawer dividers for Zone 3. It costs little and covers 90 percent of the job. A matching pair of caddies (one on the dresser, one stationed elsewhere) is a luxury, but a handy one, which I’ll get to in the night-change section.
What to look for in a caddy
- A stiff, flat bottom so it doesn’t slump.
- Compartments sized for real supplies. A deep section for a wipes pack, a wide section for diapers, and a few small pockets for cream and a pacifier.
- A carry handle. You’ll move it between the dresser and the glider.
- A wipeable surface. Newborn blowouts happen, and a caddy that can be sponged clean beats one that has to be washed.
- Neutral color and texture. Natural linen, felt, rattan, or light wood keep the nursery calm. A caddy in a bright print will make a small room feel cluttered.
Changing Table Organization Baskets: Which Ones, Where, and How Many
Baskets are the workhorse of changing station organization, and also the easiest thing to overbuy. In a small nursery, fewer, better baskets always beat a wall of mismatched ones.
The three-basket rule
For a dresser-topper setup, three baskets cover nearly everything:
- The daily basket (Zone 2). Diapers, wipes, cream. It stays on the dresser top.
- The “just in case” basket (Zone 3 or inside a drawer). Spare pad cover, a change of clothes, burp cloths, a muslin, a backup pacifier.
- The “soon” basket (a shelf or closet). The next size up in diapers, the next size up in clothes, and anything you’ll need within a month.
That’s it. Resist the urge to add a fourth until you’ve lived with these three for a week.
Basket materials compared
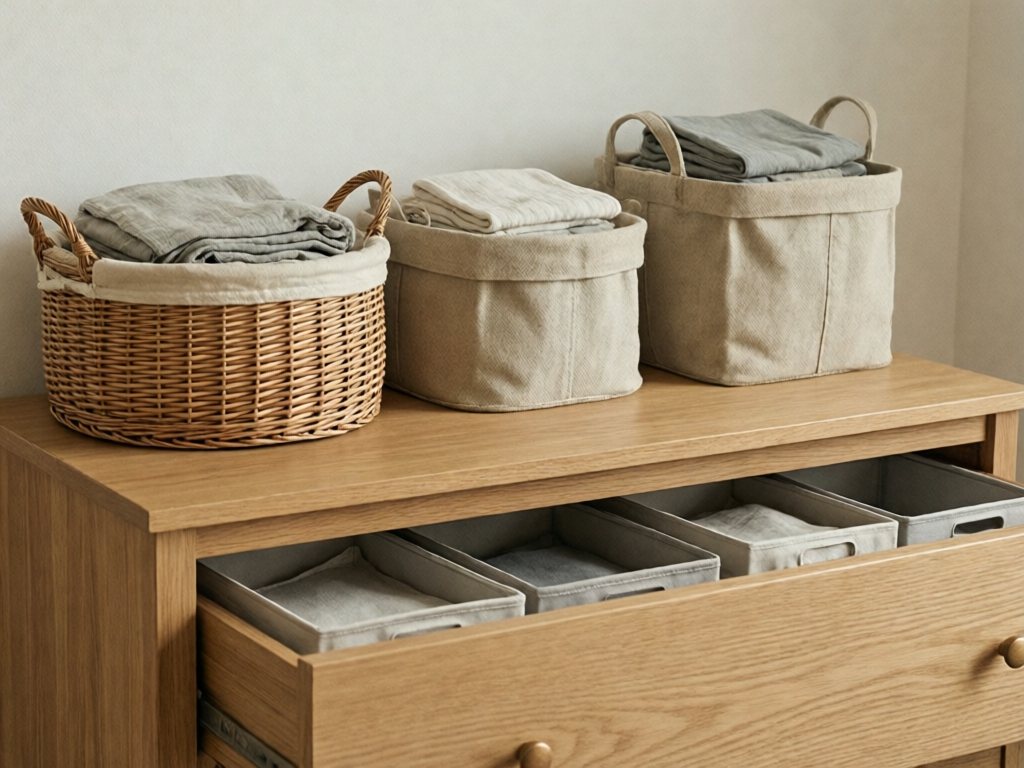
| Material | Pros | Cons |
|---|---|---|
| Woven seagrass or rattan | Warm, textured, looks great in neutral rooms | Can snag delicate fabrics. Not wipeable. Add a liner. |
| Felt or fabric | Soft, lightweight, collapsible | Stains show. Can lose shape. |
| Canvas with a stiff liner | Washable, structured | Plainer in look |
| Plastic bins | Wipeable, durable | Rarely beautiful. Hide them in drawers instead. |
| Wire baskets | Airy and visible | Can scratch surfaces and snag clothes. Use only with a liner. |
My rule: beautiful baskets on top, plain bins inside drawers. What the eye sees should feel intentional. What the drawer hides can be pure function.
Labeling baskets
A tiny label is not overkill for baskets, especially if a grandparent, partner, or babysitter is helping. Keep it simple: “Daily,” “Spare,” “Next size.” Use a neutral label, such as a small clothespin tag or a neat fabric tag, rather than anything loud.
Drawer Systems: Making the Dresser Do the Heavy Lifting
If the dresser top is your front line, the drawers are your reserve. A well-organized top drawer can cut your restocking time to a minute.
Top drawer: the changing drawer
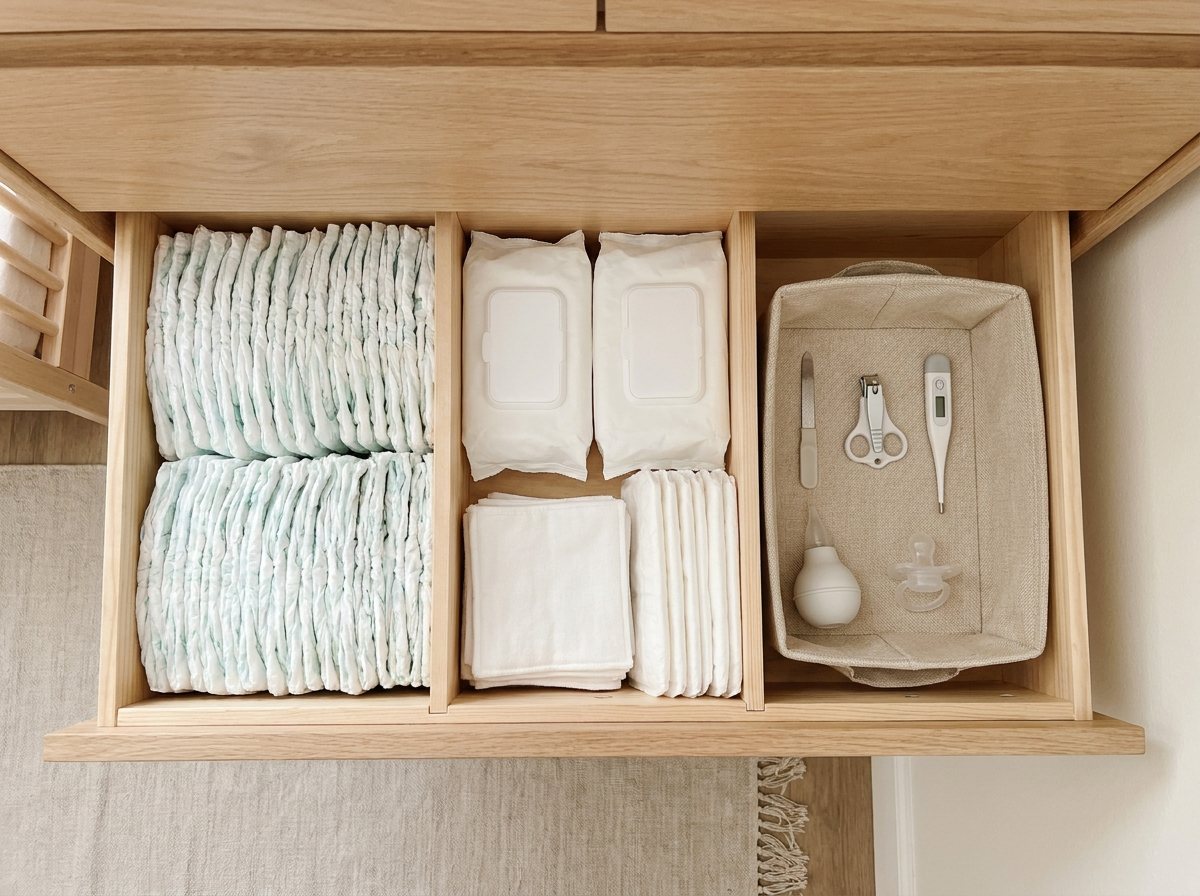
The top drawer is the most valuable real estate in the nursery. Treat it like a supply cabinet, not a clothing drawer.
Suggested layout with adjustable dividers:
| Section | Contents |
|---|---|
| Left third | Backup diapers in the current size, stacked flat or on edge |
| Center third | Extra wipes, spare pad covers folded flat, disposable pads |
| Right third | Small items in a shallow bin: nail file and clippers, thermometer, nasal aspirator, spare pacifiers |
Stack diapers on their side like files in a filing cabinet, so you can see the count at a glance and pull one without toppling the stack.
Second drawer: the clothing drawer
Keep the second drawer for the things you’ll need right after a change, which mostly means clothes. Newborns blow through outfits. When you need a fresh one, pick the baby up and take them with you to the drawer.
- Sleepers and onesies in the newborn and 0 to 3 month sizes, folded or file-folded.
- Swaddles and sleep sacks rolled.
- Socks and mittens in a small pouch so they don’t scatter.
If you’re curious how many pieces you actually need so the drawer isn’t stuffed, our guide on nursery essentials you actually need breaks down what earns its space in the first months.
Third drawer and below: the “next up” drawer
Use lower drawers for the next size up, seasonal items, and anything gifted that doesn’t fit yet. Label each drawer front with a small tag: “Newborn,” “3 to 6 months,” and so on. When size changes happen, you move a bin instead of rummaging.
For wider ideas on making a whole small nursery work, including closet and shelf strategies, see our guide to nursery organization in small rooms.
What to Stock: A Realistic Newborn List
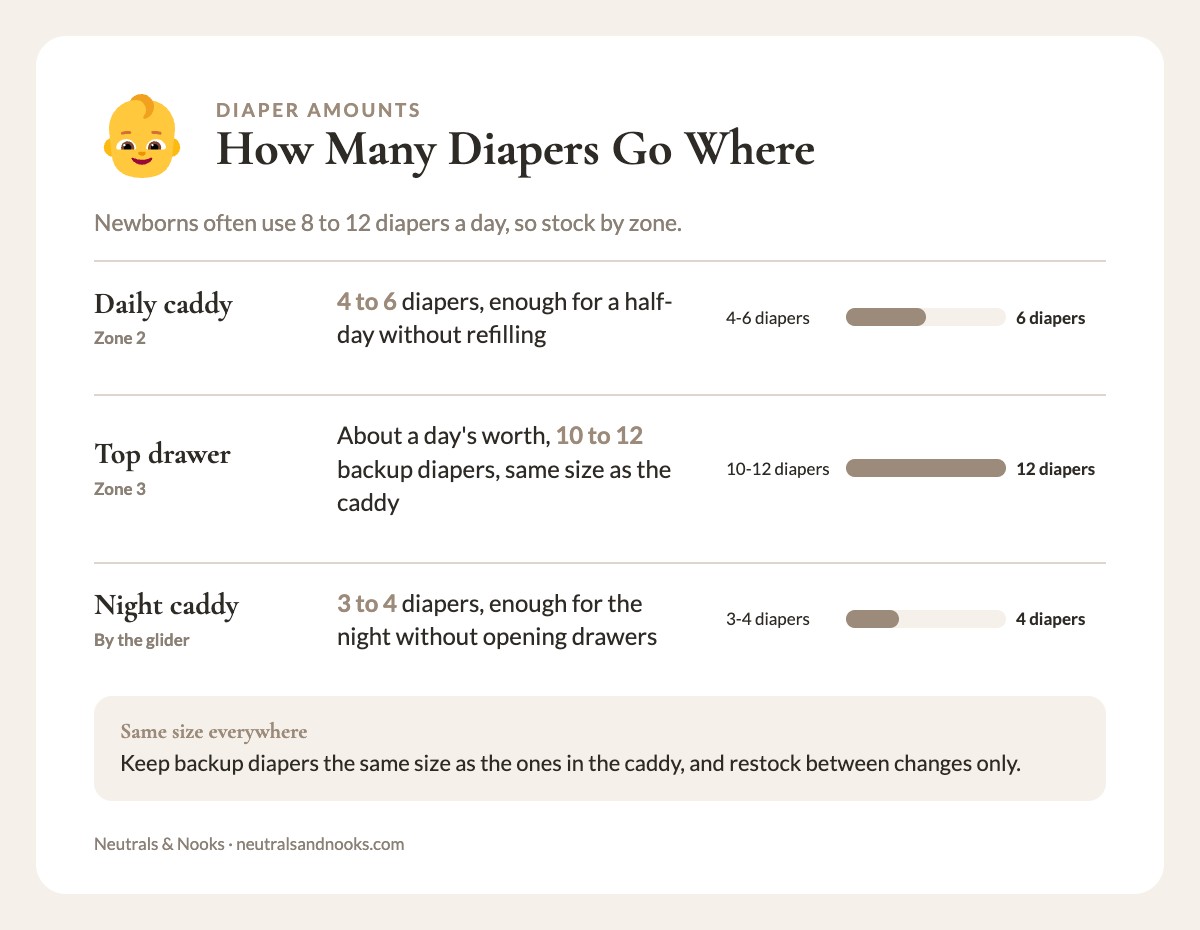
Newborns go through diapers quickly, often eight to twelve a day in the early weeks, so your stocking list should be built around speed, not storage volume. Here’s a practical starting point.
Zone 2 (daily caddy)
| Item | Quantity | Notes |
|---|---|---|
| Clean diapers | 4 to 6 | Enough for a half-day without refilling |
| Wipes | 1 dispenser or pop-up pack | A pop-up pack works one-handed |
| Diaper cream or barrier ointment | 1 tube | Keep the cap on and the tube upright |
| Muslin or small cloth | 1 | For unexpected moments |
| Small trash solution | 1 | A lidded pail nearby or a small sealed bag system |
Zone 3 (top drawer)
| Item | Quantity | Notes |
|---|---|---|
| Backup diapers | One day’s worth, about 10 to 12 | Same size as the caddy |
| Extra wipes | 1 to 2 packs | Open one at a time |
| Spare pad covers | 2 | Rotate with the one in use |
| Disposable changing pads | 3 to 5 | For blowouts and travel |
| Change of clothes | 2 to 3 outfits | Closest to where you’ll need them |
| Burp cloths | 3 | They double as quick cleanup |
Back-corner and top drawer extras (Zone 4)
| Item | Quantity | Notes |
|---|---|---|
| Spare tube of cream | 1 | Out of reach of baby |
| Gentle body wash | 1 | Top drawer, for mini wash-ups |
| Nail file or baby clippers | 1 | Nail file only on top; clippers go in the top drawer |
| Thermometer | 1 | Top drawer, easy to find |
Once your baby is rolling (around 4 to 6 months), move wash, cream and small items into a closed drawer or high cabinet.
A quick note on diaper cream: the best option for your baby depends on their skin, and your pediatrician can guide you if you notice redness or a rash that doesn’t clear up. For the organization side, just make sure whatever you choose has a permanent home in the caddy.
Night Changes: The Dim, Quiet Version of Your Station
Night changes are where a thoughtful system pays for itself. You’re tired, the room is dark, and the goal is to keep the baby calm and mostly asleep.
Safe sleepAlways lay your baby on their back to sleep on a firm, flat surface. Stop swaddling when your baby shows signs of trying to roll, often around 2 months. Keep loose blankets, bumpers and soft items out of the crib. Ask your pediatrician if unsure.
A night-light that doesn’t wake anyone
- Use a warm, dim, low-level night-light placed so it lights the changing surface but doesn’t shine in the baby’s eyes.
- Avoid bright overhead lights. A plug-in or battery LED night-light with a warm glow, placed across the room or high on a wall, works well.
- Keep the night-light out of the baby’s reach and away from fabric.
- Keep all cords at least 3 feet from the crib and out of reach of the changing surface. Prefer cordless or cool-running LED night-lights, and never put a corded lamp on the changing dresser.
The night caddy
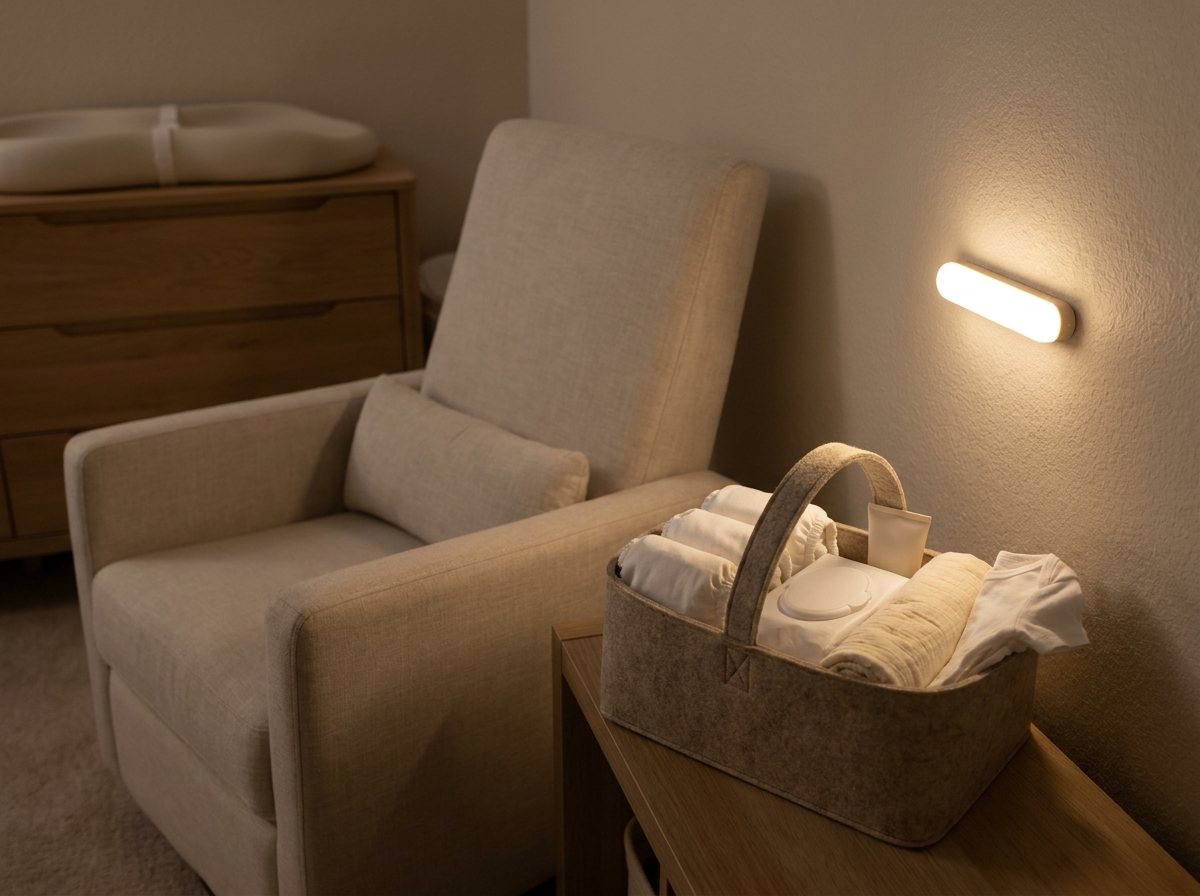
If your dresser top is crowded, make a second, smaller night caddy that lives on a nearby shelf or by the glider:
| Item | Why |
|---|---|
| 3 to 4 diapers | Enough for the night without opening drawers |
| 1 pop-up wipes pack | One-handed |
| 1 small tube of cream | Cap on, tube upright; store out of reach once your baby is mobile |
| Swaddle or sleep sack (see safe-sleep note) | So you can re-wrap quickly |
| 1 spare onesie | For leaks |
The night caddy is a lifesaver at 2 a.m. You restock it during your evening reset and don’t have to think about it overnight.
Quiet-closing drawers
Drawers that slam or squeak wake babies. Test yours. If they’re loud, add felt pads to the drawer bumpers, or use soft-close slides. Even a tiny rubber bumper at each corner reduces the noise.
Layouts for Tiny Rooms: Where the Dresser Goes
Where you put the dresser matters nearly as much as what goes on it. Here are layouts that work in small rooms.
| Layout | How it works | Best for |
|---|---|---|
| Dresser along the longest wall | Plenty of room to stand and move. Crib on an adjacent wall. | Rooms at least 9 feet in one direction |
| Dresser in a corner | Wall on one side limits your standing room, but saves floor space. | Very tiny rooms |
| Dresser beside the closet door | Use the closet interior for backup supplies. | Rooms with a shallow closet |
| Dresser at the foot of the crib | Keeps your path short between crib and changing surface. | Rooms where the crib must be against a short wall |
| Dresser in a parents’ bedroom | Skip the nursery dresser setup entirely for the first months. | Shared-room babies |
Make room to stand
Whatever layout you choose, you need clear standing room in front of the dresser. Roughly two feet of open floor lets you stand comfortably, shift your weight, and avoid backing into the crib. If the room can’t give you that, pull the dresser out an inch or two or move the glider so it isn’t blocking. If the crib placement is what’s crowding you, our guide to nursery layouts when the crib isn’t against a wall has options.
If the nursery doubles as a guest room
Many small-home families put the nursery in a room that still has to host guests. If that’s you, see our guide to the guest room nursery combo for ideas that keep both functions working. The dresser-topper setup is especially helpful there, since you can pull the topper and the caddy off when guests arrive and the dresser still looks like a dresser.
The Restocking Routine That Keeps the System Alive
Even the best system collapses if it’s never refilled. Make restocking a tiny habit rather than a chore.
The 60-second reset
At the end of each day, do this in about a minute:
- Pull the used burp cloths and muslins to the laundry.
- Refill Zone 2 from the top drawer.
- Wipe down the changing pad.
- Check the night caddy.
That’s all. If the top drawer gets low, make a note on your phone or a small list inside the closet door so you reorder before you run out.
The weekly reset
Once a week:
- Wash the changing pad cover.
- Check diaper size. If the baby is growing fast, pull the next size into the top drawer.
- Toss dried-out or smelly wipes and any cream past its expiration date.
- Re-stack the drawers so labels face front.
The one-backup-pack rule
Never let a supply drop below one backup pack. When you open the last backup pack of wipes or diapers, add it to your list. A calm nursery depends on never being the person who ran out at 4 a.m.
Common Mistakes (and Easy Fixes)
| Mistake | Why it happens | Fix |
|---|---|---|
| Putting everything on the dresser top | It looks cute in photos. | Move 80 percent to drawers. Keep only Zone 2 on top. |
| Caddy too far from your dominant hand | You set it up before you tried a real change. | Move it to your working side. |
| Wipes in a drawer | They fit better there. | Wipes live in Zone 2, always. |
| No trash plan | Forgot until the first real change. | Put a lidded pail directly beside where you stand, reachable with one hand or a foot pedal. |
| A topper that overhangs | Wrong size. | Replace it with a topper that fits within the dresser top. |
| Open shelves above the changing surface | Wall space is precious. | Move shelves to a side wall, away from the changing area. |
| Too many tiny items | Gifts accumulate. | Use a “one in, one out” rule in the “just in case” basket. |
| Skipping the wall anchor | Renting, or it seems unnecessary. | Anchor it, and re-check it now and then. |
A Sample Setup, Start to Finish
Here’s what a complete, realistic setup looks like in a nursery about ten feet by nine feet. It’s the setup I’d build again if I were starting over.
| Zone | What goes there | Safety note |
|---|---|---|
| The furniture | A 36-inch, three-drawer dresser on the long wall, with a contoured changing pad on top (about 38 to 40 inches at the pad) | Anchored to the wall; topper mounted to the dresser; strap used as a backup |
| Dresser top (Zone 2) | One linen-lined felt caddy beside the pad with five diapers, a pop-up wipes pack, a tube of barrier cream and a folded muslin; a small lidded pail on the floor beside where you stand | Cream cap on, tube upright |
| Back corner (Zone 4) | A tiny lidded basket with a nail file and a spare cream | No lamp or cords; move out of reach once your baby rolls |
| Top drawer (Zone 3) | Adjustable dividers: backup diapers on edge, extra wipes and spare pad covers, and a shallow bin with clippers, thermometer and aspirator | Restock between changes only |
| Second drawer | Newborn and 0 to 3 month sleepers folded in thirds, swaddles rolled alongside | See the safe-sleep note before swaddling |
| Third drawer | The next size up, labeled, plus a bin of burp cloths | None |
| Side wall | A single lightweight framed print, hung well off to one side | Nothing above the changing surface |
| Night caddy | A smaller felt caddy on the shelf next to the glider, restocked each evening, with a plug-in LED night-light across the room | Cords 3 feet or more from the crib |
The result is a calm nursery. Every change takes one hand-reach per item, with nothing to fetch from across the room.
Making It Look as Good as It Works
A functional changing station can look calm if you edit.
- Limit the palette. Choose two or three tones: warm white, natural wood, soft oat or sage. Repeat them in the caddy, baskets, and pad cover.
- Decant sparingly. Pouring cotton balls into a glass jar looks nice, but it adds steps. Only decant things you use slowly.
- Tame the brand colors. Bright packaging on diapers and wipes is the loudest thing in a nursery. Decant nothing, but choose a caddy compartment that tucks packaging out of sight. Wipes stay in Zone 2.
- Leave negative space. A single clear stretch of dresser top does more for the room’s mood than any decor piece.
- Pick one texture accent. A woven basket, a wool throw on the glider, or a linen caddy. One is enough.
Frequently Asked Questions
How do I organize a changing table dresser when I have almost no counter space?
Keep only what you use on every change on the top: diapers, wipes, and cream, in one caddy. Everything else moves into the top drawer, behind the dresser, or into the closet. The less you have on the surface, the more room you have to work, and the easier it is to keep a hand on the baby. If the caddy still feels crowded, move the cream into the drawer and bring it out only when needed.
What is the best changing table organizer for a dresser?
For most small nurseries, a sturdy open caddy with a flat, stiff base and a carry handle works best. It sits on the dresser top, holds a day’s worth of supplies, and can be carried to a chair for night changes. Pair it with adjustable drawer dividers inside the top drawer for backup stock. Always check that the organizer’s weight limit suits what you plan to store, and avoid any hanging organizer that doesn’t clearly fit your topper’s design.
How many diapers should I keep at the changing station?
A good starting point is four to six in the caddy and about a day’s worth, roughly ten to twelve, in the top drawer. Newborns often use eight to twelve diapers a day, so that’s about half a day in the caddy, about a day in the drawer, and about a day and a half to two days in total. As your baby settles into a routine, you can adjust these numbers up or down based on what you actually use.
Do I need to anchor a dresser if I only use it for a newborn?
Yes. Anchoring protects against tip-over, and a dresser topped with a changing pad, a caddy, and a baby carries extra weight high up. The anchor also keeps you safe when you pull drawers open to grab supplies. Use the anti-tip hardware that came with your dresser. Anchor into a stud where you can, or use anchors rated for your wall type, and re-check it every few months. Renters should ask the landlord first.
Where should I put the diaper trash near a dresser changing station?
Place a lidded pail directly beside where you stand, reachable with one hand or a foot pedal without taking a step, so you never leave the baby’s side. Avoid putting it directly under the changing surface where it might be bumped. If the floor is tight, a wall-mounted or door-mounted option can work, as long as it is out of the baby’s reach as they grow.
How do I handle night-time diaper changes without waking the baby fully?
Use a warm, dim light rather than the overhead light, and keep a small night caddy with three or four diapers, wipes, and cream within reach of your glider or the dresser. Having everything in one place keeps you quick and quiet. See the quiet-closing drawers tips above to keep the noise down.
What should I do with the changing station once the baby outgrows the changing pad?
Stop using the elevated pad once your baby reaches the pad’s weight limit or is rolling, squirming or climbing too much to change safely. From then on, change them on a floor pad or another low, flat surface. This is where the dresser-topper approach pays off: remove the topper and the caddy, and you have a regular dresser. Move the diaper supplies to wherever you now change, and shift clothing into the top drawer. Neutral baskets and bins usually find a second life holding toys, books, or socks.
You Don’t Need a Bigger Nursery, Just a Better Arm’s Reach
A small nursery is not a problem to be solved with more furniture. It’s a room asking you to be thoughtful. If you take one thing from this guide, let it be the zone map: keep the daily caddy within one forearm’s reach of your working hand, put backups in the top drawer, and leave everything else quiet.
Set it up this weekend, do a dry run with a rolled towel, and adjust anything that makes you hesitate. By the time your baby arrives, the system will feel like second nature, and those 3 a.m. changes will go a little smoother.