Allergy-Safe Pantry Organization: Free Printable Zone Labels
Organize your pantry for food allergies with a free, six-zone, color-coded system. You'll get printable labels and a checklist to ensure anyone can easily find safe foods.
- Implement a 6-zone, color-coded system for your allergy-safe pantry.
- Download free printable labels, a shelf-zoning checklist, and pantry layouts.
- Ensure anyone can easily identify safe foods, reducing confusion and risk.
- Organize your pantry in one afternoon with low cost.
This post contains affiliate links. As an Amazon Associate I earn from qualifying purchases.
This is a six-zone, color-coded system for an allergy-safe pantry. You get free printable labels, a shelf-zoning checklist, and layouts for any size of kitchen. It moves the answer to “which food is safe?” out of your head and onto the shelves, so a grandparent, a sitter, or a tired you at 6 p.m. can find it without a briefing.
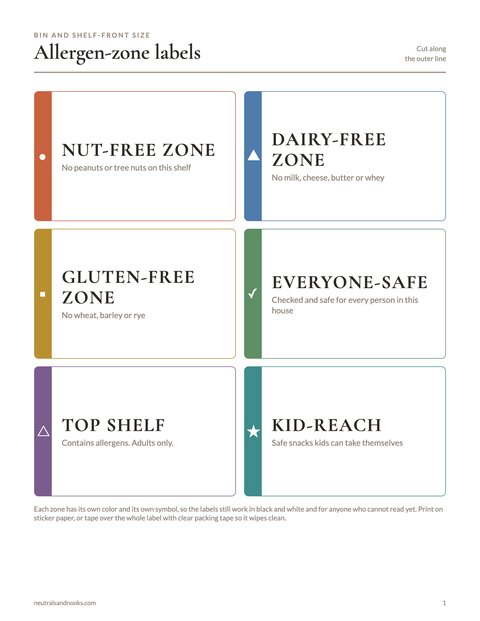
Free printable · 3 pages
Allergy-Safe Pantry Zone Labels
Six color-and-symbol coded zone labels in bin size and shelf-edge size, a household allergen card for the pantry door and a shelf-zoning checklist.
Free. Your download link appears right here. You'll also join the Monthly Home Reset. Unsubscribe anytime. Privacy
In this article (14 sections)
- Why an Allergy Pantry Needs Zones, Not Just Labels
- Before You Touch a Shelf: Decide Your Household’s Rules
- The Six Pantry Zones, Explained
- The Free Printable Zone Labels
- The Shelf-Zoning Checklist
- Mapping Zones to Your Real Pantry
- Cross-Contact: The Small Habits That Matter More Than the Shelves
- The Kid-Reach Shelf: Independence Without Risk
- Grandparents, Sitters, and Guests: The System Everyone Can Read
- Reading Labels Well: The Step Behind Every Zone
- Keeping It Working: A Monthly Reset
- A Few Gentle Words on the Emotional Side
- Frequently Asked Questions
- A Calm Shelf, A Calmer Kitchen
Why an Allergy Pantry Needs Zones, Not Just Labels
A friend once came home to find her mother-in-law holding two granola bars, unsure which was safe for her son’s tree nut allergy. One had almonds in it. Both were in the same bin. Nobody was hurt, and no one was careless. The pantry simply had no way to tell a well-meaning grandparent anything.
Most pantry advice focuses on looks: matching bins, tidy rows, a pretty label maker font. I love all of that, and a calm pantry is a pleasure to open. But an allergy pantry has a different job. It is a safety tool first, and the aesthetics are there to make the safety system easy to follow.
Plain item labels (“crackers,” “oats,” “pasta”) sort food by type. Allergy zones sort food by who it is safe for. Those are different questions, and during a busy meal you need the second one answered first.
Here is what zoning does that item labels cannot:
- It answers the question before it is asked. A caregiver does not have to read twelve ingredient lists to find something safe. They look for the green zone.
- It reduces decisions. Allergy management is already a heavy mental load. Every decision you remove from the daily routine is one less place for an error to slip in.
- It makes the rules visible to kids. A child who can read a color or a symbol can begin to understand their own boundaries long before they can read a label.
- It works when you are not there. This is the real test. A system only you can operate is not a system.
If you want the broader foundation first, our family pantry organization system covers the basics of shelf layout, containers, and flow. This post sits on top of that foundation and adds the safety layer.
Safety firstZoning is a storage and communication system, not a safety guarantee. A shelf label does not make a food safe, because ingredients and facilities change. Every new product still gets its label read before it earns a place in a safe zone, even one you have bought a dozen times. Keep following your allergist’s guidance, and keep your emergency action plan posted and understood by every caregiver.
Before You Touch a Shelf: Decide Your Household’s Rules
The most common reason allergy pantries fail is that the rules were never written down. Before you buy a single bin, answer a few questions. This takes about twenty minutes and it shapes everything else.
Question 1: Who in the household has which allergies?
Write it out, even if it feels obvious. Include the allergen, the severity as your doctor has described it, and any related foods your allergist has flagged (for example, whether a child avoids all tree nuts or only specific ones). If you are unsure about any detail, that is a question for your allergist, not something to guess at while organizing.
Question 2: Does the allergen live in the house at all?
This is the biggest fork in the road, and families land in different places for good reasons.
| Household approach | What it means | Pantry implication |
|---|---|---|
| Allergen-free home | The allergen is never brought into the house. | Fewer zones needed. Focus on label discipline and guest guidance. |
| Allergen-contained home | The allergen is allowed for other family members, but kept in a defined place. | A strict separation system is essential. This is where zoning matters most. |
| Allergen-limited home | The allergen is allowed only in certain forms or rooms. | A hybrid, with clear “never in this area” boundaries. |
None of these is the “right” one. A family with a severe peanut allergy and a toddler may choose an allergen-free home. A family with a teen who loves almond butter and a younger child with a milder dairy allergy may choose containment. Ask your allergist if you are unsure. What matters is that everyone who touches the kitchen knows which approach you have chosen.
Question 3: Which allergens need their own zone?
The six labels in this post cover the most common needs, but you may only need some of them. A household managing only a nut allergy might use nut-free, everyone-safe, contains-allergens, and kid-reach, and skip the others. A household juggling a dairy allergy and celiac disease may need most of the set. Use what fits and leave the rest in the drawer.
Question 4: Who needs to read this system?
Make a short list: the adults who live here, the kids old enough to grab their own snacks, the grandparents, the regular babysitter, the neighbor who sometimes picks up after school. The system has to be understandable to the least informed person on that list, not the most. If a visiting aunt would be confused by it, simplify it.
The Six Pantry Zones, Explained
Here is the full set. Each zone has a color, a plain-language name, and a rule. I have chosen soft, muted colors that sit comfortably in a neutral kitchen, but the system does not depend on color alone. Each label also carries a word and a symbol, so it works for anyone who is colorblind and for a quick glance in poor light.
| Zone | Color | Symbol | The rule |
|---|---|---|---|
| Nut-Free | Warm clay | ◆ | Only items verified free of peanuts and tree nuts (whichever your household avoids), in closed, lidded bins stored away from nut products. |
| Dairy-Free | Soft blue | ● | Only items verified free of milk ingredients, including hidden sources like whey and casein. Kept in closed, lidded bins. |
| Gluten-Free | Wheat gold | ▲ | Only items verified gluten-free, ideally certified, in closed, lidded bins stored above or apart from wheat products. |
| Everyone-Safe | Sage green | ★ | Items free of every allergen your household manages. The “start here” shelf. |
| Contains Allergens | Slate gray | ▼ (reversed) | Items containing an allergen, sealed, kept apart from and never above the safe zones, behind a child-proof latch. Adult-only. |
| Kid-Reach | Blush | ○ | Pre-approved snacks a child may take without asking. Drawn from Everyone-Safe, or verified safe for each child who uses the shelf. |
Let me walk through how each one works in practice, because the details are what make the system hold up.
Everyone-Safe: the shelf that does the heavy lifting
If you only set up one zone, make it this one. The everyone-safe shelf is where you keep food that is free of all the allergens in your home. It is the answer to “what can I give them?” from any caregiver.
The key discipline is that this shelf has a strict entry rule: nothing goes here unless it passes every allergen check for every person. A granola bar that is nut-free but contains milk does not belong here if someone avoids dairy. It belongs in the nut-free zone instead. Keeping this rule rigid is what lets everyone trust the shelf without thinking.
Single-allergen zones: nut-free, dairy-free, gluten-free
These zones hold food that is safe for one specific allergy but may not be safe for others. They are useful when household members have different needs, or when you want to give a child with only one restriction a wider range of choices.
A practical example: a household with one child avoiding nuts and another avoiding dairy. Oat bars that are nut-free but contain milk go in the nut-free zone. Fruit leather that is dairy-free but processed alongside tree nuts goes in the dairy-free zone. Plain oat cereal rings that are free of both live in everyone-safe.
That example is also why these zones need careful storage. The nut-free oat bars contain milk, so they are not safe for the child avoiding dairy. Single-allergen zones usually go up high, out of reach of the child they are not safe for, which puts them above the safe shelves. So they live only in closed, solid-bottom, lidded bins. The rule: nothing sits above Everyone-Safe or Kid-Reach unless it is sealed.
Contains Allergens: the contained zone
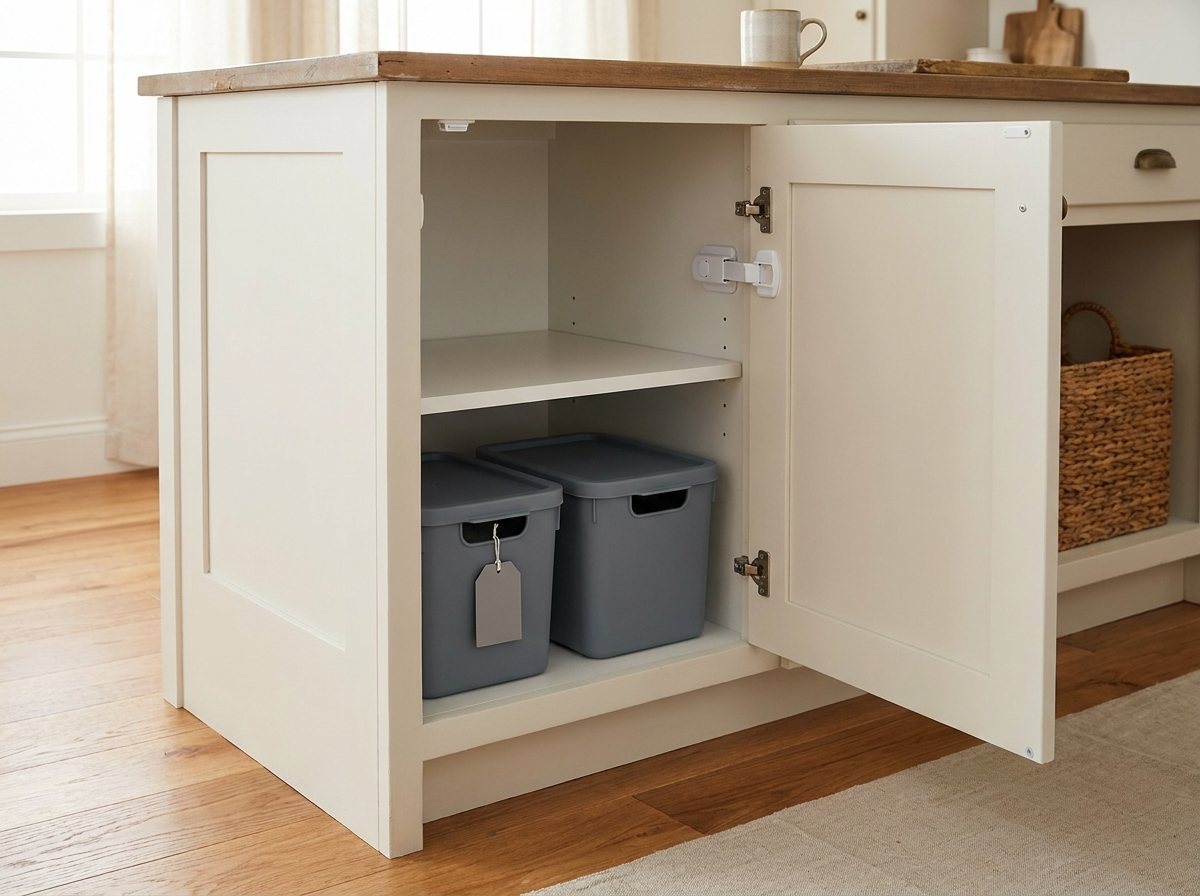
This is the place for foods that contain an allergen, in households where those foods are allowed. Two things make this zone work. First, it is physically separate. A separate closed cabinet is best, or the lowest shelf in sealed, solid-bottom, lidded bins. Spills and crumbs travel down, so allergen items never sit above safe food.
Second, a child cannot get into it. The lowest shelf is the one a toddler reaches first, and a lidded bin does not stop small hands. So the allergen cabinet gets a child-proof latch. If the allergen bins share the bottom shelf of a reach-in pantry, latch the pantry door itself.
Either way, keep the kid-reach bin on its own shelf, never beside the allergen bins. If you are choosing latches, our baby-proofing guide is a good place to start.
Some families prefer to move the contained zone to a completely different cabinet or even a different room. If you have the space, that is an even stronger boundary.
Kid-Reach: autonomy within safe limits
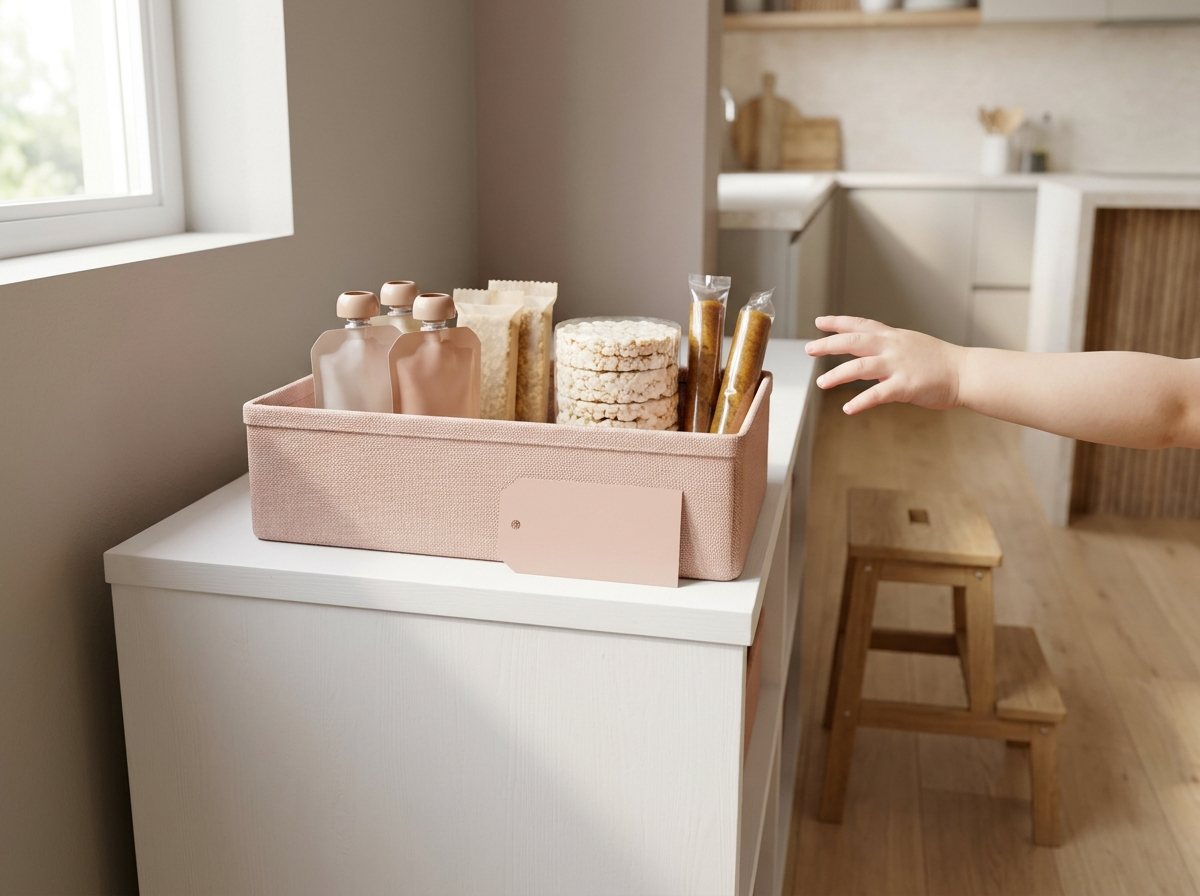
This is my favorite zone, because it gives children something they love: independence. The kid-reach shelf sits low, on its own shelf away from the allergen bins. It holds a small set of pre-approved snacks drawn only from Everyone-Safe, or from items verified safe for each child who uses it. Choosing their own snack helps a child feel capable, and it frees you from answering every request. For children under 4 this is supervised self-serve: an adult is present and the child is seated.
The rule that makes this safe is that nothing goes in the kid-reach zone unless an adult has already verified it as safe for every child who uses the shelf. A child grabbing from this shelf is making a choice among options you already approved.
The Free Printable Zone Labels
Here is the label set. Print this section on cardstock or sticker paper, cut along the borders, and attach to the shelf edge, a bin front, or a small clip frame. If you laminate them or use clear packing tape over the top, they will survive years of kitchen life.
A note on printing: use your browser’s print function and choose “actual size” or 100% scale. Each label is designed to be roughly 3.5 by 2 inches when printed at standard scale, which fits most shelf edges and bin fronts.
Making the labels your own
Feel free to edit the text to match your household. If your child avoids sesame, egg, or soy, rename a label to fit. Some families write the child’s name on the kid-reach label. Others add a small line such as “Checked by Mom/Dad” with a date. A blank corner for a handwritten “last checked” date is a good habit, and I will come back to why in the maintenance section.
Where to attach them
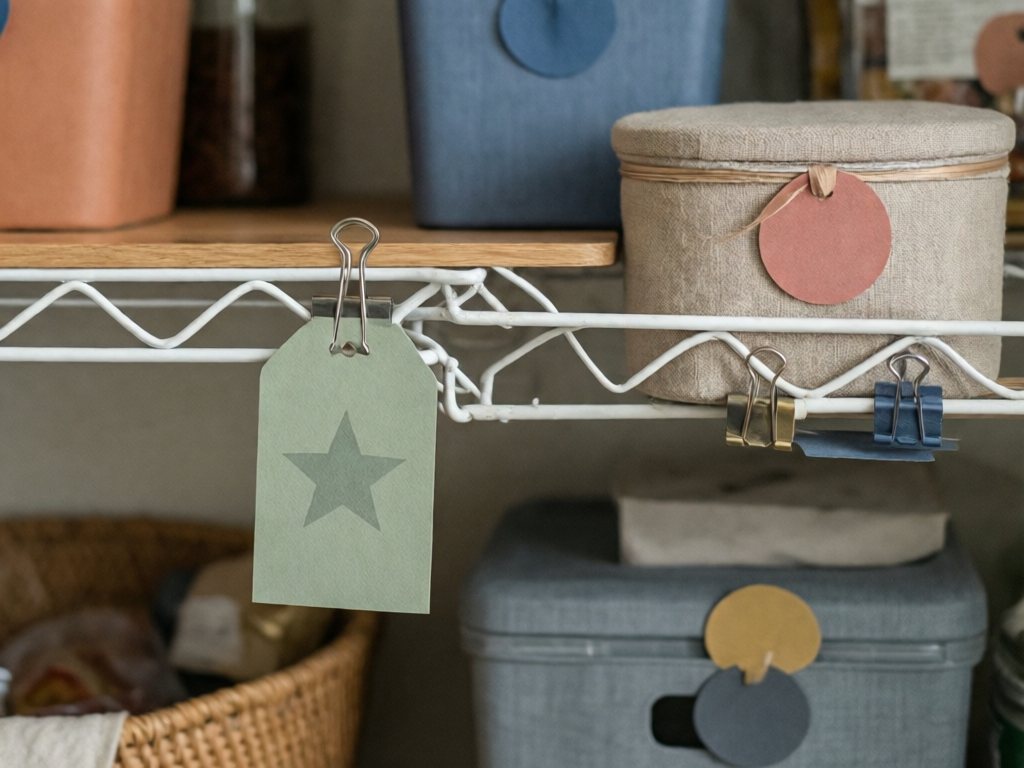
| Surface | Best label type | Why it works |
|---|---|---|
| Wire shelf edge | Clip-on label holder | Slides and repositions as the shelf changes |
| Solid shelf lip | Sticker or washi-backed paper | Sits flush and wipes clean |
| Bin or basket front | Cardstock in a slot or on a ribbon tag | Moves with the bin |
| Cabinet door interior | Tape or removable adhesive | Visible when opened, tidy when closed |
| Pantry door (map) | Full set arranged as a legend | Shows the whole system at once |
If you have a label maker you already love, you can use it, but I recommend keeping the color element. A black-and-white label is readable, but a color block is readable in half a second, which is the whole point.
The zone labels tell you who a shelf is for. For naming what is inside each bin, our pantry label system printable sits alongside them.
The Shelf-Zoning Checklist
Work through this list in order. It is built so you can complete it in one afternoon or spread it over a weekend. Print it, check the boxes, and keep it somewhere you can find it for your monthly reset.
Phase 1: Prepare (about 20 minutes)
- Write down each person’s allergens and your household approach (allergen-free, contained, or limited).
- Decide which of the six zones you actually need.
- Clear a wide counter or table to hold everything you will remove.
- Gather supplies: wipes, trash bag, bins, label materials, and a marker.
Phase 2: Empty and sort (about 45 minutes)
- Take everything out of the pantry. All of it.
- Wipe down every shelf. Crumbs and residue are part of the cross-contact picture.
- Check expiration dates and discard anything expired or unidentifiable.
- Read the ingredient list and allergen statement on every package you plan to keep. Do not rely on memory.
- Sort items into piles: everyone-safe, single-allergen safe, contains allergen, and unsure.
- For anything in the “unsure” pile, check the manufacturer’s website or contact them, or set it aside in the contains-allergens zone until you know.
Phase 3: Assign zones (about 30 minutes)
- Choose the eye-level shelf for everyone-safe.
- Choose a low shelf for kid-reach, drawing only from Everyone-Safe or items verified for each child who uses it. Keep it on a different shelf from any allergen bins.
- Choose a separate cabinet with a child-proof latch for contains allergens. If you use the pantry’s lowest shelf instead (in sealed, solid-bottom, lidded bins), put a child-proof latch on the pantry door.
- Place single-allergen zones (nut-free, dairy-free, gluten-free) on the upper shelves, in closed, solid-bottom, lidded bins only.
- Confirm that nothing sits above Everyone-Safe or Kid-Reach unless it is sealed in a closed, solid-bottom, lidded bin. Contains-allergens items sit below everything else, where they cannot drip or spill onto safe food.
Phase 4: Contain and label (about 30 minutes)
- Put loose items in bins, baskets, or lidded containers so zones have clear edges. Single-allergen and contains-allergens items go only in closed, solid-bottom, lidded bins.
- Attach a zone label to every shelf and bin.
- Put open packages in sealed containers and keep the original label or allergen information with them (a photo of the label taped inside the lid works well).
- Separate shared-use items, such as jars and spreads, into the correct zone or replace with dedicated versions.
Phase 5: Make it readable to others (about 15 minutes)
- Post the zone legend inside the pantry door or on the fridge.
- Walk one other adult through the system and ask them to tell you what each zone means without your help. Where they hesitate, simplify.
- Add the caregiver cheat card (see the grandparents section) to your command center or fridge.
- Make sure your emergency action plan and medication locations are visible and known to every caregiver.
Phase 6: Set a rhythm (ongoing)
- Put a monthly “zone check” on your calendar.
- Decide who is responsible for putting groceries away into the correct zones.
- Agree on a rule that new products get their label read before they get a shelf.
Mapping Zones to Your Real Pantry
Pantries come in a few shapes, and the same six zones fit each one differently. Find yours below.
The reach-in pantry or tall cabinet
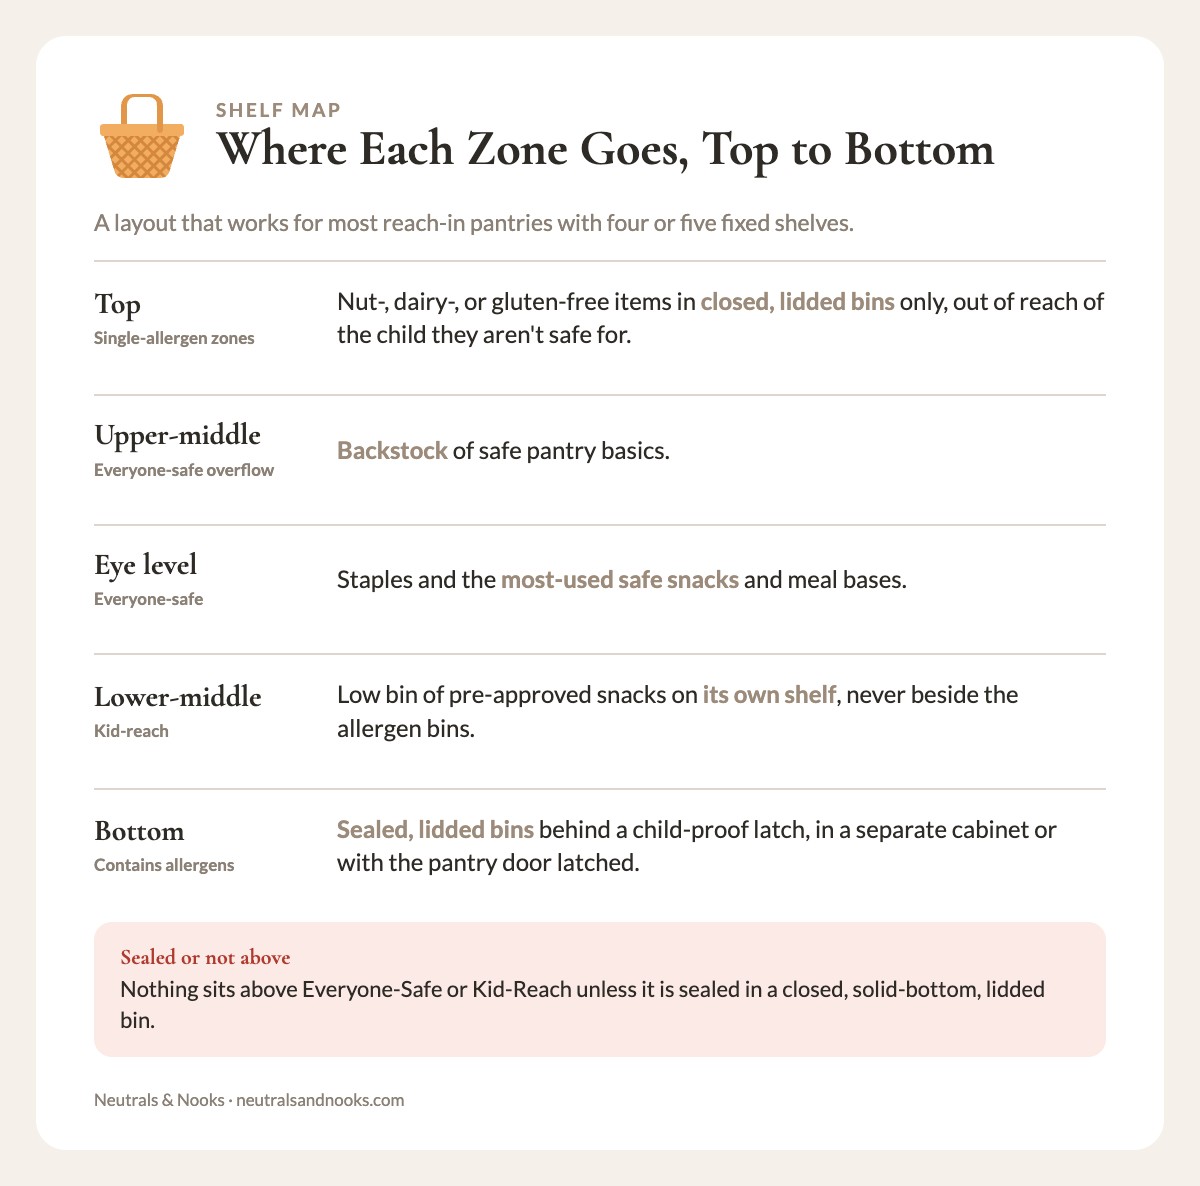
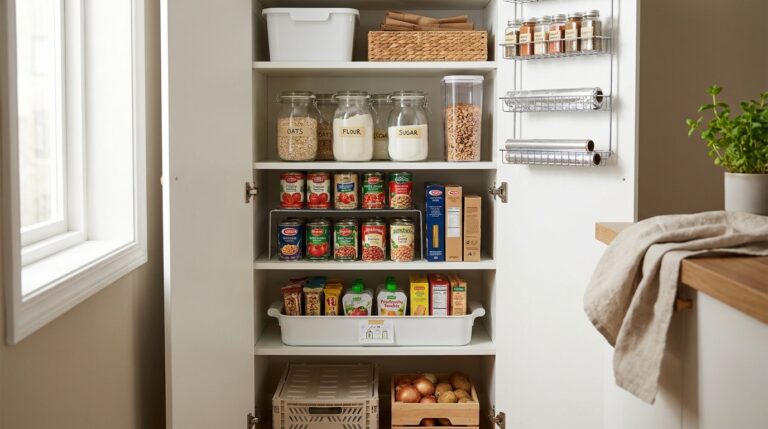
This is the most common setup: a cabinet with four or five fixed shelves. Here is a layout that works for most families.
| Shelf (top to bottom) | Zone | What lives there |
|---|---|---|
| Top | Single-allergen zones | Nut-free, dairy-free, or gluten-free items, only in closed, solid-bottom, lidded bins, out of reach of the child they are not safe for |
| Upper-middle | Everyone-safe overflow | Backstock of safe pantry basics |
| Eye level | Everyone-safe | Staples and the most-used safe snacks and meal bases |
| Lower-middle | Kid-reach | Low bin of pre-approved snacks on its own shelf, never beside the allergen bins; seated snack time |
| Bottom (or separate cabinet) | Contains allergens | Sealed, solid-bottom, lidded bins behind a child-proof latch, on the separate cabinet or on the pantry door itself |
The allergen zone sits at the bottom for a practical reason: spills, drips, and crumbs travel down, so the food with the most allergens belongs below everything else. Anything that could shed crumbs, like crackers, bread, or cereal containing an allergen, stays in a closed, solid-bottom bin.
The top shelf needs the same care. Single-allergen food can still contain another allergen in your home, like the nut-free oat bars made with milk. It sits up high to stay out of reach of the child it is not safe for, so it goes only in closed, solid-bottom, lidded bins.
Safety firstTwo rules hold this layout together. Nothing sits above Everyone-Safe or Kid-Reach unless it is sealed in a closed, solid-bottom, lidded bin. And because the bottom shelf is the easiest one for a toddler to reach, the allergen bins need a child-proof latch. A separate latched cabinet is best. If the allergen bins stay on the pantry’s lowest shelf, latch the pantry door. That makes kid-reach an adult-opens-the-door shelf, which suits children under 4 anyway. For older kids who serve themselves, move the allergen bins to their own latched cabinet so the pantry can stay open.
The walk-in pantry
A walk-in gives you the luxury of walls, and walls are great for zoning. Assign one wall or one side to the contained zone and the opposite side to the safe zones. A physical gap between them is more reliable than a label.
Because the allergen wall faces the safe one, its bins can sit on the upper shelves, out of a child’s reach, without being above any safe food. If they have to go low, latch the pantry door. Single-allergen bins on the safe side follow the same rule as in a reach-in: sealed, and never open above Everyone-Safe or Kid-Reach.
In a walk-in, you can also afford a dedicated “safe counter”: a shelf or small table surface used only for preparing safe snacks, so there is no question about what has touched it.
The small pantry or no pantry at all
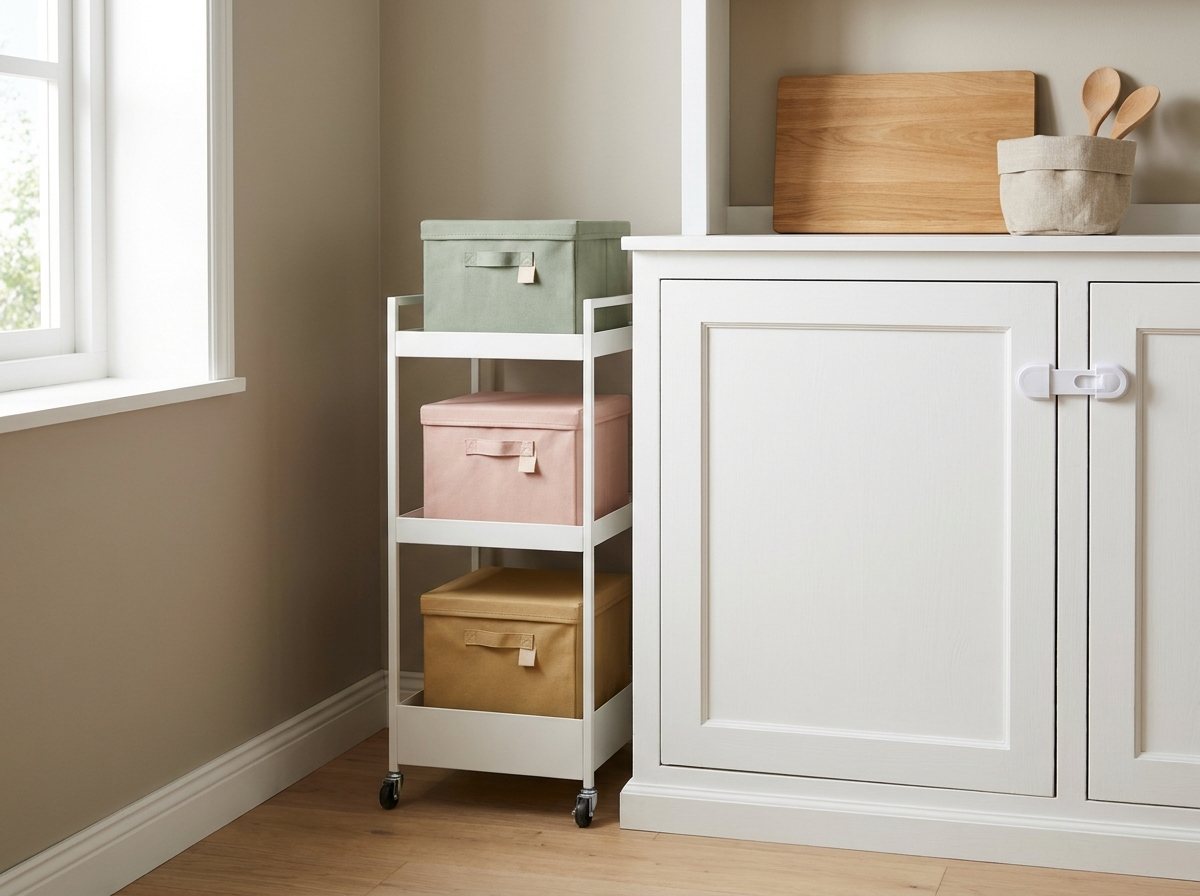
Many of us do not have a real pantry. If you are working with a single cabinet, a closet shelf, or a rolling cart, the zones still apply. They just shrink.
- Use one cabinet for safe food and a separate latched cabinet for allergen-containing items. A lidded bin works only if it sits behind a child-proof latch.
- Use a color-coded bin per zone instead of a shelf per zone. Bins can live anywhere and they move with you.
- If space is tight, skip the single-allergen zones. Stock the safe area only with food that passes every allergen check, under the everyone-safe label, and give anything safe for just one person its own labeled, lidded bin.
- Keep the contains-allergens zone in a different room entirely, such as a latched cabinet in another area, if that is the only way to get real separation.
For tight budgets and small footprints, our post on small pantry organization ideas for families on a budget walks through containers and layouts that do not cost much. The zone labels in this article drop right on top of any of those layouts.
The fridge and freezer
Allergy zoning does not stop at the pantry door. The refrigerator and freezer need the same logic, and a freezer full of batch-cooked meals is a place where mix-ups happen quietly. Use the same colors on bin labels in the fridge. Keep allergen-containing foods on the lowest shelves in sealed containers, so nothing can drip onto safe food. We cover cold storage in more depth in our post on family fridge and freezer organization.
Cross-Contact: The Small Habits That Matter More Than the Shelves
A beautifully zoned pantry can still fail if the habits around it are loose. Cross-contact, where an allergen transfers to a safe food through a shared surface, utensil, or container, is the quiet risk in every kitchen with an allergy. Most of the prevention is small and repetitive.
Dedicated items for the safe zones
Consider keeping a few things only for safe food:
- A dedicated scoop or spoon for each safe bin.
- Separate jars for spreads (a dedicated sunflower seed butter jar, a dedicated jelly jar that never meets a knife that touched peanut butter).
- A separate toaster or toaster bags for gluten-free bread, if that applies to you.
- Cutting boards and knives marked for allergen-safe prep, in a clearly different color.
Color-coding these items to match your zone colors is a lovely design detail and a real safety one: the sage green scoop belongs to the sage green zone.
The double-dipping problem
Squeeze bottles beat jars for anything that gets a knife or spoon dipped into it. A shared jar of jam, butter, or mayonnaise can pick up crumbs or traces from earlier use. Squeeze bottles and pump dispensers keep utensils out of the food entirely. For butter and spreads, many families simply keep two: one safe, one not, in clearly different containers.
Open packages and decanting
Decanting is a gift to a pantry’s looks, but be careful with it. When you move food out of its original package into a jar or bin, you lose the ingredient list, the allergen statement, and the lot code. Here is how to keep that information:
- Take a photo of the front and back of the package before you throw it away.
- Tape a small card to the inside of the container’s lid, or to the bottom of the bin, with the product name, the allergen statement, and the purchase date.
- Never decant a product whose ingredients you have not checked.
- If a product changes its packaging or recipe, re-read the label and update your card.
Crumbs, spills, and wipe-downs
A weekly wipe of the safe shelves is a small ritual with a real payoff. Use a dedicated cloth for the safe zones, wash it separately, and never use it on surfaces that touch allergen-containing foods. After any spill from a top-shelf item, clean the area below it as well.
Shared surfaces and prep areas
The pantry is only part of the picture. The counter where snacks get assembled matters as much as the shelf they came from. Wipe the counter before preparing a safe snack, use clean hands and clean utensils, and keep allergen-containing food prep to a different area when you can. If you cook two versions of a meal, make the safe version first.
The Kid-Reach Shelf: Independence Without Risk
Children can learn their own boundaries, but they still need adult oversight, with responsibility growing as they do. They also deserve to feel capable in their own kitchen. The kid-reach shelf is where those two things meet.
How to set it up
Choose a low shelf that holds nothing else, or a single bin on it. Keep it on a different shelf from the allergen bins, never on the floor beside them. Fill it with a small number of options, perhaps five to eight items. Too many choices make the shelf messy and harder to keep safe. Include a mix of textures and types: something crunchy, something fruity, something filling. Use the blush kid-reach label so the zone is recognizable at a glance.
The unbreakable rule is that every item on this shelf comes from Everyone-Safe, or has been checked as safe for each child who uses the shelf. If a product gets restocked, the person doing the restocking reads the label again.
Safety firstFor children under 4, kid-reach is supervised self-serve: an adult is nearby and the child eats seated. Keep choking-risk foods off the shelf, including popcorn, whole nuts, whole grapes, and hard raw vegetables. The zone never replaces supervision.
If you are building a child-friendly cooking and snacking space more broadly, our guide to a toddler-friendly kitchen setup pairs well with this shelf. A low drawer for cups and plates, a stool, and a kid-reach shelf together let a small child handle snack time themselves.
Teaching the system by age
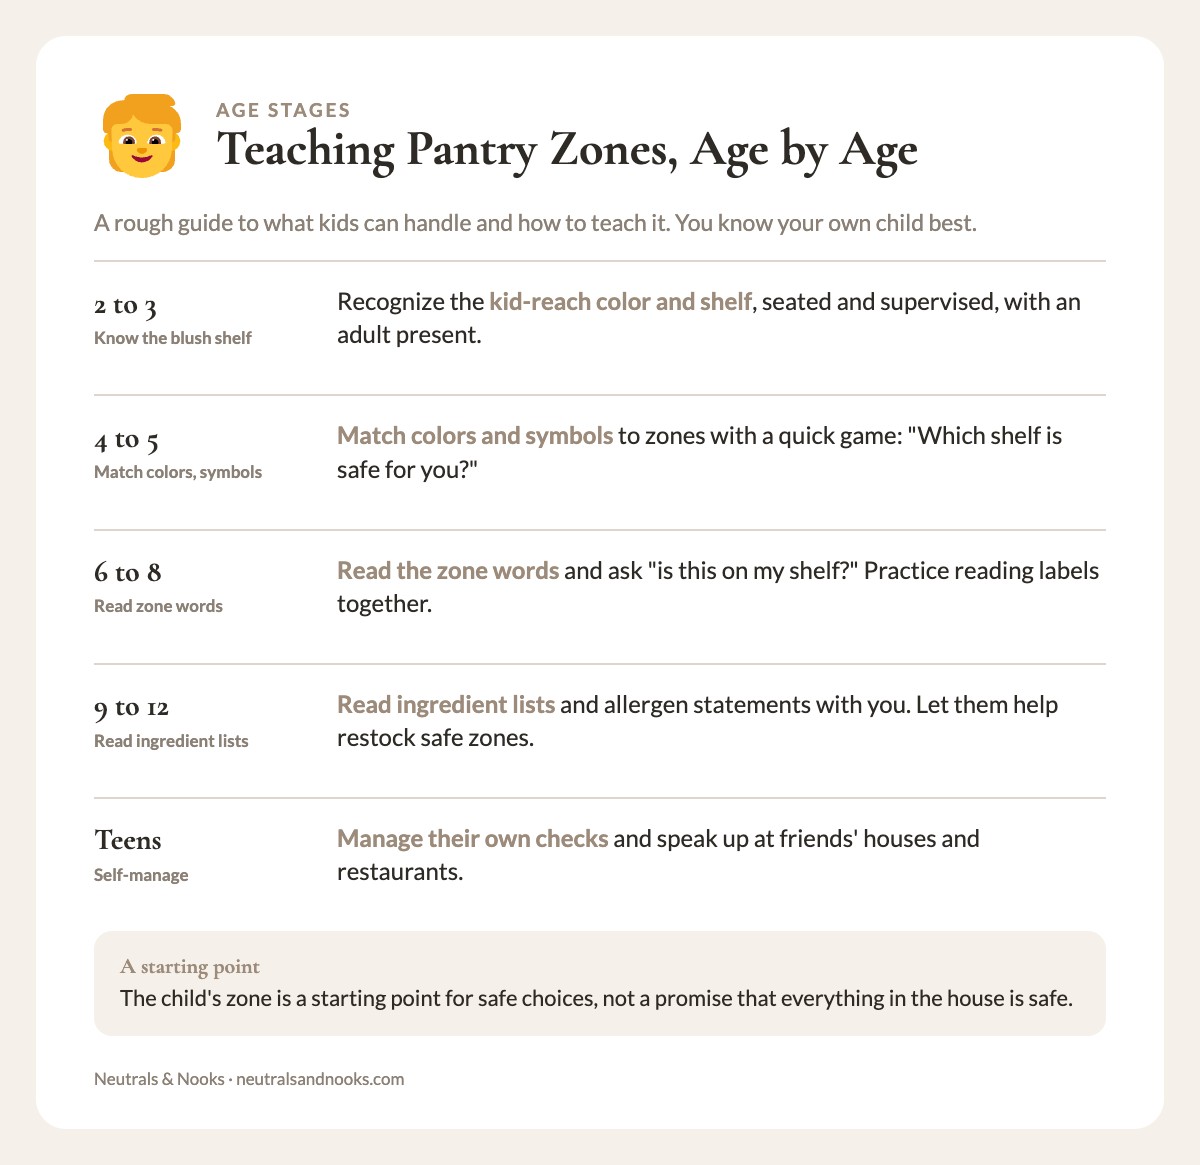
You can introduce the zones as soon as a child can follow simple instructions. Here is a rough guide, and of course you know your own child best.
| Age | What they can do | How to teach it |
|---|---|---|
| 2 to 3 | Recognize the kid-reach color and shelf, with an adult present | “Blush shelf is yours. Everything here is safe.” Keep it to one rule, and keep them seated and supervised. |
| 4 to 5 | Match colors and symbols to zones | Play a quick matching game: “Which shelf has food that’s safe for you?” |
| 6 to 8 | Read the zone words and ask “is this on my shelf?” | Practice before picking anything new. Introduce the idea of reading labels together. |
| 9 to 12 | Read ingredient lists with you, check allergen statements | Make label reading a shared habit. Let them help restock the safe zones. |
| Teens | Manage their own checks and speak up with others | Talk through how to ask about ingredients at friends’ houses and restaurants. |
At every age, the child’s zone is a starting point for safe choices, not a promise that everything in the house is safe. As children grow, the goal shifts from “the pantry keeps me safe” to “I know how to keep myself safe,” and that is a skill worth building gradually.
What to say when a child tests the rules
Kids test boundaries, and a child with an allergy will sometimes want the thing on the top shelf because a sibling has it. Keep the response calm and consistent. Something like: “That one has an ingredient that isn’t safe for your body. Let’s pick something from your shelf, or I can help you find a similar treat that is safe.” Offering an alternative matters. A “no” with nothing attached tends to turn into sneaking and resentment. A “no, and here is a yes” keeps the system feeling fair.
Grandparents, Sitters, and Guests: The System Everyone Can Read
Back to the granola bars. The goal here is for a caregiver who has never met your system to understand it in under a minute.
The pantry legend
Post a simple legend on the inside of the pantry door or the side of the fridge. Print the six labels in a small row with one line each:
- Sage star: Free of our household’s allergens. Ask before serving other children.
- Blush circle: Kid snacks. Pre-approved.
- Clay, blue, and gold: Safe for one allergy only. Check the sign before serving.
- Gray triangle: Contains allergens. Adults only; please keep it sealed, apart, and latched.
That is the whole lesson. If a visitor remembers one thing, it should be: sage star means free of our household’s allergens. Ask before serving other children.
The caregiver cheat card
A one-page card kept on the fridge or in your command center is worth its weight in gold. It should include:
| Section | What to write |
|---|---|
| Allergies | Each child’s allergens, written plainly |
| Safe shelf | “Everything on the sage shelf is safe. If in doubt, choose from there.” |
| Never | A short, specific list of foods and brands to avoid |
| If something happens | Severe reaction: give epinephrine per the action plan, call 911, then call parents. Note where the medication is. |
| Phone numbers | Emergency services first, then both parents and the pediatrician or allergist |
Keep the tone simple and kind. Frightening a grandparent into hovering helplessly in your kitchen is not the goal. The goal is confident help.
If your family already uses a command center, the card belongs there. We walk through building one in our post on family command center ideas, and a laminated allergy card is one of the most useful things it can hold.
Guests and parties
For guests, the easiest rule is also the clearest: serve guests food from your safe zones, or ask guests to bring only food that fits your child’s allergy rules, and label anything that contains an allergen. For a child’s birthday party or a holiday gathering, consider stocking an everyone-safe snack table and putting a small sign next to anything that contains an allergen. If you host a Thanksgiving table or a big holiday meal, tell guests ahead of time which dishes are safe, and think about assigning a trusted person to supervise the buffet.
When you are the guest
The system travels. Pack a small bag of kid-reach snacks when you visit family, and ask in advance what will be served. A small label sticker on a travel container, in the same color as home, can help your child recognize their safe food in an unfamiliar place.
Reading Labels Well: The Step Behind Every Zone
Because the entire system rests on the accuracy of what goes into each zone, it is worth being deliberate about label reading. This is the step no color can replace.
A simple routine for new products
- Read the ingredient list every time, even for products you have bought before.
- Read the allergen statement (the “Contains” line) and any precautionary statements such as “may contain” or “made in a facility that also processes.”
- Know the other names for your allergen. Milk can appear as whey, casein, or lactose. Wheat can hide in many sauces and starches. Your allergist or a trusted resource can give you a reliable list for your specific allergen.
- Decide how you treat precautionary statements. Households differ here, and it is a question for your allergist. Whatever you decide, apply it consistently across the pantry.
- When in doubt, don’t. If you cannot confirm a product is safe, it goes in the contains-allergens zone or out of the house.
The recheck habit
Manufacturers change recipes, suppliers, and facilities. A product that was safe six months ago may not be today. Build a habit of re-reading the label each time you buy, not just the first time. A quick glance at the allergen statement while you are putting groceries away takes five seconds.
Gluten-free labeling specifics
For celiac disease or gluten sensitivity, certified gluten-free labeling can offer extra assurance, since it reflects testing standards. Whether a certified product is needed or a plain “gluten-free” claim is enough is a question for your doctor. Whichever you choose, keep gluten-free items stored above or apart from wheat flour, bread, and crackers, because airborne flour and crumbs are a real source of cross-contact.
Keeping It Working: A Monthly Reset
A system that is right on day one can drift by day thirty. Groceries get shoved wherever there is space, a visitor puts things back in the wrong place, and a bin quietly collects a mislabeled box. A short monthly check keeps the pantry honest.
The 15-minute zone check
- Scan each zone. Does everything in it still belong? Move anything out of place.
- Spot-check labels. Pick five items at random from the safe zones and re-read their ingredient lists.
- Check dates. Discard expired food and update any “last checked” dates on your zone labels.
- Wipe the shelves. A quick pass with a cloth on the safe zones.
- Refresh kid-reach. Remove stale snacks, rotate in new approved options, and make sure the bin is not overfull.
- Review the cheat card. Are phone numbers, medications, and instructions still current?
Assigning ownership
In a household with more than one adult, decide who puts groceries away. Mixed ownership is where zones blur. Even if both of you shop, one person (or one agreed process) should do the actual putting away, with the labels as a guide. Some families make it a team routine: unpack the bags together, read the labels aloud, and place each item in its zone.
When something changes
A new diagnosis, an outgrown allergy, a new baby starting solids, a new school with different rules: these all call for a pantry update. Revisit your household approach, adjust the zones, and reprint the labels. The system is meant to flex. Allergy needs change over time, and a pantry that can change with them is a pantry that keeps working.
A Few Gentle Words on the Emotional Side
Organizing around an allergy can feel heavier than organizing around a mess. There is real worry behind these shelves, and I do not want to pretend a pretty label makes it go away.
A clear system tends to lower the background hum of anxiety. When the information lives on the shelf and not only in your head, you can let someone else handle snack time, and that is not a small thing.
Do be kind to yourself during the setup. You will probably find a few things that surprise you: a product that quietly changed its recipe, a jar that has been cross-contaminated for months, a hiding place for an allergen you thought was gone. Finding these is the system working, not a failure on your part. Fix it, move on, and notice that the pantry is now safer than it was yesterday.
Frequently Asked Questions
Is a color-coded pantry enough to keep my child safe?
No. A color-coded pantry is a communication and storage tool, not a safety guarantee. It helps caregivers find safe food quickly and reduces cross-contact. You still need to read the label of every new product and follow your allergist’s guidance. Keep an emergency action plan visible, and make sure any prescribed medication is accessible and understood by every caregiver.
Should I keep allergens in the house at all?
That depends on the severity of the allergy, the age of your child, who else lives in the home, and your allergist’s advice. Some families keep their homes entirely free of the allergen. Others allow it in a tightly contained area. There is no single right answer, and it is worth talking through with your allergist so your choice fits your child’s specific situation. Whichever you choose, write down the rule so every caregiver follows the same one.
How do I set up a nut-free pantry if other family members eat nuts?
Use a containment approach. Store nut-containing foods in a separate cabinet with a child-proof latch. If they go on the pantry’s lowest shelf instead, use sealed, solid-bottom, lidded bins and latch the pantry door. Keep the nut-free and everyone-safe zones above them. Keep dedicated utensils, spreads, and cutting boards for nut-free food, and wipe surfaces after anyone has handled nut products. Make a household habit of washing hands after eating nuts, and keep any nut-containing snacks out of the kid-reach zone entirely. Some families also choose to enjoy nut products outside the house or only in one room.
What should I do with a product that says “may contain” my child’s allergen?
Precautionary statements are voluntary and vary between manufacturers, so how to treat them is a question for your allergist. Many families treat them as a reason to keep the product out of the safe zones, and some contact the manufacturer for more detail. Whatever approach you adopt, apply it consistently so that every item in your everyone-safe and kid-reach zones has been held to the same standard.
How do I use the gluten-free pantry labels if my household also eats regular wheat products?
Store gluten-free items above or apart from wheat products, never below them, because flour dust and crumbs can drift or fall. Keep gluten-free foods in sealed containers, use dedicated scoops, and consider a separate toaster or toaster bags for bread. Place the gold gluten-free label on the shelf or bin, and keep wheat-based foods on a lower shelf than the gluten-free items, in closed bins, or in a separate cabinet. Wipe shelves regularly and avoid sharing jars of spreads that have had crumbs introduced.
How many items should go on the kid-reach shelf?
Aim for roughly five to eight pre-approved options. That is enough variety to feel like a real choice without turning the shelf into clutter that is hard to check. Every item should come from Everyone-Safe, or be verified safe for each child who uses the shelf. Rotate the selection monthly, and re-read labels whenever you restock.
How can I make sure grandparents and babysitters actually follow the system?
Keep it simple and visible. Post a small legend inside the pantry door, keep a one-page cheat card on the fridge, and walk through it once in person. Ask them to explain it back to you, and simplify anything that confuses them. Emphasize one easy rule: if in doubt, choose from the everyone-safe shelf. People follow systems they understand and feel confident about, so make it easy to understand.
A Calm Shelf, A Calmer Kitchen
You do not need a perfect pantry to make a safer one. Start with a single shelf: put the sage star label on the place where the safest food lives, and teach one other person what it means. Add a kid-reach bin when you are ready, then the other zones as the weekend allows.
The goal is not a showpiece. It is a kitchen that quietly does some of the remembering for you, so that the next time a grandparent stands in front of your pantry, the shelves can answer the question before it is asked.