Pantry Label System for Busy Families (Printable Labels)
Last winter I opened our pantry looking for the box of quick oats and found it wedged behind three half-open bags of pretzels, a jar of something unidentifiable, and a bin that used to hold “snacks” but had somehow become the place where loose granola bar wrappers went to die. My youngest wanted breakfast. My oldest wanted a specific snack that he swore was “right there yesterday.” I stood there for a full two minutes, coffee in hand, doing the mental math of whether it was faster to keep digging or just start over.
That morning is the whole reason this post exists. Not because our pantry was messy — plenty of pantries are messy and function fine — but because nobody besides me could find anything in it. My husband would open the door, sigh, and ask where the rice was. My kids would ask what snacks were “allowed” because they genuinely couldn’t tell what was in half the containers. The system lived entirely in my head, which meant I was the only one who could operate it.
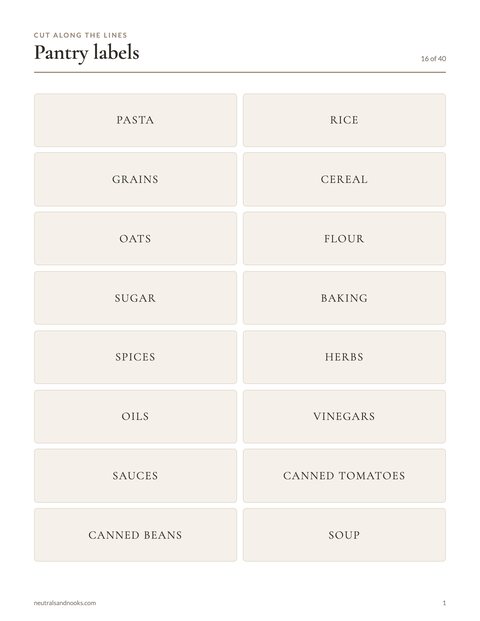
Free printable · 4 pages
Pantry Label Set
Forty printed pantry labels plus twenty blanks, sized for clear bins and jars.
Free. Your download link appears right here. You'll also join the Monthly Home Reset. Unsubscribe anytime. Privacy
Labels fixed that. Not fancy labels, not a full pantry renovation — just a clear, consistent labeling system that told everyone in the house what belonged where, at a glance, without needing to ask me first. This post walks through exactly how to build that system for your own pantry, including a full printable label set with 40 common pantry categories plus blank templates for the stuff that doesn’t fit a category. If you haven’t tackled the bins and shelves themselves yet, it’s worth starting with Family Pantry Organization: A Complete System That Actually Works first — labels work best once the pantry has actual zones to label. But if your pantry is already sorted and you’re just missing the finishing layer that makes it stick, you’re in the right place.
In this article (12 sections)
- Why Labels Actually Change How Your Family Uses the Pantry
- Before You Print: Measure Your Bins and Map Your Zones
- The Printable Pantry Label Set: 40 Category Labels + Blank Templates
- How to Print, Cut, and Attach Your Labels
- Matching Label Style to Container Type
- Organizing Your Pantry Into Zones (Not Just Shelves)
- Labels Kids Can “Read”: Picture + Word Systems for Non-Readers
- Beyond the Pantry: Using the Same Label System in the Fridge and Freezer
- Keeping the System Alive: Weekly and Monthly Upkeep
- When to Redo Your Labels Entirely
- Frequently Asked Questions
- A Small System That Makes a Real Difference
Why Labels Actually Change How Your Family Uses the Pantry
It’s tempting to think of pantry labels as the decorative last step — the thing you add once everything’s already organized, mostly for the way it photographs. In practice, labels do something more functional than that: they remove the need for anyone to ask a question.
Every unlabeled bin in your house generates a small tax every time someone uses it. “Where do the crackers go?” “Is this the snack bin or the lunch bin?” “Can I have this?” Multiply that by every family member, every day, and you get a surprising amount of friction for something as simple as putting away groceries or grabbing a snack. Labels collapse all of that into a glance. A bin that says “Crackers” doesn’t need a conversation.
This matters most for the people in your house who aren’t you — kids, a partner, a babysitter, grandparents visiting for the week. You know where things go because you put them there. Everyone else is guessing unless the system tells them otherwise. A labeled pantry is really a set of instructions that doesn’t require you to be home to give them.
There’s also a quieter benefit: labels create a boundary for what belongs in each spot, which makes it obvious when something’s out of place. A bin labeled “Pasta” that’s slowly filling up with granola bars is a visual cue to course-correct before it becomes an unsorted catch-all again. Without a label, that same bin just drifts — nobody notices the granola bars creeping in because there was never a defined “supposed to be” in the first place.
Before You Print: Measure Your Bins and Map Your Zones
The single biggest mistake I see with pantry labels — including my own first attempt — is printing a beautiful label set before figuring out what it actually needs to say. If you print “Pasta” and “Rice” but your real categories are “Quick Dinners” and “Kids’ Lunch Stuff,” you’ll end up with labels that don’t match how your family actually shops and cooks, and they’ll get ignored within a week.
Before you print anything, spend fifteen minutes with your pantry open and a notepad (or the notes app on your phone) and do three things:
1. List your containers, not your ideal containers. Walk your shelves and write down every bin, basket, jar, and canister you currently have — including the mismatched Tupperware and the cardboard box you’ve been meaning to replace. You’re labeling what exists, not what you wish existed.
2. Group by how your family actually uses the space, not by grocery store aisle logic. A grocery store separates baking goods from snacks from breakfast items because that’s how a warehouse is organized. Your pantry doesn’t have to follow the same logic. If your kids grab the same five things every afternoon, those five things deserve to live together in a labeled “After School Snacks” zone even if that mixes crackers, fruit snacks, and granola bars that a store would keep in three different aisles.
3. Note who reaches which shelf. If you have young kids, the labels on the bottom two shelves matter more than the labels up top — those are the ones your kids will actually read (or recognize, if they’re not reading yet). Save the more detailed or breakable-item labels for shelves only adults reach.
If you already went through the full zoning process in Family Pantry Organization: A Complete System That Actually Works, you likely have this mapped out already — this label set is designed to slot directly into that structure. If you’re layering labels onto a pantry you haven’t fully sorted yet, that’s fine too; just know the labels will only be as good as the zones underneath them.
The Printable Pantry Label Set: 40 Category Labels + Blank Templates
Here’s the actual label set — 40 of the most common pantry categories, organized by zone so you can print and cut them in the order they’ll go on your shelves. Each one is designed as a simple, readable word label: no clutter, no tiny fine print, just a clear category name that’s easy to scan from across the kitchen.
How to use this table: Print this page, or retype the list into a document using a clean sans-serif font at a large size (24–30pt works well for most bin sizes). Set your labels at roughly 2 inches wide by 1 inch tall, and you’ll fit 4 across and 10 down on a standard 8.5″ x 11″ sheet — 40 labels per page, which lines up perfectly with the list below.
| # | Label Text | Zone |
|---|---|---|
| 1 | Cereal | Breakfast |
| 2 | Oatmeal | Breakfast |
| 3 | Granola | Breakfast |
| 4 | Pancake Mix | Breakfast |
| 5 | Waffle Mix | Breakfast |
| 6 | Pasta | Pasta & Grains |
| 7 | Rice | Pasta & Grains |
| 8 | Quinoa | Pasta & Grains |
| 9 | Couscous | Pasta & Grains |
| 10 | Lentils | Pasta & Grains |
| 11 | Beans (Dry) | Pasta & Grains |
| 12 | Flour | Baking |
| 13 | Sugar | Baking |
| 14 | Brown Sugar | Baking |
| 15 | Powdered Sugar | Baking |
| 16 | Baking Soda | Baking |
| 17 | Baking Powder | Baking |
| 18 | Chocolate Chips | Baking |
| 19 | Sprinkles | Baking |
| 20 | Cake Mix | Baking |
| 21 | Crackers | Snacks |
| 22 | Pretzels | Snacks |
| 23 | Chips | Snacks |
| 24 | Popcorn | Snacks |
| 25 | Trail Mix | Snacks |
| 26 | Granola Bars | Snacks |
| 27 | Fruit Snacks | Snacks |
| 28 | Nuts | Snacks |
| 29 | Dried Fruit | Snacks |
| 30 | Canned Vegetables | Canned Goods |
| 31 | Canned Fruit | Canned Goods |
| 32 | Canned Beans | Canned Goods |
| 33 | Soup | Canned Goods |
| 34 | Sauces | Condiments |
| 35 | Salad Dressing | Condiments |
| 36 | Oils & Vinegars | Condiments |
| 37 | Spices | Condiments |
| 38 | Coffee | Drinks |
| 39 | Tea | Drinks |
| 40 | Kids’ Snacks | Kids’ Zone |
That covers the categories most families actually stock. But every pantry has a few things that don’t fit neatly into a category — the sourdough starter kit, the seasonal candy stash, the specialty flour your one kid needs. Rather than skip labeling those items or cram them into the wrong bin, print a handful of blank templates in the same size and style as the rest, and hand-letter or type in whatever they need to say.
| Blank Template | Suggested Use |
|---|---|
| Blank 1 | Custom pantry item |
| Blank 2 | Seasonal rotation (holiday baking, summer BBQ items) |
| Blank 3 | Dietary-specific item (gluten-free, allergy-safe) |
| Blank 4 | Overflow / “extras” bin |
| Blank 5 | Meal-prep or freezer-to-pantry staples |
Printing five blanks alongside your 40 categories means the system can flex with your family instead of forcing every container into a predefined box. That’s the difference between a label set that lasts a year and one that gets abandoned the first time you buy something it doesn’t have a name for.
How to Print, Cut, and Attach Your Labels
You don’t need a laminator or a specialty label printer to make this work, though both help if you already own them. Here’s what actually holds up in a real, sticky-fingered pantry:
Paper choice matters more than printer quality. Regular printer paper will work for a week, maybe two, before it curls, smudges, or gets a jam stain on it. Cardstock (the kind used for greeting cards, usually 65–110 lb weight) is sturdier and only slightly more expensive, and it’s the minimum I’d recommend for anything on a shelf kids touch daily.
Lamination is worth it if you have the option. A cheap laminating pouch (or clear contact paper if you don’t own a laminator) turns a paper label into something that survives spills, sticky hands, and the occasional wipe-down. If you’re labeling glass jars or anything near the stove, lamination is close to mandatory — steam and humidity destroy unprotected paper fast.
Cutting straight lines makes a bigger visual difference than you’d expect. A paper trimmer (the kind with a sliding blade, not scissors) gives you clean, consistent edges across all 40 labels in a few minutes. If you don’t have one, a ruler and a fresh craft knife on a cutting mat works almost as well — just go slow on the first few cuts to get your hand steady.
Attaching labels depends on your container type:
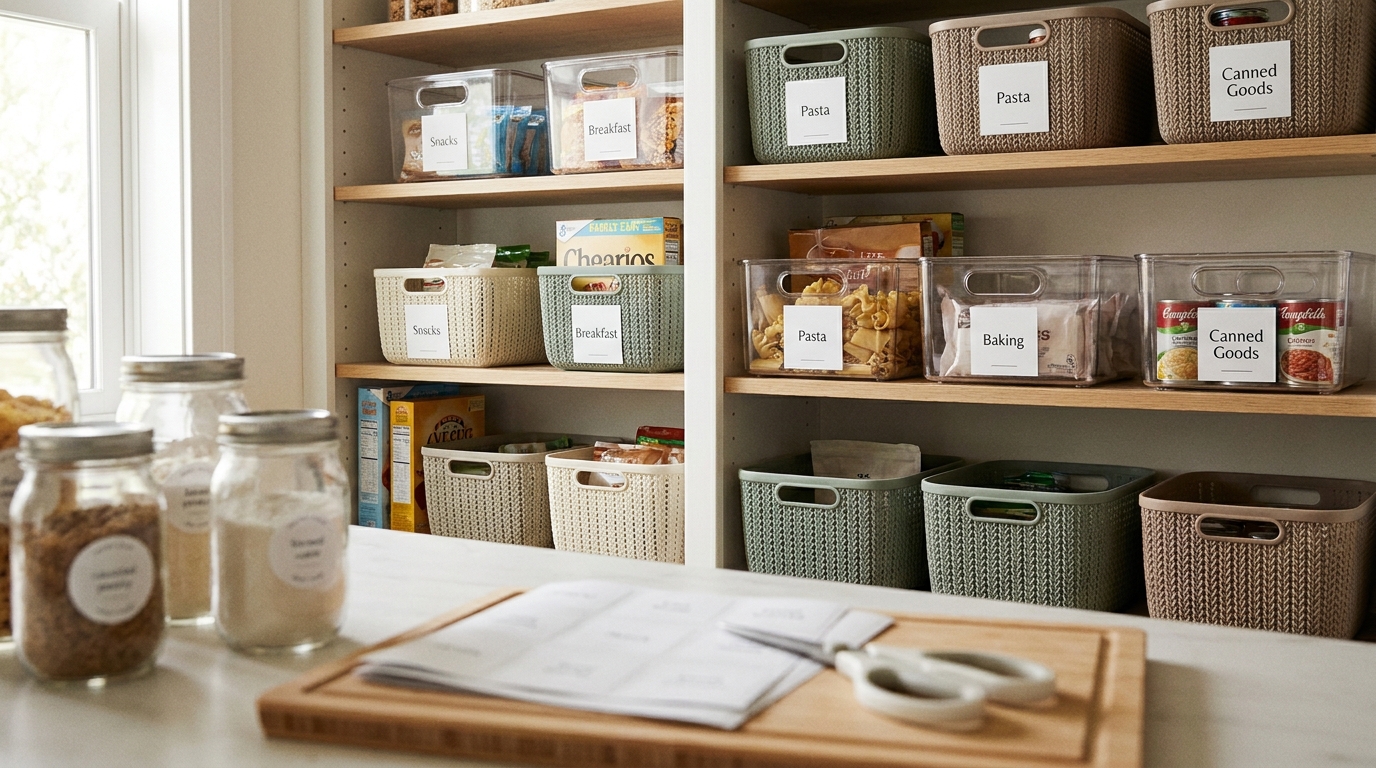
- Baskets and woven bins: Use label holder clips (small plastic or chalkboard clip-on tags) rather than adhesive — baskets have texture that adhesive won’t stick to reliably, and clips let you swap labels instantly when contents change.
- Plastic bins with smooth fronts: Removable adhesive strips (the kind designed not to damage surfaces) work well and let you reposition or replace labels without leaving residue.
- Glass jars and canisters: A small round or oval label on the front, applied with regular adhesive, holds up fine since jars don’t flex or get bumped around like bins do.
- Shelf edges (for zones rather than individual containers): A label maker or a printed strip taped to the shelf lip works well when you’re labeling a whole zone (“Breakfast” spanning three bins) rather than a single container.
If you’re printing on a home inkjet, do one test page first and let it dry fully before handling — inkjet ink smears easily on cardstock until it sets, and you don’t want to discover that after cutting all 40.
Matching Label Style to Container Type
Not every label needs to look the same, and honestly, it shouldn’t. The goal is legibility for your family, not a matched aesthetic for Pinterest — though the two aren’t mutually exclusive if you want both.
| Container Type | Best Label Format | Why |
|---|---|---|
| Clear glass jars/canisters | Small, minimal text label on front | Contents are already visible; label just confirms the name |
| Opaque plastic bins | Larger label with bigger text | Contents are hidden; label does all the identifying work |
| Woven or fabric baskets | Clip-on tag, not adhesive | Adhesive won’t hold on textured surfaces |
| Wire baskets | Clip-on tag or ribbon-tied tag | Same issue — no flat surface for adhesive |
| Deep bins (reach-in, not see-through) | Label on the front lip, angled slightly down | Visible even when the bin is on a lower shelf |
| Shelf-level zones | Label on shelf edge or riser, not on each container | Keeps a whole category readable without labeling every single item in it |
A quick rule of thumb: if you can see the contents through the container, keep the label small and simple — it’s just confirmation. If the container hides its contents, the label needs to work harder, which usually means bigger text and a spot that’s visible without pulling the bin out.
Organizing Your Pantry Into Zones (Not Just Shelves)
Labels work best when they’re attached to a zone system rather than scattered across shelves in whatever order groceries happened to land. Here’s a zone breakdown that works for most family pantries, built around how people actually move through a kitchen during a normal week:
Breakfast Zone — cereal, oatmeal, granola, pancake mix. Put this at a height kids can reach if they’re old enough to pour their own cereal; it removes an entire category of morning requests.
Snack Zone — crackers, pretzels, granola bars, fruit snacks. This is the zone that gets used the most in a house with kids, so it earns prime real estate: eye-level or lower, front and center.
Baking Zone — flour, sugar, baking soda, chocolate chips. This one can live higher up or further back since it’s typically an adult-only zone, especially with heavier bags of flour and sugar.
Pasta & Grains Zone — rice, pasta, quinoa, lentils. Group these together since they’re often used interchangeably in the same dinners, which makes meal planning faster.
Canned Goods Zone — beans, soup, canned vegetables. Deep shelves or a step shelf riser work well here since cans are heavy and easy to lose track of behind each other.
Condiments Zone — sauces, dressings, oils, spices. These tend to be small and numerous, so a turntable or narrow bin keeps them from disappearing into the back of a shelf.
Kids’ Reach Zone — a dedicated low shelf or bin combining a few items from other zones (a couple of snack options, a breakfast option, maybe a lunch item) specifically sized and placed for independent access. This is the zone that does the most to reduce daily requests, because it’s the one shelf where kids genuinely don’t need help.
If your kitchen setup includes younger children who are just starting to navigate the space independently, it’s worth reading Creating a Toddler-Friendly Kitchen: Safety Meets Independence alongside this — the same low-shelf, kid-reach principles that make a kitchen safer for toddlers also make a labeled pantry more useful for them.
Labels Kids Can “Read”: Picture + Word Systems for Non-Readers
If you have a child who isn’t reading fluently yet, a word-only label set will get you partway there but won’t fully solve the “where does this go” problem for them. The fix is simple: pair each word label with a small icon or photo, especially in the zones your youngest kids access most (usually the snack zone and kids’ reach zone from above).
You have a few options here, roughly in order of effort:
- Simple icon stickers next to the word label — a small cracker icon, a fruit icon, a cereal bowl icon. These are inexpensive and widely available as sticker sheets, and they don’t require any design work on your part.
- A quick photo of the actual product, printed small and placed next to the category name. This is more accurate than a generic icon (your kid will recognize the exact cracker box) and takes about the same effort as printing the word labels themselves.
- Color-coding by zone, using a colored border or dot on each label so kids learn “yellow zone = breakfast” even before they can read the word. This works especially well for kids who are pre-readers or who are just learning colors and categories together.
The combination of a word (for the adults and older siblings) and a picture or color cue (for younger kids) means the same label set works across every age in the house, rather than needing a separate system for your 3-year-old and your 9-year-old.
Beyond the Pantry: Using the Same Label System in the Fridge and Freezer
Once you’ve built a label system that works, there’s no reason to stop at the pantry door. The same 40-category approach — clear word labels, zones that match how your family actually eats, blank templates for the stuff that doesn’t fit — translates directly into the fridge and freezer, where the “where does this go” problem is often even worse because everything’s cold, similar-looking, and moving in and out constantly.
A few categories carry over almost exactly (drinks, condiments, snacks), while others are fridge- and freezer-specific: “Leftovers,” “Lunch Prep,” “Freezer Meals,” “School Snacks — Cold.” If you’re ready to tackle that space next, Family Fridge and Freezer Organization: A System That Survives School Lunches and Meal Prep walks through the zone-and-bin setup in detail, and the same printable label approach from this post slots right in.
Keeping the System Alive: Weekly and Monthly Upkeep
Every organizing system — labels included — has a natural decay curve. It looks great the day you finish it, drifts a little over the following weeks, and either stabilizes into a habit or slowly falls apart depending on whether it gets any maintenance at all. A few small habits keep a labeled pantry from sliding back into chaos:
During your weekly grocery put-away, take the extra ten seconds to put items in their labeled home rather than the nearest open spot. This is the single highest-leverage habit in the whole system — it’s also the one that erodes first when you’re tired, so it’s worth being deliberate about it, especially for the first month after you set the system up.
Once a month, do a two-minute label check. Walk the pantry and ask whether the labels still match reality. Categories shift as your kids grow — the “toddler snacks” bin eventually becomes irrelevant, and a “kids’ lunch” bin might need to expand. Swapping a label takes thirty seconds if you printed extras; it’s a bigger project if you didn’t and have to reprint from scratch.
Let kids help enforce it. Once a child understands that the cracker bin has a label that says “Crackers,” they become surprisingly reliable about noticing when something’s in the wrong spot — sometimes more reliable than the adults in the house, honestly. Giving them ownership over “their” zone (the kids’ reach shelf, especially) turns the label system into something they maintain rather than something that’s done to them.
If your household already runs on a shared visual system — a whiteboard, a chore chart, a family command center — tying the pantry labels into that same rhythm makes the upkeep almost automatic. Family Command Center Ideas: Create a Hub That Actually Keeps You Organized covers building that kind of shared system if you don’t already have one; a labeled pantry is a natural extension of the same idea, just applied to food instead of schedules and mail.
When to Redo Your Labels Entirely
Most families won’t need to overhaul their label set more than once every year or two, but a few signals tell you it’s time for a fresh batch rather than a patch job:
- You’ve added or removed entire categories — a new dietary need, a kid who’s aged out of purees, a shift from mostly-cooking to mostly-meal-kits.
- The physical labels are visibly worn — curling corners, faded ink, peeling adhesive. A tired-looking label set quietly signals “this isn’t really maintained anymore,” even if the system underneath is still working.
- You’ve moved kitchens or replaced containers, which usually means different bin sizes and shapes that your old labels don’t fit cleanly anymore.
- Nobody’s using the labels correctly anymore — if you’re finding crackers in the pasta bin every week despite a label that clearly says “Pasta,” that’s less a labeling problem and more a sign the zones themselves need rethinking, which is worth revisiting alongside the full Family Pantry Organization system.
Printing 40 labels plus blanks takes maybe twenty minutes once you’re set up, so there’s no reason to limp along with a system that’s stopped matching your actual pantry. Treat the label set as a living document, not a one-time craft project.
Frequently Asked Questions
What’s the best material to print pantry labels on?
Cardstock (65–110 lb weight) is the sweet spot for most families — sturdy enough to survive daily handling, cheap enough to reprint without guilt, and compatible with any home printer. If you want labels to survive spills or steam near the stove, laminate them or cover them with clear contact paper after cutting. Regular printer paper works in a pinch but tends to curl and smudge within a couple of weeks.
How do I label pantry items for kids who can’t read yet?
Pair each word label with a small icon, sticker, or printed photo of the actual product, especially in low-shelf zones your youngest kids access. Color-coding zones (a colored border or dot per category) also helps pre-readers learn the system quickly, since they can match colors before they can match letters.
What if my containers are a different size than the labels are designed for?
Scale the label size up or down before printing — most word processors let you resize a text box or table cell freely. The 2″ x 1″ size in this post fits most standard bins and jars, but for oversized bins (like a large under-shelf basket) simply enlarge the font and label footprint so it’s still legible from a few feet away.
Do pantry labels actually change kids’ behavior, or is it just aesthetic?
In practice, labels function less like decoration and more like instructions. A clearly labeled bin removes the need for a child to ask where something goes or whether they’re “allowed” to grab it — which cuts down on a surprising number of daily kitchen questions. The behavior change comes from removing ambiguity, not from the labels looking nice (though there’s no reason they can’t do both).
How often should I update or reprint pantry labels?
Most families only need a full reprint once every year or two, triggered by a change in categories (new dietary needs, kids aging into new foods) or visible wear on the physical labels. Printing a handful of blank templates alongside your main set lets you patch small changes without redoing the whole system.
Can I use this same label system in the fridge or freezer?
Yes — the same word-label, zone-based approach translates directly. Some categories carry over as-is (drinks, condiments, snacks), while others are fridge-specific, like “Leftovers” or “Lunch Prep.” See Family Fridge and Freezer Organization for a full zone breakdown.
Do I need to label every single container, or just the main zones?
Zone-level labeling (a shelf edge label covering “Breakfast” or “Snacks”) is enough for shelves with a small, self-evident group of items. Individual container labels matter most for opaque bins where you can’t see the contents at a glance, or for zones your kids access independently and need a clear visual cue for.
A Small System That Makes a Real Difference
A labeled pantry isn’t going to fix every logistical headache of running a busy household, but it quietly removes one small friction point, every single day, for everyone who opens that door. That adds up faster than it sounds. Print the set, give it a week to settle in, and adjust the categories once you see how your family actually uses it — the goal was never a perfect pantry, just one that runs without you standing in the middle of it, coffee in hand, doing math before breakfast.