Kid-Height Coat Hooks: A Montessori-Inspired Coat Closet Setup
A tidy coat closet with every hanger two feet above a two-year-old’s reach is organized only for the adults.
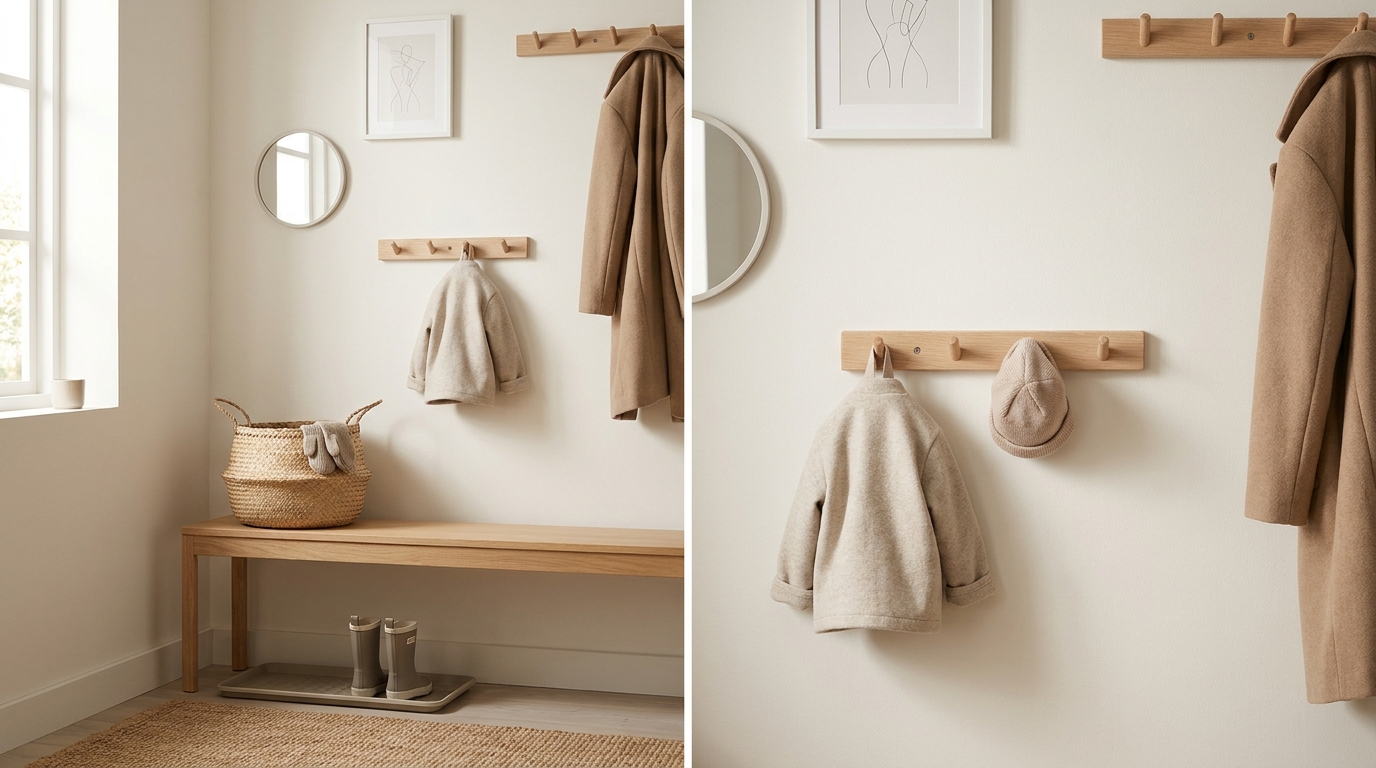
Coat hooks for toddlers go at or just under your child’s shoulder height. As a rough starting range, that is about 20-29 inches from the floor for most children from 12 months to 3 years. Your own child’s measured shoulder height overrides that range.
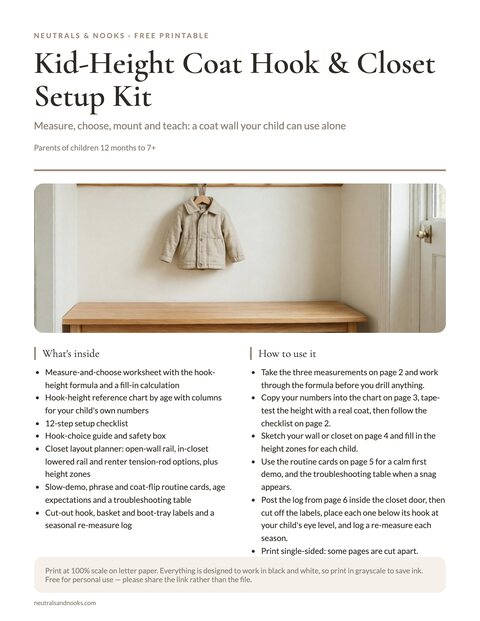
Free printable · 7 pages
Kid-Height Coat Hook & Closet Setup Kit
A measure-and-choose worksheet, an age-by-age hook height chart with fill-in columns and a seasonal re-measure log, a 12-step setup checklist with a hook-choice guide and safety box, a wall and closet layout planner, age guideposts, a troubleshooting table, cut-apart routine cards and cut-out hook, basket and boot-tray labels.
Free. Your download link appears right here. You'll also join the Monthly Home Reset. Unsubscribe anytime. Privacy
Start with a tape measure, not a drill. This post covers measuring your child, a height chart by age, safe hooks, and a wall or closet setup they can use alone. It also covers raising the hooks as they grow.
Safety firstMount rails and hooks into studs. Where there is no stud, use heavy-duty anchors rated for a child’s full weight in motion. For children under 3, use only rounded wooden knobs or pegs at face height. Teach children not to swing or hang on hooks, and tug-test every hook once a month.
In this article (11 sections)
- Why Hook Height Matters for Toddler Independence
- How to Measure Your Child for Coat Hook Height
- Coat Hook Height Chart by Age
- Choosing Hooks a Toddler Can Actually Use
- How to Set Up a Kid-Height Coat Closet or Wall
- How to Make Coats Easy for a Toddler to Hang
- How to Teach a Toddler to Hang Their Coat
- When to Raise the Hooks as Your Child Grows
- Common Problems and Quick Fixes
- Frequently Asked Questions
- Start With One Hook
Why Hook Height Matters for Toddler Independence
The Montessori idea behind a low hook is practical. When a child can do something themselves, give them a space where they can. Reach is the first barrier, because a child who can’t reach the hook can’t practice the task.
Coats make a good first real job for a toddler:
- It happens every day. A coat routine gives a toddler two or more practice runs daily without you inventing an activity.
- It has a clear beginning and end. Come in, take off the coat, hang it up, done.
- It matters. A hung coat is dry, findable, and ready for tomorrow.
- It’s physical. Reaching, lifting a loop, and aiming at a hook builds hand-eye coordination and gross motor planning in a way that feels like play.
When hooks are at adult height, even a keen toddler is stuck. They wait for help, or they drop the coat on the floor. That is a mismatch between the child and the furniture, and a lower hook fixes it.
What “kid-height” actually means
People hear “low hooks” and picture something near the baseboard. That’s too low. Coats puddle on the floor, kids have to crouch, and the hook ends up at tripping level.
Kid-height means within comfortable standing reach, with the coat hanging clear of the floor.
For most toddlers, that lands at or just under shoulder height, depending on age and the length of the coat. The chart below gives starting numbers.
How to Measure Your Child for Coat Hook Height
You’ll find plenty of numbers online, and I’m going to give you a chart of starting points shortly. But children vary a lot at the same age, and a hook that’s perfect for a tall two-year-old is out of reach for a petite one. Five minutes with a tape measure beats any guideline, including mine.
The three measurements to take
Have your child stand barefoot against a wall, relaxed, with arms at their sides. You’ll need a tape measure and a pencil (or a piece of painter’s tape on the wall).
- Shoulder height. Measure from the floor to the top of the shoulder. This is your anchor number.
- Comfortable reach height. Ask them to reach up with one hand, like they’re picking an apple, but without stretching onto tiptoes. Measure to the fingertips. This is the ceiling for any hook they’ll use daily.
- Coat length. Hold a typical winter coat up by its hanging loop or collar and measure from the top to the hem. You need this so the hem doesn’t hit the floor.
The simple formula
TipShoulder height is your anchor number. Mark it with painter’s tape, then adjust by an inch or two after a test with a real coat.
Here’s the rule of thumb I use:
- Place the hook a few inches below their comfortable reach height, roughly at or just under shoulder height for most toddlers.
- Then check that hook height minus coat length leaves at least 2-3 inches between the hem and the floor.
If the coat is long enough that the hem would drag, you have two options: raise the hook slightly, or choose shorter coats for daily use. Most toddler coats are short enough that this isn’t an issue, but long parkas and rain slickers can surprise you.
A quick sanity test is to ask your child to hang a coat while you stand back and watch. If they have to stretch, lift their heels, or throw the coat upward, the hook is too high. If they have to bend their knees or the coat pools on the floor, it’s too low. Adjust by an inch or two and try again.
Coat Hook Height Chart by Age
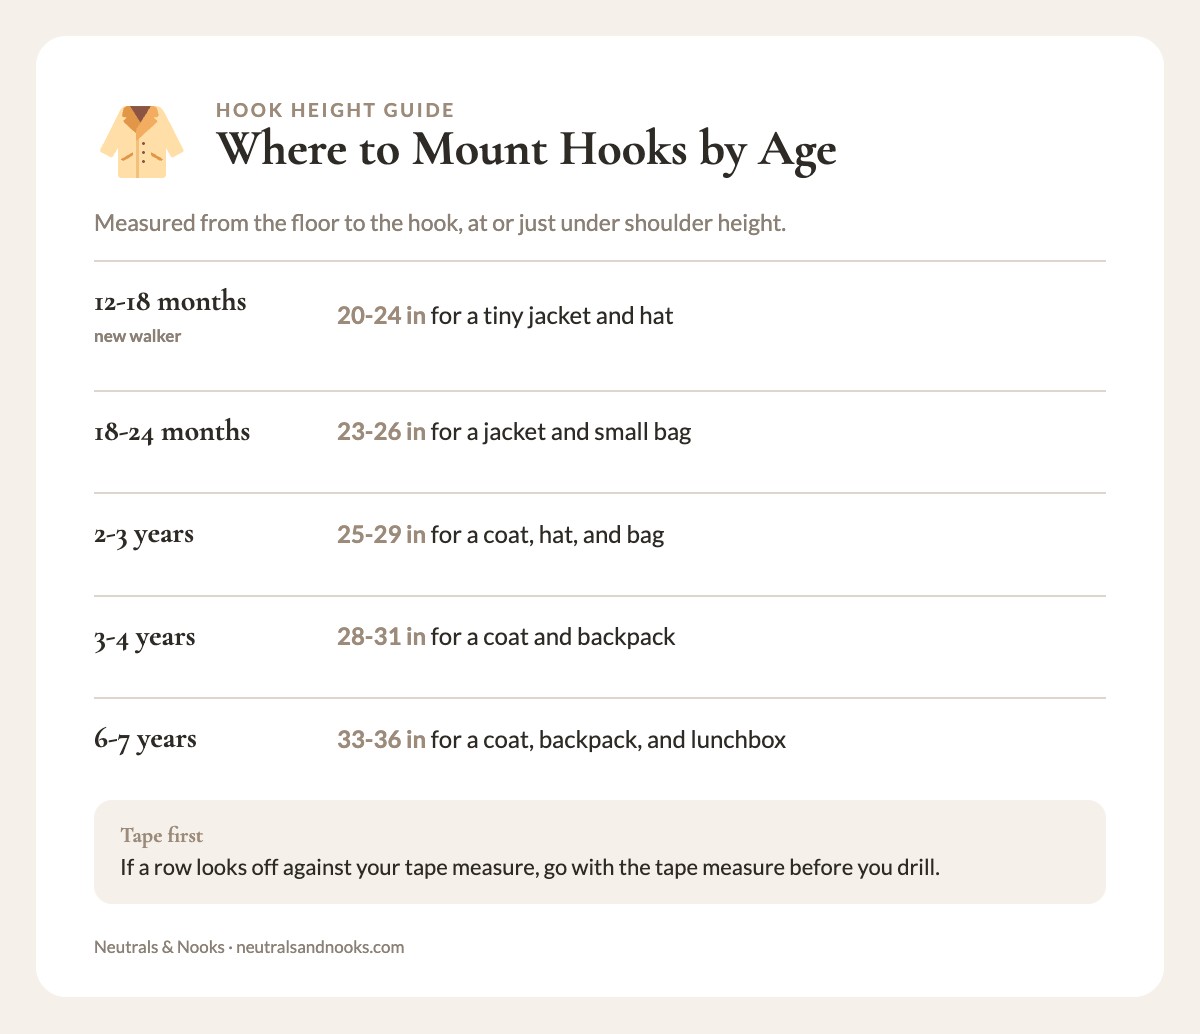
Below is a starting-point chart by age. Ranges are measured from the floor to the hook and assume average growth, so treat them as a first draft.
The Kid-Height Coat Hook & Closet Setup Kit has the fill-in columns for your child’s shoulder height, reach height, the hook height you chose, and the date.
Good to knowThese hook heights are rough starting ranges, set at or a little under a typical shoulder height for each age. Your own child’s measured shoulder height overrides the chart. If a row looks low or high against your tape measure, go with the tape measure before you drill.
| Age | Standing height | Hook height (floor to hook) | Typical use |
|---|---|---|---|
| 12-18 months (new walker) | 29-32 in | 20-24 in | Tiny jacket, hat. |
| 18-24 months | 32-34 in | 23-26 in | Jacket, small bag. |
| 2-3 years | 34-38 in | 25-29 in | Coat, hat, bag. |
| 3-4 years | 37-41 in | 28-31 in | Coat, backpack. |
| 4-5 years | 40-44 in | 30-33 in | Coat, backpack, hat. |
| 5-6 years | 42-46 in | 32-35 in | Coat, backpack, lunchbox. |
| 6-7 years | 44-48 in | 33-36 in | Coat, backpack, lunchbox. |
| 8+ years | 48 in and up | 36-44 in | Full-size coat, bag. |
| Adult (for comparison) | n/a | 60-66 in | Long coats, guest coats. |
A few notes on reading the chart:
- The ranges overlap on purpose. A child at the top of one age band and the bottom of the next might sit right in the overlap. That’s normal.
- Standing height is only an estimate. Pediatric growth charts are wide, and healthy kids land all over them. If your child is consistently on the shorter or taller end, shift toward the matching end of the hook range.
- Backpacks change the math. A backpack with a top loop usually wants a hook a few inches higher than a coat of the same length. The loop sits at the top of a bulky bag. Check this once the backpack is loaded.
- The 8+ range is wide on purpose. It depends on your child’s height and the length of the coat, so measure before you choose.
Coat hook setup and safety checklist
This is the whole setup in order. It’s also in the kit.
- Measure shoulder height (barefoot, standing straight).
- Measure comfortable reach height (no tiptoes).
- Measure the longest coat they wear daily.
- Choose a hook height at or just below shoulder height.
- Mark the spot with painter’s tape and test it with a real coat.
- Confirm the hem clears the floor by 2-3 inches.
- Pick a hook style for your child’s age, and mount it as the Safety first box at the top describes.
- Tug-test each hook monthly, and re-measure at the next season change.
Choosing Hooks a Toddler Can Actually Use
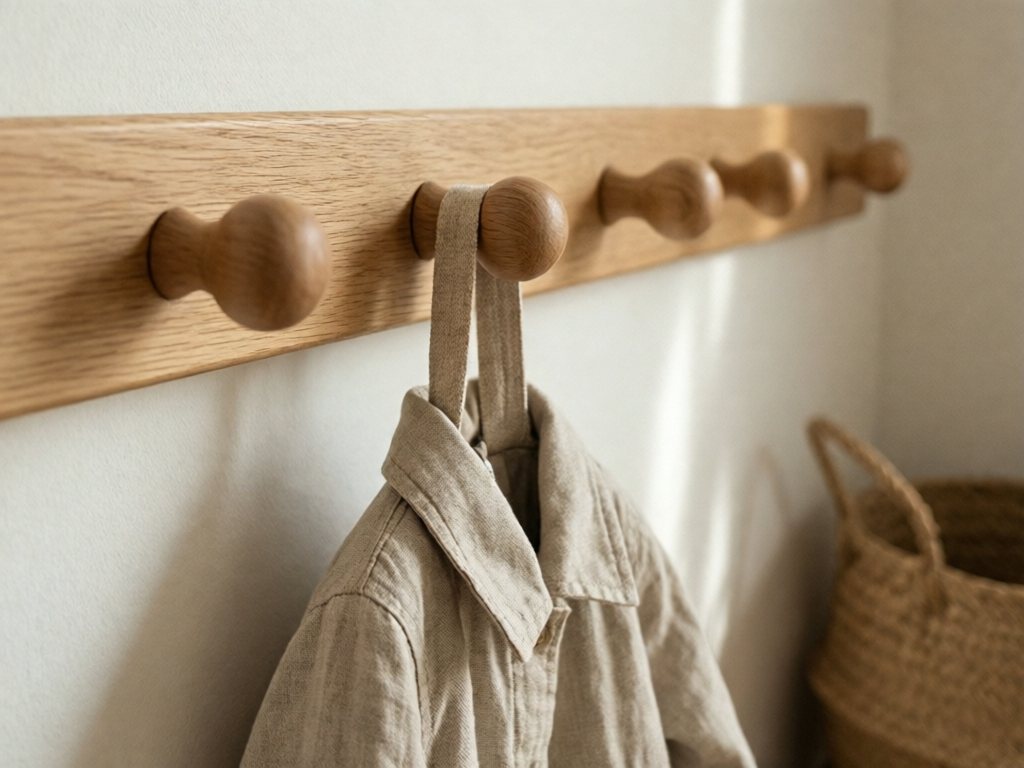
Not every hook that looks good works for small hands. Safety comes first, then ease of use.
Safety firstA low hook can sit level with a small child’s head. For children under 3, use only rounded wooden knobs or pegs at face height. From age 3, a metal hook needs a rounded, ball-tipped cap on every tip. Keep open S-hooks and cords away from toddler height.
What to look for
- Rounded ends. Toddlers fall, run, and turn quickly, so every tip at face height needs to be rounded. The Safety first box above has the rule by age.
- A shape that catches a loop. The easiest pegs for a toddler have a wider head or a slight upward tilt, so a fabric loop stays put. Flat knobs make coats slide off.
- Enough projection. The hook should stand out from the wall far enough that a bulky coat has somewhere to hang, usually 2-3 inches.
- Sturdy attachment. A toddler may pull or hang their whole body weight on a hook, so mount it as the Safety first box at the top describes.
- Simplicity. One hook per child, per item, is easier than a crowded rail where hooks compete.
Hook styles compared
| Style | Pros | Cons | Best for |
|---|---|---|---|
| Single wooden knob or peg | Gentle on small hands, simple look | Coats can slide off if the loop is thin. | All ages, including under 3. Light jackets, one-coat households. |
| Curved metal hook (ages 3+ only) | Holds a loop well, widely available | Exposed tips need rounded caps. | Daily coats and backpacks. |
| Wooden rail with multiple pegs | Easy to mount level, adjustable spacing | Pegs can be too close together for bulky coats. | All ages, including under 3. Siblings, shared walls. |
| Double-prong coat hook (ages 3+ only) | Holds hat on top, coat below | Needs a rounded cap on every tip. | Preschoolers and school-age kids. |
| Over-the-door hooks | No drilling, renter-friendly | Hang at set heights, so they’re often too high. | Temporary or small-space solutions. |
| Adhesive hooks | Easy, no tools | Low weight limits, so heavy winter coats can pull them off. A pulled-off hook is a small-part risk for under 3s, so supervise or skip. | Hats and light jackets only. |
My own pick for toddlers is a simple wooden rail with rounded pegs. It’s the only style I’d put at face height for a child under 3. It also looks calm on the wall, and you can adjust spacing as kids grow.
How to Set Up a Kid-Height Coat Closet or Wall
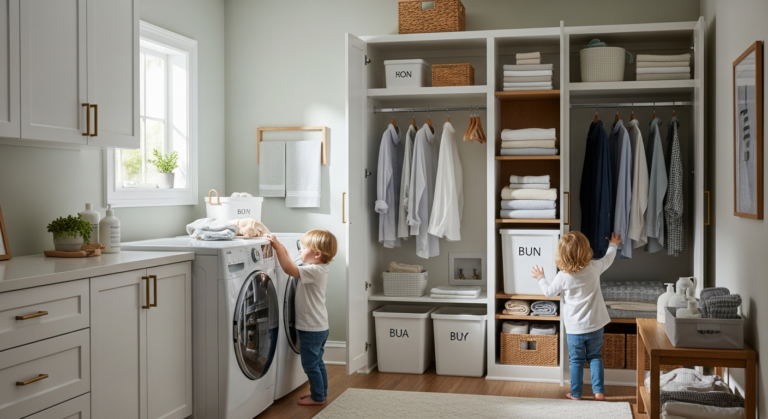
The best coat setup for kids is often not inside a closet at all. A coat on a closet rod behind a door means opening the door, finding the hook, and managing a hanger. That’s three extra steps for a toddler.
An open wall near the door, with a rail at child height, lets the child see where things go and finish the task in one motion.
Plenty of homes have only a standard coat closet, and that can work too. Here are three approaches side by side.
| Setup | Drilling needed | Steps for the child | Best for |
|---|---|---|---|
| Open wall rail | Yes, into studs | One: hang the coat | Toddlers and first-time learners. |
| Lowered rail or rod inside the closet | Yes | Two or three: open the door, find the hook, hang the coat | Homes with only a reach-in closet. |
| Renter-friendly rack or removable rail | Minimal: one anchor point for a rack’s anti-tip strap | One: hang the coat | Renters who can’t mount a full rail. |
Option 1: The open wall rail (best for independence)
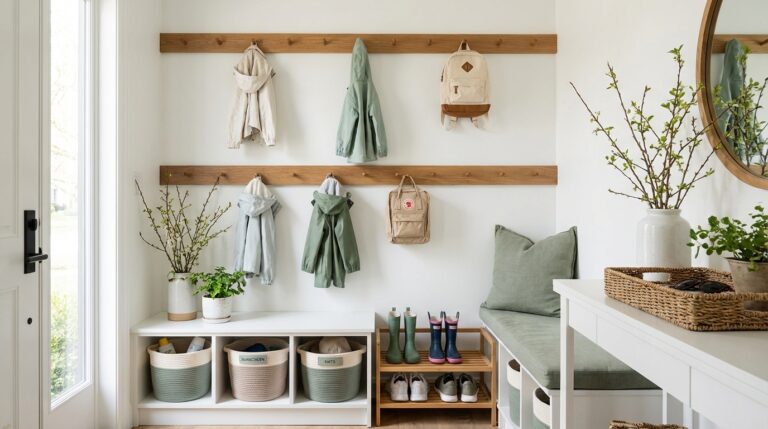
If you have a few feet of wall near your entry, this is the most intuitive setup:
- Mount a rail at your chosen hook height. For one toddler, 2 feet of rail is plenty. Pegs about 6-8 inches apart leave room for a bulky coat. For siblings, give each child their own section.
- Leave a gap between children. At least 8-10 inches per child so bulky coats don’t overlap.
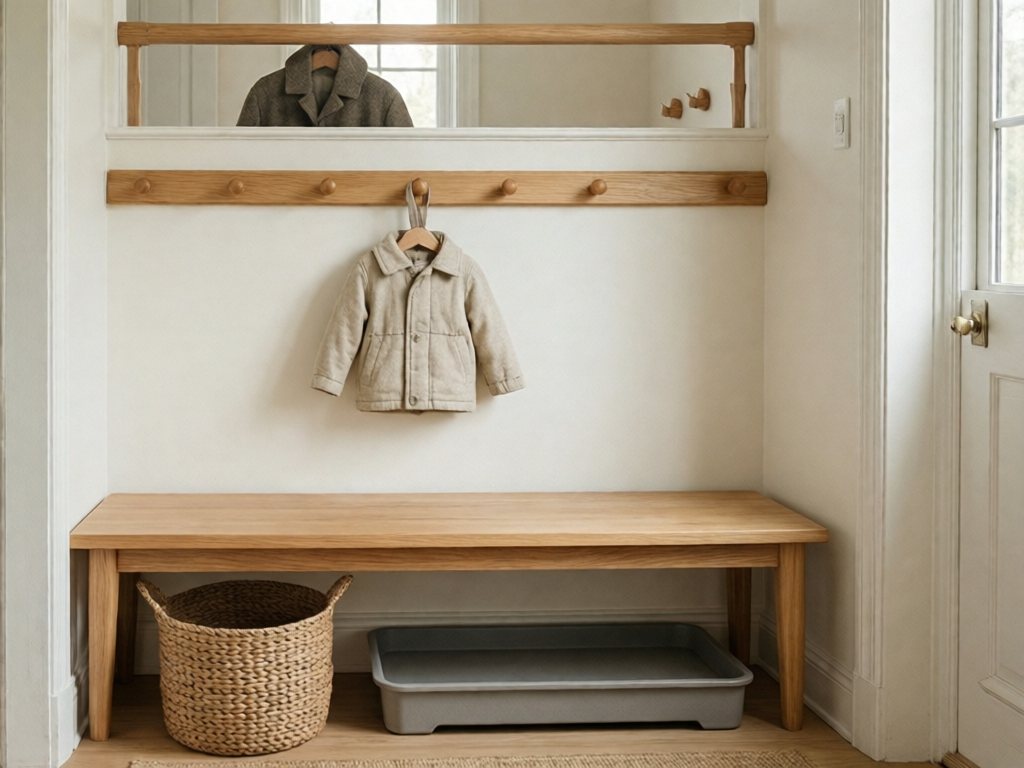
- Add a low, stable bench under the rail. A bench lets a toddler sit down to take off shoes. Anchor any shelf or tall bench to the wall, and keep a basket underneath for hats and mittens.
- Put a small mirror nearby. A mirror at child height makes the routine feel grown-up. Choose a shatterproof acrylic mirror and mount it securely to the wall.
Mounting the rail takes five steps. The $15-40 in the box at the top covers a rail or hooks plus mounting hardware. A bench, basket, and mirror are optional extras.
- Find the studs. Run a stud finder along the wall and mark the center of each stud in pencil.
- Mark the height. Put painter’s tape at your chosen hook height and test it with a real coat.
- Level the rail. Hold the rail on the tape line, set a level on top, and mark the screw holes over the studs.
- Pre-drill and screw. Drill pilot holes slightly narrower than the screws, then drive the screws through the drywall and well into the studs.
- Tug-test. Pull down firmly on every peg before your child uses it.
TipChoose screws long enough to bite well into the stud. The screws supplied with a rail are sometimes too short for that.
For the wider entry, my post on entryway organization for families walks through how to zone the space. That way the coat wall, shoes, and bags don’t compete with each other.
Option 2: A lowered rail inside the closet
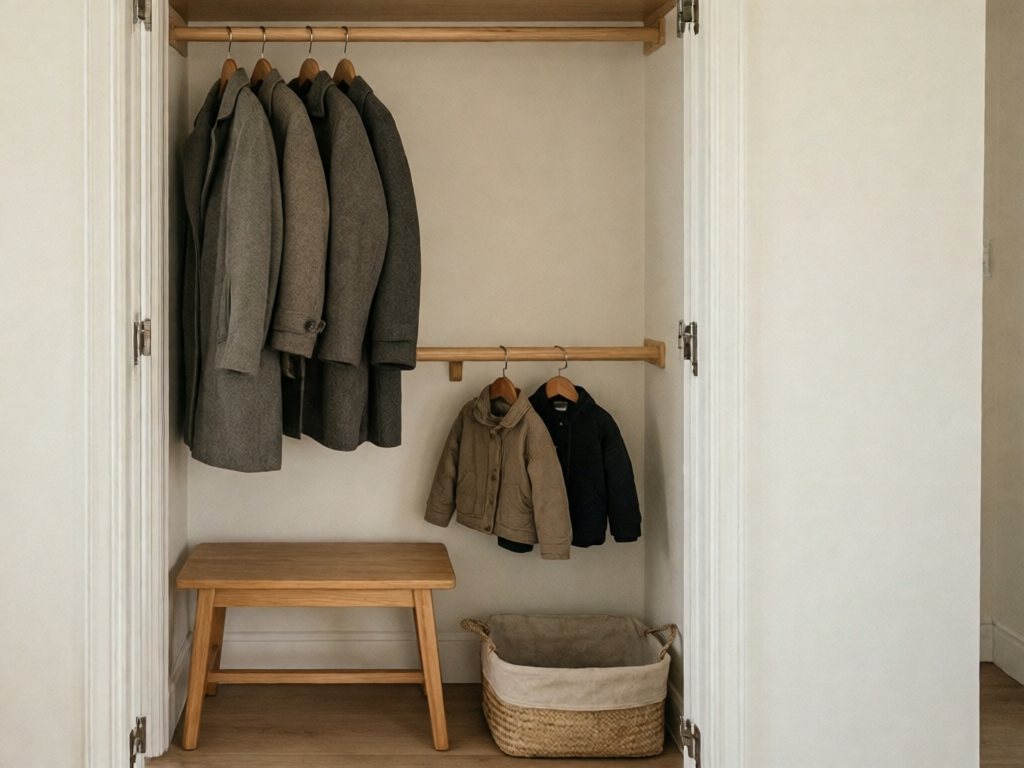
For a deep or reach-in closet, you can set up a kid zone on the side wall or inside the door:
- Mount a rail on the inside of the closet door. Set it at kid height, and make sure the door opens fully and doesn’t swing into a hanging coat.
- Use the side wall. If you have a side wall inside a walk-in or deep closet, a short rail there keeps kid coats out of the way of adult ones.
- Add a second, lower rod. Many closets let you add a rod beneath the main one for a kid-height hanging zone. Secure it to studs, or use brackets rated for a child’s full weight, because a child may hang on it. Use only lightweight child-size hangers.
- Leave the door open or remove it. Taking the door off removes the single biggest obstacle for a toddler. If you add a curtain, keep it lightweight, cordless, and tie-free on a securely mounted rod.
Option 3: Renter-friendly setups
If mounting a full rail isn’t an option, the safest renter choices are a freestanding kids’ coat rack or a removable-mount rail rated for the weight. A removable mount holds coats, not a child who pulls or hangs on it. Check its weight rating, and tug-test it more often than a screwed-in rail.
A freestanding rack can tip over when a child pulls on it. Anchor it to a wall stud with a furniture anti-tip strap, which leaves only a small screw hole. Follow the manufacturer’s instructions and CPSC furniture-anchoring guidance.
Safety firstSkip tension rods at toddler height, since one can fall and strike a child. Skip open S-hooks too. Their exposed ends can detach when tugged and injure eyes and faces.
A sample small-entry layout
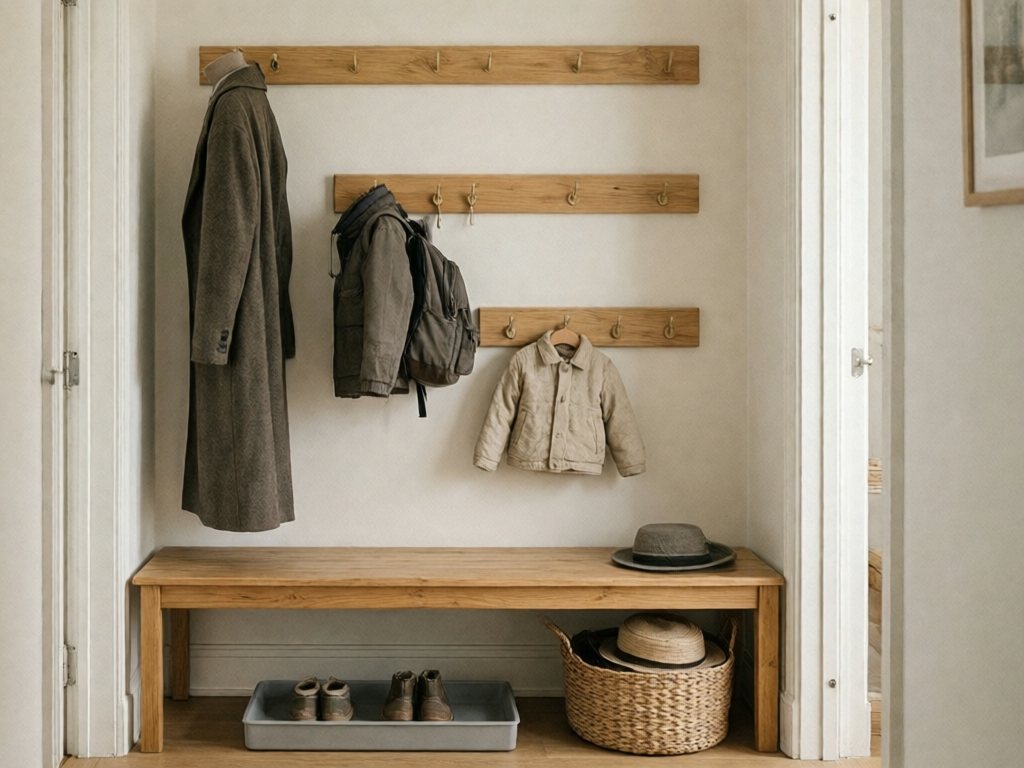
For a typical narrow entry with about 4 feet of free wall, this layout works well:
| Zone | Height from floor | What goes here |
|---|---|---|
| Adult hooks | 60-66 in | Adult coats, bags, guest coats. |
| Older child hooks (5-7 years) | 32-36 in | School-age coat, backpack. |
| Toddler hooks (2-3 years) | 25-29 in | Toddler coat, small bag. |
| Shelf or bench | 14-18 in | Seat for putting on shoes. |
| Floor tray | 0 in | Boots and wet shoes. |
| Basket | Floor or low shelf | Hats, mittens, scarves. |
The child heights come from the chart above, so swap in your own child’s row.
How to Make Coats Easy for a Toddler to Hang
Even at the perfect height, a toddler can struggle if the coat itself is awkward. Five things make coats and bags easier to hang.
Check that the coat has a hanging loop
A hanging loop gives a child a clear thing to grab. Choose coats with a manufacturer-sewn loop at the collar.
Many toddler coats have a tiny loop or none at all. For those, hang the empty coat by its hood on a rounded peg. Do this only when the hood has no drawstring, and never while your child is wearing the coat.
Safety firstDon’t sew or clip your own loops onto children’s coats. An added loop or cord at the neck can catch while the coat is being worn. Skip any coat with a hood drawstring or neck cord.
Teach the coat flip
Some children pick up the coat flip at around two and a half to three, usually with help. The age varies widely, so treat that as a rough guide.
- Lay the coat on the floor, lining side up, with the collar at the child’s feet.
- Have the child stand at the collar and put their arms into the sleeves.
- They lift their arms up and flip the coat over their head.
- The coat lands on their back, and they zip or fasten.
A child who can put a coat on alone is more likely to take it off and hang it up alone.
Keep coats simple
A coat covered in toggles, belts, and hidden snaps is hard for a toddler to manage. When you buy or rotate, look for these features.
- Big zipper pulls or a pull ring.
- Stretchy cuffs rather than fiddly closures.
- Soft fabric that doesn’t hold a stiff shape.
- A hood that’s attached, not removable, with no drawstring.
- Bright interior lining so the child can tell inside from outside.
If the coat collection is already out of hand, my post on fall closet organization and the swap system covers rotating seasonal clothing.
A “one coat” rule
Toddlers can’t manage a rack of choices, and neither can a low hook. A good limit is one or two coats on the hooks at a time: the daily coat and perhaps a rain jacket. Everything else lives in a bin, a closet, or a high shelf until the season changes. It keeps the wall calm, and it makes hanging a coat easier because there’s room.
Backpacks and bags
A toddler “bag” might be a little tote with a snack and a toy. Give it its own hook, set a little higher or lower than the coat hook depending on the loop length.
How to Teach a Toddler to Hang Their Coat
Once the hooks are up, teach the routine in a few calm steps, without nagging.
Show it slowly, once
Choose a calm moment, not the frantic arrival after a long outing. Show your child the whole sequence at a slightly slower than normal pace:
- Take off the coat.
- Find the loop.
- Lift it to the hook.
- Let go and look at it.
- Walk away.
Say very little while you do it. Toddlers learn from watching, and talking over a demonstration can muddy it.
Let them practice when nothing’s at stake
Try a “coat game” on a quiet afternoon. Put the coat on and take it off a few times. Let them hang it up, take it down, and hang it up again. There’s no rush, and no one needs to leave the house.
Use short, positive phrases
Swap “Don’t drop your coat” for one of these.
- “Where does your coat live?”
- “Coat on the hook.”
- “Your hook is ready for you.”
Short phrases give the child a task and a destination. They don’t point to the mistake.
Expect lapses
A toddler will sometimes drop the coat on the floor, leave it on the bench, or insist you do it. That’s normal. Treat it as a skill that’s still wobbling, not a behavior problem. Calmly say, “Let’s put it on the hook together,” and do it together. Over a few weeks, the lapses get fewer.
Celebrate the result, not the child
Describe the result instead of praising the child. “Your coat is on the hook, and it’s ready for tomorrow” keeps the focus on the task and the outcome. “Good girl” or “Good boy” shifts it to your approval.
A realistic expectation by age
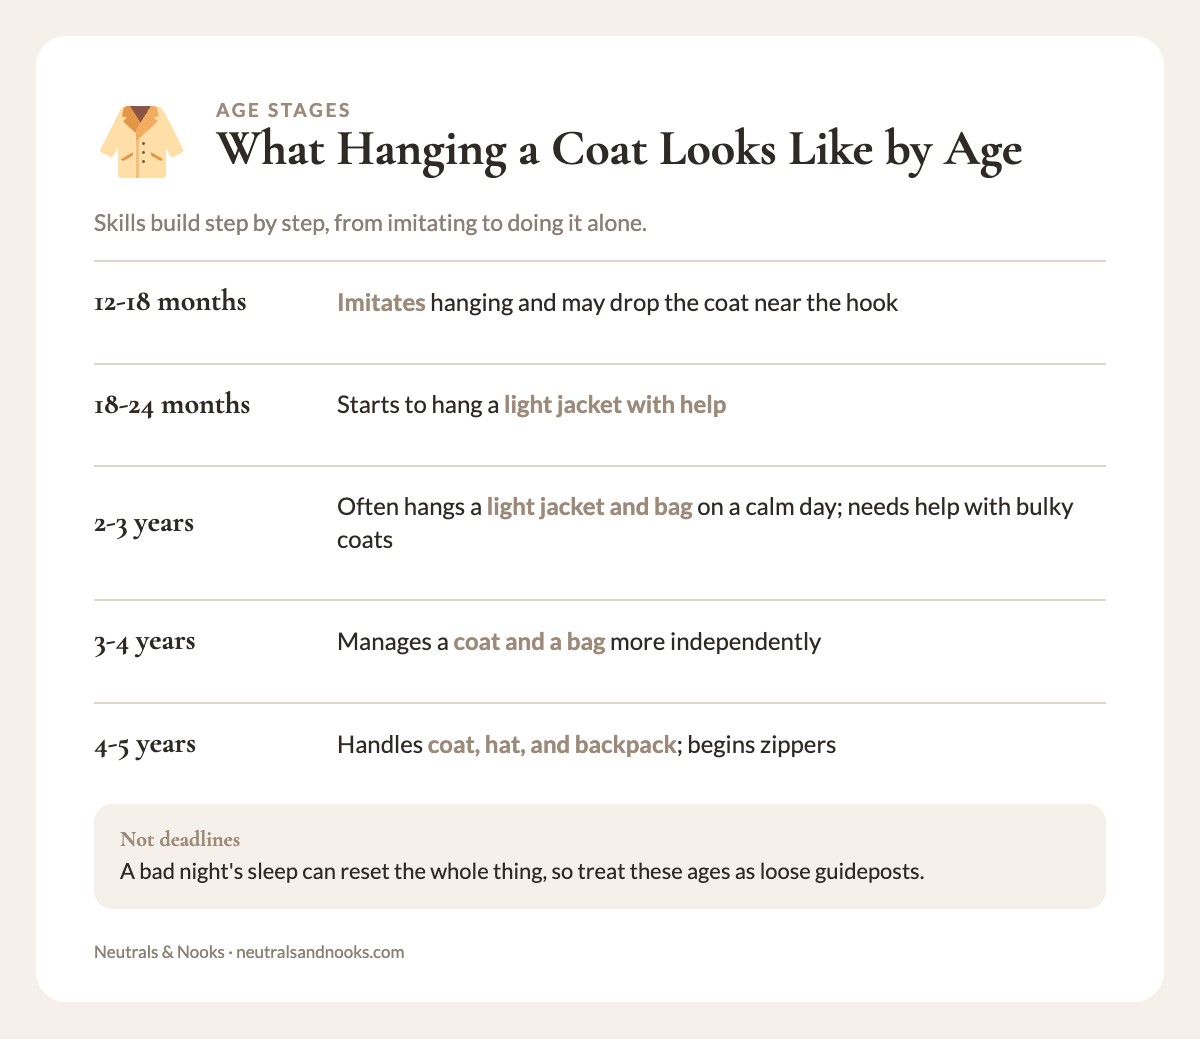
| Age | What you can reasonably expect |
|---|---|
| 12-18 months | Imitates hanging and may drop the coat near the hook. |
| 18-24 months | Starts to hang a light jacket with help. |
| 2-3 years | Often hangs a light jacket and bag on a calm day. Still needs help with bulky coats. |
| 3-4 years | Manages a coat and a bag more independently. |
| 4-5 years | Handles coat, hat, and backpack, and begins to manage zippers. |
These are guideposts, not deadlines. Children develop at different paces, and a bad night’s sleep can reset the whole thing.
When to Raise the Hooks as Your Child Grows
A kid-height hook isn’t a one-time install. A toddler can gain several inches in a year, and a hook that was perfect in October may be too low by summer.
Plan for adjustment
Here’s how to make the setup flexible from the start:
- Use a rail with multiple mounting points. Rails with a row of pegs let you shift a child’s coat over by one peg as their needs change, and you can eventually swap the rail height.
- Expect to re-drill. A rail screwed into studs can be lifted and repositioned later, with only small holes to patch.
- Keep your chart handy. The fill-in chart in the kit has a date column. Re-measure every season, or when a coat starts to hang strangely.
- Mark a growth line. A small piece of painter’s tape on the wall at the current “reach height” makes it easy to see when it’s time to move up.
Seasonal checks
Pair these checks with your seasonal clothing swap. My guide to seasonal clothing storage for kids covers where the off-season coats go.
- First cold snap. Re-measure, and try the winter coat on the hook.
- Mid-winter. Check loops, hooks, and wall anchors for wear.
- Spring. Swap heavy coats for light jackets, and rotate bins.
- Back to school. Re-measure for a bigger backpack and a longer coat.
- Birthday. Compare to last year’s measurements in the kit’s chart.
When a younger sibling arrives
A second child is a good excuse to give the older child more responsibility. Keep the older child’s hooks where they are, and add a lower rail section for the younger one. Let the older child “show” the younger one how it works, since siblings tend to enjoy the teacher role. If you’re sharing a wall among several kids, my post on mudroom cubbies for multiple kids covers sizing, labels, and layout in more depth.
Common Problems and Quick Fixes
Even a well-planned setup hits snags. Here are the common ones.
| Problem | Likely cause | Quick fix |
|---|---|---|
| Coat slides off the hook | Loop too thin or hook too flat | Choose a coat with a sturdier sewn loop, or switch to a peg with a wider head. |
| Child can’t reach | Hook too high | Lower by 1-2 inches and retest. |
| Coat drags on the floor | Hook too low, or coat too long | Raise by an inch or two, or use a shorter coat for daily wear. |
| Hooks get crowded | Too many coats | Limit to one or two per child, and store the rest. |
| Child ignores the hook | Routine isn’t built yet | Practice together on a calm day, and praise the result. |
| Hook pulls out of the wall | No stud or weak anchor | Remount it as the Safety first box at the top describes. |
| Hats and mittens everywhere | No home for them | Add a shallow basket at floor or low-shelf height. |
| Siblings fight over hooks | No clear ownership | Label each hook with a name or small picture. |
| Wet coats mildew | No air circulation | Leave space between coats, and add a boot tray. |
A note on labels
A small picture or name label by each child’s hook reduces squabbles and teaches early recognition. A little wooden tag, a piece of washi tape with a name, or a simple icon is enough. Keep the label at the child’s eye level, which means beside or just below the hook, not above it.
Keeping the coat wall calm and neutral
Three choices keep a kid-height coat wall looking intentional.
- Match the rail to the room. A natural wood rail with soft round pegs blends into most entries. Painting the rail the same color as the wall gives a seamless look.
- Keep the palette tight. Oatmeal, warm white, and soft gray backdrops let colorful coats be the accent. You don’t need to color-code everything.
- Use natural-material baskets. Woven seagrass, felt, or linen-lined bins feel calm and are friendly on small hands.
A good test is to take a photo of the entry. If the coat wall, the bench, and a basket read as one calm group, you’re in good shape. If the photo looks busy, remove a label or a bin.
Frequently Asked Questions
How high should coat hooks be for a toddler?
As a rough starting range, hooks for most children from 12 months to 3 years sit about 20 to 29 inches from the floor, as in the chart above. New walkers sit at the low end of that range. Your child’s measured shoulder height overrides the chart. Place the hook at or just below it, within comfortable reach without tiptoeing. Then check that the coat’s hem clears the floor by 2 to 3 inches.
Are low hooks for kids’ coats safe?
They can be, when you choose and install them thoughtfully. For children under 3, use only rounded wooden knobs or pegs, since a toddler’s face may be near hook height. From age 3, metal hooks need a rounded cap on every tip. Mount hooks into studs or heavy-duty anchors rated for a child’s full weight, and tug-test monthly. Skip coats with drawstrings or cords at the neck.
Do I need to drill into the wall for a Montessori coat hook setup?
Not for a full rail. A mounted rail is the sturdiest option, but renters can use a removable-mount rail rated for the weight. A freestanding kids’ coat rack also works once it is anchored to a wall stud with an anti-tip strap. Adhesive hooks suit hats and light jackets only, not heavy winter parkas. Skip tension rods at toddler height, since they can fall.
What age can a child start hanging their own coat?
Many children begin imitating the motion around 12 to 18 months. Between 18 and 24 months, some start to hang a light jacket with help. From 2 to 3 years, a lot of toddlers hang a light jacket on a low hook on a calm day. By 3 to 4, most manage a coat and a bag more independently. Every child moves at their own pace, so treat these ages as loose guideposts.
How do I organize a coat closet for kids if I only have a standard reach-in closet?
Add a kid zone inside it. Mount a low rail on the inside of the door or on a side wall, or install a second, lower rod beneath the main one. Secure a lower rod to studs and use lightweight hangers. A small bench and basket on the floor finish the zone. Taking the door off or leaving it open also helps, since a closed door is an extra step for a toddler.
How often should I adjust the hook height as my child grows?
A quick check every season is plenty, such as when you bring out the winter coat and again at the start of spring. Children can grow a few inches in a year, and a bulkier coat can change how it hangs. If your child starts stretching, lifting their heels, or throwing the coat upward, it’s time to raise the hook by an inch or two. A rail with several mounting points makes this easy.
What should go on the hooks besides coats?
Light bags, small backpacks, and hats are all good candidates, but keep the number limited so the wall doesn’t feel crowded. A good starting point is one or two coats and one bag per child. Put mittens, scarves, and extra hats in a shallow basket at floor or low-shelf height, and keep boots on a tray below. Fewer items make the routine easier for a toddler to follow.
Start With One Hook
Lowering a hook takes about an hour, and it changes a daily moment. Your child comes in and hangs up their own coat without waiting for you.
Start with a tape measure, a pencil, and the chart above. Pick one hook height, test it with a real coat, and adjust by an inch or two until it feels right. Give it a week of calm practice, and let the small wobbles be part of the process.
The same Montessori filter works in any room. Can your child see where a thing goes, reach it comfortably, and finish the job alone in one or two steps? If not, the fix is usually lower, simpler, or fewer. My Montessori toddler bedroom post applies it to the bedroom.