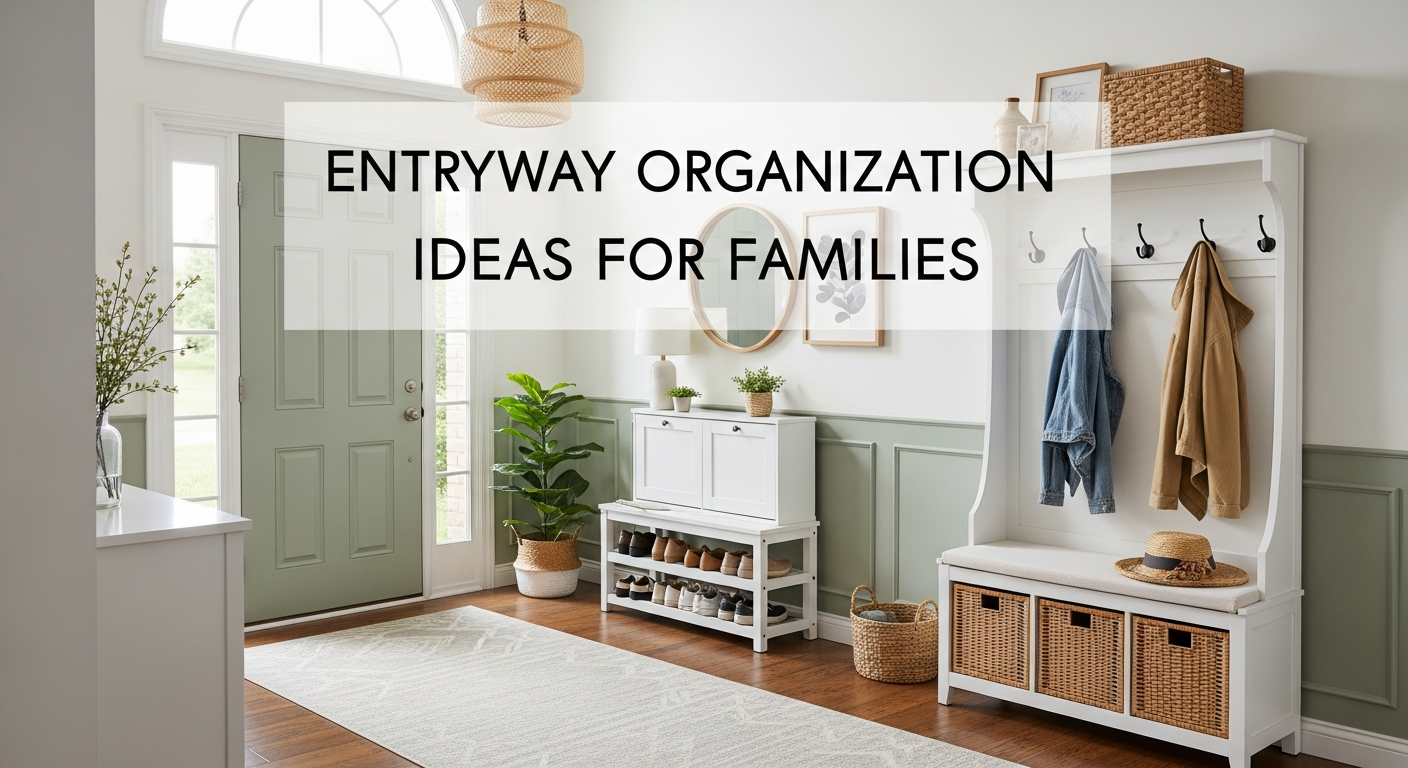
Entryway Organization Ideas for Families
Transform your chaotic family entryway into an organized launch pad by creating a functional zone with strategic storage and a simple system, even in small spaces. You'll learn to assess your needs and implement five core components.
- Assess your entryway's specific needs by observing daily chaos and measuring space.
- Create an entryway zone, even in small spaces, by designing around daily actions.
- Implement five core components: hooks, shoe storage, a drop zone, bag storage, and an outbox.
- Provide individual hooks for each family member at appropriate heights.
- Use an "outbox" for items needing to leave the house to reduce clutter.
Shoes, backpacks, jackets, and mail pile up by the door in almost every family home. That is normal: most entryways were never designed for the amount of stuff kids bring through them each day.
This guide covers the five pieces every family entryway needs and three budget setups from about $45 to $300. It also covers kid-height hooks and cubbies, a simple mail system, and a seasonal reset. You don’t need a mudroom, just a small zone and a routine your kids can follow.
In this article (8 sections)
Small Entryway Ideas: Measure Before You Buy
Not every home has a dedicated mudroom or spacious foyer. Many families walk straight into a living room, a narrow hallway, or a cramped landing. That’s okay—you just need to create an entryway zone, even if it’s only 24 inches of wall space beside the door.
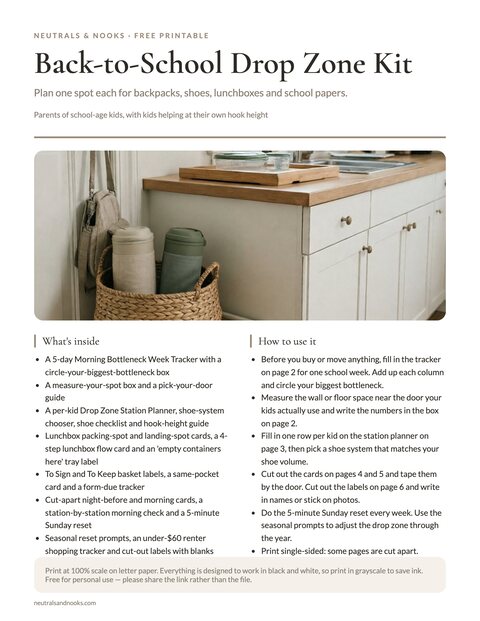
Free printable · 6 pages
Back-to-School Drop Zone Kit
A week-long morning bottleneck tracker, spot measuring and door guide, a per-kid station planner with hook heights and shoe chooser, lunchbox flow and paper cards, night-before and morning door cards, a Sunday and seasonal reset, an under-$60 renter shopping tracker, and cut-out labels.
Free. Your download link appears right here. You'll also join the Monthly Home Reset. Unsubscribe anytime. Privacy
Start by standing at your door and asking: what needs to happen here every day? In most families, shoes come off, bags get dropped, and coats get hung. Keys and wallets need a home, and outgoing items (library books, permission slips, sports gear) wait to leave. Build the zone around those daily actions.
Before you buy anything, measure and write down:
- Wall width, plus the height available for hooks and shelves.
- Clearance above the kids’ hook row for adult coats.
- Floor depth for a shoe rack or bench.
- Door swing, so nothing blocks the door.
Even a space 30 inches wide and 12 inches deep can work as a drop zone. If you rent, plan around adhesive hooks and freestanding pieces, and save drilling for the items that carry real weight.
Mark the spots where things land today; that tells you where hooks and trays belong. A pile of shoes means you need a rack, a heap of backpacks means hooks at kid height, and loose mail means a paper landing pad.
Entryway Storage Essentials for Families
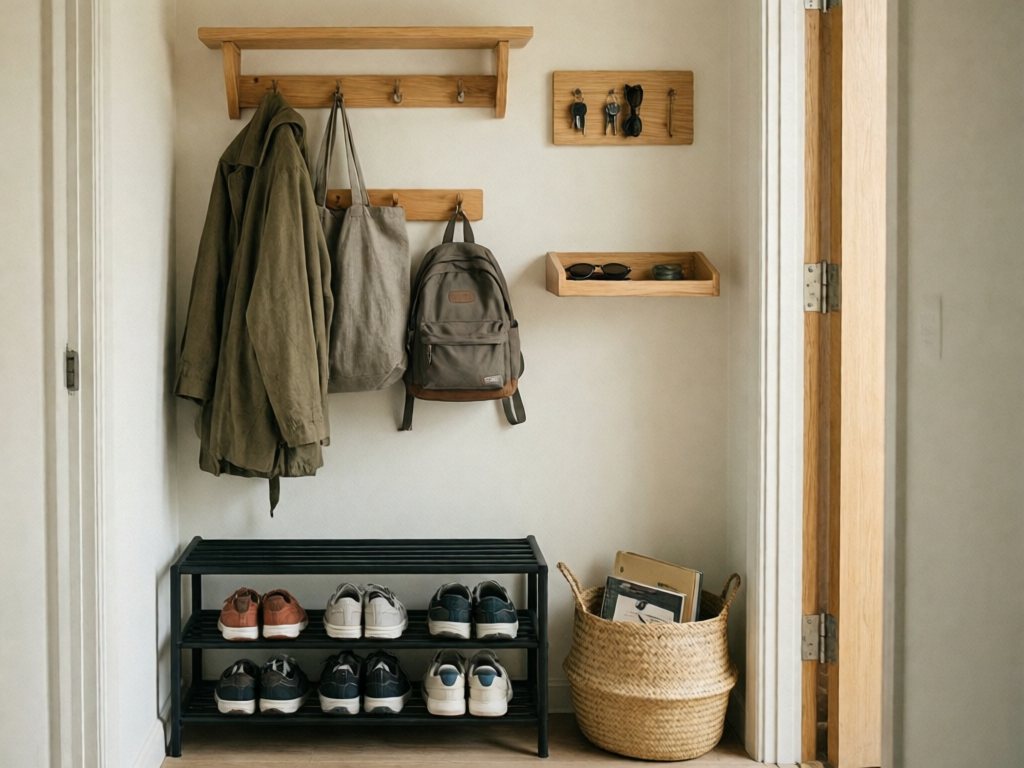
Every family entryway needs five pieces, whatever its size: hooks, shoe storage, a drop zone, bag storage, and an outbox. Once these are in place, the morning scramble gets shorter.
Good to knowPrices and product names here are approximate and can change. Check current listings before you buy, and measure first.
Safety firstAnchor every tall or top-heavy unit (cubby systems, KALLAX shelves, benches with shelves) to wall studs with anti-tip hardware, especially with children under 6, and don’t let kids climb them. Wall racks and shelves need studs or wall anchors rated for the load. Use rounded or blunt-tipped hooks at kid height. Keep button batteries, key fobs, and magnets out of reach of all young children, under 6 at minimum. Keep coins, small clips, and loose tags away from children under 3–4.
Hooks for Every Person
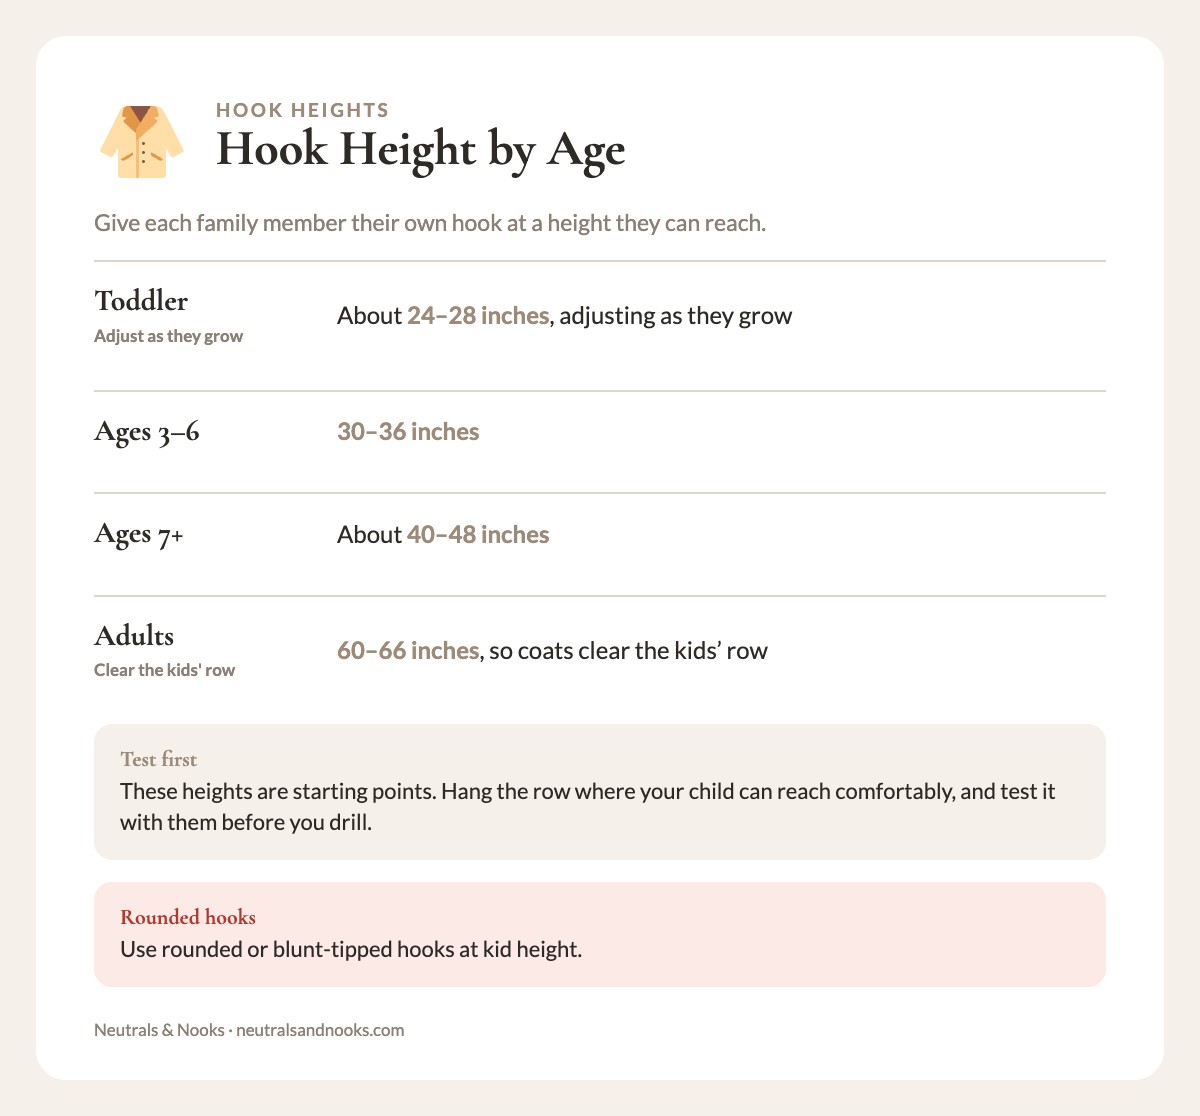
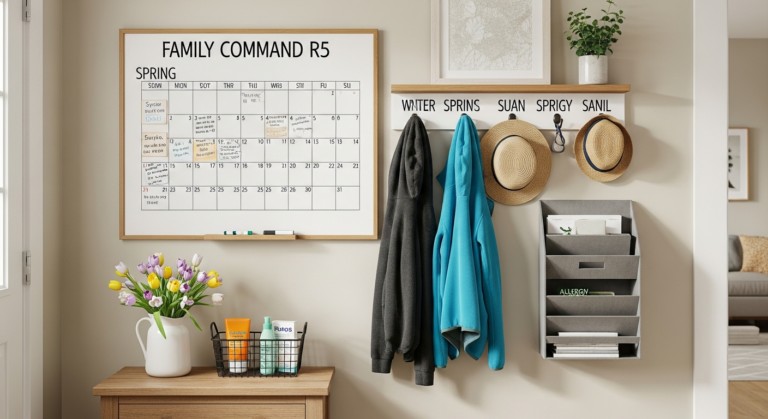
Give each family member their own hook at a height they can reach. A hook rack with a shelf on top, such as the IKEA PINNIG rack (about $35; check the current hook count and price), suits heavy winter coats when it is fastened into studs or proper anchors.
For a no-drill option, Command decorative hooks ($5–8 each at Target) work for light jackets and hats. Clean the wall first, wait the cure time on the package before hanging anything, and stay under the weight rating for your model. Recheck them monthly, because an overloaded or loose adhesive hook can pull free and fall onto a child. Use screwed-in hooks for loaded backpacks.
| Who | Hook height |
|---|---|
| Toddler | About 24–28 inches, adjusting as they grow |
| Ages 3–6 | 30–36 inches |
| Ages 7+ | About 40–48 inches |
| Adults | 60–66 inches, so coats clear the kids’ row |
These heights are starting points. Hang the row where your child can reach comfortably, and test it with them before you drill.
Shoe Storage
Shoes on the floor are the most common entryway problem. A 3-tier shoe rack ($15–25 at Target or Amazon) holds about 6–9 adult pairs, and more if they are kids’ shoes. Check the pair count on the listing before you buy.
The IKEA TJUSIG shoe rack ($30) is slim and clean-lined. For tight spaces, hang an over-the-door shoe organizer ($10 at Walmart) on a coat closet door. It often stores 12 or more pairs out of sight, depending on the model.
A Drop Zone for Daily Essentials
Keys, sunglasses, wallets, and earbuds need a landing pad. A small tray, wall-mounted shelf, or the IKEA SKADIS pegboard ($20 for the panel plus hooks and containers) by the door keeps them together. Add a dish or hook for car keys and they’re much easier to find.
Safety firstMount the drop zone above the reach of children under 6, or keep keys and remotes in a closed box on a high shelf. Key fobs and remotes hold button batteries, which need to stay away from children under 6 at minimum. Loose coins are a choking hazard for children under 3–4. If a child swallows a button battery or a magnet, go to the ER immediately. In the US, you can also call the National Poison Help line at 1-800-222-1222.
Backpack and Bag Storage
Oversized hooks or a row of double hooks ($4–6 each at Home Depot) handle heavy backpacks better than single hooks. A cubby bench with compartments gives each child a labeled spot for their bag. Open hooks look busier than closed cubbies, but they are faster for kids to use.
An Outbox
Place a basket or bin near the door for items that need to leave the house: library books to return, packages to mail, dry cleaning, signed permission slips. The Target Brightroom woven basket ($10–15) is attractive and functional.
TipGlance at the outbox every time you head out the door. It only works if it becomes part of the leaving routine.
Entryway Setups on a Budget
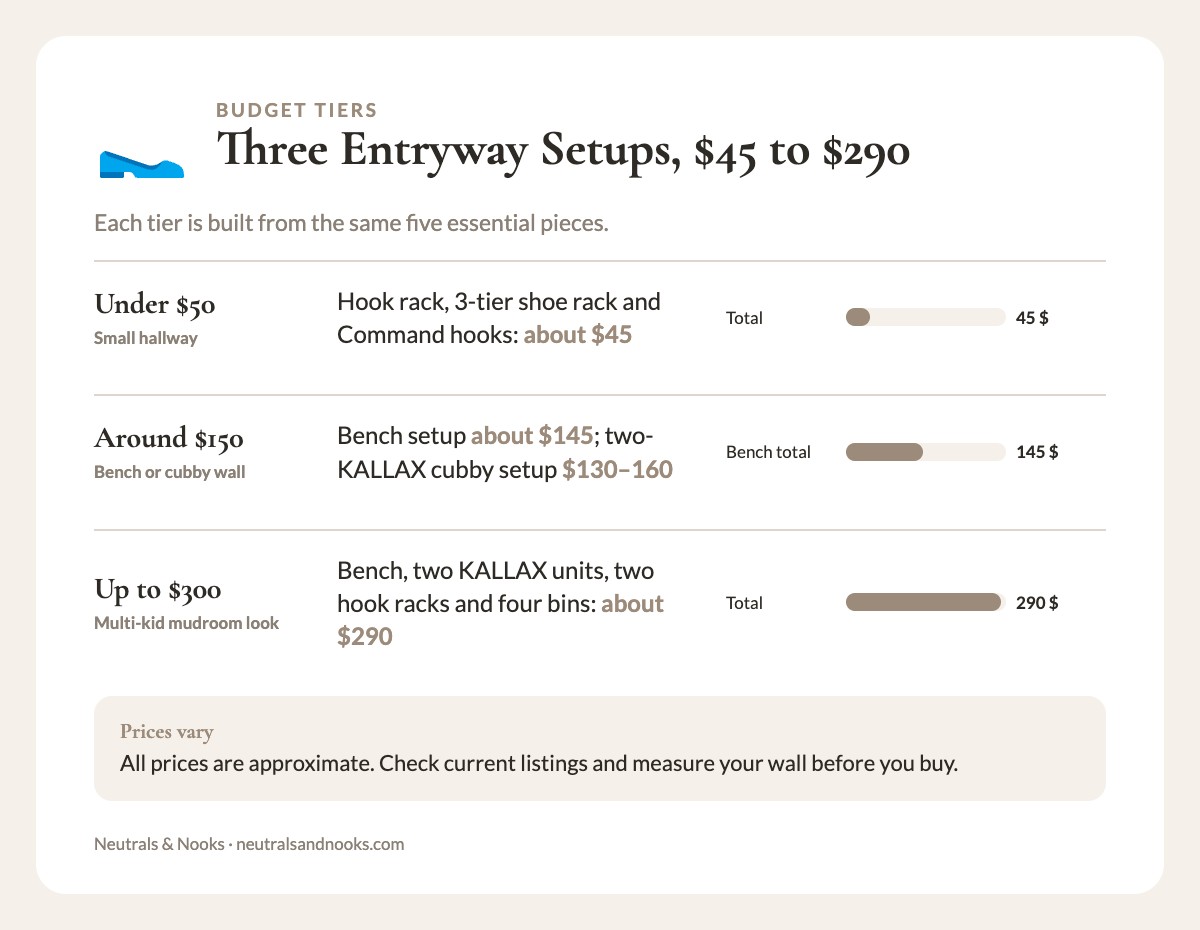
You don’t need to spend hundreds to create a functional entryway. Here are three setups at different price points, built from the pieces above. All prices are approximate.
| Tier | What’s included | Approx. total | Best for |
|---|---|---|---|
| Under $50 | Wall hook rack ($20) + 3-tier shoe rack from Amazon ($18) + Command hooks at kid height ($5 for a 2-pack) = $43. Add a Dollar Tree basket for the outbox. | About $45. | Small hallway. |
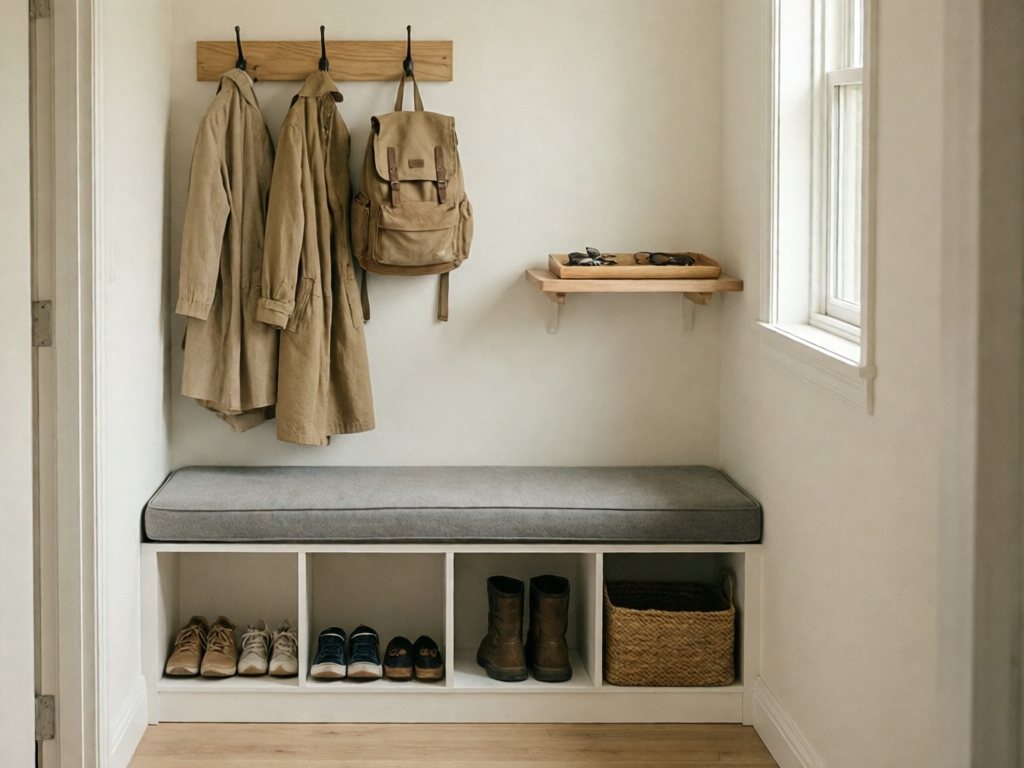
| Around $150 | Bench option: IKEA HEMNES bench with shoe storage ($100) + hook rack above it ($35) + small wall shelf for keys ($10) = $145. Cubby option: two IKEA KALLAX 1×4 units (about $100 together) + hooks and bins ($30–60) = about $130–160. | About $145 for the bench, or $130–160 for the cubbies. | Bench station or cubby wall. |
| Up to $300 | Locker-style wall: IKEA HEMNES bench with shoe storage ($100) + two IKEA KALLAX 1×4 units (about $100 together) + two hook racks ($35 each, $70 total) + four small bins ($4–5 each, $16–20 total) = about $290. | About $290. | Multi-kid mudroom look. |
Under $50: Hooks and a Shoe Rack
Mount the wall hook rack at adult height, into studs or anchors rated for the load. Put the Command hooks below it for kids, and keep those for light jackets and hats only.
Loaded backpacks go on the screwed-in rack or in a basket on the floor, not on adhesive hooks. Prep the wall, follow the cure time on the package, and recheck the adhesive hooks monthly.
Around $150: Bench Station or Cubby Wall
The bench setup gives you seating and shoe cubbies. It has a polished look that reads like built-in cabinetry, and you can take it with you if you move. Closed storage hides clutter, but it also gets stuffed, so plan on a quick purge each season.
The cubby option takes three steps:
- Stand the units upright. Set two IKEA KALLAX 1×4 units against the wall.
- Anchor to studs. Fasten each unit to wall studs with the included tip-over restraint.
- Mount the hooks. Fix hooks into the wall or a solid backboard above the units, not into the hollow-core panels.
For more layouts, see our guide to mudroom cubbies for several kids.
Up to $300: A Locker-Style Wall
This tier combines the bench and the cubbies from the middle tier. Each family member gets their own section with hooks, a shelf, and a cubby. You get locker-style storage without needing a separate room.
Place the IKEA HEMNES bench in the middle, with one upright IKEA KALLAX 1×4 unit on each side. Mount one hook rack at adult height above the bench and a second at kid height, both into studs or rated anchors. Add a labeled bin to each child’s cubby.
At the prices above, the bench ($100), two KALLAX units (about $100), two hook racks ($70), and four bins ($16–20) come to about $290. Anchor both KALLAX units to studs, the same way as in the cubby steps above.
Measure before you buy, because this layout needs wall room for the bench plus both units. Ready-made modular cubby systems are another route, but prices vary widely, so check the listing.
Kids’ Hooks and Cubbies: A Station for Each Child
The fastest way to get kids to use an entryway system is to give them ownership. When each child has a clearly labeled, personalized spot, they feel pride in keeping it tidy—and they know exactly where their stuff lives.
Label each hook, cubby, or section with the child’s name. For little ones who can’t read, use a photo of their face, a symbol (star, heart, dinosaur), or their favorite color. The DYMO label maker ($25) creates clean labels. For a warmer look, hand-letter names on small wooden tags from Michaels ($3 for a pack).
Good to knowFor children under 3–4, use large labels fixed securely with adhesive or screws. Avoid loose small tags, pegs, or detachable pieces within reach.
Each station should hold one coat, one backpack, one pair of daily shoes, and a small bin for hats and gloves only. The IKEA VARIERA bins ($5 each) or Target’s Brightroom small storage bins ($4 each) fit inside cubby shelves. Keep keys, coins, and small items out of kids’ bins.
Keep the rule simple: when you walk in, everything goes in your station. Coat on hook, shoes on rack, bag in cubby. Expect the first week to need reminders. In most homes the routine gets easier after that, and a weekly 5-minute reset catches the slips.
With more than one child, give each a day of the week to “inspect” the entryway. They check that shoes are on the rack, hooks are being used, and nothing is on the floor. Many kids like being the inspector, and it spreads the upkeep across the family.
One-Hour Entryway Setup: Step by Step
- Measure. Check wall width, floor depth, and door swing.
- Mark hook heights. Mark one row for adults and one for each child.
- Mount and anchor. Install hooks and anchor any tall furniture to studs.
- Label. Use large, fixed labels for little ones.
- Set up the zones. Add the drop zone, outbox, and paper slots.
- Walk it through. Do the daily routine once with the kids.
The Back-to-School Drop Zone Kit below has a zone map, a hook-height chart, and a weekly reset checklist to go with these steps. For more on hooks and closets, see our back-to-school drop zone guide.
Mail and Paper Organizer Ideas
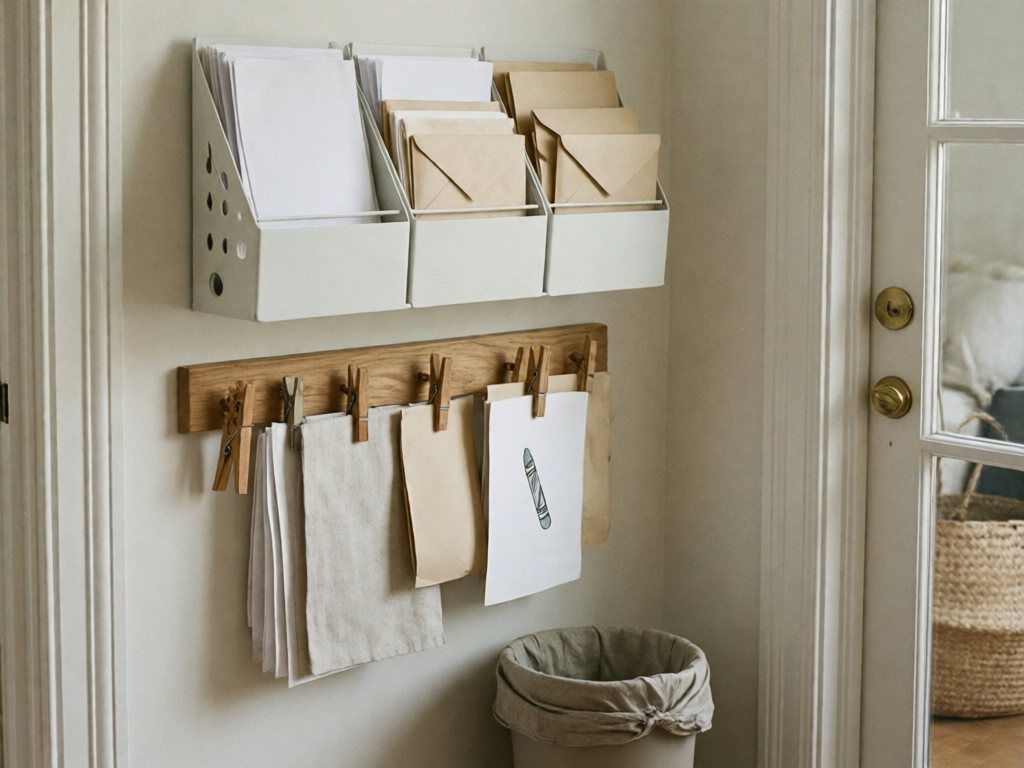
Paper clutter builds quickly at the door. Junk mail piles up, school flyers land on the bench, and permission slips go missing. A simple paper system right at the door catches it before it spreads through the house.
Mount a wall file organizer ($12–20 at Target or Staples) with three slots right by the door. Label them like this.
- Action. Needs a response: sign this, pay this, RSVP.
- File. Keep, but deal with later.
- Recycle. Junk mail, flyers, and duplicates.
Sort mail as soon as it comes inside. Empty the recycle slot into the recycling bin every day.
For school-age kids, add a clothespin rail ($10 at Amazon) at kid height. If a child under 3–4 is around, mount it above their reach or use a flat paper tray instead.
A magnetic clip strip costs about the same, but use one only if no children under 6 live in or visit your home. Choose one with large, flat, weak magnets fixed into the strip, not loose ones.
Kids clip their own papers there when they get home, and you check it in your evening routine. Important papers move to the Action slot. Artwork goes to the display area or into your kids’ artwork and school papers system.
Safety firstIf children under 6 live in or visit your home, skip the magnetic strip and keep all magnets out of reach. Use a large-clip rail or a flat paper tray instead, and keep small clips and clothespins away from children under 3–4. A swallowed magnet is a medical emergency at any age, so go to the ER right away.
Go digital whenever possible. Photograph permission slips before signing and returning them. Use your phone’s calendar for school events instead of keeping paper flyers. The less paper that enters your home, the less your entryway has to manage.
Seasonal Entryway Swaps and Upkeep
An entryway that works in September may not work in January, when bulky coats, snow boots, wet mittens, and hats enter the picture. Build seasonal flexibility into your system.
Keep a boot tray ($12–20 at Target) by the door during wet months. The Mohawk Home boot tray ($15) has raised edges that contain water and mud. In dry months, swap it out for a simple doormat and reclaim the floor space.
During winter, add a mitten and hat basket to each child’s station. A small mesh or open basket lets wet items air-dry while staying contained.
For really wet gear, mount a drying rail or a row of hooks on the wall above the boot tray. Mittens hung there are often dry by morning, depending on humidity.
Safety firstA tension rod is an option only at adult height, in homes without toddlers. Rods can slip, so keep boots off it and check it weekly. Clothespins are small parts, so keep them away from children under 3–4. Where younger children are around, stick to a wall-mounted rail, a basket, or hooks.
Twice a year, when the seasons change, do an entryway audit. It takes about 20–30 minutes and is on top of the daily drop-and-hang routine.
- Remove outgrown shoes and coats, and donate extras.
- Restock the outbox.
- Refresh labels.
- Swap the boot tray and doormat.
- Check that hooks and furniture anchors are still tight.
The entryway is the first thing you see when you come home and the last thing you see when you leave. Start with the hooks and the shoe rack, then adjust as you learn what your family actually uses.
For the next step, see our spring mudroom refresh and our kids’ closet organization ideas.
Entryway Organization FAQ
How do I organize a small entryway?
Start with a 24-inch wall zone: hooks at two heights, a slim shoe rack, a high shelf or tray for keys, and a small outbox basket. Measure first so nothing blocks the door.
How high should kid hooks be?
About 30–36 inches suits roughly ages 3–6. Go lower for toddlers, around 24–28 inches, and raise the row as they grow. Use rounded hooks.
How many hooks does each person need?
Plan one hook per person for a coat and a second for a backpack. Add a shared spot for hats and bags if space allows.
What if my kids won’t use it?
Lower the hooks, give each child fewer items per station, and walk through the routine together once. Then do a 5-minute weekly reset.
What can renters use without drilling?
Freestanding pieces like a shoe rack, a bench, and a tray for keys need no drilling. Command hooks hold light jackets and hats within their package rating. Save drilling for hooks that carry loaded backpacks.
Neutral Nina
Neutral Nina is an interior design enthusiast and mom of three who proves that beautiful, organized spaces and family life can coexist. She shares practical strategies for creating calm, functional homes that work for kids and grown-ups alike.