Turning the Playroom Into a Guest Room for Thanksgiving Week
Learn how to turn your playroom into a guest room by sorting toys into three tiers, picking the right bed, and following a one-week timeline with a 90-minute reset.
- Sort playroom toys into three tiers to clear space efficiently.
- Choose a bed option that fits your space, from sofa beds to air mattresses.
- Spread conversion tasks over 4 to 5 hours across one week.
- Follow a 90-minute reset plan over two days to quickly restore your playroom.
This post contains affiliate links. As an Amazon Associate I earn from qualifying purchases.
No spare room or extra bedroom for Thanksgiving guests? To turn a playroom into a guest room, sort the toys into three tiers, set up a bed that fits the space, and plan a 90-minute reset. This guide compares sofa beds, Murphy beds, air mattresses and floor beds, then lays out a one-week timeline and a reset checklist. It’s written for kids ages 3 to 8, with safety notes for younger guests.
Last November, my sister-in-law texted me her flight confirmation with one line underneath: “Is the bed situation okay?” It was not. Our three bedrooms were all spoken for, so the playroom it was.
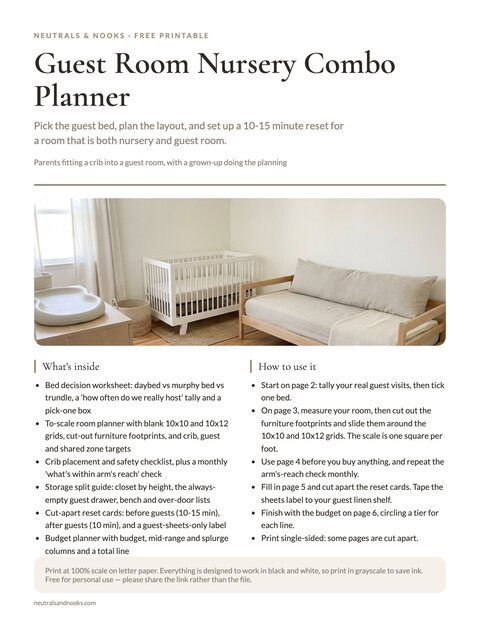
Free printable · 6 pages
Guest Room Nursery Combo Planner
A bed decision worksheet (daybed vs murphy vs trundle), a to-scale 10x10 and 10x12 room planner with cut-out furniture, a crib placement and monthly safety check, a closet and storage split, nursery-mode and guest-mode reset cards with a guest-sheets label, and a three-tier budget planner.
Free. Your download link appears right here. You'll also join the Monthly Home Reset. Unsubscribe anytime. Privacy
In this article (14 sections)
- First, Decide Whether the Playroom Is the Right Room
- The One-Week Timeline (Your Master Reset Plan)
- The Toy Protection Plan (Do This Before the Bed)
- Choosing the Sleeping Setup
- Setting Up the Room So It Feels Like a Guest Room
- Where Kids Play While the Playroom Is a Guest Room
- Age-by-Age Tips for Kids 3 to 8
- During the Visit: Daily Tidy and Guest Etiquette
- The Reset Plan: Back to a Playroom in 90 Minutes
- Turning the Temporary Setup Into a Permanent Combo (If You Want To)
- A Realistic Shopping and Borrowing List
- Common Mistakes (and How to Dodge Them)
- Frequently Asked Questions
- Final Thoughts: Hosting Without Losing Your Playroom
First, Decide Whether the Playroom Is the Right Room
Before you move a single bin, give the plan a quick reality check. Converting a playroom works beautifully for some households and badly for others.
| Question | Good sign | Warning sign |
|---|---|---|
| Does the room have a door that closes? | Yes, full door | Open archway or no door |
| Is it near a bathroom? | Same floor or adjacent | Two floors away |
| Is there a window? | Yes, with curtains or blinds | No window or no coverings |
| Can the floor fit a bed footprint? | At least 7 x 5 feet clear | Floor is mostly built-ins |
| How long are guests staying? | 3 to 7 nights | 2+ weeks |
| Are your kids early risers who need that room? | Kids play elsewhere before 8 a.m. | The playroom is the 6 a.m. default |
If you have three or more warning signs, consider the alternatives in our guide to small guest room ideas for Thanksgiving, such as an office, a dining nook, or a living room zone. A playroom without a door is a living room with extra steps, and guests will feel it.
If it’s mostly good signs, keep going. A playroom is actually one of the better candidates, because it’s usually the one room already built around soft surfaces, flexible floor space, and stuff that can be put in boxes.
Be honest about the week you’re actually having
Thanksgiving week isn’t an ordinary week of guests. The house is fuller, cooking happens at odd hours, and everyone is a little keyed up. Write down the real shape of it before you plan:
- Arrival day and departure day
- How many adults, how many kids, and who’s sharing a bed
- Whether anyone has mobility needs, back problems, or early-morning flights
- Which days your kids will be home all day, which includes the Wednesday before and the Friday after
The last one matters most. Where the kids play for those days decides how much of the toy plan you can skimp on.
The One-Week Timeline (Your Master Reset Plan)
Here is the whole thing on one page. The details for each step follow in the sections below, but if you only read this table, you’ll still have a workable plan.
| When | What happens | Time needed |
|---|---|---|
| 7 days before | Decide the bed setup, order or borrow anything missing, tell the kids the plan | 30 minutes |
| 5 days before | Toy sort: three tiers (stay out, lock up, remove) | 60 to 90 minutes |
| 3 days before | Move the toys, assemble the bed | 2 hours |
| 2 days before | Stage the guest-ready details: lamp, hooks, luggage spot, water. Wash all linens in the background | 30 minutes |
| 1 day before | Final tidy, check outlets and lighting, set kids’ replacement play zone | 20 minutes |
| Guests stay | Daily 5-minute tidy, protect the “do not touch” bins | 5 minutes/day |
| Departure day | Strip the bed, open the windows, start the laundry | 30 minutes |
| Day after departure | Vacuum, return toys in reverse order, bring back the special toys | About 60 minutes |
| Two days after | Quick audit for lost pieces and anything that needs replacing | 15 minutes |
The conversion and the reset mirror each other. Pack the toys in a set order, unpack them in reverse, and the reset goes quickly. The toy section below shows how.
The Toy Protection Plan (Do This Before the Bed)
This is the section that gets skipped, and it’s the one that decides whether you’re happy on Monday.
Toys get damaged during guest conversions for boring reasons. Someone puts a duffel bag on a half-built LEGO castle. A pile of “temporary” bins gets sat on. A toddler cousin dismantles the puzzle you spent three weeks keeping in order. And the pieces that matter most, the ones with a single irreplaceable part, are always the ones that get lost.
Sort into three tiers
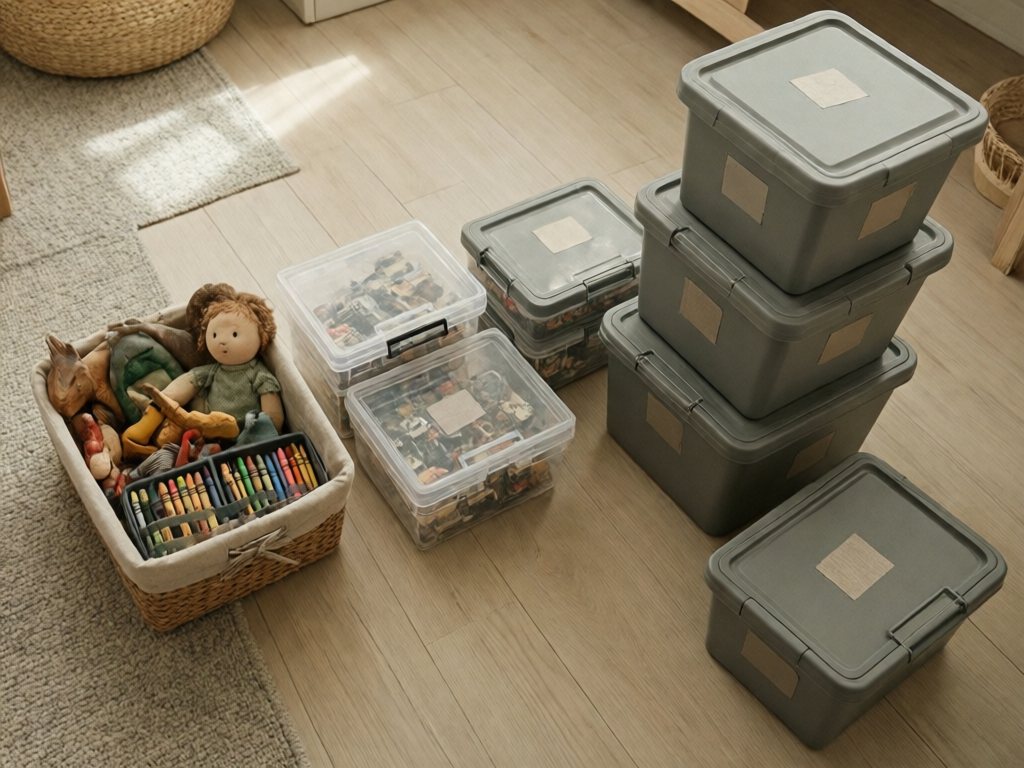
Pull everything out of the playroom and sort into three piles. Do this with your kids if they’re 5 or older, because buy-in prevents the Tuesday-night meltdown.
Tier 1: Stays in the home play zone. These are the daily favorites, roughly 10 to 15 items. The doll, the dinosaur set, the art caddy, a couple of puzzles, the books currently in rotation. They move to wherever your kids will play for the week (more on that below).
Tier 2: Locked up and protected. These are the fragile, expensive, or sentimental items. Large LEGO builds, handmade items, anything with many tiny pieces, any wooden toy with a single loose part, a finished diorama, a model your child is proud of. These get boxed, labeled, and stored out of sight. Anything small enough to swallow also goes into a latched container, out of children’s reach (see the safety note below).
Tier 3: Rotated out of sight. Everything else. This is the bulk of the playroom. It goes into bins and into a closet, garage shelf, or the attic. Small craft pieces and anything else a young child could swallow follow the same latched-container rule as Tier 2.
If the toy-sorting step feels overwhelming, our playroom organization ideas guide covers the zones and bin systems that make this faster. A playroom that’s already sorted into labeled zones converts in half the time.
Tier 2: lock up the fragile things
These are the items you’d be most upset to lose, so they get the most care.
- Photograph builds before you pack them. For any LEGO set, magnet tile structure, or block creation, take two photos from different angles. Kids around 6 and up can often rebuild from a photo, and younger kids enjoy looking at it with a grown-up’s help. Either way it takes the grief out of the dismantling.
- Lock up loose magnets. Small powerful magnets, including any that have come loose from broken magnetic tiles, can cause serious injury if swallowed. Seal them in a latched container whenever any child under 8 or a mouthing child is staying, and keep rare-earth magnets away from all children.
- Contain small parts with labels. A small lidded container labeled “Train station pieces” and tucked inside the bin saves you from the sorting nightmare later. Keep zip bags and small-part containers inside a latched bin, out of reach of young children.
- Keep sets together. Don’t pour three puzzles into one bin. If a wooden puzzle set has to be stacked, check out how we store wooden puzzles so the sets stay complete for tricks like flat boxes and labeled bags.
- Keep fragile and sentimental bins out of sight. For builds, handmade pieces and dioramas, a closet with a door or the bottom of a parent’s wardrobe works well, because guests and cousins can’t bump what they can’t see. Swallowable small parts need more than this (see the safety note below).
- Add a sticky note on the door of the storage spot. Something like “Kid treasure, please don’t open” saves a lot of awkward conversations.
Safety firstA closed closet isn’t enough for magnets, button batteries or small parts. Put them in a latched or locking container or cabinet, on a high shelf if you can, out of reach of children under 4 and any child who still mouths toys. Climbing, door-opening cousins can get into an unlatched closet or a lidded bin. Don’t store anything small enough to swallow on a garage shelf unless it’s in a latched container, away from tools and chemicals.
Tier 3: the reverse-order bin system
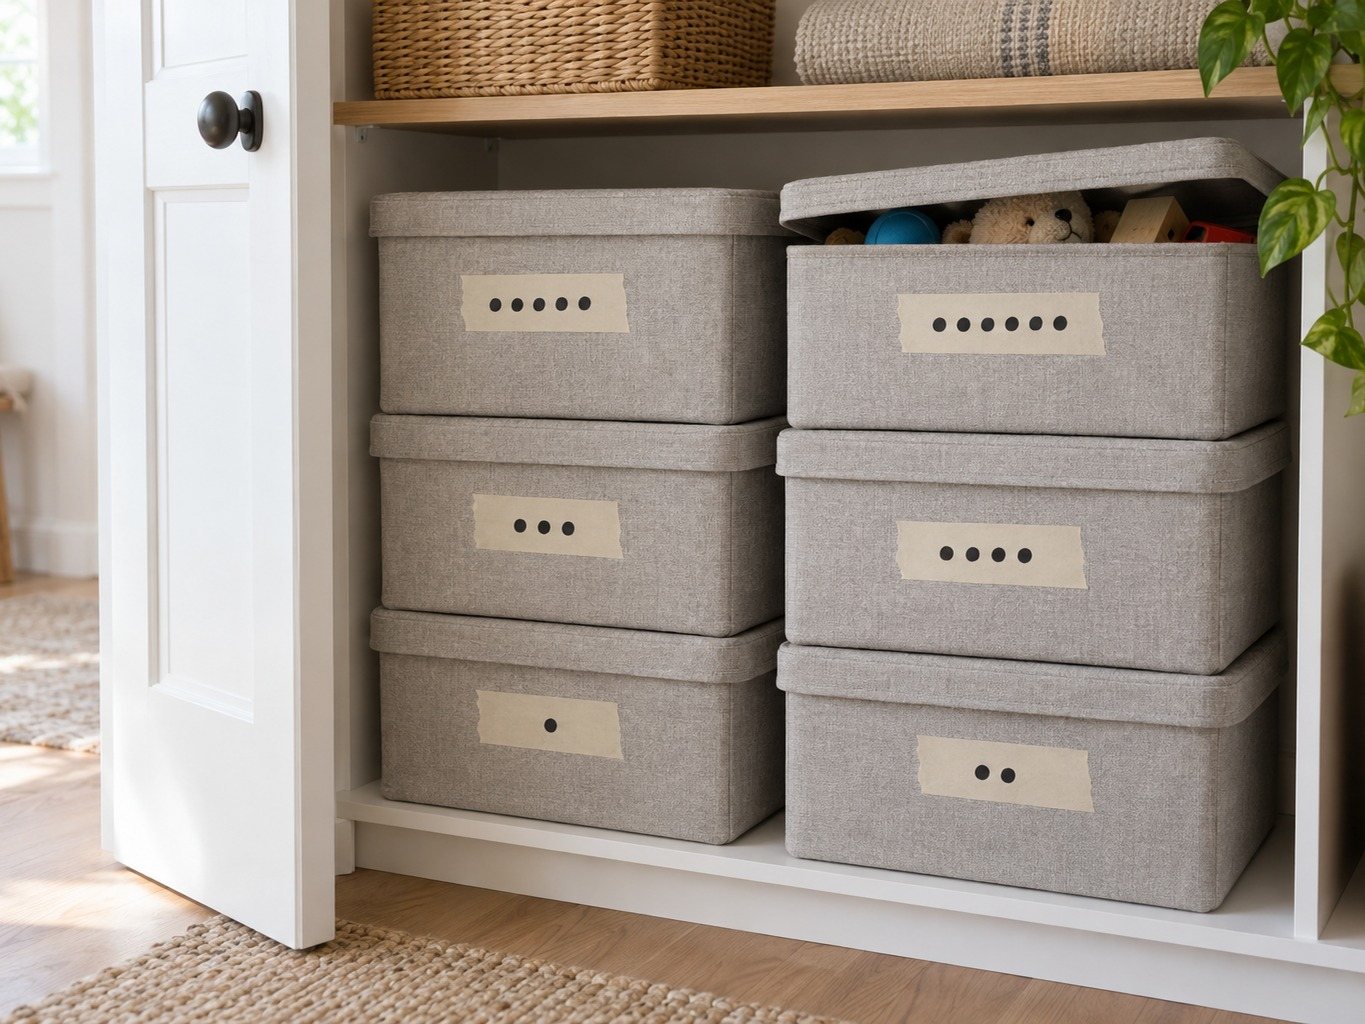
This is the trick that makes the reset fast. Pack the bins in the order you’ll want them back.
- Number each bin on a piece of painter’s tape, 1 through however many you have.
- Pack the things you’ll want back last first, and the things you’ll want back first last. That way the first bin you open at reset time is the one on top.
- Stack them in a closet so the last-packed bin is on top.
- When guests leave, open the top bin first. The everyday basics come back first and the rarely used extras come back last.
Here is a sample bin order you can copy:
| Bin | Contents | Return order |
|---|---|---|
| Bin 1 (packed first, returned last) | Seasonal dress-up, rarely used craft kits, extra stuffed animals | 6th |
| Bin 2 | Extra blocks, board games, the second set of anything | 5th |
| Bin 3 | Play kitchen food and dishes | 4th |
| Bin 4 | Vehicles, train pieces | 3rd |
| Bin 5 | Art supplies, paper, stickers | 2nd |
| Bin 6 (packed last, returned first) | Reading nook basket, floor cushions | 1st |
It sounds fussy. It takes about ten extra minutes to label, and it saves close to an hour on the reset.
TipIf your temporary play zone has room, send the reading nook basket and cushions there with the Tier 1 books instead of packing bin 6. Kids tend to miss their reading spot first. On reset day, carry them back and start the unpacking there.
A quick purge, since you’re already handling everything
You’re touching every toy anyway. If there’s a bin of broken crayons, a puzzle missing a piece, or a game with no instructions, now is the moment. Our pre-holiday toy purge checklist is built for exactly this November window, and a lighter playroom is easier to convert and easier to rebuild.
The “no-go” list for the guest room
Make a short, kid-friendly list and say it out loud so everyone hears it.
- No toys in the guest room once it’s set up
- Knock before entering, always
- The closet in that room is guest territory
- Anything of yours that ends up in there gets collected during the daily tidy
Kids this age can hold on to a few short rules. A longer list tends to get tuned out.
Choosing the Sleeping Setup
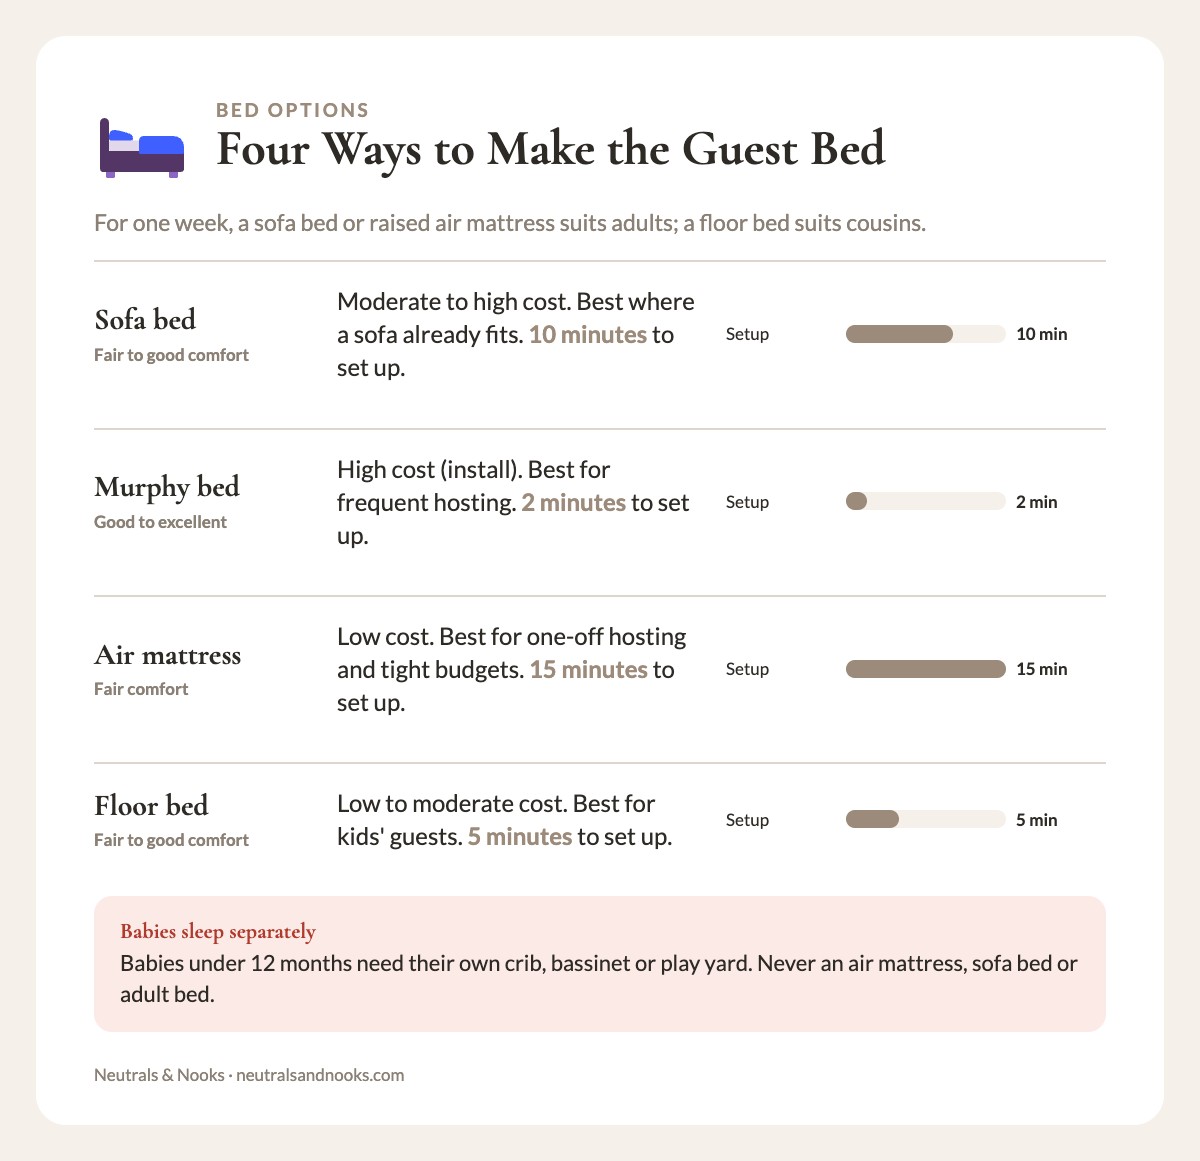
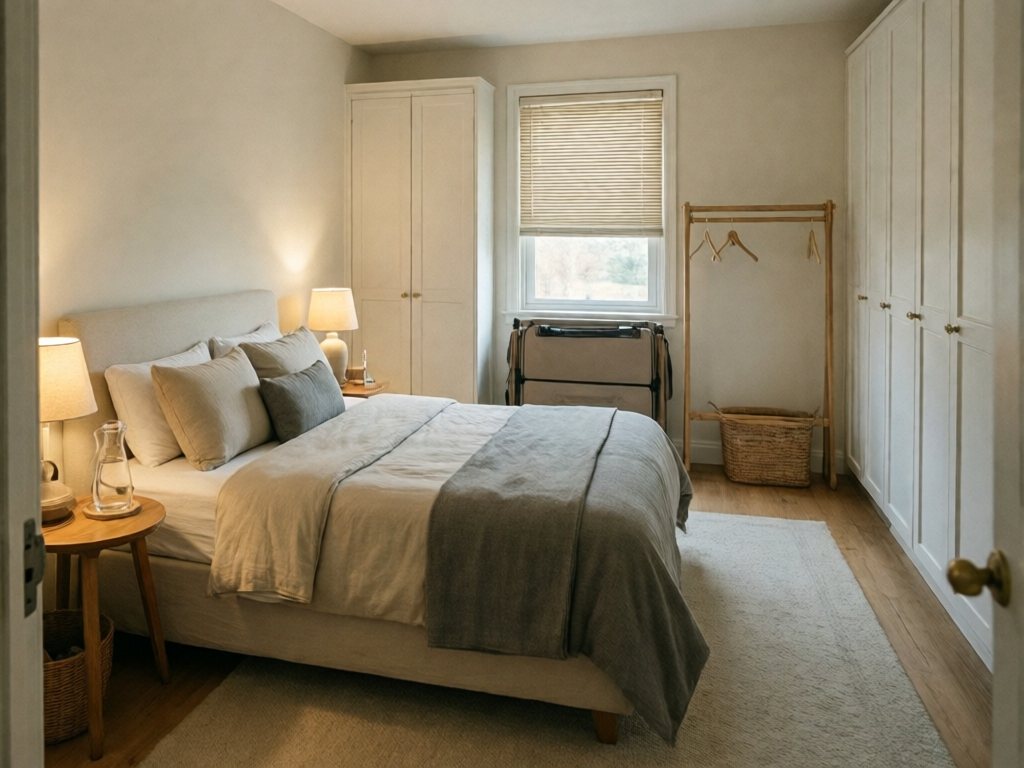
There are four realistic playroom guest room combo setups for a one-week stay, and the right one depends on your space, your budget, and how often you’ll host again.
| Setup | Best for | Cost | Setup time | Daily comfort |
|---|---|---|---|---|
| Sofa bed | Rooms with an existing sofa or a spot for one | Moderate to high | 10 minutes | Fair to good |
| Murphy bed | Permanent combo rooms, frequent hosting | High (install) | 2 minutes | Good to excellent |
| Air mattress or inflatable bed | One-off hosting, tight budgets | Low | 15 minutes | Fair |
| Floor bed (foam or futon mattress) | Kids’ guests, flexible spaces | Low to moderate | 5 minutes | Fair to good |
Good to knowWhich one should you pick? For a single week, a sofa bed or a raised air mattress works for adults. A floor bed suits cousins. Choose a Murphy bed only if you host several times a year.
Safety firstBabies under 12 months need their own firm, flat, bare crib, bassinet or play yard (AAP guidance), with no pillows, blankets or soft bedding. Never put an infant on an air mattress, sofa bed or adult bed, and don’t co-sleep in this room. Ask guests with a baby to bring or borrow a portable play yard. Air mattresses are for adults and older kids only, never infants or toddlers. Keep any child guest’s bed away from window cords, radiators, heaters and tip-prone furniture.
Sofa bed: what to check
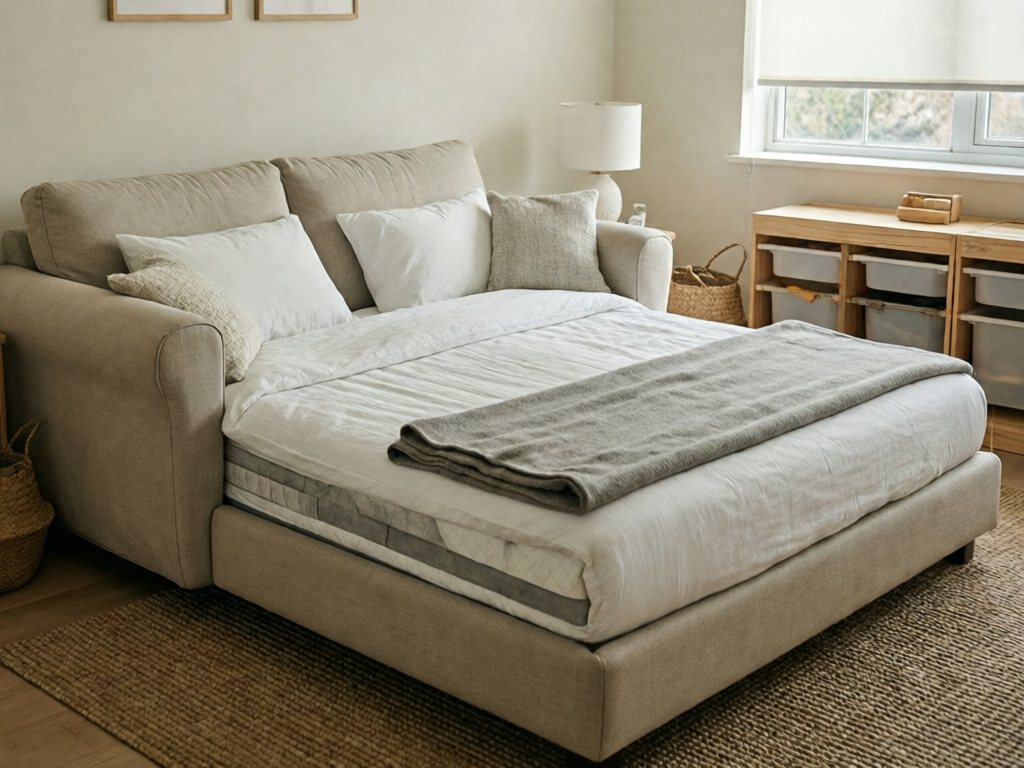
A sofa bed is the most common playroom-guest-room hybrid, and it works because the playroom probably needs seating anyway. A few notes from experience:
- Measure the open footprint, not the closed one. A queen sofa bed often needs 80 to 95 inches of depth when extended, so check the manufacturer’s spec. Fold-out mechanisms can pinch or trap, so only adults should open and close the bed. Make sure the toy storage you haven’t moved yet isn’t in the way.
- Check the mattress honestly. Sleeper sofa mattresses are thin, and a five-night guest with a sore back will feel every bar. A 2 to 3 inch memory foam topper makes a dramatic difference and is easy to store afterward.
- Test it with a person. Open it, lie on it, and sleep on it one night if you can. It takes a single evening and prevents a week of apologies.
- Keep the bedding in a bag. Linens stored inside the sofa bed get musty, so store sheets in a labeled bin elsewhere and make the bed fresh. Our linen closet organization guide has a system for keeping a guest set ready.
- Consider slipcovers. A washable neutral slipcover protects the sofa from a week of travel clothes and from the aftermath if a kid decides the bed is a trampoline.
A sofa bed has a quiet advantage for kids ages 3 to 8: the room stays usable as a seating area during the day. Guests fold it up, the room is a lounge, and your kids have a cozy spot to read.
Murphy bed: safety and fit
A Murphy bed folds into the wall, so the floor stays clear for play most of the year and a real bed appears when guests do. For a once-a-year Thanksgiving week, it’s probably more than you need.
Safety firstMurphy beds are heavy and spring- or piston-loaded, and they have caused serious injuries. Install into wall studs, strictly per the manufacturer’s instructions, and professionally if possible. Use the latch or lock whenever the bed is closed. Kids must never play on or near it, or be inside when it closes.
If you’re considering one, three things matter most:
- Plan the install first. Confirm stud locations and clearance with your installer before you buy.
- Choose a secure latch. Pick a model with a lock, since ages 3 to 8 love buttons and mechanisms.
- Check mattress limits. Murphy beds take specific mattress thicknesses, so you can’t always add a thick topper. Ask for a comfortable mattress at purchase.
For a family that hosts grandparents three or four times a year, a Murphy bed with side cabinets is the most livable answer, since the cabinets double as toy storage. The permanent-combo section further down covers costs and zoning.
The air mattress option (the honest version)
Air mattresses get a bad reputation, and some of it is earned. But a good one, raised, with a built-in pump and a proper fitted sheet, can be a perfectly pleasant bed for a few nights.
- Choose a raised, double-height model, for adults and older kids only (see the safety note above).
- Inflate it a day early and check it in the morning. If it’s lost air overnight, you have time to patch or replace it.
- Put a rug or a folded blanket underneath so it doesn’t slide on hard flooring.
- Add a topper. A 2-inch foam topper on an air mattress turns “camping” into “hotel.”
- Keep a small pump nearby, because they all lose a little air by night four.
The floor bed (works well for kids’ guests)
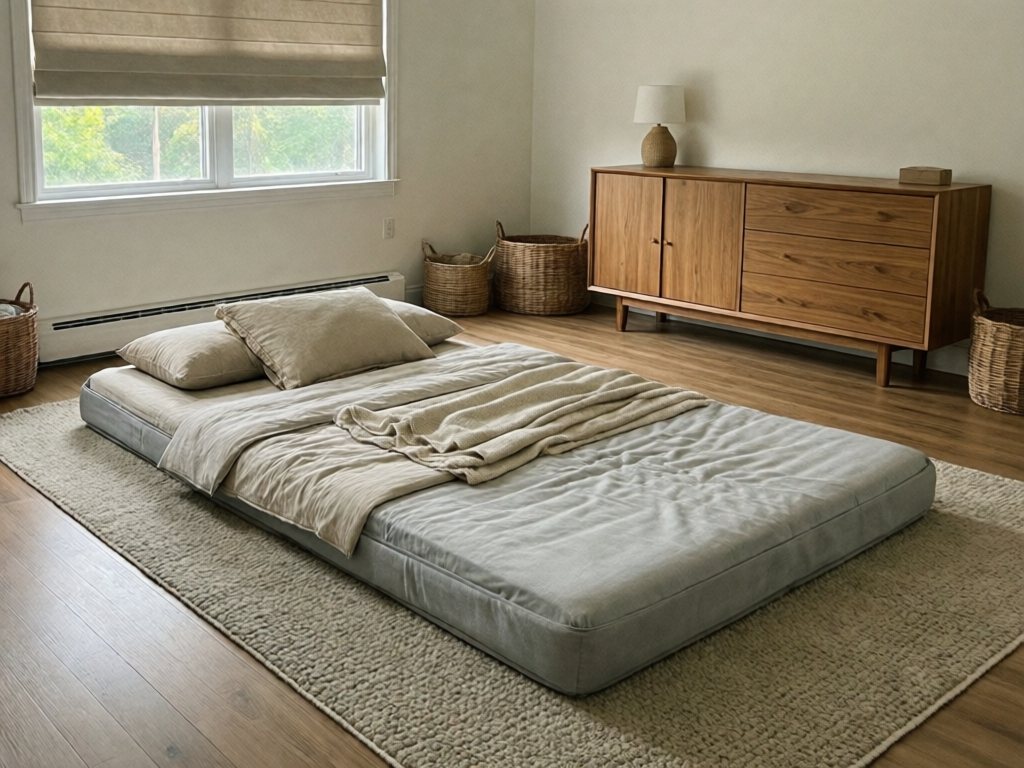
If your guests are cousins around your kids’ ages, a floor mattress or a roll-out foam bed is often the best answer. Kids don’t care about bed height, a floor bed is low to the ground, and it’s easy to stow in a closet afterward. A folding foam mattress with a washable cover costs less than a decent air mattress and lasts years. Place it away from window cords, radiators, heaters and tip-prone furniture.
Setting Up the Room So It Feels Like a Guest Room
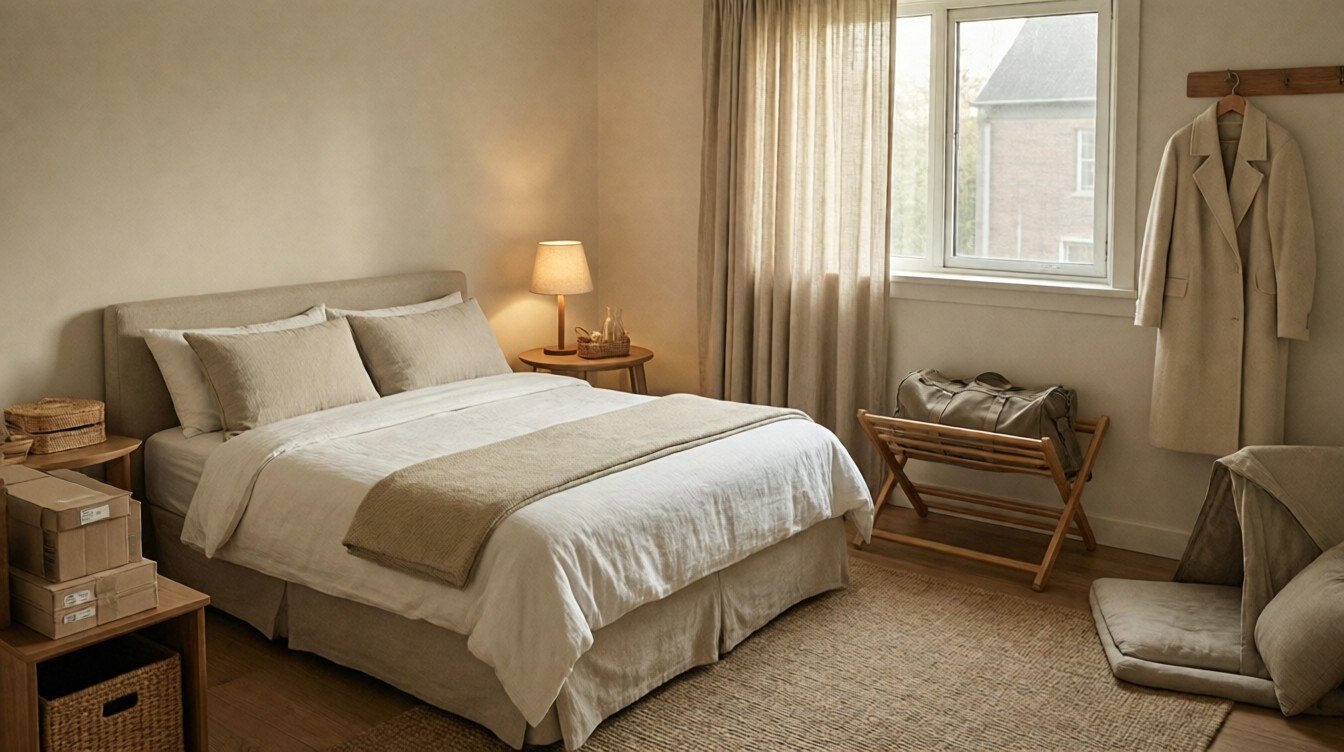
A bed in a playroom is a bed in a playroom. What makes it a guest room is a handful of small details that tell the person staying there, “We planned for you.”
Start with the layout
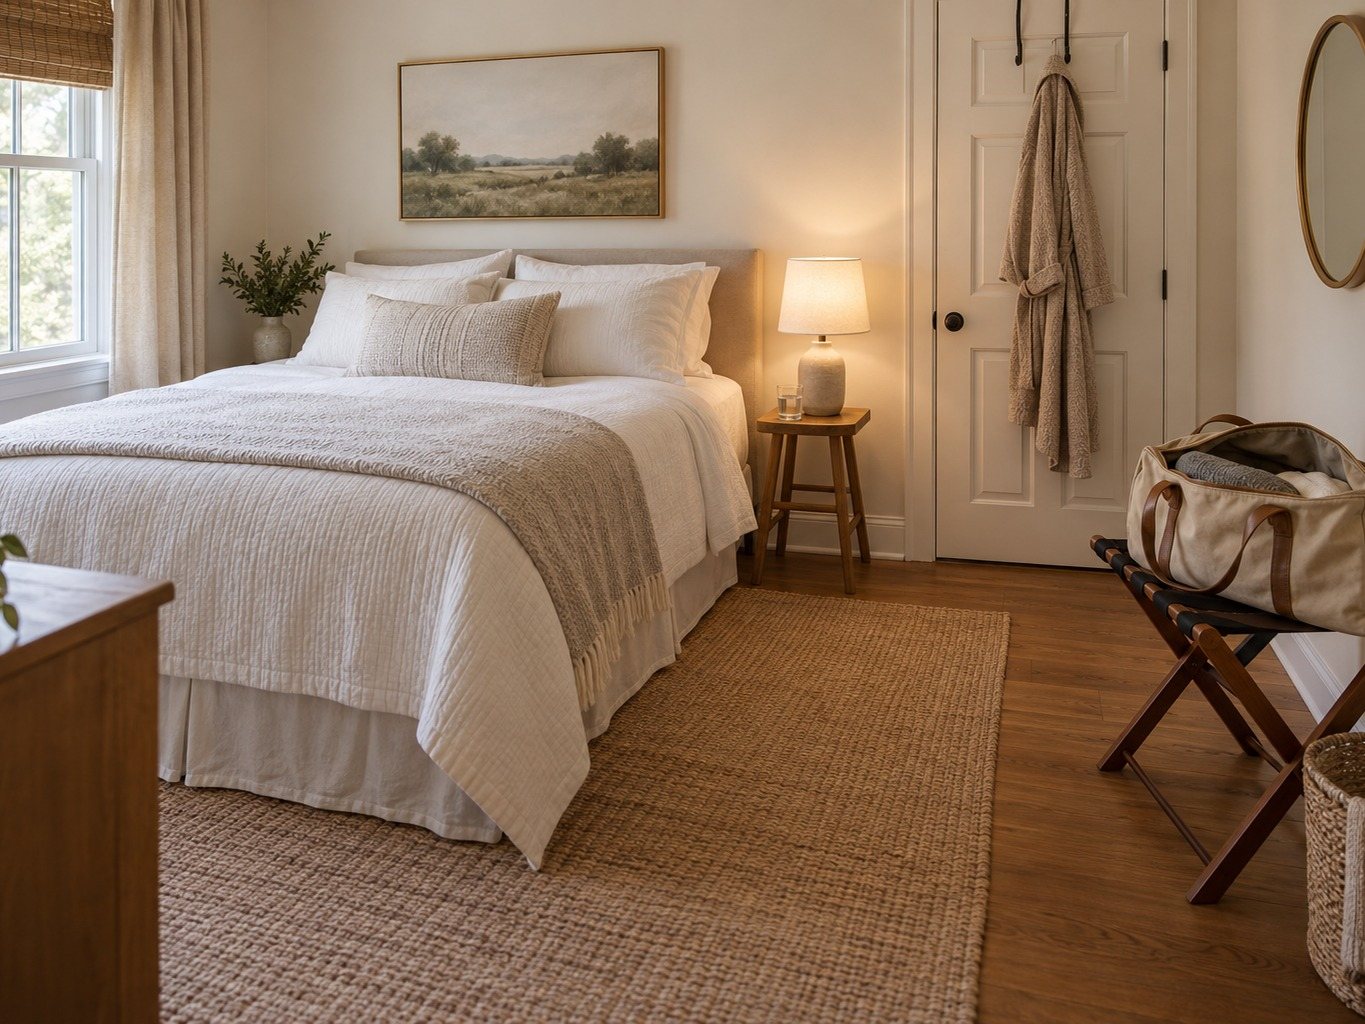
Draw a rough sketch on paper. Place the bed first, then find spots for:
- A bedside surface within arm’s reach
- A place to put a suitcase that isn’t the bed
- A spot for hanging clothes
- A clear path from the door to the bed that isn’t a toy obstacle course
Here’s a sample layout for a typical 10 x 12 foot playroom:
| Zone | Placement | What goes there |
|---|---|---|
| Sleep zone | Along the longest wall | Bed or sofa bed |
| Bedside zone | Next to the bed head | Small table or stool, lamp, water, charger |
| Luggage zone | Opposite the bed, against the wall | Luggage rack or a low bench |
| Hanging zone | Back of the door or a wall | Over-door hooks or a freestanding rack |
| Mirror zone | Where light is best | Mirror, even a small one |
Safety firstChoose cordless shades only, and keep all cords (lamp, charger, blinds) out of kids’ reach. Secure lamps so they can’t be pulled over. Anchor garment racks, shelves and tall furniture to the wall, and keep freestanding racks and stools out of climbing reach.
Handle the light and privacy
Playrooms often have bright overhead lights and minimal window coverings, since kids don’t mind. Guests do.
- Hang a tension rod with a simple curtain, or use a temporary blackout cover if the window has no treatment. Cordless, no-drill blackout shades are cheap and quick.
- Swap harsh overhead lighting for a lamp or two. A warm bulb makes the room look like a bedroom immediately.
- Add a nightlight if guests will have to find a bathroom in the dark. A plug-in model is plenty.
Handle the clothes and luggage
Guests need somewhere to put things. Without it, the entire room becomes a suitcase explosion, and that’s stressful for them and for you.
- A folding luggage rack is a small purchase that changes the whole feel of a guest space.
- If you have no closet space, bring in a freestanding garment rack for the week.
- Over-door hooks give guests a place for coats, robes, and bags. If you’ve set up a kid-height hook system, clear a couple of adult-height hooks so guests aren’t squeezing in beside tiny jackets.
- Empty one drawer or one shelf of the room’s furniture, even a half-shelf, and say so.
Make the bed like it’s a hotel
You don’t need luxury, just a few thoughtful layers.
- Fitted sheet, flat sheet, and a light blanket
- A duvet or comforter in a neutral tone
- Two pillows per person, plus an extra
- A throw blanket folded at the foot
- A spare blanket in a nearby spot, since temperature is the most common complaint
A neutral palette of white, oatmeal, and warm gray fits both a calm playroom and a guest room, and it hides the evidence of kid life well.
The welcome basket (small, not fussy)
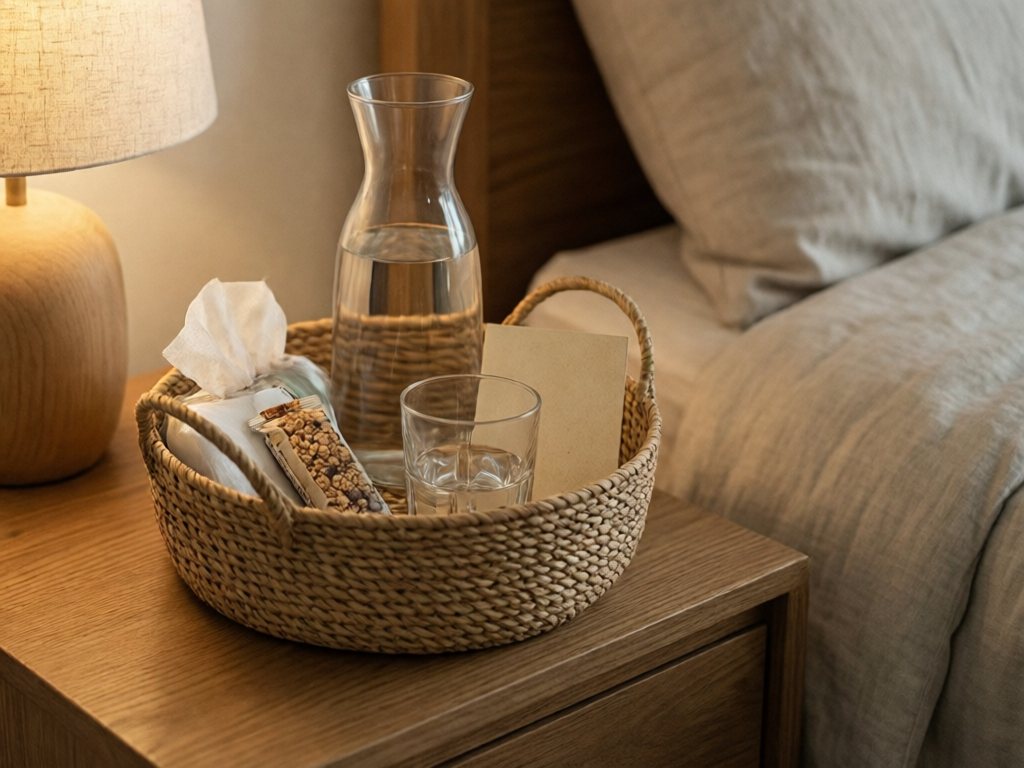
A simple basket or tray on the bedside table is the detail guests remember. If little ones are visiting, keep the basket up high, since earplugs, snacks and tissues are small-object hazards. Choose snacks that are safe for young visitors, with no whole nuts, hard candy or whole grapes.
- A water carafe and glass
- A phone charger or charging strip
- A small pack of tissues
- A local snack or two
- A card with the Wi-Fi password and the plan for the first morning
- Earplugs, because even in a calm household, kids make noise (keep them out of young children’s reach)
Ask guests to keep medications and toiletries in their luggage or up high, out of visiting children’s reach. Bedside tables are exactly where kids find them.
Where Kids Play While the Playroom Is a Guest Room
This is the piece people underestimate. Your children’s playroom is gone, and they’re still children. If you don’t give them somewhere to land, the toys will spread through the whole house.
Build a “Thanksgiving week play zone”
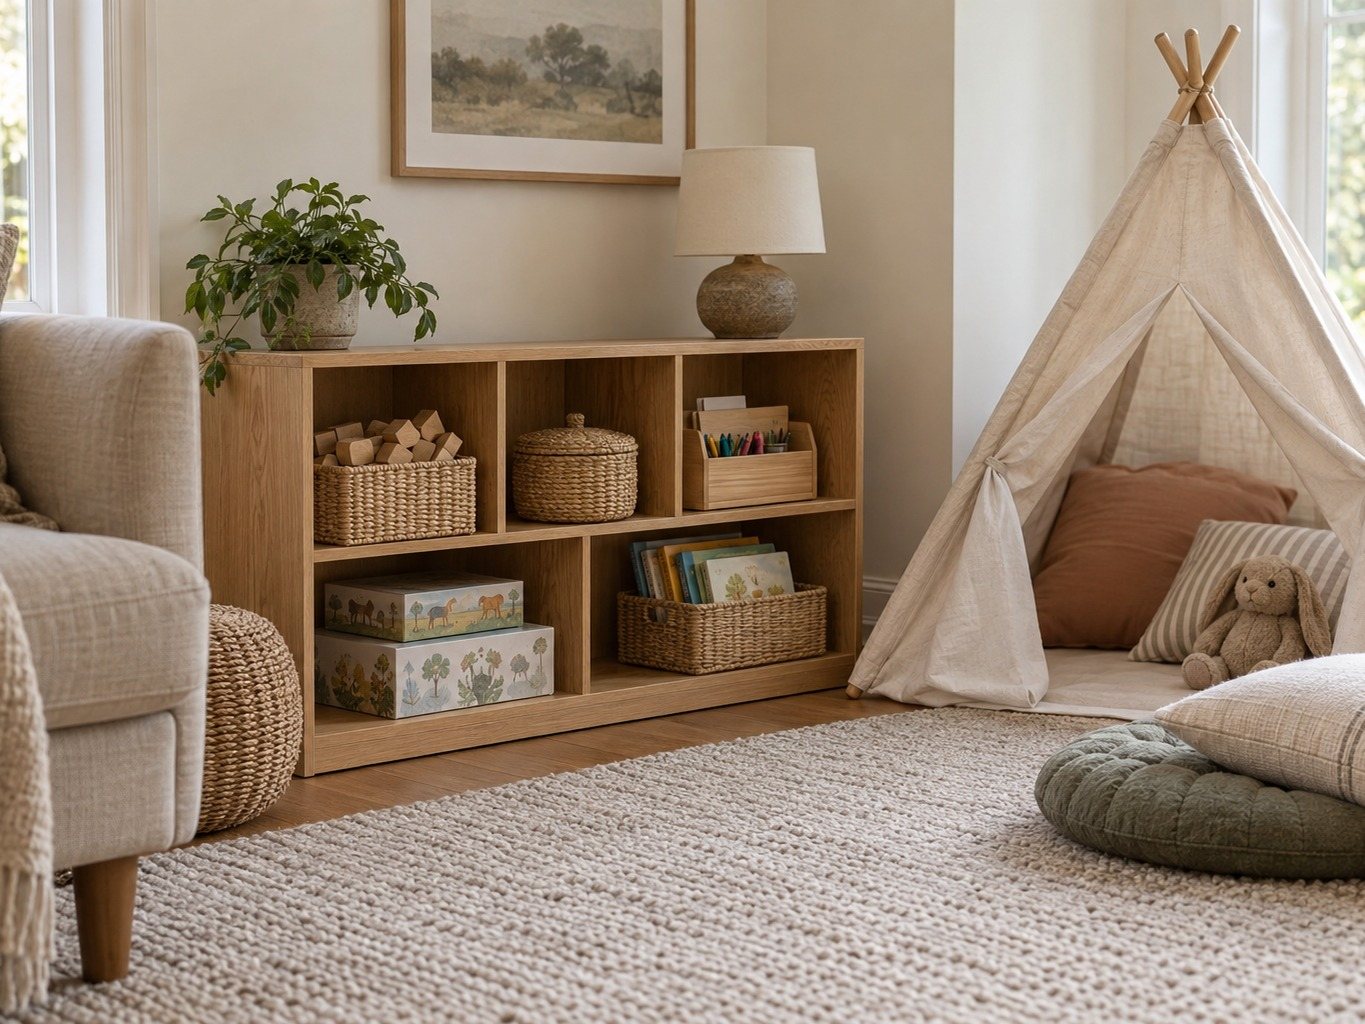
Pick one corner of the house. A living room corner, a dining room alcove, a section of a bedroom, even a hallway nook can work. The goal is a defined edge: a rug, a low shelf, a play mat, or a pop-up tent.
Fill it with the Tier 1 items only, about 10 to 15 things:
| Item type | Example | Why it works |
|---|---|---|
| Open-ended building | One bin of blocks or magnetic tiles | Plays for hours |
| Pretend play | A small set of animals or dolls | Easy to scale up or down |
| Art | A caddy with crayons, markers, paper | Quiet and contained |
| Puzzles | Two or three, in boxes | Table or floor play |
| Reading | A basket of 8 to 10 books | Calms the house |
| Movement | A small pop-up tent or cushions | Burns energy indoors |
A smaller selection is more engaging, not less. If you’ve never tried a limited-toy approach, how many toys should be out at once lays out the logic. Thanksgiving week is a perfect, low-stakes experiment.
Set the boundaries early
Kids ages 3 to 8 do well with a simple map. Show them:
- This is where we play this week.
- This is the guest room. We knock first.
- These are the special toys we’re keeping safe, and we’ll bring them back on Sunday.
A visual helps. A hand-drawn map on a piece of paper, or a before-and-after photo of the playroom, makes the idea concrete. Many kids find it easier to cope with a temporary change when they can see the end of it. A paper chain with one link per day until the playroom comes back also works well.
Plan for the Wednesday-and-Friday problem
The days right before and after Thanksgiving are the hardest, because kids are home, adults are cooking, and there’s no real “away” for anyone. Some ideas that help:
- Schedule one outing each day, even if it’s a walk.
- Have a “quiet bin” for the cooking hours: sticker books, audiobooks, a screen-free puzzle.
- Rotate one or two items from the locked bins into the play zone as a surprise on Friday. A little novelty goes a long way.
- Set out a table-friendly activity during the meal so little ones can stay engaged. Our ideas for a neutral Thanksgiving table that survives kids include tips for kid-friendly place settings.
Age-by-Age Tips for Kids 3 to 8
The same plan needs small tweaks depending on where your kids are.
Ages 3 to 4
Safety firstAnything that fits through a toilet paper tube (about 1.75 inches) is a choking hazard for children under 4, including younger visiting cousins. Keep small magnets, button batteries and small balls in a latched container on a high shelf.
- They’re the most likely to be upset by a missing item, so keep two or three comfort toys in reach at all times.
- They need a physical marker for “the playroom is closed.” A paper sign on the door with a picture helps.
- Expect regression. Thanksgiving week disrupts routines, and a three-year-old might need extra cuddles and extra patience.
Ages 5 to 6
- This is the sweet spot for involvement. Let them choose their Tier 1 items and help label the locked bins.
- They’ll love the idea of a “museum” or a “secret vault” for the special toys. Lean into the story.
- They can handle a simple “knock and wait” rule and can remind younger siblings.
- Their builds matter to them. Take the photos and let them see you do it.
Ages 7 to 8
- They can run a lot of the process themselves with a checklist.
- They may be embarrassed about toys in front of older guests or cousins. Offer them a private place to keep a few things.
- They can help the guests find things and play host, which is a source of pride at this age.
- Give them a role: welcome basket assistant, “tour guide,” or checklist captain.
During the Visit: Daily Tidy and Guest Etiquette
A converted playroom isn’t a set-it-and-forget-it project. A few small habits keep it calm for everyone.
The 5-minute daily tidy
Each morning, before the day gets going, do a quick sweep.
- Check the guest room door. Is it closed, and is anything toy-related drifting in?
- Collect stray items from the hallway and common areas and return them to the play zone.
- Make sure the Tier 2 storage spot is still closed and labeled, and the small-parts container is latched.
- Fold or straighten the throw blanket and fluff pillows in the guest room if the guest is out.
Don’t enter an occupied guest room without invitation. Ask the guest on day one if they’d like you to tidy or if they prefer you stay out.
The “lost piece” bin
Keep one sturdy lidded box labeled “Found pieces” on a high shelf or in a latched cabinet, out of children’s reach. Anything small that turns up goes in there instead of getting thrown away or left on a counter. On reset day, you sort the bin back into its sets. It’s the cheapest insurance against a missing puzzle piece.
Talk to your guests
Nothing about this works if guests don’t know the plan. Send a short message before they arrive:
- Tell them the room is normally the playroom.
- Mention that the kids have been briefed and will knock.
- Ask about allergies, early-morning needs, and sleep preferences.
- Let them know where the bathroom and extra blankets are.
Most guests are charmed by the “temporarily a playroom” story, and it sets a relaxed tone.
The Reset Plan: Back to a Playroom in 90 Minutes
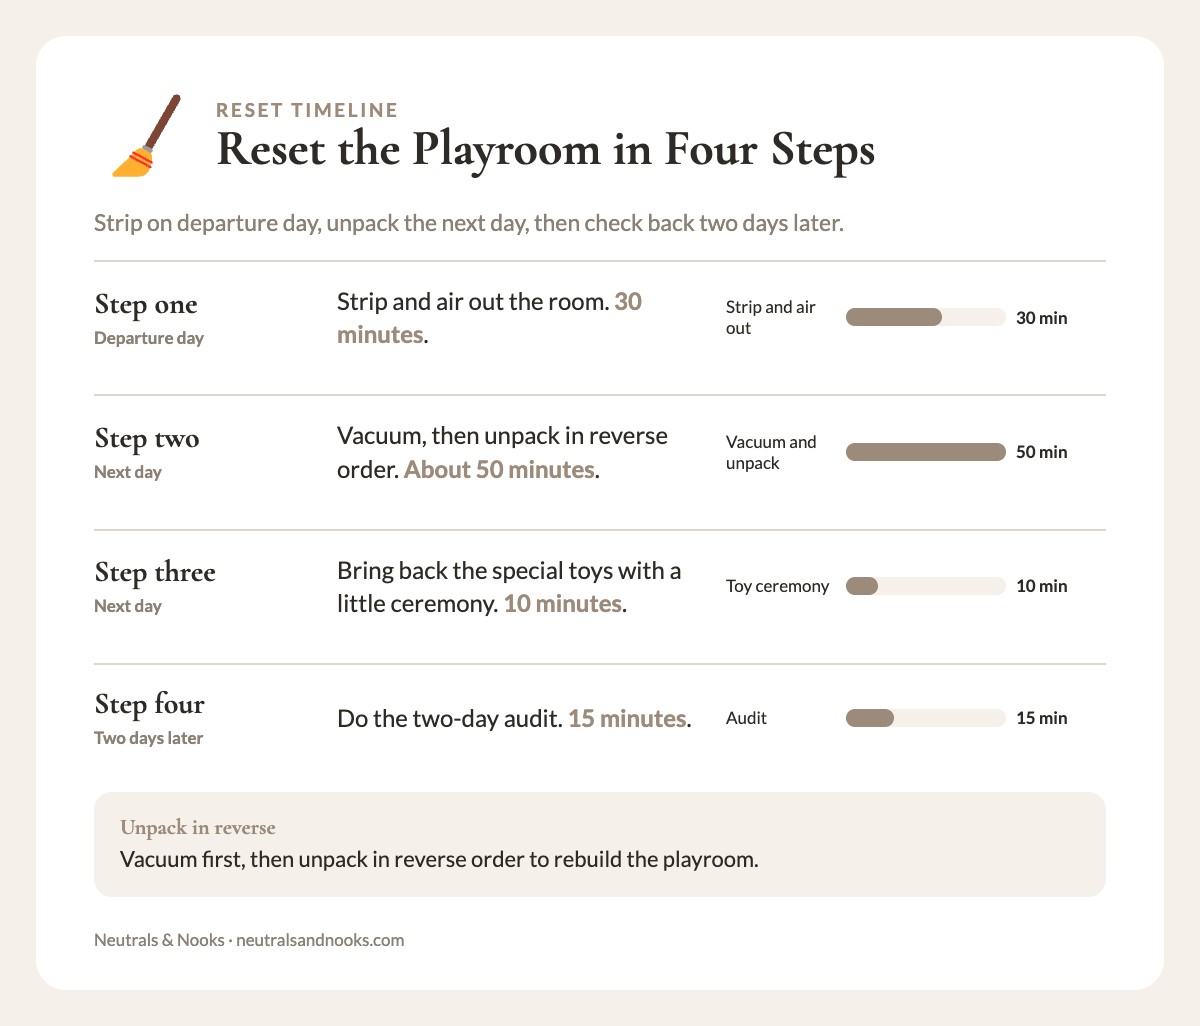
The 90 minutes covers steps 1 to 3, split across two days. Strip and air out the room on departure day (30 minutes), then vacuum, unpack and rebuild the next day (about 60 minutes). The two-day audit is a separate 15-minute check.
Step 1: Strip and air out (30 minutes)
- Strip the bed completely. Wash sheets, pillowcases, and any blankets.
- Open the window if the weather allows. Even ten minutes of fresh air resets the room.
- Wipe down surfaces: the bedside table, the lamp, door handles.
- If you used an air mattress or floor bed, deflate, wipe, and fold it according to the manufacturer’s instructions. Let it air-dry fully before storing, since damp fabric can develop mildew. For laundering help, see our laundry room organization guide.
- Put the guest-room details, the luggage rack, lamp, curtain, and welcome basket items, into a labeled “guest room kit” bin. Next year, setup will take half the time.
Step 2: Vacuum and unpack in reverse order (about 50 minutes)
Vacuum the empty floor first, including under furniture. Then let the numbered bins do the work.
- Start with bin 6, the reading nook basket and floor cushions, or carry them back from the play zone. Set up the cozy corner.
- Open bin 5 and restock the art caddy.
- Continue with bin 4 (vehicles and trains), bin 3 (play kitchen), and bin 2 (extra blocks and games).
- Finish with bin 1, the seasonal dress-up and craft extras. By then you’ll have a fresh sense of what the room needs, and some of it can stay rotated out.
Here’s the whole reset as a checklist you can screenshot:
- Bedding washed and stored
- Guest room kit bin packed and labeled
- Mattress or sofa bed returned to storage or closed
- Floor vacuumed, including under furniture
- Windows and curtains returned to normal
- Numbered bins unpacked from the top down, with bin 1 extras returned or left rotated out
- Tier 2 builds and special toys returned
- “Found pieces” bin sorted
Step 3: Bring back the special toys with a little ceremony (10 minutes)
Let your kids open their locked bins, a small moment that closes the loop. Show them the photos of their builds and rebuild together, with a grown-up’s help for the younger ones. Many kids love this part, and it turns a week of disruption into a story with a happy ending.
Step 4: The two-day audit (15 minutes, two days later)
Two days after the reset, take a look around.
- Is anything missing? Check the car, the guest’s luggage (politely), and under the furniture.
- Are there toys that your kids haven’t touched since the reset? Those are donation candidates, and this is a natural moment to pass them along.
- Does the room’s layout still feel right? Sometimes a week with a different arrangement shows you a better one. Keep the changes that worked.
Step 5: Store the guest-room kit
Put your guest room kit somewhere you can find it next year, a labeled bin on a closet shelf or in the garage. Include a short note listing what you’d buy or change next time.
Turning the Temporary Setup Into a Permanent Combo (If You Want To)
Some families finish the week and realize that a playroom guest room combo isn’t just a one-time fix. If hosting becomes a regular thing, you can build a more permanent hybrid.
Multi-purpose playroom guest room: what to invest in
| Upgrade | Why it helps | Rough cost |
|---|---|---|
| Murphy bed with side storage | Clears the floor daily, hosts easily | $1,500 to $4,000 |
| Quality sleeper sofa | Daily seating and a real bed | $800 to $2,500 |
| Storage bench with lid | Toy storage and luggage surface | $100 to $300 |
| Closed cabinets or cubbies | Hides toy clutter from guest view | $150 to $500 |
| Washable area rug | Defines the play zone, hides wear | $100 to $400 |
| Wall-mounted shelves | Display builds, free the floor | $50 to $200 |
| Blackout curtains | Better sleep for guests and nap time for kids | $40 to $120 |
The best combo rooms follow one rule: everything closes, folds, or hides. Open shelves of toys are lovely until a guest has to sleep next to them. A closed cabinet with a pretty front keeps the room feeling calm in both modes.
Zoning a combo room
If the room will be both, divide it clearly.
- The play side: low shelves, a rug, floor cushions, a small table
- The sleep side: the bed or sofa, a lamp, a bedside surface
- The shared strip: closets or cabinets that hold both toys and guest linens, with clear labeling
When the bed is folded or the sofa is closed, the whole room is a playroom. When it’s open, the play zone shrinks to a corner and the cabinets are shut. If you’re planning a bigger overhaul, our multi-functional furniture guide goes deeper on pieces that earn their footprint. If the room may become a nursery later, our guest room and nursery combo guide covers that version.
When a playroom guest room isn’t the answer
Be honest if the combo isn’t working. If the room is too small, guests are staying for weeks, or your kids need that space daily, consider other options. A hotel room for a night or two, an air mattress in the living room, or a friend’s spare room can all work. A comfortable guest and a calm family beat a heroic conversion every time.
A Realistic Shopping and Borrowing List
You don’t need to buy everything. Borrow, repurpose, and rent where you can.
| Item | Buy | Borrow or repurpose |
|---|---|---|
| Mattress topper | Buy if you’ll host often | Borrow from a friend |
| Folding luggage rack | Cheap and useful | Use a sturdy chair or bench |
| Over-door hooks | Buy, low cost | Use command hooks |
| Blackout shades | Buy removable ones | Hang a dark blanket from a tension rod, or use painter’s tape or suction-cup travel blackout shades |
| Lamp | Buy or move one | Borrow from another room |
| Extra bedding | Buy a second set | Use what you have, wash fast |
| Air mattress | Buy raised model | Borrow from a neighbor |
| Storage bins | Buy matching, labeled | Reuse boxes |
If you’re also planning other holiday prep, the pre-Thanksgiving declutter checklist pairs nicely with this project, and the work overlaps more than you’d expect.
Common Mistakes (and How to Dodge Them)
Here are the mistakes that tripped us up, or that I’ve watched friends make.
- Skipping the toy tiers. Everything gets shoved into one bin, and the reset takes far longer than 90 minutes.
- Forgetting the kids’ feelings. A child who wasn’t told in advance feels like the room was taken, not borrowed.
- Using the closet for toys. The guest room closet should belong to the guest, even if it’s half a closet.
- Ignoring sound. Playrooms often share walls with living areas. A white noise machine or fan helps guests sleep.
- Starting too late. A setup that takes 4 to 5 hours spread over a week becomes a one-night panic on Tuesday.
- Leaving the reset for “later.” Toys scattered across the house for two weeks make everyone cranky.
- Not testing the bed. Pump it up, unfold it, or lie on it before the day.
Frequently Asked Questions
Can a playroom be a guest room for Thanksgiving?
Yes, for a short stay. A playroom makes a good stand-in for a spare room or extra bedroom when it has a door that closes, a window with coverings, a nearby bathroom and at least 7 x 5 feet of clear floor. For stays of two weeks or more, or if your kids need the room every morning, an office or living room zone usually works better.
How far in advance should I start converting the playroom?
Start the planning a week ahead, and do the physical work three to five days before guests arrive. The toy sort is the slowest part, so give it a quiet evening about five days out. Assemble the bed three days before and stage the details two days before, which leaves a buffer for a missing sheet or a deflating mattress.
What’s the best sleeping setup for a playroom guest room for just one week?
For a single week, a sofa bed with a memory foam topper or a good raised air mattress is the most practical. A Murphy bed is wonderful if you host several times a year, but it’s a big commitment for one visit. For kid guests, a floor mattress is simple and comfortable.
How do I keep my kids from feeling like they lost their space?
Involve them early. Explain that the playroom is a guest room for a few days, let them choose their favorite toys for the temporary play zone, and show them where the special items are being kept safe. A paper chain or a simple countdown to “playroom day” gives them an end point. A visible end date often helps kids cope with a temporary change.
What should I do with big builds like LEGO sets or block towers?
Photograph them from two angles and store the builds in a closed spot that guests won’t enter. Loose parts go in a latched container on a high shelf if young children are visiting. If a build is too large to move, cover it with a sheet and place a clear sign nearby, or relocate it onto a sturdy tray and carry it to a closet shelf. Rebuilding from photos can be a fun reset-day activity, with a grown-up’s help for younger kids.
Can a Murphy bed work in a playroom with young kids?
Yes, with precautions. Choose a model with a secure latch or lock, make sure it’s installed into wall studs per the manufacturer’s instructions (professionally if possible), and set a firm “grown-ups only” rule. Kids this age are curious about mechanisms, so use the latch or lock whenever the bed is closed, and never let kids play on or near it. The payoff is a clear floor for play most of the year.
How do I make a temporary guest room feel welcoming without spending much?
Focus on small details: fresh sheets, a bedside lamp, a spot to put luggage, a few hooks, a water glass, and a phone charger. A neutral throw blanket and a window covering do more than any decor.
What if guests arrive early or the plan changes?
Keep a small “emergency kit”: a spare set of sheets, a pump, and a clean towel set. If the room isn’t ready, have the guests settle in the living area while you finish. The tiered toy system helps here, because even a half-converted room is easier to finish when the toys are already sorted.
Final Thoughts: Hosting Without Losing Your Playroom
Converting a playroom for Thanksgiving week asks a little from you and a little from your kids. A three-tier toy plan, a bed that suits your space, a few welcoming details and a reset you’ve already mapped out keep the week calm. Take the photos, number the bins and set out the lamp. By the Sunday after, your kids will be building in their playroom again, and the guest-room kit will be on a shelf for next time.