The Spring Playroom Reset: How to Do a Toy Rotation Before Spring Break (Without the Meltdowns)
Before spring break, learn how to implement a toy rotation to reset your playroom, re-engage your kids with 'new' toys, and avoid meltdowns. Discover why this timing is ideal for maximizing toy engagement and managing clutter.
- Rotate your toys before spring break for maximum impact.
- Re-engage your kids; rotated toys feel new and boost play.
- Align your toy rotation with seasonal play shifts.
- Purge broken or outgrown toys to reset your playroom.
You felt it this morning: that small, sharp shock of plastic under your bare foot. By March, the playroom has absorbed every holiday and birthday haul, and spring break means about a week of kids home all day. This guide covers a spring toy rotation in four steps: pull everything out, sort it, build rotation sets, and set up the playroom.
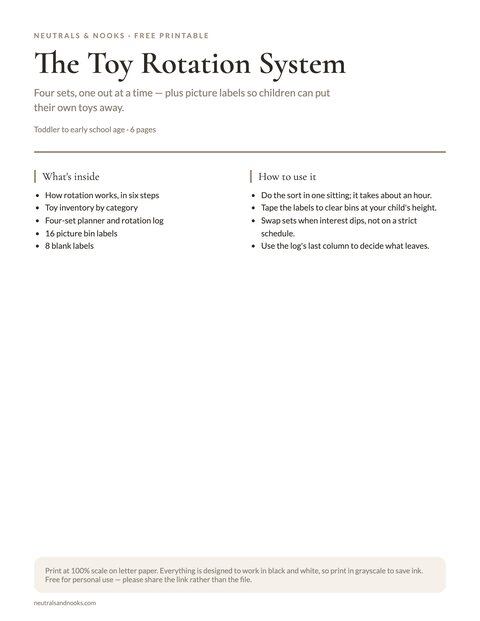
Free printable · 7 pages
The Toy Rotation System
Four sets, one out at a time, plus 16 picture bin labels so children can put their own toys away.
Free. Your download link appears right here. You'll also join the Monthly Home Reset. Unsubscribe anytime. Privacy
You’ll also find age-by-age tips for involving kids, simple zones, and a budget storage list. You don’t need to redo the whole room or buy more bins.
In this article (9 sections)
- Why Do a Toy Rotation Before Spring Break?
- What Is a Toy Rotation (and How Does It Work)?
- How to Do a Toy Rotation in 4 Steps
- How to Involve Kids Without Meltdowns
- Zone-Based Playroom Setup: Making the Space Work Harder
- Storage Solutions on a Budget
- How to Store Rotate-Later Toys
- Maintaining the System Through Spring
- Frequently Asked Questions
Why Do a Toy Rotation Before Spring Break?
Most guides say to rotate quarterly. The week or two before spring break is a good moment to start, for three reasons.
The toys feel old by March. Many holiday and birthday toys have lost their shine. Toys boxed away for a month or two often feel new again, so a rotation works like a fresh toy haul for the week at home.
The season is shifting anyway. Play moves from sit-down indoor toys toward things that can go outside. “We’re putting away the winter things and getting out the spring things” is an idea a three-year-old can follow. It works like seasonal clothing storage for kids, so kids who have done a clothing swap often accept the toy version more easily.
The room needs a clear-out. After the holidays, birthdays and Valentine bags, some toys are broken, some are missing pieces, and some are too young for the child who owns them.
One to two weeks before break gives you a weekend to do the work and a few days for the “new” toys to settle in. Break week then runs on Set 1 only. The first swap comes four to six weeks after the reset, usually mid-April to early May.
Doing it after break works too; you just lose the fresh-toy effect for the week at home. If the reset lands during break itself, split it across two mornings and give the kids the sorting jobs below.
What Is a Toy Rotation (and How Does It Work)?
A toy rotation means dividing your toys into groups and keeping only one group out at a time, swapping every few weeks. You aren’t getting rid of most of your toys, and it isn’t a minimalist philosophy.
Think of it like a library: kids can’t borrow every book at once, and finding one on the shelf is part of the fun. More out at once isn’t better. It tends to bring overwhelm and a floor you can’t walk across.
What many families notice:
- Kids often play longer with each toy when there are fewer distractions.
- Cleanup tends to go faster, because there is less to put away.
- A calmer space can help kids settle and focus.
- Toys may last longer when fewer of them are underfoot.
- You may feel less pull to buy something new for a bored child.
The spring rotation is also a reset. You look at the whole collection and decide what stays, what gets donated and what needs repair.
How to Do a Toy Rotation in 4 Steps
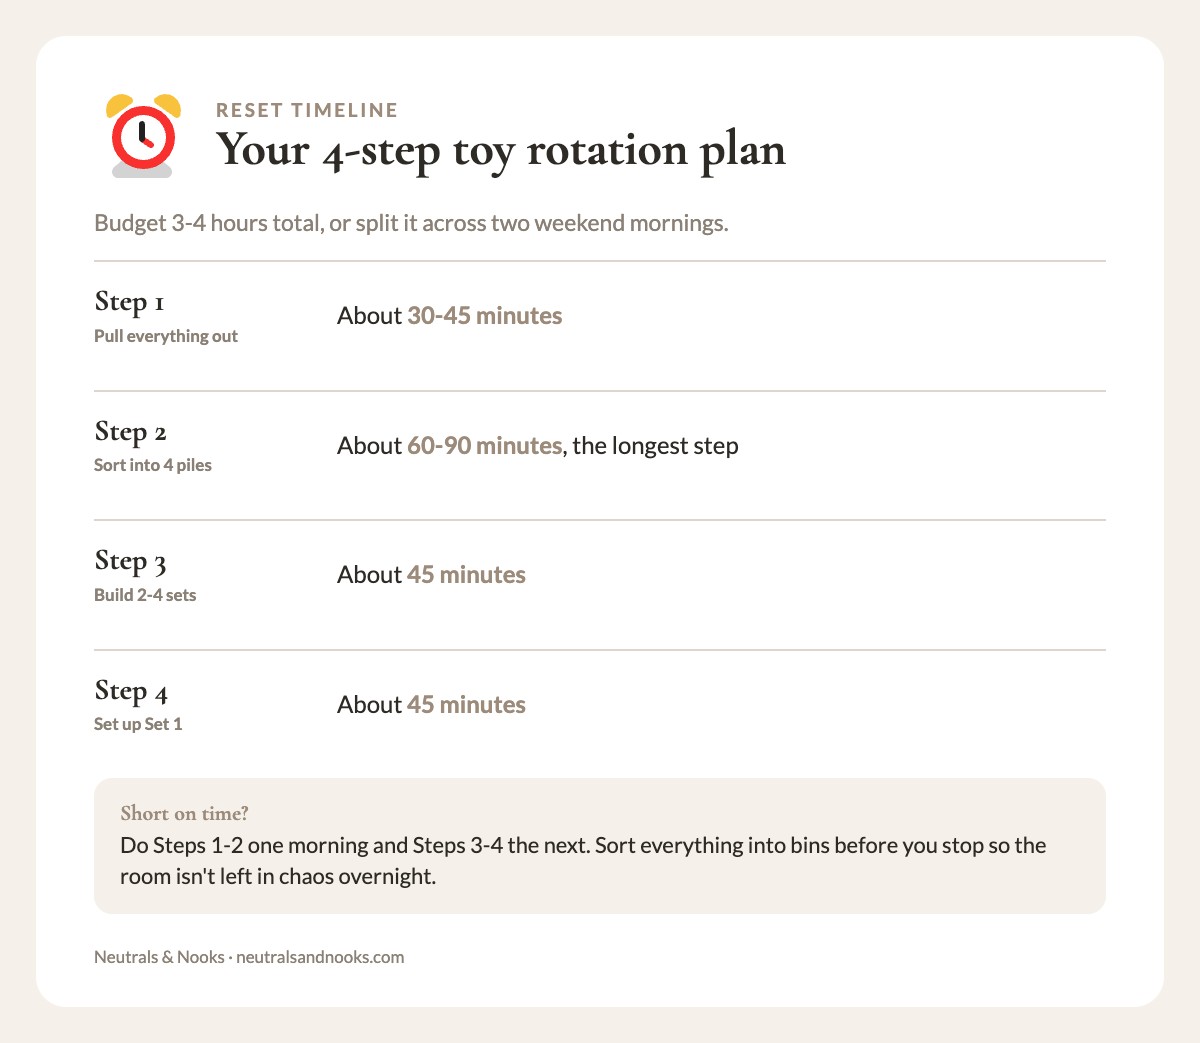
This isn’t an hour-long nap-time project. Budget three to four hours, or split it across two weekend mornings.
- Pull everything out. About 30-45 minutes.
- Sort into four piles. About 60-90 minutes.
- Build 2-4 rotation sets. About 45 minutes.
- Set up Set 1. About 45 minutes.
TipIf time is tight, do Steps 1-2 one morning and Steps 3-4 the next. Sort everything into bins before you stop, so the room is never left in chaos overnight.
Step 1: The Full Pull-Out
Everything comes out. Yes, everything.
It feels backwards to make a bigger mess first. But toys migrate into the wrong bins, behind furniture and inside other toys. A full pull-out is the only way to see what you have.
Empty the bins, shelves and couch cushions, and check under the furniture. Pile it all in the middle of the room. Include:
- All bins and baskets of toys.
- Shelf items.
- Items stored in closets.
- The under-bed collection, if toys have migrated there.
- Toys that have drifted into other rooms, like the Duplos in the living room.
Pile it all together. It will look terrible. This is intentional.
What to have on hand:
- Large trash bags (at least 3-4).
- Cardboard boxes or plastic bins for sorting.
- Sticky notes and a marker for labeling.
- A good playlist
This step typically takes 30-45 minutes. Do not start sorting yet.
Step 2: The Sort
Now sort into four categories. Use clearly labeled bins, boxes or floor zones.
| Category | What Goes Here | What to Do With It |
|---|---|---|
| Keep + Active Rotation | Loved, used regularly, age-appropriate, complete | Goes back into playroom in current rotation |
| Keep + Box Away | Still loved but needs a break, seasonal, specialty | Stored in rotation bins for future swap-out |
| Fix or Toss | Broken, missing pieces, battery toys that need checking | Decide here: repair or trash |
| Donate/Pass Along | Too young, never played with, duplicates | Out of the house within a week |
Safety firstCheck that battery compartments on electronic toys are screwed shut. Loose and spare batteries are never toys for any child, so keep them locked away. Discard toys with broken compartments or sharp edges. If a child swallows a battery, or you think they might have, treat it as an emergency. Go to the ER immediately and call the National Battery Ingestion Hotline at 800-498-8666. Do not wait for symptoms, do not induce vomiting, and do not let the child eat or drink unless the hotline or a doctor tells you to. Call 911 if the child is struggling to breathe.
Run each toy through this quick sort test:
- Played with in the last month?
- Complete, with no missing pieces?
- Safe for the youngest child in the house? Check batteries and small parts first.
- Age-appropriate for the child who owns it?
- Still loved by this child?
A few honest principles for sorting:
Broken things are not sentimental. A toy with a missing wheel or a puzzle with four pieces gone is not being played with. It takes up space and adds visual noise. Let it go.
“But they loved that” is past tense. The fact that your child adored something at age two does not obligate you to keep it at age five. You are not betraying the memory of that love by donating it to a child who will love it now.
Fewer toys out beats more. Many families find play gets longer and cleanup gets easier when less is out. I would rather see a clear floor than a full one. For a rough target, see how many toys to keep out at once.
When in doubt about a specific toy, box it. Put it in a separate bin with a six-week date. If they ask for it, bring it out. If they don’t notice it’s gone after six weeks, you have your answer.
This test is only for toys you are unsure about. Loved toys resting in a rotation set come back on schedule, whether or not anyone asks.
This sorting step is the longest. Plan 60-90 minutes. For families with significant toy volume, it can run longer.
Step 3: Build Toy Rotation Sets (What to Include)
Now, from your “Keep + Active Rotation” and “Keep + Box Away” piles, you’re going to create specific rotation sets.
The goal: 2-4 sets of toys that represent a balanced, complete play experience. Each set should stand alone as the only toys available for 4-6 weeks.
A balanced rotation set typically includes:
| Toy Category | Examples | Why Include It |
|---|---|---|
| Open-ended building | Blocks and Duplos; Magna-Tiles and Lincoln Logs (3+; keep away from under-3s and any child who mouths objects) | Develops spatial reasoning, no “wrong” way to play |
| Imaginative/role play | Dollhouse, figures, kitchen set, puppet theater | Social-emotional development, narrative building |
| Art/creative | Markers, playdough, stamps, stickers | Fine motor, self-expression, independent activity |
| Puzzles/games | Age-appropriate puzzles, board games, card games | Cognitive development, can involve adults |
| Active/physical | Ball, bean bag toss; jump rope and balance board for school-age kids only | Gross motor, energy discharge indoors |
| Books | 8-12 books accessible at a time | Literacy, quiet time, transitions |
You do not need every category equally in every set. Weight each set toward your child’s current interests and stage. A 2-year-old needs more sensory and large-piece building options. A 6-year-old needs more games and complexity.
Sample Set 1 for a 4-year-old (about 15 items, plus books):
| Category | What’s out |
|---|---|
| Building | Wooden blocks, Duplo bin, magnetic tiles |
| Pretend play | Play kitchen with food, animal figures, two dress-up pieces |
| Art | Washable markers and paper, playdough with a few cutters |
| Puzzles and games | Two 24-piece puzzles, one matching game |
| Active | Soft ball, bean bag toss, sidewalk chalk, bubbles |
| Books | 8-12 books in a basket |
Treat this as an example to adjust, not a prescription. Four is not a blanket safe age for everything in it. If a child under 3, or any child who still mouths objects, shares the room, store the magnetic tiles, small figures and playdough cutters out of their reach.
Safety firstSmall parts such as LEGO bricks and small figures are choking hazards. Keep them away from children under 3 and from any older child who still mouths objects. Supervise children under 4 closely, and follow the age label on each set. For marbles and small balls, wait until at least 4. Loose batteries are never toys for any child; keep them locked away. In a mixed-age room, store small-parts sets in a high or lidded bin or in the older child’s own zone, and use only Duplo-size pieces where under-3s play.
Magnetic tiles and Lincoln Logs are 3+ toys, so keep them out of reach of under-3s and of any child who still mouths objects. Check magnetic tiles often and discard any that are cracked or have detached magnets. High-powered magnets are not toys for any child and should be thrown out. A swallowed magnet is an emergency: get medical care right away without waiting for symptoms, and do not induce vomiting.
Spring rotation set considerations:
- Lean Set 1 toward things that can move outside, like balls, chalk and bubbles.
- Box up bulky indoor sets, like a large train layout, in favor of portable toys.
- Include at least one creative option that works outdoors, such as chalk or watercolors.
Build 2 sets if you have a smaller collection, 3-4 if you have more. Label each set clearly. Set 1 stays in the playroom. Sets 2-4 go into labeled bins stored in a closet, garage, or storage area.
Set 1 carries you through spring break. Swap in Set 2 four to six weeks after the reset, usually mid-April to early May. With only two sets, you simply alternate.
The Toy Rotation System printable has set labels, a swap calendar, and a sorting checklist. This step takes about 45 minutes.
Step 4: Set Up the Active Rotation
Now set up the playroom with only Set 1. Give this step about 45 minutes.
The room will look sparse compared to before. That is the point.
A few setup principles:
Everything should have a specific home. Skip “the bin of random stuff” and give each kind of toy a labeled spot. When cleanup time comes, nobody has to guess where things go, and kids are far more likely to do it.
Less height is better for younger kids. Toys should be reachable without climbing. Open-faced shelving or low cube storage works better than tall units with things stacked on top. Whatever unit you keep, tall or low, gets anchored to the wall.
Safety firstAnchor all shelving, bookcases and cube units to the wall, even low ones, using the manufacturer’s tip-over hardware. Add an anti-tip kit to any thrifted piece that comes without it. Keep heavy items on lower shelves. Choose lightweight, easy-lift or no lids, and avoid heavy hinged toy chests for young children because of pinch and entrapment risk.
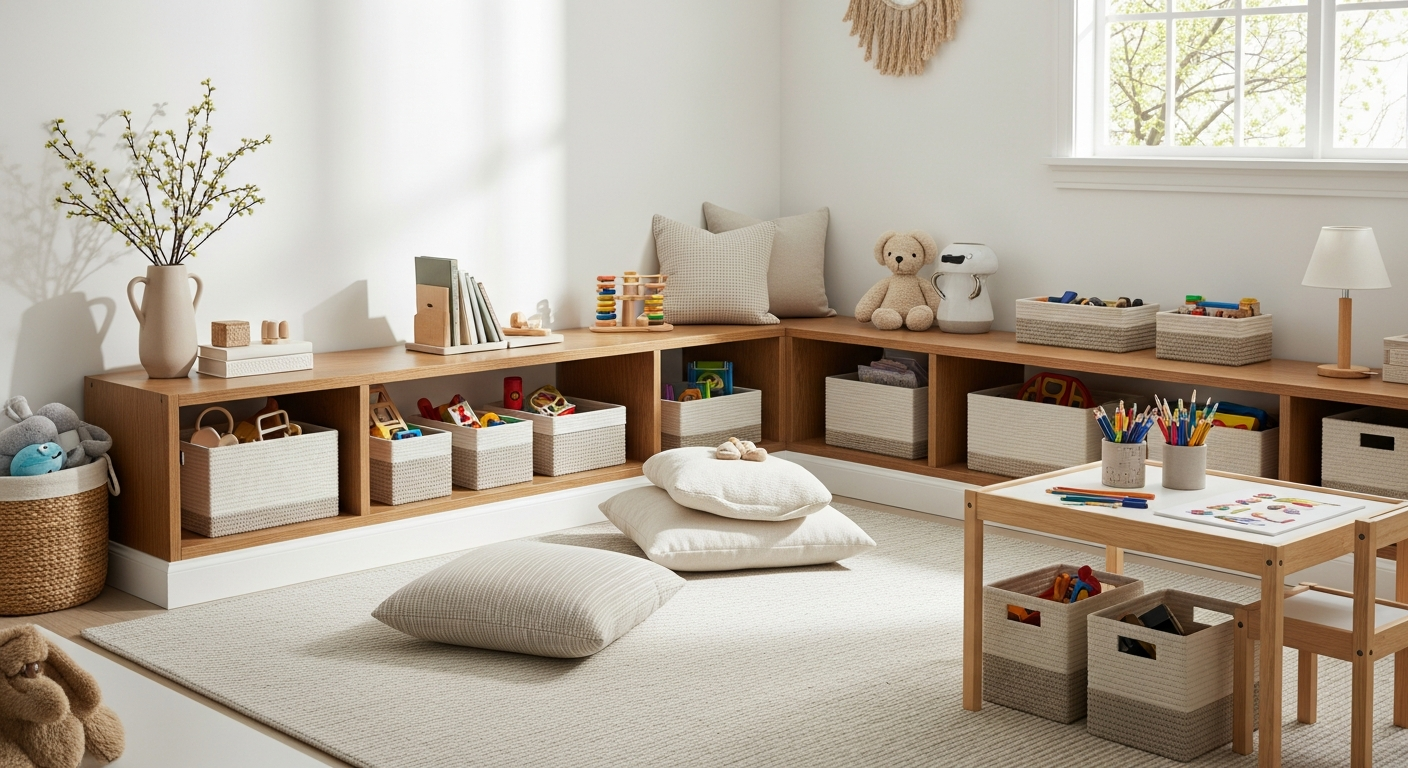
Visual calm matters. Matching bins reduce visual chaos, and neutral baskets look calmer than a wall of primary-colored plastic. You don’t need to go full Montessori aesthetic, but limiting visual noise often helps kids settle into play.
Rotate on a schedule. Mark it on the family calendar: every 4-6 weeks, a rotation swap. The interval matters less than the consistency.
Good to knowWhen rotation falls flat: some kids insist on one specific toy, and that toy should simply stay out. The first swap also takes real effort, and some kids resist it. Start with one set change and keep the favorites in play.
How to Involve Kids Without Meltdowns
With kids watching, the sort goes differently. Here is how to handle each age.
The meltdown risk is real. Young kids get attached to objects. Watching a parent handle their things can upset them, even when they rarely play with the toy.
Doing the whole reset while they sleep can backfire, because some kids feel blindsided when toys vanish. Involve them in a way that fits their age instead. You can still finish the donation pass on your own afterward, as long as you tell them about it.
| Age | Their role | Say this | Avoid |
|---|---|---|---|
| 2-3 | Small sorting jobs | “Your job is to put all the balls in this basket.” | Asking them to choose what to donate |
| 4-6 | Helper with limited choices | “We’re putting some toys to sleep so new ones can wake up.” | Open-ended permission questions |
| 7-10 | Partner who proposes sets | “Can you help me make this room easier to clean up?” | Overriding something that truly matters to them |
Ages 2-3: Parallel Process
Toddlers have limited ability to make keep-or-donate decisions, but they can do simple sorting jobs and feel in control of something small.
What works:
- Let them fill the keep bin. You finish the donation pass later and tell them plainly what is leaving.
- Give them a specific job: “Your job is to put all the balls in this basket.”
- Pick a calm, fed, rested time. Skip transitions and tired hours.
- Keep language simple: “We’re making the playroom better so it’s easier to find your toys.”
- Skip the phrase “giving away” for now. Say the toys are “going to help other kids.”
At this age, a calm, low-key session is a win, even if they lose interest halfway through.
Ages 4-6: Guided Participation
This age group can genuinely participate with the right framing. They understand fairness, they respond to being “the helper,” and they’re old enough to grasp the concept of sharing.
What works:
- Frame rotation as adding, not subtracting: “We’re putting some toys to sleep so new ones can wake up.”
- Offer real choices with limits: “Three stuffed animals need a new home. Which three?”
- Give them the “expert” role for their own toys: “Only you know which ones you really love.”
- Use the six-week box technique: “If you miss it, we’ll bring it back.” Follow through on this consistently.
- Make it a game. Play music or race to fill the donation bag.
What doesn’t work:
- Asking open-ended permission, like “Can we get rid of some toys?”
- Sorting while they’re hungry, tired or worn out after preschool.
- Expecting a perfect donate pile. They will change their mind, so build that in.
Ages 7-10: Real Partnership
Older kids can be genuine partners in this process. They can understand the reasoning, they have more self-regulation around attachment, and they often feel good about the charitable angle.
What works:
- Explain the actual why: “I want this room to feel calmer and be easier to clean up. Can you help me figure out the best way?”
- Let them propose the rotation sets.
- Let them make the donation calls for their own things.
- Connect to something they care about: “These toys will go to kids who don’t have many toys. That’s a real thing you can do.”
- Respect their nos. If something truly matters to them, it stays.
What works well at this age: the “museum box” concept. They curate a small box of 5-10 items that are too important to donate or rotate but too old to play with. These get stored with meaning, not tossed. This often eases the “but I need to keep everything” dynamic.
Zone-Based Playroom Setup: Making the Space Work Harder
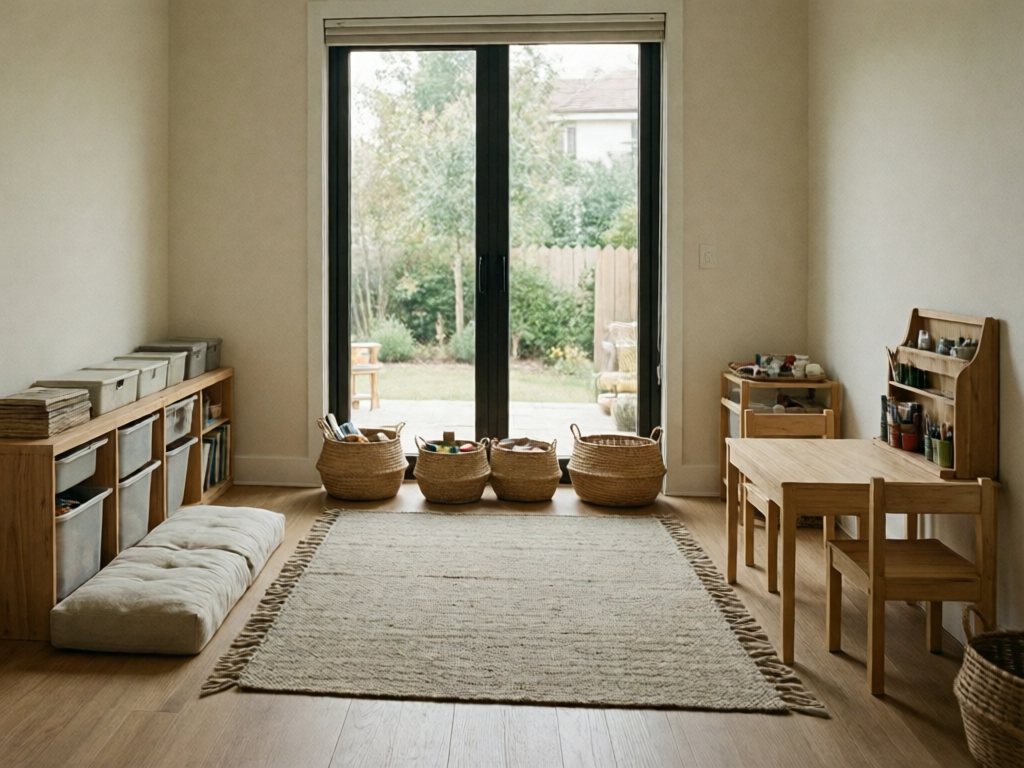
Once you’ve done the rotation reset, the physical setup of the playroom matters. Zones give kids a structure they pick up quickly, and cleanup gets much easier because each zone holds one kind of thing.
A simple spring playroom setup for most families involves three zones.
The Calm Zone
Purpose: Quiet, focused, independent play.
- What lives here: Puzzles, books and sensory activities.
- Setup: Lower light if possible, a rug or soft seating, contained storage.
Why it matters: A quiet spot gives kids somewhere to land when they need to wind down. If you also have a calm-down corner, this zone can overlap with it.
The Active Zone
Purpose: Higher-energy, larger-movement play.
- What lives here: Building sets, vehicles, larger figures, and active toys such as soft balls and a bean bag toss. A balance board belongs here only for school-age kids.
- Setup: Open floor space, durable flooring or a sturdy rug, nothing breakable at floor level.
Why it matters: Kids need room to move when they play. Ban active play from the playroom and it tends to move to your living room. A set space contains it.
Spring adjustment: Put this zone near an outside door if you can, so active toys are easy to carry out.
Safety firstI leave mini trampolines out of the playroom. The American Academy of Pediatrics recommends against home trampoline use for children of any age, mini trampolines included, and says children under 6 should never use one. A handrail does not remove the injury risk. Balance boards are for school-age kids, not toddlers or preschoolers, so leave them out of sets for younger children. When an older child uses one, supervise, keep the floor around it clear, and follow the age and weight limits on the label.
The Creative Zone
Purpose: Art, craft, imaginative projects.
- What lives here: Art supplies, playdough, paper, kid scissors, dress-up clothes and a puppet theater.
- Setup: A table or hard surface, easy-to-clean floor, contained supply storage.
Why it matters: Creative mess is easier to live with when it has a boundary. Art stays at the table, not on the couch, and cleanup stays in one spot.
Spring swaps for each zone are in the table below.
TipLook for the ACMI AP (Approved Product) seal on art supplies. It means a toxicologist reviewed the product and found it non-toxic when used as directed. Choose blunt-tip kid scissors.
Safety firstSeeds, beads and other small craft items are choking hazards. Keep them away from children under 3, and closely supervise children under 4 and any child who still mouths objects. If your spring rotation includes a water table or outdoor water play, stay within arm’s reach of toddlers and empty the water after every use. Even shallow water is a drowning risk.
Zone Setup Guide
| Zone | Key Furniture | Storage | Spring Additions |
|---|---|---|---|
| Calm | Floor cushion, low bookshelf | Easy-lift bins, cube organizer | Nature journals, light sensory materials |
| Active | Open floor space, low table | Open bins, labeled baskets | Bubbles, chalk, outdoor balls near door |
| Creative | Table with chairs, wipe-clean surface | Art supply organizer, easy-lift craft bins | Watercolors, seed-starting kit, nature craft supplies |
Most playrooms aren’t big enough for fully separate zones, so three corners or three walls of one room work fine. What matters is that each area has one main purpose and everything in it fits that purpose.
Storage Solutions on a Budget
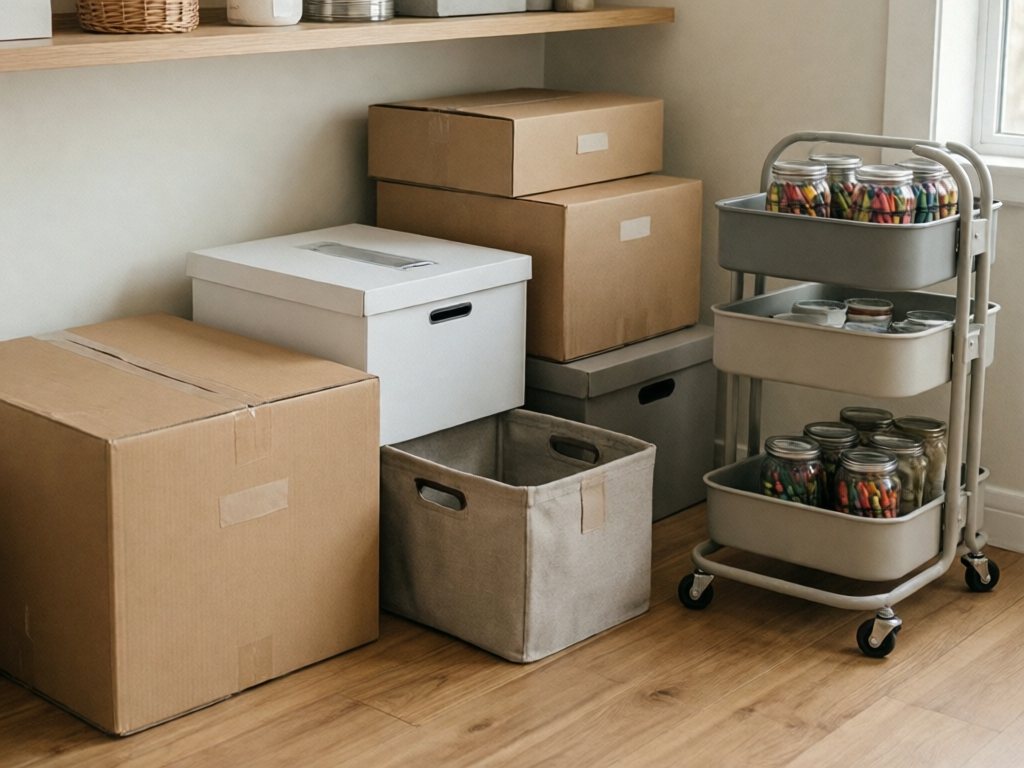
You don’t need to spend much to make playroom storage work. A clear system matters more than nice containers. A cardboard box with a handwritten label works as well as a $30 wicker basket if kids know what goes in it.
A few purchases do help. Prices below are approximate and vary by store and season.
Storage Options by Budget
| Item | Budget Option | Mid-Range Option | Notes |
|---|---|---|---|
| Main toy bins | Cardboard boxes ($0) or Dollar Tree bins ($1-3 each) | IKEA TROFAST bins ($5-8 each) | Lightweight, easy-lift or no lids for young kids; skip heavy hinged toy chests (pinch and entrapment risk) |
| Shelf/cube unit | Thrifted bookshelf ($0-15) | IKEA KALLAX ($60-100) | KALLAX is a flexible, widely available option. Anchor any shelf or cube unit to the wall with the manufacturer’s tip-over hardware, and add an anti-tip kit to a thrifted bookshelf |
| Rotation storage | Bankers boxes ($2-3 each) | Clear plastic bins with lids ($10-15 each) | Label with contents, date boxed, and child’s age |
| Book display | Rain gutter shelf DIY ($10-20; file down or cap cut ends, mount into studs, and load it with a few picture books only, never heavy items) | Ledge shelves ($15-25 each) | Face-out display can make books more inviting (see book storage ideas) |
| Art supply | Repurposed desk organizer ($0) | Rolling art cart ($30-60) | Roll it to wherever the art is happening |
| Labels | Masking tape + marker ($0) | Label maker or printed labels ($15-25) | Pictorial labels for pre-readers |
The $0-50 spring reset:
On a tight budget, do these in order:
- Declutter first. Removing toys costs nothing and makes the biggest difference.
- Add labels. Masking tape and a marker are enough.
- Use what you have differently. Change which bins hold what, reposition shelves, or move the creative zone toward better light.
- One $15-20 purchase. If you spend anything, spend it on a few uniform open bins. Target’s dollar spot often has these, and TROFAST bins work too. Matching bins often do the most to calm visual clutter.
The rule of thumb: spend money on the containers you’ll see the most and use most often. Everything in the rotation storage bins (hidden in a closet) can be whatever box you have.
How to Store Rotate-Later Toys
Your rotate-later bins hold Sets 2-4: toys that stay in the collection but are not out right now. They supply your next swap.
What makes a good rotate-later candidate:
- A toy that’s still loved but got little play in the last month.
- A seasonal toy that doesn’t fit the current season.
- A toy that’s slightly too advanced now but will be right in a few months.
- A toy that feels fresh after a rest, like a playdough set or a marble run. Store marbles where children under 4 can’t reach them.
- Gifts that haven’t been introduced yet. Bank these and bring them out at a swap. The six-week test doesn’t apply to them.
Rotate-later bin management:
- Use clear bins or labeled opaque bins stored in a closet, garage, or under a bed.
- Label each bin with contents and the approximate date you boxed it.
- Keep a simple list of what’s inside. A sticky note on the bin is fine.
- Put the swap dates on the calendar so these bins actually get opened.
The spring-specific rotate-later strategy:
If you already have rotate-later bins, go through them in March too. Toys boxed since fall have been away four to five months and will feel new. Pull them into your spring sets and let the winter toys take their place.
Each cycle, the bins get better. You learn what your kids actually miss, which tells you what really matters to them.
Maintaining the System Through Spring
A toy rotation only works if the swaps actually happen. The usual failure is that the next swap never gets scheduled. Three small habits keep it going.
The Weekly Check-In (5 Minutes)
Every Sunday, do a quick visual scan of the playroom. You are checking, not cleaning. Ask:
- Is anything obviously broken and needs to go?
- Is anything drifting out of its zone regularly? It may need a better home.
- Are there items the kids stopped engaging with this week?
- Is the cleanup routine actually working?
Note any issues and save the fixes for the next swap.
The 4-6 Week Swap (45-60 Minutes)
This is the actual rotation. The first one falls four to six weeks after your reset, usually mid-April to early May, when Set 2 replaces Set 1.
- Do a quick sort of the current rotation. Donate anything the kids are done with.
- Box up Set 1 cleanly and label it.
- Retrieve Set 2 from storage.
- Check Set 2 for dead batteries and missing pieces.
- Set up Set 2 in the playroom.
- Announce to kids: “The toys got refreshed! New stuff is out!”
That last step matters. A simple, cheerful “New rotation!” as you reveal it helps the old toys feel new, at no cost.
Maintenance Schedule at a Glance
If you’ve built a family command center, add the swap dates to the calendar there. Treat them like a recurring appointment.
| Frequency | Action | Time Required |
|---|---|---|
| Daily | Toys return to their zones before bed | 5-10 min (kids do this) |
| Weekly | Visual assessment, broken toy removal | 5 min |
| Monthly | Rotation swap (every 4-6 weeks) or partial refresh | 45-60 min |
| Seasonally | Full reset like this one | 3-4 hours |
| Annually | Comprehensive declutter + system reassessment | Half day |
The daily return-to-zones habit carries the system. When toys don’t go home, the zones blur and the room slides back to where it started. It is worth the training time with kids.
Getting Kids to Keep It Up
The age-by-age roles above cover reset day. These habits cover the weeks after.
Tie cleanup to transitions. Before screen time or snacks, do a five-minute toy return to the zones. It isn’t a full clean.
Ask “where does it live?” When something is out of place, ask the question out loud instead of moving it yourself. Repetition builds the habit for little kids and hands the job to older ones.
Make returns easy. Picture labels for pre-readers, color-coded zones, and open bins cut the friction that kills cleanup habits.
Let them run the reveal. On swap day, kids open the bin and decide where the new things go within each zone.
Connect to existing systems. If the kids’ closet or the kitchen already runs on “things have homes,” kids pick up the idea faster here.
Neutral Nina
Neutral Nina is an interior design enthusiast and mom of three who proves that beautiful, organized spaces and family life can coexist. She shares practical strategies for creating calm, functional homes that work for kids and grown-ups alike.
Frequently Asked Questions
How many toys should be in the active rotation at one time?
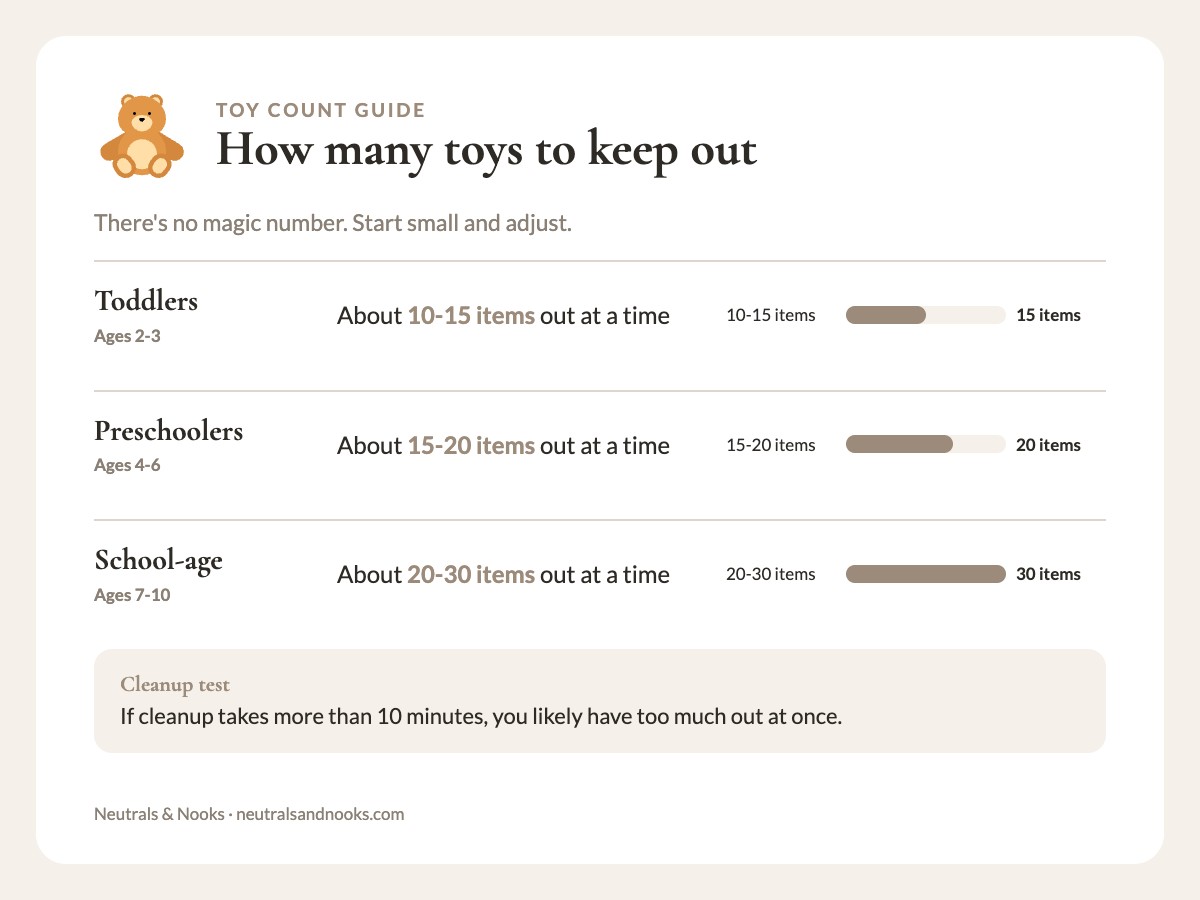
There’s no magic number. As a rule of thumb, start small: about 10-15 items for toddlers, 15-20 for preschoolers, and 20-30 for school-age kids. Let cleanup set the upper limit. If it takes more than 10 minutes, you likely have too much out at once.
What do I do with toys my child is obsessed with? Do they have to rotate?
No. Toys in daily use don’t need to rotate. Rotation is for toys that have lost their pull. If your child plays with their Duplos every single day, those stay out. If the Duplos haven’t been touched in three weeks, they’re a candidate for a rest.
My child cries every time I try to donate anything. How do I handle this?
First, skip the open-ended permission question and offer a limited choice instead. Second, use the six-week box method: nothing goes straight to donation. Contested items go in a box with a date. If your child asks for one within six weeks, bring it back. If they don’t, donate it without making it an event, and answer honestly if they ask later. Often, contested items are never asked for again.
How do I do a toy rotation with multiple kids sharing a playroom?
The same framework applies, but you build rotation sets that serve both kids. Create mini-zones within zones by child if ages are far apart, and keep small-parts sets out of a toddler’s reach. With close-in-age siblings, shared rotation sets often work fine. Give each child at least one bin or section that is clearly theirs and not for sharing. This often reduces conflict.
We have a very small playroom (or no dedicated playroom). Does this still apply?
Yes. A rotation can help even more in a small space, because there is less room for toys to spill into. Keep one set out and the rest in bins under a bed or on a closet shelf.
My kids get bored so fast. Won’t reducing toys just make this worse?
Less often produces more engagement, not less. What looks like boredom in an overstuffed room is sometimes overwhelm. With 50 options, choosing can feel like too much, and some kids default to screens. With 15 well-chosen options, the choice is manageable and they often settle in.
How do I handle gift-giving family members who keep adding to the collection?
Try a short script: “We’re keeping toys to a small set right now. Would you like to give an experience, a book, or something from this wish list?” Then keep a one-in-one-out policy. For every toy that enters, one leaves. The rotate-later bin works as a buffer. Bank new gifts there and bring them out at the next swap, not into an already full playroom.