How to Organize Holiday Decor Storage Before the Season Rush Hits
Learn to organize your holiday decor storage with a structured four-weekend plan, preventing last-minute rushes and easily finding what you need. You'll take inventory, sort items, label bins, and tier your shelves for efficient access.
- Follow a 4-weekend plan to inventory, sort, label, and tier your holiday decor storage.
- Start by taking inventory and purging unused or damaged decor to reduce clutter.
- Sort decor by category into appropriately sized bins and label everything clearly.
- Tier your shelves by calendar and pack a 'Day One' kit for easy decorating.
- Begin about six weeks before Halloween, or use the fast track if starting late.
This post contains affiliate links. As an Amazon Associate I earn from qualifying purchases.
Last November, I spent forty-five minutes in the garage hunting for one strand of icicle lights while my daughter waited in the doorway. The bins said “XMAS,” “HOLIDAY STUFF,” and “MISC 2,” and the lights were in that last one, wound around a broken picture frame. I’d packed it all away in a tired December rush and left future-me the mess.
This guide fixes that with a four-weekend plan: take inventory and purge, choose bins and sort by category, label everything, then tier your shelves by calendar and pack a Day One kit. Start about six weeks before Halloween, or use the two-weekend fast track below if you’re starting late.
Good to knowStarting late? If Halloween is less than six weeks away, use the two-weekend fast track. Pull the Halloween bins first, check those lights for damage and decorate as usual. Then take inventory, purge and sort into bins on the first weekend. Label, tier the shelves and pack the Day One kit on the second.
Free printable · 6 pages
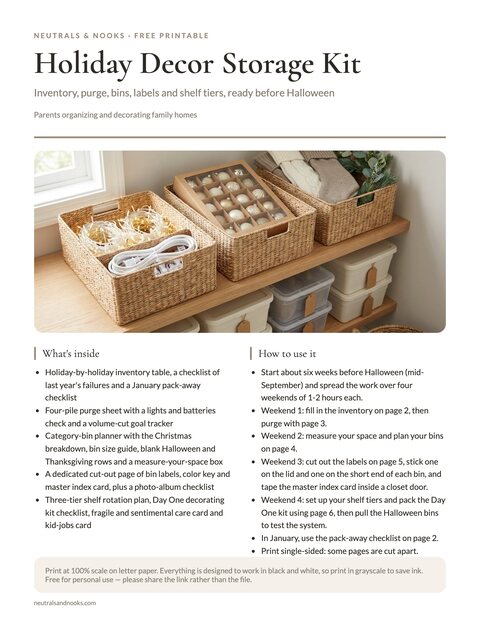
Holiday Decor Storage Kit
An inventory sheet with a January pack-away checklist, a four-pile purge sheet with lights check and volume-cut tracker, a category-bin planner, a cut-out page of bin labels with a master index card, and a shelf-tier rotation plan with a Day One decorating kit checklist and care and kid-jobs cards.
Free. Your download link appears right here. You'll also join the Monthly Home Reset. Unsubscribe anytime. Privacy
The Holiday Decor Storage Kit that goes with this guide bundles an inventory sheet, a bin label set, a tier plan and a master list.
In this article (12 sections)
- Your Four-Weekend Plan
- Start With an Honest Inventory, Not a Pinterest Board
- Purge Before You Pack (Even If Nothing’s “In Season” Right Now)
- Choose Bins That Fit Your Space
- Sort by Category, Not by Holiday Alone
- Label Bins So Anyone Can Find Things
- Store Decor by Access Frequency
- Build a “Day One” Decorating Kit So Setup Doesn’t Require Opening Every Bin
- Getting Kids to Help Pack Holiday Decor
- Pack Away Holiday Decor in January
- Frequently Asked Questions
- Your Storage System, Ready for November
Your Four-Weekend Plan
You don’t need one exhausting Saturday. Spread the work across four weekends, ideally starting about six weeks before Halloween so you finish by mid-October, before most Halloween decorating begins. The sections below follow the same order.
| Weekend | Task | Time |
|---|---|---|
| Weekend 1 | Take inventory, then pull everything out and sort it into keep, fix, donate and trash piles. | 1-2 hours |
| Weekend 2 | Buy or gather bins sized to your space, then sort the keepers by category. | 1-2 hours |
| Weekend 3 | Label every bin on two sides and build the master list. | 1-2 hours |
| Weekend 4 | Set up tiered shelving with Halloween and fall in front, and pack the Day One kit. Test the system by pulling the Halloween bins. | 1-2 hours |
Start With an Honest Inventory, Not a Pinterest Board
Weekend 1 starts with a walk-through. Before you touch a single bin, look at your current storage. Don’t sort or buy anything yet.
Ask yourself:
- How many holiday categories do we store? Think Christmas, Halloween, Thanksgiving, Easter, Fourth of July, birthdays and everyday seasonal pieces like fall wreaths and spring flags.
- Where does it live now? Is that space reachable in November, or does someone have to move three totes of camping gear first?
- What’s damaged, dead or duplicated? Two strands of the same broken lights count.
- What do we use every year, and what’s been riding along since a move three years ago? Flag anything unused for two seasons.
Write this down — a note on your phone is fine. The goal is a rough headcount: how many bins do you need per category, and how much shelf or floor space does that require? It’s common to overestimate how much you use and underestimate the space taken by things you haven’t touched in years.
This is also the moment to be honest about why last year’s system failed. These are the usual culprits.
| Symptom | Usual Root Cause |
|---|---|
| Bins are unlabeled or vaguely labeled | Packed away in a rush, with no time set aside. |
| Lights are tangled every year | No dedicated light-wrapping tool or method. |
| Ornaments arrive broken | Packed loose or in newspaper instead of divided storage. |
| Can’t find specific items (tree topper, stockings) | Everything from one holiday dumped into one giant bin. |
| Bins are stored somewhere hard to reach | Storage spot chosen for what was empty, not what made sense. |
| Duplicate purchases every year | No visibility into what you already own. |
None of these need new furniture to fix, just a system.
Purge Before You Pack (Even If Nothing’s “In Season” Right Now)
Spend the rest of Weekend 1 on the purge. The best time to declutter holiday decor is not while you’re decorating, when everything feels nostalgic and you want to keep it all.
It’s now, weeks before the next big holiday, when a broken plastic pumpkin is just a broken plastic pumpkin and not a memory attached to your kid’s first Halloween.
Pull everything out onto the garage floor or driveway on a dry day. Then sort it into four piles.
- Keep and love. Used most years, undamaged and still your style.
- Keep but fix. A wreath that needs new floral wire, or a stocking with a loose hook. Light strands never go in this pile; replace damaged ones.
- Donate. Décor you never use, duplicates, or pieces that no longer suit your home. That gold tinsel garland from your first apartment can go to someone who’ll hang it.
- Trash. Anything broken beyond repair, missing pieces, or so tangled, melted or faded that it isn’t worth the storage space.
Check lights carefully. Replace a strand rather than repairing or storing it if it has a dead section, frayed or cracked insulation, cracked sockets or exposed wire.
Test anything battery-operated that has sat for a year, too. Flip each switch now and have an adult open battery compartments and swap dead batteries. That beats finding out in December, while your kid waits for the light-up reindeer to work right now.
Safety firstKeep young children and pets out of the sorting area, and sweep up any broken glass right away. Older or imported PVC-insulated cords and light strands can contain lead, and some carry a lead warning label on the tag or packaging. Wash your hands after handling them, and don’t let children or pets chew or mouth them.
If certain categories are hard for you to let go of, our Declutter Score Quiz shows whether you tend to over-keep out of sentimentality or under-plan out of avoidance. That changes how you should approach a purge like this one.
Anything you flagged as unused for two seasons goes in the donate pile. You’re not trying to strip Christmas down to nothing, just to fill every bin with things you use.
Choose Bins That Fit Your Space
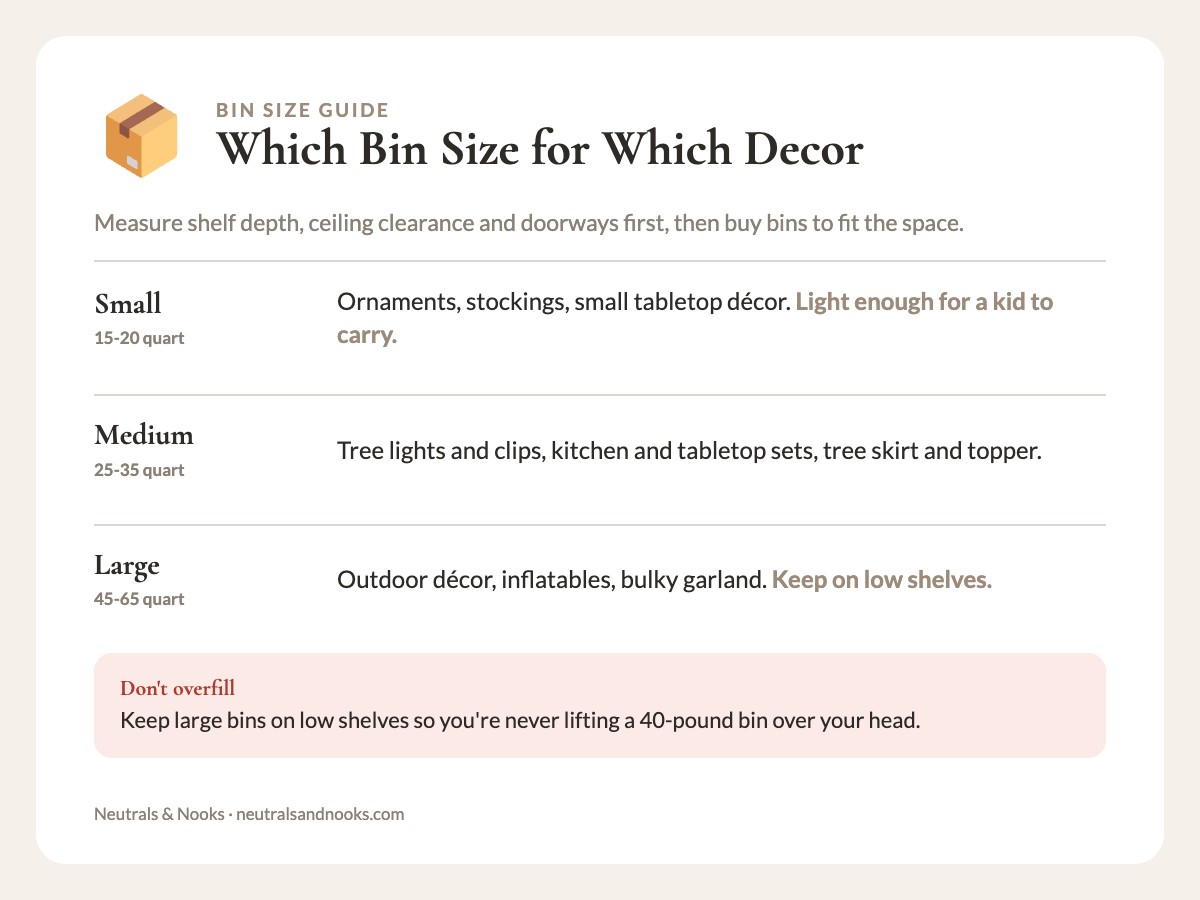
Weekend 2 starts with bins, before you sort anything. A matched set of large bins looks tidy in the store. At home, they often don’t fit the shelf, get too heavy to lift once full, or don’t stack safely more than three high.
Measure your storage space first: shelf depth, ceiling clearance and any doorway the bins have to pass through. Then buy bins to fit the space, not the other way around.
| Size | Capacity | Best for |
|---|---|---|
| Small | Roughly 15-20 quart | Ornaments, stockings, small tabletop décor and wrapping accessories. Light enough for one person, even a kid, to carry. |
| Medium | 25-35 quart | Tree lights and clips, kitchen and tabletop sets, and the tree skirt and topper if not stored flat. |
| Large | 45-65 quart | Outdoor décor, inflatables and bulky garland. Don’t overfill them, and keep them on low shelves so you’re never lifting a 40-pound bin over your head. |
Clear vs. opaque
Clear bins let you see what’s inside at a glance. The tradeoff is sunlight: under a garage window or attic vent, clear plastic can fade or turn brittle over the years. If your storage area gets real light, choose opaque bins and lean harder on labels, or keep clear bins on lower, shaded shelves.
Stackability matters more than capacity. A bin with a locking lid or a lip-and-groove design that locks to the one below beats a slightly bigger bin that slides around. That’s especially true in a garage, where bins get bumped to make room for the car.
Specialty shapes
Two items are worth a specialty bag.
- Wreath storage bags. These flat, round, zippered bags keep a wreath’s shape instead of crushing it in a square bin.
- Tree storage bags with wheels. If you have an artificial tree, a rolling bag saves your back and keeps the tree from being crushed under other bins.
If your holiday decor shares space with bikes, sports gear and the lawn mower, our guide to Family Garage Organization covers zone-based systems that make room for seasonal overflow without letting it take over.
Sort by Category, Not by Holiday Alone
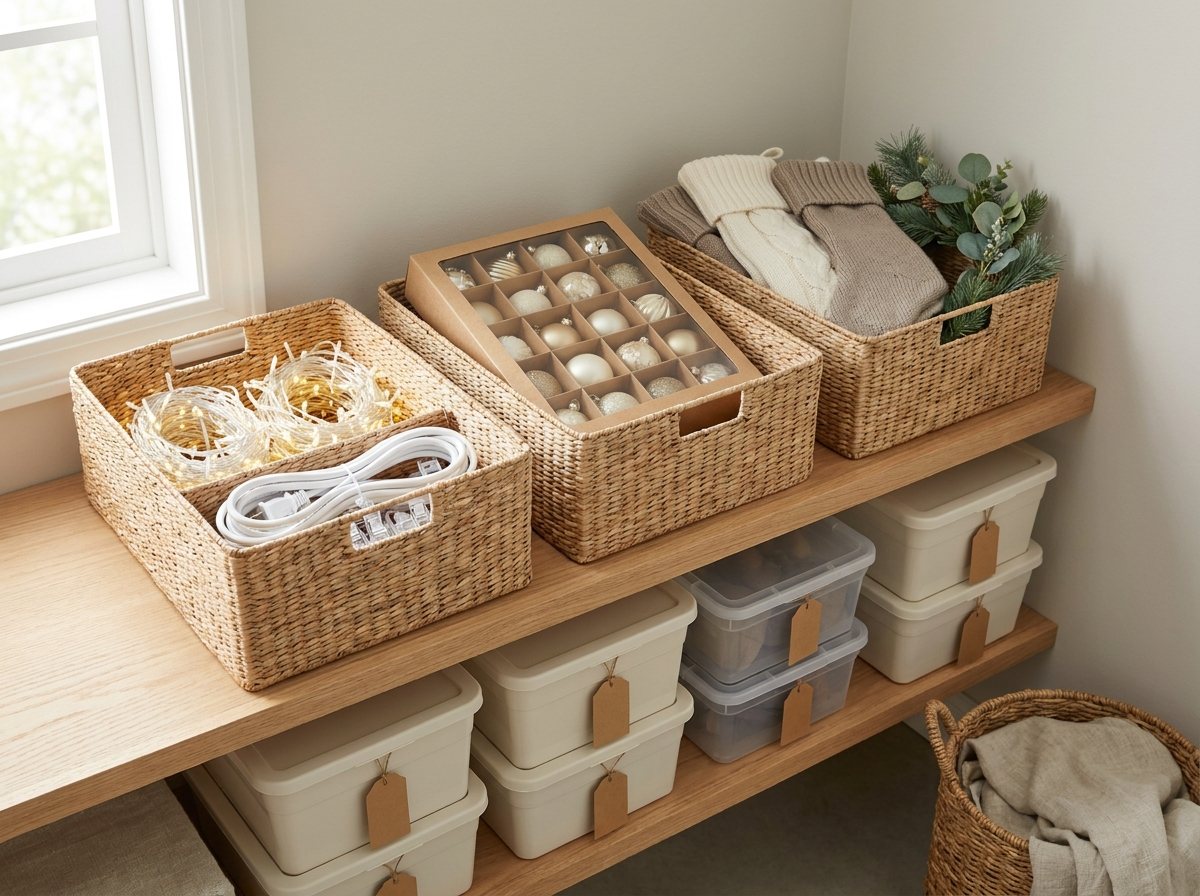
With your bins ready, spend the rest of Weekend 2 sorting the keepers. This is the single biggest upgrade over the “one bin per holiday” system most families default to. Instead of one “CHRISTMAS” bin holding lights, ornaments, the tree skirt and stockings all mixed together, sort by function within each holiday. Everything in a bin should serve the same task.
Christmas category breakdown
| Category | What Goes In It | Bin Size |
|---|---|---|
| Tree & lights | String lights, extension cords and light clips. | Medium |
| Ornaments | Fragile and durable pieces, kept apart. | 2 small, with dividers |
| Tree topper & skirt | Kept flat or in a soft bag. | 1 flat/long bin |
| Stockings & mantel décor | Stockings, holders and garland. | Small |
| Outdoor décor | Yard lights, inflatables and door wreaths. | Large, weatherproof |
| Tabletop & kitchen | Holiday dishes, napkins and centerpieces. | Medium |
| Wrapping station | Paper, ribbon, tags and tape. | Long flat bin or caddy |
Halloween, Thanksgiving and the in-between seasons get a smaller version of the same logic. Use one or two fall/Halloween bins for pumpkins, string lights and yard décor. Use a Thanksgiving bin for the tablecloth, place cards and tabletop pieces that come out once a year. If you’re planning this year’s look, our guide to Neutral Halloween Decor for a Family Home pairs well with this step.
If you already rotate kids’ clothing between seasons, this will feel familiar. It’s the same principle we cover in Seasonal Clothing Storage for Kids: store by what you’ll grab together, not by a vague general category.
A note on ornaments specifically
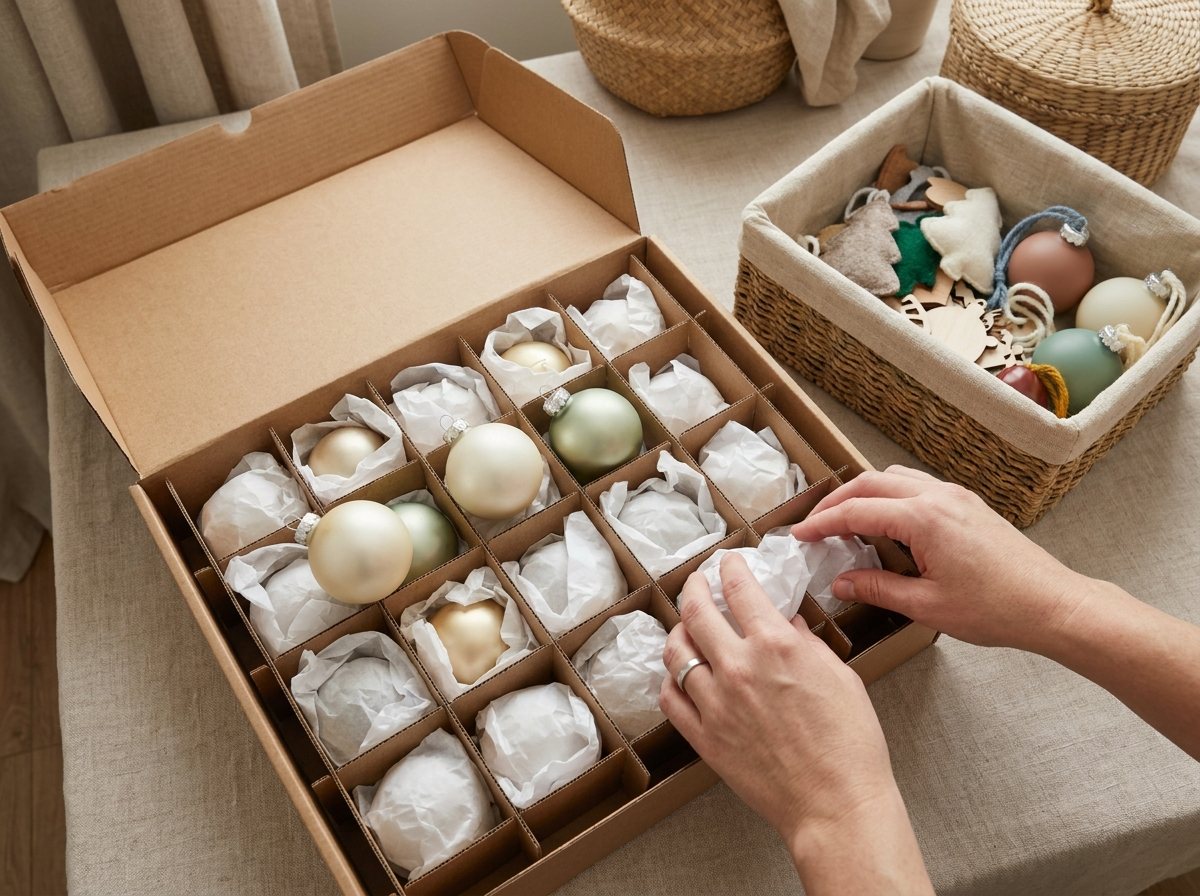
Ornaments deserve their own sub-system. They’re the most likely thing to break in storage, and the thing kids care about most. Three approaches hold up well.
- Adjustable-cell ornament storage boxes (cardboard or plastic with cardboard dividers) work best for glass and ceramic ornaments, one per cell.
- Layered ornament storage bins with foam trays are worth it if you have 100+ ornaments and want to see everything at a glance.
- Cloth ornament bags with individual pockets sit well on a shelf, though they don’t stack as neatly as boxes.
Whatever you choose, separate fragile from durable before you pack. Kid-made and plastic ornaments can go in a simple divided bin. Wrap glass and heirloom pieces individually in tissue or bubble wrap, taped so it doesn’t unravel, or give each its own cell. “I’ll wrap it better next year” is a promise tired-you rarely gets to keep.
Heirlooms and sentimental pieces
Every family has a few decorations that matter more than the rest, like the ornament from a baby’s first Christmas or a grandparent’s hand-blown glass. They deserve more care than the string lights.
- Give them their own small bin, even if it’s not full. Mixed in with plastic balls, an heirloom gets handled just as carelessly.
- Store fragile pieces upright, not flat under other bins, with a divided insert or foam tray so nothing touches.
- Keep wax and fabric pieces out of attics and uninsulated garages. Temperature swings can warp, melt or mildew them, so a climate-controlled closet or under-bed spot is worth the space.
- Photograph sentimental pieces once, especially child-made ones that may not last. If one breaks, you’ll have a record, and letting go of a worn-out piece gets easier.
If your kids add handmade ornaments every year, pair this with a plan for Kids’ Artwork and School Papers so construction-paper wreaths don’t take over the bin.
Label Bins So Anyone Can Find Things
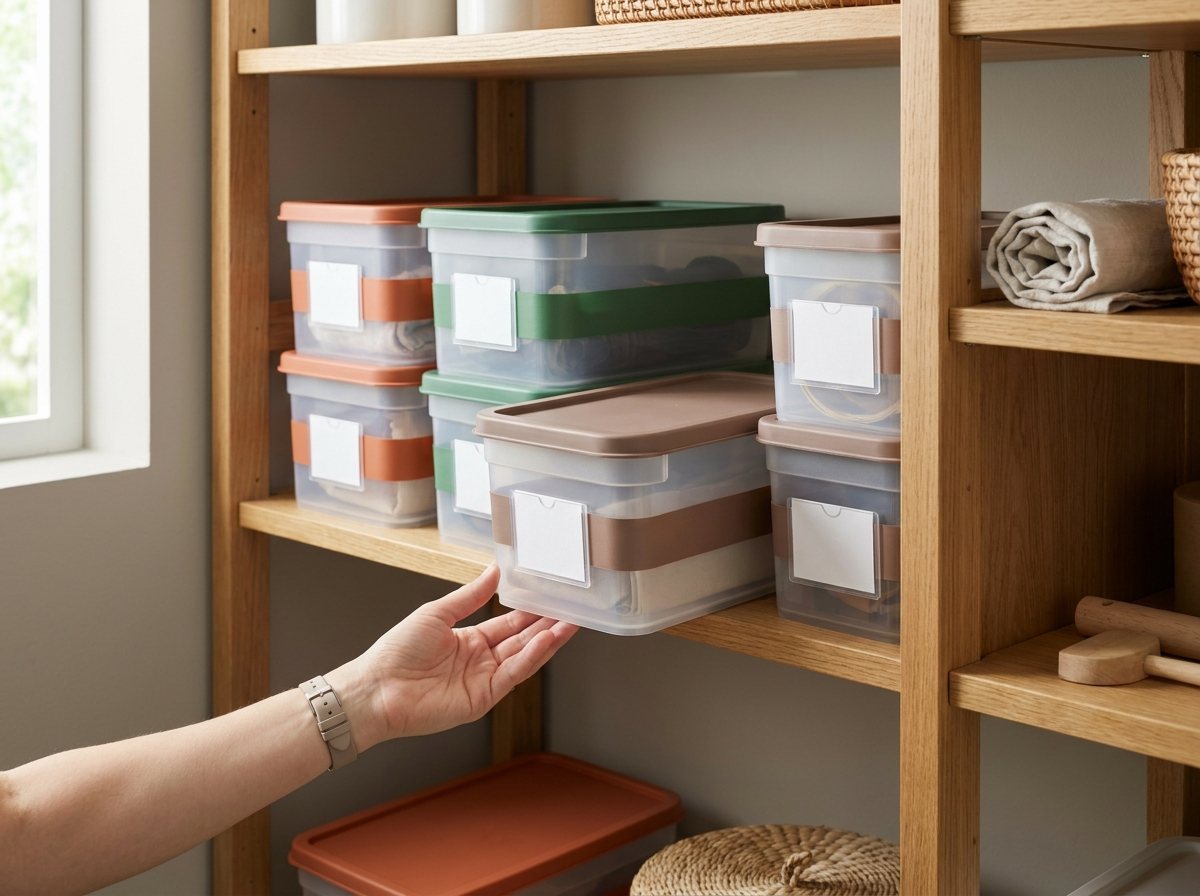
Weekend 3 is for labels and the master list. A good label lets someone other than you, like a partner, a grandparent or an older kid, find things without asking. It should answer three questions at a glance: what holiday, what category and what’s inside.
A label like “Christmas — Tree & Lights — string lights (5), extension cords, clips” beats “XMAS” every time.
A labeling system that scales
- Color-code by holiday. Red or green lids or tape for Christmas, orange for Halloween and fall, brown or gold for Thanksgiving, pastel for Easter and spring. You’ll spot the right shelf zone from across the garage before you read a word.
- Number bins within a category. If you have more than one, “Ornaments 1 of 2” tells you right away whether you’ve found everything.
- Label two sides, not just the lid. A lid label disappears once bins are stacked or slid onto a shelf, so add one to the short end that faces out.
- Print labels instead of using marker on tape. Marker fades and smudges in a garage with temperature swings. A label maker or printed cardstock in a clear label holder lasts for years and looks calmer than handwriting.
- Keep a master list. An index card taped inside a closet door, a note on your phone or the master list from the Holiday Decor Storage Kit all work. It helps when bins get shuffled, and it settles questions like whether the tablecloth is in the Thanksgiving bin or with the everyday linens.
Before you close each lid, snap a photo of the contents and save it to a phone album called “Holiday Storage.” In November, when you can’t tell whether you need Ornaments 1 or Ornaments 2, check the photo instead of hauling both down.
Store Decor by Access Frequency
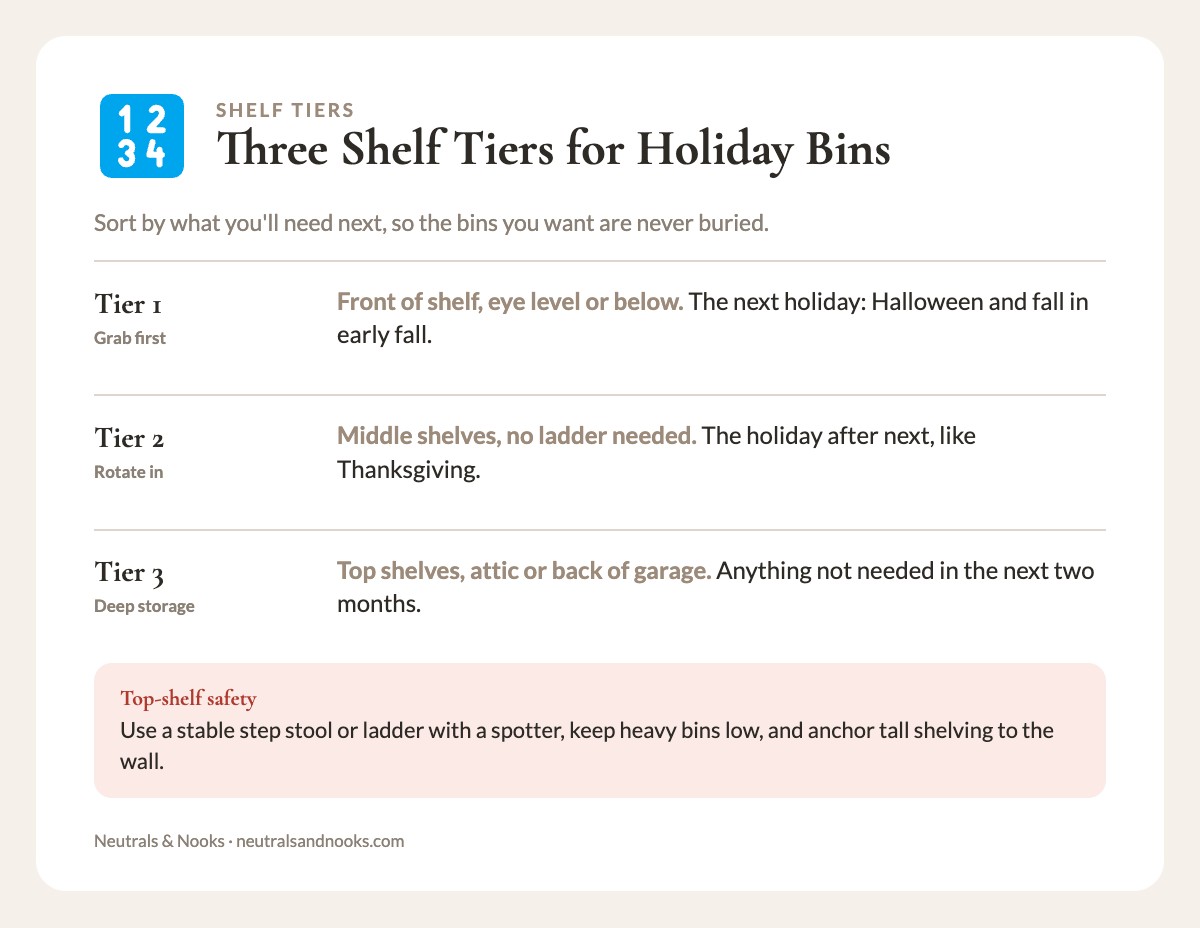
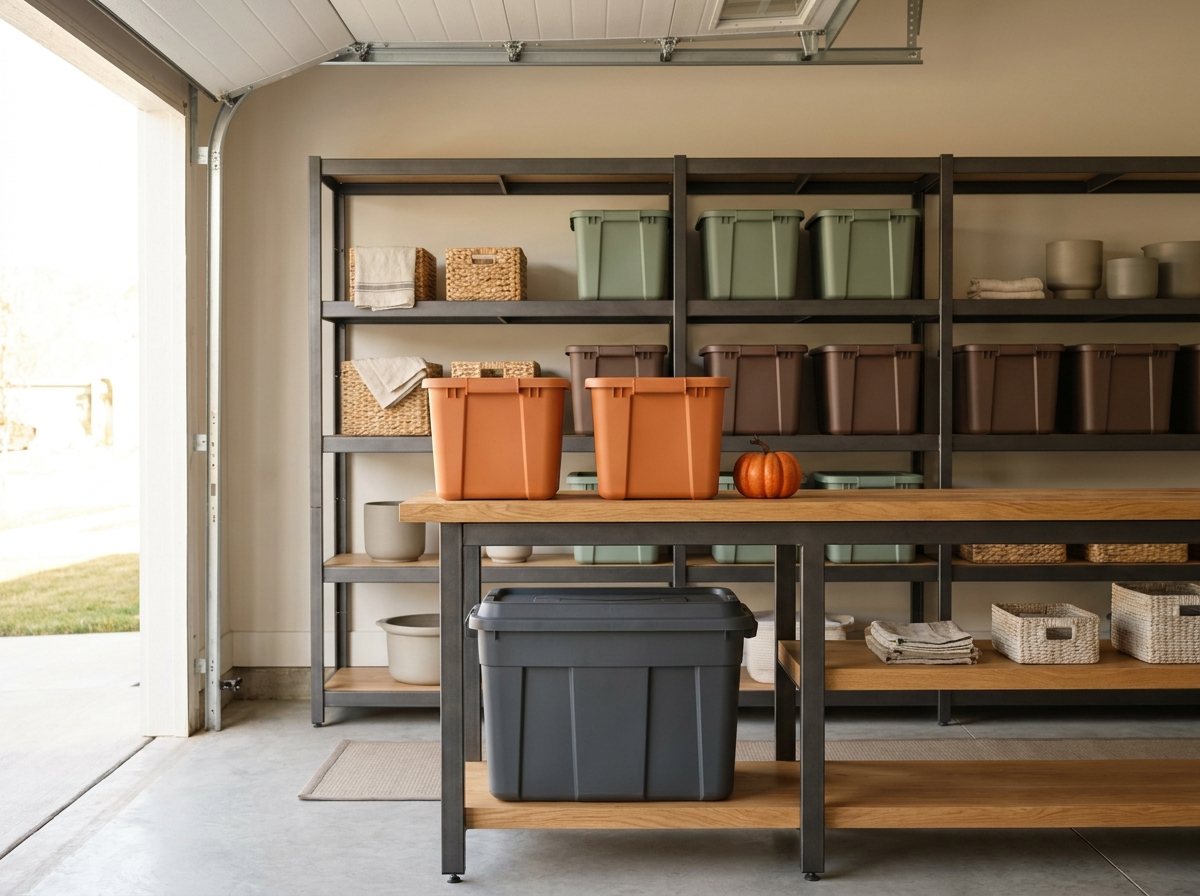
Weekend 4 puts everything on the shelves. Not all holiday décor needs equal access, and skipping this step is how the bins you need end up buried behind the ones you don’t.
Think in three tiers:
Tier 1 — Grab-first items (front of shelf, eye level or below)
Whatever holiday comes next on your calendar. In early fall, that’s Halloween and fall décor.
Tier 2 — Rotate-in items (middle shelves, reachable without a ladder)
The holiday after the next one. If you’re storing Halloween in Tier 1 right now, Thanksgiving lives in Tier 2.
Tier 3 — Deep storage (top shelves, attic, or the back of the garage)
Everything you won’t need in the next two months: whatever just wrapped up, holidays still far off, and extras like spare ornaments, backup lights or pieces you rotate every other year.
Safety firstUse a stable step stool or ladder, with a second person spotting you, for top shelves. Keep heavy bins on low shelves, and anchor tall shelving to the wall so it can’t tip.
Sample rotation, key months
| Month | Tier 1 (front) | Tier 2 (middle) | Tier 3 (back/top) | Your move |
|---|---|---|---|---|
| September–October | Halloween/fall | Thanksgiving | Christmas and everything else | Set up tiers and test with the Halloween bins. |
| November | Thanksgiving | Christmas | Halloween (packed away) | Pack Halloween away and shift each tier forward. |
| December | Christmas | Winter/Valentine’s | Thanksgiving (packed away) | After Thanksgiving, bring Christmas to the front. |
| January–February | Winter/Valentine’s | Easter | Christmas (packed away) | Pack Christmas away by category and check for damage. |
| April | Easter | Summer/July 4th | Spring extras | After Easter, bring July 4th forward. |
| July | July 4th | Fall prep | Easter/spring | After July 4th, plan your September reset. |
TipPut a sticky note on the shelf edge with the month you’ll next swap tiers, so you don’t have to remember the calendar. If your garage also rotates sports and outdoor gear, pair this with our guide to rotating seasonal gear in the garage.
If your storage space is a closet rather than a garage or attic, the same tiered logic applies at a smaller scale. Zone it the way we describe for a Linen Closet: most-used items at the most reachable height, everything else stacked by how soon you’ll need it.
Build a “Day One” Decorating Kit So Setup Doesn’t Require Opening Every Bin
Finish Weekend 4 by packing a small, separate kit of the tools you need to start decorating. It holds no decorations, just the supplies that make setup smooth.
A Day One kit might include:
- Command hooks or ornament hangers, plus extras, since some always go missing.
- A small screwdriver or scissors for opening packaging.
- Extension cords and a power strip, inspected for damage and coiled neatly.
- A list of the battery sizes your décor uses, not the batteries themselves (see the safety note below).
- A tape measure, if you hang lights along a roofline or mantel.
- Zip ties or twist ties for cord management, kept out of reach of young children.
- A sticky note of “things we said we’d do differently this year,” like buying a tree topper, replacing the porch lights or donating the extra stockings.
Keep this kit at the front of Tier 1 at adult eye level, separate from the category bins and out of small children’s reach. On decorating day, you grab the kit and the first bin you need instead of opening five bins to discover you’re out of ornament hooks.
Safety firstInspect cords and light strands for frayed or cracked insulation, cracked sockets or exposed wire, and discard any that are damaged. Don’t daisy-chain extension cords or overload power strips, and use outdoor-rated cords outside. Store spare batteries, especially coin or button cells, in a sealed container on a high or locked shelf. Tape over the terminals of loose cells. Keep cords, zip ties and twist ties away from young children. A swallowed button battery is an emergency. Go to the ER or call poison control right away, and don’t wait for symptoms.
Getting Kids to Help Pack Holiday Decor
Decor storage is a low-stakes way to teach organizing skills. Nobody’s upset if a Halloween bin isn’t perfectly sorted, unlike the school backpack drop zone on a Monday morning.
Give kids ownership of a specific, contained piece of the system:
- Their own small bin for handmade and shatterproof ornaments, decorated with their name or a photo so it’s unmistakably theirs. “Kid-safe” means no glass, no small detachable parts and no metal hooks for children under 4.
- The job of testing battery-operated decorations by flipping the external power switch and reporting which ones don’t work. An adult opens battery compartments and changes the batteries.
- Putting their ornaments back in their own bin each year. A five-year-old can do this with an adult’s help.
- Wrapping their own shatterproof or kid-made ornaments in tissue paper, which most kids can manage independently by age six or seven. Adults handle glass and heirloom pieces.
Safety firstChildren under 4 need supervision around ornaments and hangers. Store hooks, hangers, rubber bands and other small parts out of their reach, and keep coin or button batteries locked away.
The same idea works for Kids’ Craft Supply Organization. Give kids a defined, appropriately sized space with a clear rule for what goes in it, and they’ll maintain it far more often than a system only a parent understands.
Pack Away Holiday Decor in January
A storage system is tested by the un-decorating in January, when everyone is tired of the season and wants the boxes gone. A few habits keep it working year after year:
- Pack by category, not by “whatever’s closest to the box.” If the Tree & Lights bin is full, that’s information: you need a second bin or fewer lights. Don’t force the lid shut on a bin that’s also holding ornaments.
- Do a five-minute damage check while packing away, not next fall. If a light strand died this year, toss it now while it’s fresh in your mind, rather than re-discovering the same dead strand in eleven months.
- Re-label anything that changed. If you added a bin or split one that was overflowing, update the label and the master list immediately, rather than trusting yourself to remember the new system next year.
- Give packing away a real time slot. Twenty minutes on a weekend with the whole family beats a rushed hour alone on a weeknight. It’s the same logic behind The 15-Minute Evening Reset — a short window with a clear end point gets done.
- Remove all batteries before storing. Batteries left in decorations can corrode and leak in a garage or attic. Store them with your spares, following the battery safety note in the Day One section.
Frequently Asked Questions
How many bins do I actually need for holiday decor storage?
It depends on how much you keep and how many holidays you decorate for. Using the Christmas breakdown above, Christmas alone takes about eight bins, and Halloween and Thanksgiving usually need one or two each. That puts a typical family at about 10-12 bins for the three big holidays, and your inventory count will refine it.
What’s the best way to store Christmas lights so they don’t tangle?
After checking each strand for damage, wrap it around a cord reel, a piece of cardboard or a light storage spool. Don’t coil lights loosely into a bag or bin. Secure the end with a twist tie or velcro strap before storing. It takes an extra two minutes at pack-away time and saves twenty minutes of untangling the following year.
Should I store holiday decor in the attic or the garage?
Attics and garages both work, but climate matters more than location. Un-insulated spaces with big temperature swings can warp candles, crack ornaments and encourage mildew in fabric items over several years. If you can, keep fragile and sentimental pieces somewhere more climate-stable, like a closet or under-bed storage. Save the attic or garage for sturdier items such as lights, inflatables and plastic décor.
How do I stop buying duplicate decorations every year?
It usually comes down to visibility. If you can’t easily find what you own, buying a new strand of lights feels easier than digging for the old one. Labeled category bins and a master list fix that, because you can check what you already have before you shop.
What’s the best way to store an artificial Christmas tree?
A rolling tree storage bag designed for the tree’s specific height keeps branches from getting crushed and saves your back at pack-away time. If you don’t want to buy a specialty bag, storing the tree upright in a corner under a large trash bag works in a pinch. It just takes up much more floor space than a compressed rolling bag.
How do I keep kids’ handmade ornaments organized without keeping absolutely everything forever?
Give each child their own small labeled bin for handmade and sentimental pieces, separate from the general ornament storage. When it’s full, that’s your natural cutoff. Let your child choose which ones stay in the bin, and photograph the ones you’re letting go. This keeps the collection meaningful instead of growing indefinitely.
When should I start decor storage prep if I want to be ready before the holiday rush?
Start about six weeks before Halloween, which usually means mid-September. That leaves four weekends to purge, sort and label before Halloween decorating starts, so the system is tested before Thanksgiving and Christmas. If you’re starting later, pull the Halloween bins first and compress the rest into two weekends, as described in the fast-track note at the top of this guide.
Your Storage System, Ready for November
The goal was never a perfectly color-coordinated garage. It’s being able to grab the right bin on a November Tuesday, when your kid asks to put up the lights before dinner. Build the system now, while you have the mental space for it. Future-you won’t be standing in a dark garage hunting for one strand of lights.