
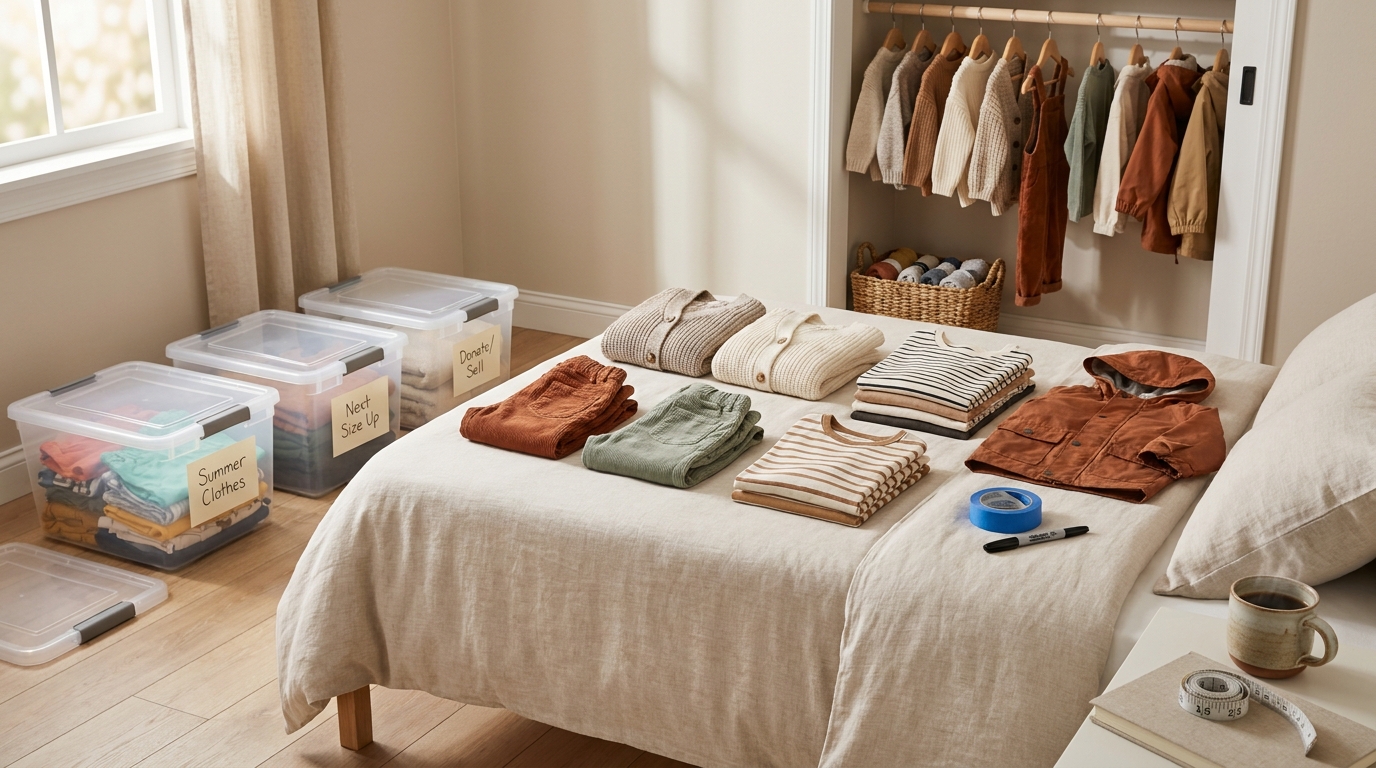
Fall Closet Organization: A Simple Swap System for Kids’ Clothes
Last October I stood in my daughter’s doorway on the first properly cold morning, holding a pair of corduroy pants that had fit perfectly in March. They now landed somewhere near her shins. Behind me, a laundry basket held four short-sleeve shirts, two sundresses, and a single sandal. Her closet rod was still packed with summer. The fall clothes were in a bin in the garage, and I had no idea whether anything in it would fit her.
We were late for school. She wore leggings, a T-shirt, and a cardigan that was slightly too small in the arms. I told myself I’d sort it all out that weekend.
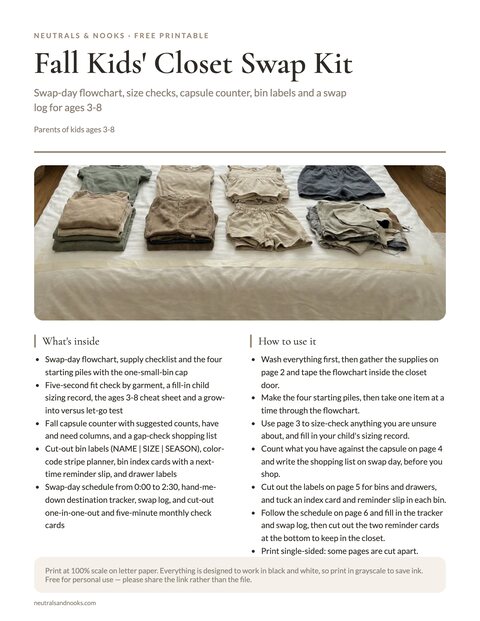
Free printable · 6 pages
Fall Kids' Closet Swap Kit
A swap-day flowchart to tape inside the closet door, a five-second fit check with an ages 3-8 sizing cheat sheet, a fall capsule counter with a gap-check shopping list, cut-out bin and drawer labels, and a swap-day schedule with a hand-me-down tracker and a fall, winter and spring log.
Free. Your download link appears right here. You'll also join the Monthly Home Reset. Unsubscribe anytime. Privacy
The next year I built a four-step system: sort, size-check, bin, label. It takes one weekend morning and repeats every spring and fall. This guide covers it for kids ages 3 to 8, with a swap-day decision guide, sizing and capsule tables, and a sample schedule.
In this article (14 sections)
- Why Fall Closet Organization Works Best as a Swap, Not a Purge
- What You Need Before Swap Day
- The Swap-Day Decision Guide: Every Decision in One Place
- Step 1: Sort (Get Everything Into Piles)
- Step 2: Size-Check Kids’ Fall Clothes
- Step 3: Bin (Put Each Pile Where It Belongs)
- Step 4: Label (Make the System Run Without You)
- Kids’ Fall Capsule Wardrobe Checklist (Ages 3-8)
- Setting Up the Fall Closet Itself
- The Mid-Season Check and the Spring Swap
- A Sample Swap-Day Schedule
- Common Mistakes and How to Avoid Them
- Frequently Asked Questions
- Your Next Step: Start With One Child
Why Fall Closet Organization Works Best as a Swap, Not a Purge
Most “fall closet clean out” advice treats the job as a purge: pull everything out, get ruthless, keep only what sparks joy. That’s a fine philosophy for an adult wardrobe. For kids it breaks down quickly.
Kids’ clothes aren’t a fixed collection. They’re a moving stream. A purge asks “do I keep this?” A swap asks better questions: does it fit now, will it fit this season, and where does it live until then?
A swap keeps each decision small, repeats the same way every spring and fall, and leaves only the current season in the closet. That last part is what makes mornings easier.
If you want the bigger picture of how storage bins, rotation, and labeling fit together across the whole year, our guide to seasonal clothing storage for kids covers the long game. This post is the hands-on companion: what you actually do on swap day.
What You Need Before Swap Day
The most useful thing I learned is that a swap day fails at the supplies stage. If you’re halfway through and realize you have no bins, no marker, and no place to put the outgrown clothes, momentum dies. Gather everything first.
The supply list
| Item | Quantity | Why you need it |
|---|---|---|
| Large trash bags or donation bags | 2-3 | For “outgrown and donate” and “worn out” |
| Clear lidded bins (medium) | 2-4 per child | Storage for out-of-season and next-size-up clothes |
| Painter’s tape and a marker | 1 roll, 1 pen | Temporary labels while you work |
| Permanent labels (or label maker) | As needed | Final labels once the bins are set |
| A measuring tape | 1 | For the size-check, especially waistbands and inseams |
| Laundry basket | 1 | For anything that needs washing or mending before it’s stored |
| A “try-on” spot | 1 | A clear patch of floor or a bed where your child can try things on |
| Snacks and a drink | Enough for two | Keeps swap day moving |
Choose a good window
Pick a two-to-three-hour stretch on a weekend morning. Kids have more patience early in the day, and you’ll want them available for try-ons. If your child is under five, aim for shorter, and consider splitting the job across two mornings: one for sorting and size-checking, one for binning and labeling.
Clear the runway
Before you touch a single piece of clothing, clear a large flat surface. A bed works well. You need room to lay out piles without them sliding into each other. Put the empty bins nearby, lids off.
One more prep step that saves headaches: do the laundry first. Everything in the closet and drawers should be clean before it gets stored. Stains set over months in a bin. Wash, dry, and only then start.
The Swap-Day Decision Guide: Every Decision in One Place
This is the heart of the system. Every item of clothing takes a trip through this path, and only a few items need a real decision.
Pick up one item at a time and ask these questions in order:
| Question | If yes | If no |
|---|---|---|
| 1. Is it clean, intact, and wearable? | Go to question 2. | Fixable: mend basket (fix this week). Not fixable: rag bag. |
| 2. Does it fit right now? | Right for fall: fall closet. Wrong season: off-season bin. | Go to question 3 (too small) or 4 (too big). |
| 3. Too small: is there a younger sibling or friend? | Hand-me-down bin. | Donate bag. |
| 4. Too big: will it fit within about 12 months? | Grow-into bin, labeled by size and season. | Donate bag. |
How to read it
Ask the questions in order, item by item, and swap day gets almost mechanical. Save your energy for the few items that need real thought.
Safety firstCheck for loose or missing buttons, snaps, and decorations, especially on hand-me-downs and clothes for kids under 4. Re-sew them securely or retire the item.
Step 1: Sort (Get Everything Into Piles)
Sorting is the first of the four steps and the one people rush. Resist that. A good sort makes every later step faster.
Empty everything
Take every piece of clothing out of the closet, dresser, and any bins in the room. Yes, everything, including the drawer of mystery socks. Seeing the whole collection at once is what lets you spot duplicates, gaps, and the items you forgot existed.
If you have clothes elsewhere (the hall closet, a laundry-room basket, that garage bin from last year), bring those in too. If you’re short on space, this is also a good moment to peek at your linen closet organization, since kids’ spare sheets, towels, and pajamas tend to migrate between the two.
Make four starting piles
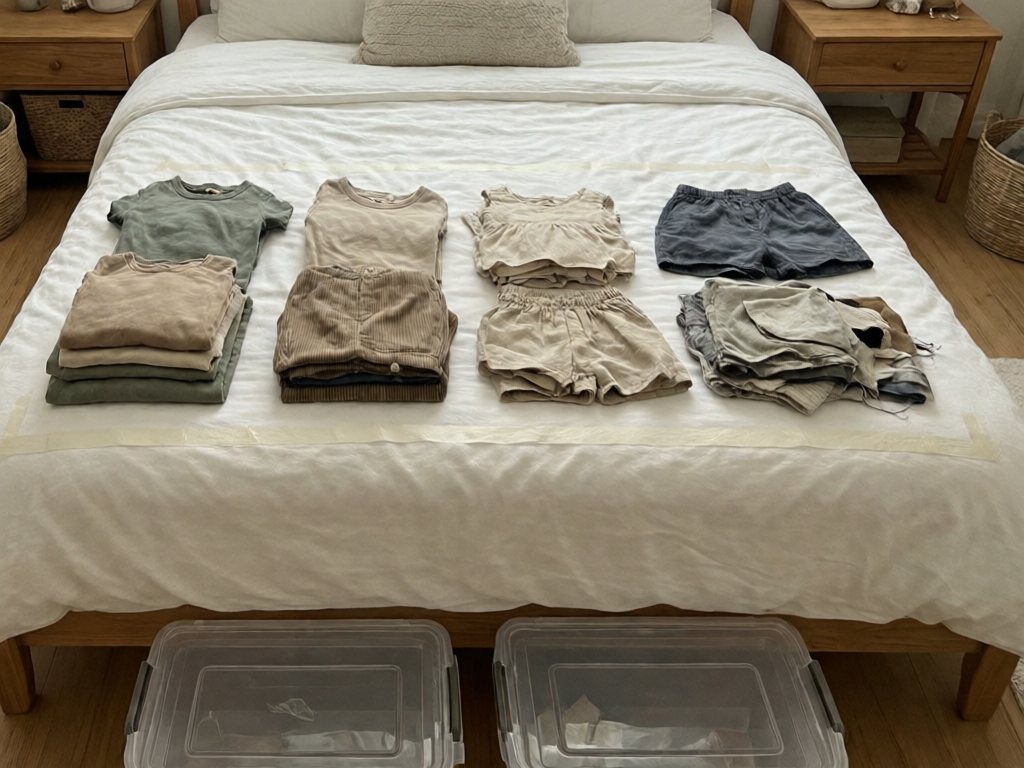
Lay out four zones on the bed or floor. Label them with painter’s tape if it helps:
| Pile | What goes in it |
|---|---|
| Keep Now | Fits currently, in good shape, works for fall |
| Store | Fits but is the wrong season (summer stuff), or is a size to grow into |
| Let Go | Outgrown, worn out, or never worn |
| Fix or Decide | Needs mending, or you genuinely can’t decide yet |
The fourth pile matters. It’s a pressure valve. When you hit an item you can’t decide on, you don’t stall, you set it there and keep moving. At the end of the session you’ll handle that pile in about 15 minutes with a clearer head.
A quick rule for the “can’t decide” pile
Give yourself a hard cap: that pile can hold no more than one small bin’s worth. If it overflows, you’re avoiding decisions, and the system won’t work. When I set this limit, I noticed I’d been using “maybe” as a way to avoid the emotional stuff. That tiny christening cardigan, the first-day-of-school outfit. Those get a special spot, not a “maybe” pile. More on that below.
TipCap the “fix or decide” pile at one small bin. If it overflows, you’re avoiding decisions.
Involve your child, briefly
For kids in the 3 to 8 range, a little participation goes a long way, but a long involvement doesn’t. A five-year-old can:
- Hold up each item and say “wear” or “too small” (with your quick check after).
- Choose two or three favorites to definitely keep in the closet.
- Carry the donation bag to the car, which gives them a sense of ownership.
Don’t ask a child to make every decision. Too many choices leads to tears, and the results tend toward “keep everything.” Give them a few meaningful choices and handle the rest yourself.
Step 2: Size-Check Kids’ Fall Clothes
If sorting is the setup, size-checking is where the real work happens. It’s also where most of the guesswork lives. Here’s how to make it systematic instead of a gamble.
Try on, don’t guess
The number on the tag is a rough hint at best. A size 5 from one brand runs like a 4 from another. So the rule is simple: anything you’re unsure about gets tried on.
To keep it from taking forever, try things on in batches. Have your child put on a pair of leggings or bike shorts as a base layer, then layer through tops and bottoms quickly. You’re looking for a few specific things.
The five-second fit check
| Garment | What to check | Sign it’s outgrown |
|---|---|---|
| Tops | Sleeve length, shoulder seams, tummy coverage | Wrist bone showing, tight through the shoulders, rides up when arms lift |
| Pants and leggings | Length, rise, waistband comfort | Ankle showing well above the shoe, red marks at the waist, visibly tight thighs |
| Dresses | Hem length, armholes, bodice | Hem well above the knee (for school rules or comfort), arm pinching |
| Jackets and coats | Layering room, sleeve length | Can’t comfortably wear a sweater underneath, sleeves ride up when arms are forward |
| Pajamas | Foot and ankle coverage, torso length | Feet pinched in footed styles, top rides up on the belly |
| Underwear and socks | Comfort, elastic | Marks, rolling down, holes |
Safety firstBulky coats shouldn’t be worn under a car seat harness or seat belt. Buckle the child in wearing thin layers, then put the coat on backwards over the straps or use a blanket.
The growth reality check
Between ages 3 and 8, kids typically grow a couple of inches a year, in spurts rather than steady lines. Clothes bought in spring can be too small by fall. It’s normal for a child to skip a size or stay in one for two seasons.
Handle the “too big” pile with a plan
Clothes that are too big are the ones most parents get stuck on, because they might fit in a few months. Ask two questions:
- Will it fit within about 12 months? If yes, it goes in a “grow into” bin. If it’s further away, it’s usually better to let it go and buy what’s needed when the time comes, because styles, tastes, and needs change.
- Is it something specific that will still be useful? A quality winter coat two sizes up is worth saving. A random graphic tee in size 8 for a child who’s currently a 4 is not.
Handle the “too small” pile with a home
Outgrown items that are in good shape shouldn’t just vanish. Give each a destination:
- A younger sibling, cousin, or friend: Put these in a labeled hand-me-down bin by size and season.
- A consignment store or resale app: Worth it for quality brands and coats.
- Donation: Bag it and put it in the car that day so it doesn’t linger in the hallway.
- Rags or recycling: For stained or worn-through items that aren’t good for donation.
The sizing cheat sheet for ages 3-8
This table is a starting point, not a rule. Every child is different. But it helps for sanity-checking what you’re seeing.
| Age | Typical clothing size (US) | Approx. shoe size range | Common fit quirks |
|---|---|---|---|
| 3 | 3T | Toddler 7-9 | Still needs easy fasteners, wide neck openings |
| 4 | 4T or 4 | Toddler 9-10.5 | Transition between “T” sizes and kids’ sizes |
| 5 | 5 | Little Kid 11-13 | Legs lengthen, tops often fit longer than pants |
| 6 | 6 | Little Kid 13-1 | Growth spurts common, pants get short quickly |
| 7 | 7 | Little Kid 1-2 | Longer torso, more opinions about comfort |
| 8 | 8 | Little Kid 2-3 / Big Kid 3.5-4 | Often between sizes, adjustable waistbands help |
Shoe sizes vary by brand, so treat these ranges as rough. Shoes tend to change fastest, often every four to six months in the younger years, and a little slower as kids get older. Check shoe fit at the same time you swap the closet. Fall is a good moment, since school shoes, boots, and rain gear all show up together.
The “keep the sentimental” rule
Every family has a few pieces that aren’t about size at all. The tiny sweater from the hospital. The first-day-of-kindergarten outfit. Decide once, in advance, how much room you’ll give to these. We keep a single shallow bin per child, and when it’s full, something has to graduate out. It removes the guilt from every individual decision, because the limit is already set.
Step 3: Bin (Put Each Pile Where It Belongs)
Now that everything is sorted and size-checked, you’re left with piles. The binning step is about giving each pile a clear, permanent home.
The four bins every kid needs
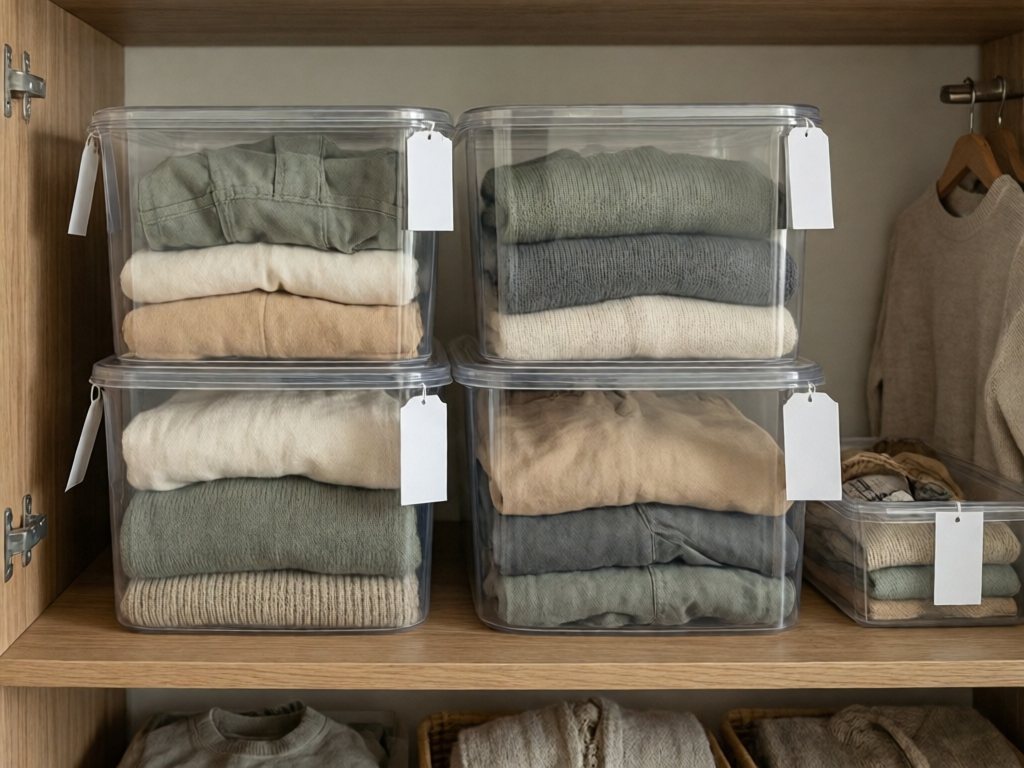
Here’s the basic set I use. Adjust the number based on how many children you have and how much you keep.
| Bin | Contents | Where it lives |
|---|---|---|
| Off-season bin | Clean summer clothes that still fit and will fit next year | Top shelf, under bed, or interior storage room |
| Grow-into bin | Clothes for the next size or season, labeled by size | Closet shelf or storage room |
| Hand-me-down bin | Outgrown clothes saved for a sibling or friend | Storage area, labeled by size |
| Memory bin | A small, capped collection of keepsakes | Shelf out of daily reach |
Choosing the right bins
You don’t need matching, expensive containers. What matters is a few practical traits:
- Clear or labeled on the front. If you can’t see inside, you’ll open every bin to find what you need.
- Stackable with a lid. Especially if you’re storing in a garage, attic, or closet shelf.
- Sized for the shelf. Measure the space before you buy. A bin that’s an inch too tall wastes an entire shelf.
- Breathable for long storage. Use lidded bins that aren’t airtight, and store only fully dry clothes, ideally indoors. Skip sachets and cedar blocks, since clean dry clothes are all you need.
- Lightweight. If you have to drag it down from a high shelf, you’ll avoid the swap. Medium bins beat giant ones.
Avoid stuffing bins to the point of bulging. A packed bin wrinkles everything, and you’ll dread opening it.
How to pack a bin so you enjoy opening it
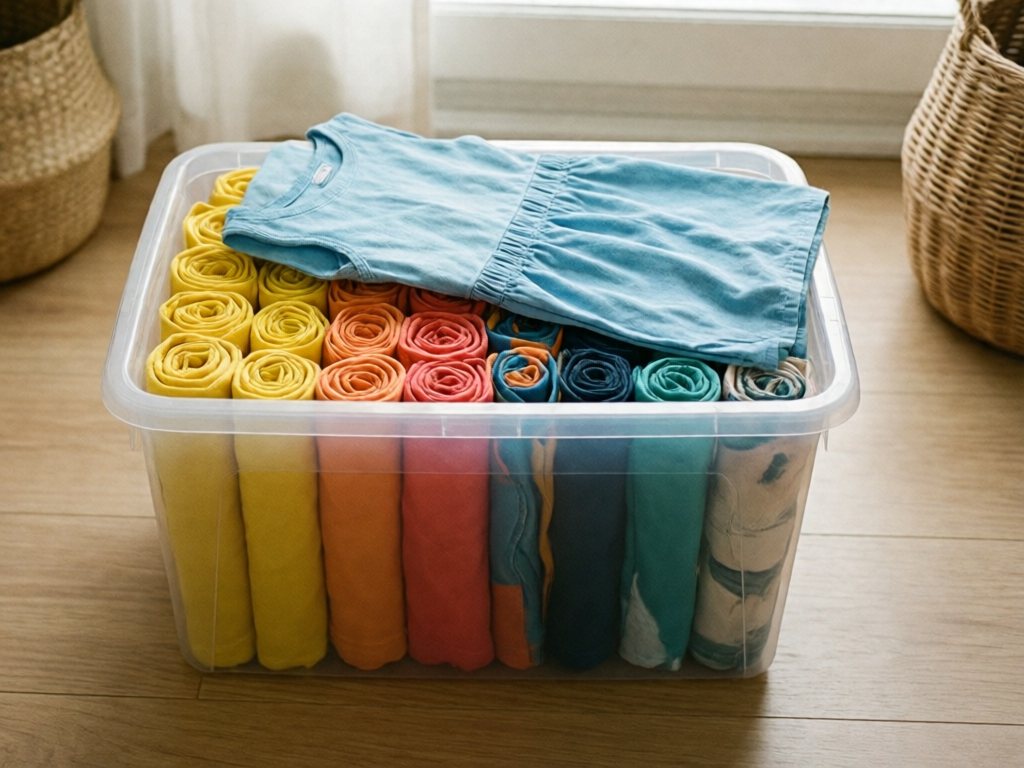
A few habits make the next swap easier:
- Fold flat or roll. Rolling saves space and lets you see everything at a glance.
- Group by type. Shorts together, dresses together, swimwear together.
- Put a note on top. A simple index card listing “6 shorts, 4 tees, 2 dresses, 1 swimsuit” tells you what you have without unpacking.
- Include a small reminder for next time. Tuck a slip in each bin that says what to check: “Check shoe size before summer” or “Needs new swim goggles.”
What stays in the closet
The fall closet should hold only what your child can wear this season, plus a few extras. For kids’ closets, less is genuinely more: many children dress more independently when they can see and reach a few outfits. We go deeper on the closet layout itself in our guide to kids’ closet organization, including heights and rod placement that grows with your child.
Step 4: Label (Make the System Run Without You)
Labeling is what turns a one-time cleanup into a system. Without labels, you’ll forget what’s in the bin by the time spring arrives. With them, you or anyone else in the house can find and swap things without a treasure hunt.
What to put on a label
A good label answers three questions at a glance: whose, what size, what season.
| Label element | Example |
|---|---|
| Child’s name or initial | “Maya” or “M” |
| Size | “Size 6” |
| Season or type | “Summer,” “Grow into: Fall/Winter,” “Hand-me-down” |
| Contents (optional) | “Shorts and tees” |
A full label might read: MAYA | SIZE 6 | SUMMER. That’s it. Skip the essays.
Label placement
Good to knowWrite labels in one format, like MAYA | SIZE 6 | SUMMER. Put them on the short end of the bin, which faces out on a shelf, and label two sides if the bin will be moved or turned. Use the same spot on every bin.
Temporary versus permanent labels
During the swap, use painter’s tape and a marker. It’s fast, forgiving, and lets you change your mind. Once you’re sure of what’s in each bin, swap in the permanent labels. This two-stage approach keeps you moving instead of fussing over a label maker mid-sort.
A color-coding option for multiple kids
If you have two or more children, color-coding can save a lot of confusion. Give each child a color, using a tape stripe, a label border, or a colored bin lid. It’s especially handy with hand-me-downs, since a younger child’s grow-into bin might contain clothes that used to be an older sibling’s. A neutral palette works well here too. Think soft sage, warm sand, and slate instead of a rainbow of primaries.
Label the closet, too
Labels aren’t only for bins. For children who are just learning to dress themselves, small labels or icons on drawers and shelves help them put things away. A small picture of a shirt on the shirt drawer works for a three-year-old, and words work for a seven-year-old. It shifts some of the daily maintenance to the person who’s actually wearing the clothes.
Kids’ Fall Capsule Wardrobe Checklist (Ages 3-8)
Once the old clothes are sorted, you’ll see gaps. This is the moment to figure out what your child actually needs for fall, before you shop. A rough capsule keeps you from buying more than you need and helps you spot what’s missing.
A simple fall capsule
The exact numbers depend on how often you do laundry, but here’s a starting point for a school-age child:
| Category | Suggested count | Notes |
|---|---|---|
| Long-sleeve tops | 5-7 | Mix of tees and lightweight layers |
| Short-sleeve tops | 3-4 | For warm days and layering |
| Sweaters or sweatshirts | 3-4 | Easy-on styles, zip-front for younger kids |
| Pants and leggings | 5-6 | At least two “play-proof” pairs |
| Dresses or skirts (if worn) | 2-3 | With leggings or tights |
| Pajamas | 4-5 | Snug-fitting, or labeled flame-resistant; skip oversized sets |
| Light jacket | 1-2 | One for rain, one for chilly mornings |
| Warm coat | 1 | Buy or check sizing before the first cold snap |
| Socks | 7-10 pairs | Include warm, thicker pairs |
| Underwear | 7-10 | Enough for a week |
| Shoes | 2-3 pairs | Sneakers, rain boots, plus one dressier option |
| Accessories | Basic set | Hat, gloves or mittens, and a snug neck warmer |
Adjust for your climate. If you live somewhere that stays mild until December, your fall closet looks different from a family in a colder region.
Safety firstChoose hoodies and jackets with no neck or hood drawstrings, and cut them off hand-me-downs. Skip long scarves on playgrounds and buses. Sleepwear should fit snugly, so don’t save oversized pajamas to grow into.
Layers are the real fall must-have
Fall weather is unpredictable. Mornings can be cold and afternoons warm, and school buildings run hot or drafty. A layering system a child can manage alone works best:
- A base layer: A soft, breathable tee or long-sleeve.
- A middle layer: A cardigan, fleece, or sweatshirt that’s easy to take off and tie around the waist.
- An outer layer: A jacket that’s water-resistant and easy to zip.
Kids in the 3 to 8 range are learning independence, so choose pieces with easy zippers, elastic waistbands, and no fiddly buttons at the back. If a child can put on their own jacket, morning routines get smoother for everyone. For the practical side of getting outerwear, backpacks, and shoes out the door, the drop zone approach in our back-to-school drop zone guide works well alongside this system.
Check the gaps before you shop
Before buying anything, run through this quick checklist:
- Are there enough play-worthy pants? Knees wear out first.
- Do all the tops go with at least two bottoms? A closet of pieces that don’t match leads to a lot of fights.
- Is the coat sized correctly for this season, not last?
- Are there enough warm socks and pajamas? These are the things you notice are missing at 9 p.m. on the first chilly night.
- Do rain boots and sneakers fit, with room for thicker socks?
Write down what’s missing right there on swap day. You’ll shop from a list instead of a vague feeling, and you’ll spend less.
Buying ahead versus buying as needed
End-of-season sales are a good time to buy basics one size up, like plain leggings and sturdy pants. Skip trend-driven items, since taste can change in six months, and label anything you buy ahead with its size. Pajamas should be bought to fit now.
Setting Up the Fall Closet Itself
With the bins packed and labeled, the last piece is the closet where the “keep now” pile lives. A well-arranged closet means a child can dress themselves, and you spend less time fixing outfits.
Adjust the heights
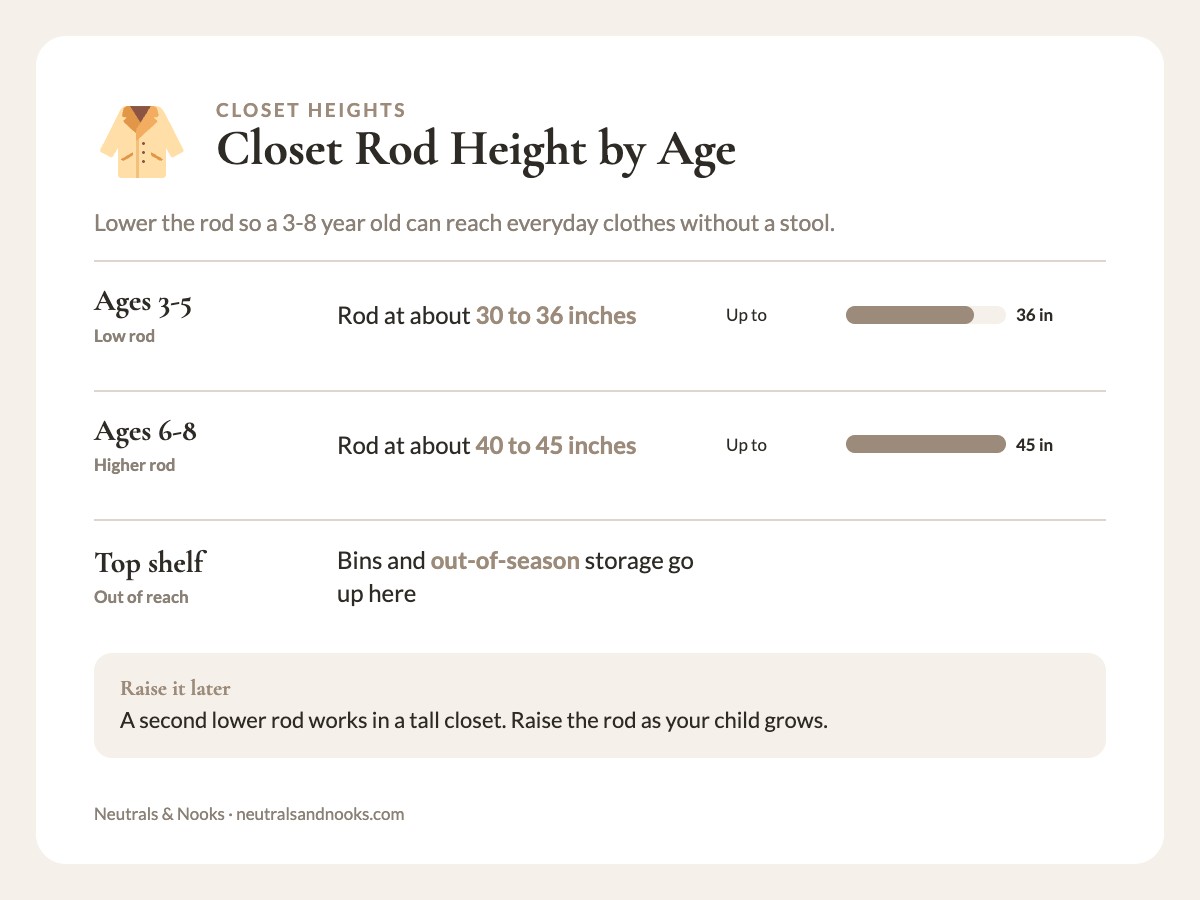
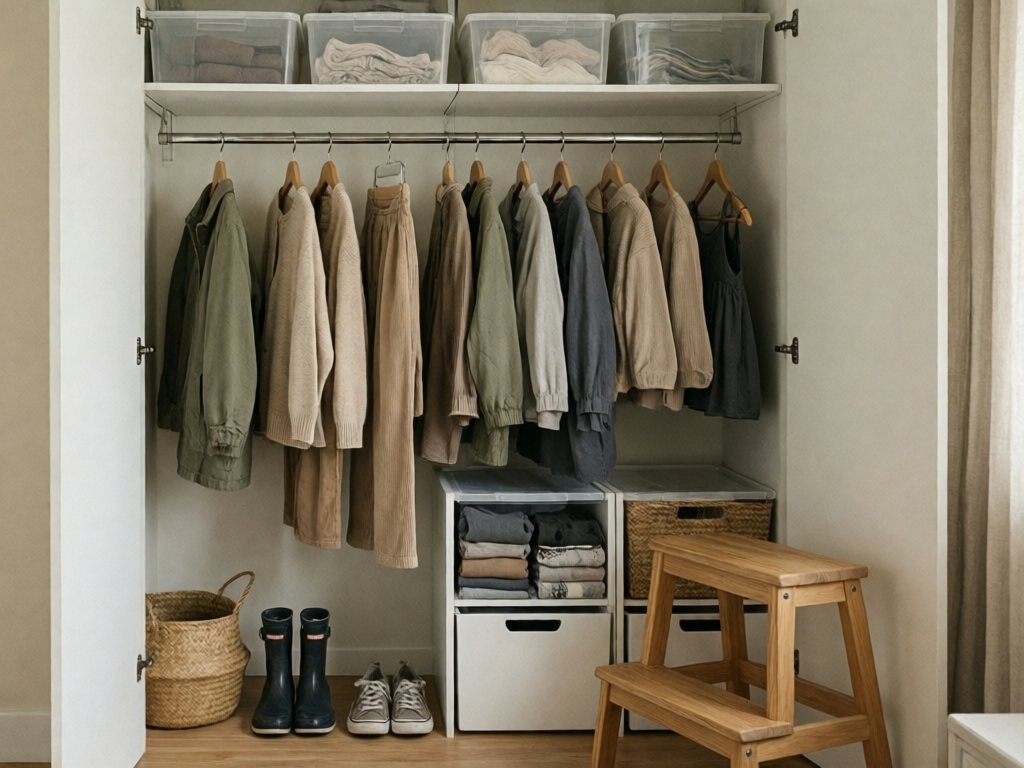
For ages 3 to 8, the goal is to make everyday clothes reachable without a stool:
- Lower the rod to about 30 to 36 inches for ages 3 to 5 and 40 to 45 inches for ages 6 to 8. A second lower rod works in a tall closet. Raise it as they grow.
- Use the top shelf for bins and out-of-season storage.
- Put everyday items at child height: shirts and pants in drawers or low bins, hanging items on the lower rod.
- Store rarely used items higher: dressy clothes, spare blankets, and next-size bins.
Hangers, folds, and drawers
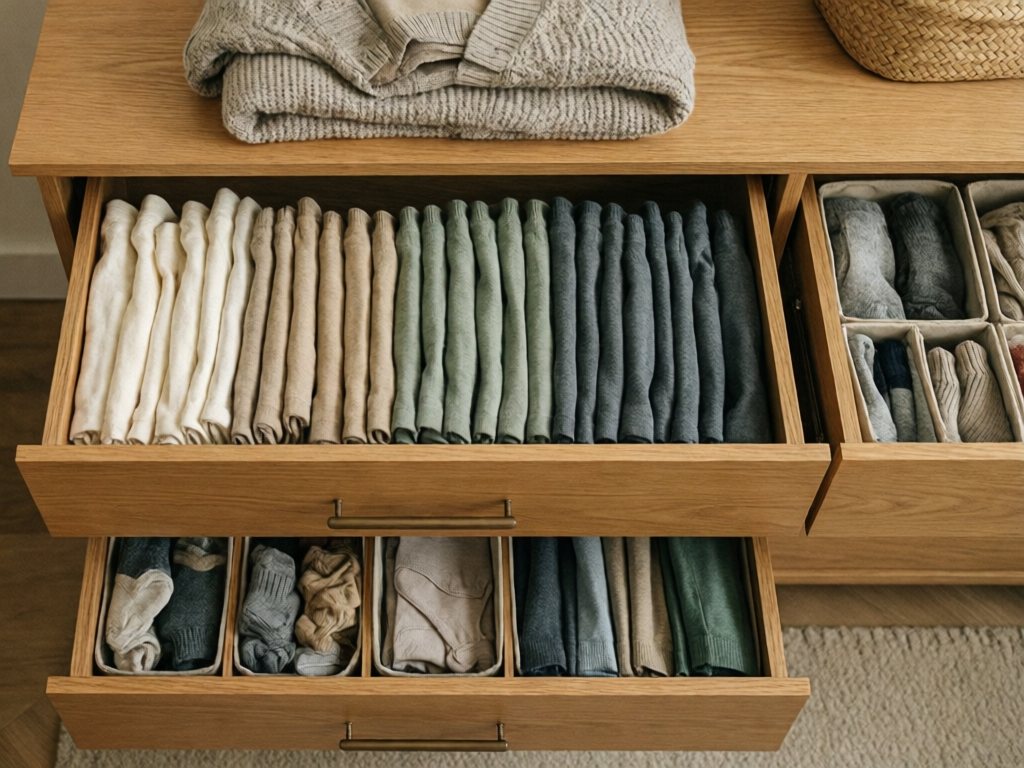
There’s no single right answer, but here are some guidelines that hold up:
| Item | Best method | Why |
|---|---|---|
| Sweaters and sweatshirts | Fold on a shelf or drawer | Hangers stretch shoulders |
| Jackets and coats | Hang on a low hook or rod | Easy for kids to reach |
| Dresses and dressier items | Hang | Prevent wrinkles |
| Tees and leggings | Fold in drawers (file-fold style) | Easy to see and grab |
| Socks and underwear | Bins or small drawer dividers | Contained and quick to find |
| Pajamas | Own drawer or basket | Simplifies bedtime |
Safety firstAnchor dressers and tall shelving to the wall, and don’t let kids climb on open drawers.
If you’re working with a small space, you’re not alone. Many families deal with tiny closets and shared rooms, and creative use of vertical space, hooks, and over-the-door storage can help.
Try the “outfit zone” trick
For kids who struggle to choose, or for school mornings that feel chaotic, set up a weekly outfit system. Use a small hanging organizer or a set of five bins labeled Monday through Friday, and let your child choose (with your guidance) five outfits on Sunday. For some families it removes the daily negotiation.
The one-in, one-out rule
Once the closet is set, keep it that way with a simple rule: when a new item comes in, one goes out. A new sweater arrives for a birthday, and an old one moves to the donate bag. It sounds strict, but it takes ten seconds and prevents the slow creep that leads to overflowing hangers by January.
The Mid-Season Check and the Spring Swap
A swap isn’t finished after one weekend. Two small habits keep the system working through the year.
The five-minute monthly check
TipDo the scan on laundry day, when the clothes are already in your hands.
Once a month, on a laundry day or a quiet Sunday, do a quick scan:
- Pull out anything that’s clearly too small. It’ll be obvious once you’re looking.
- Note any gaps, like a missing pair of leggings or holes in the socks.
- Move outgrown items straight into the hand-me-down or donation bin, and don’t let them sit in the closet.
This is also a good moment to reset the drawer and put things back where they belong. Small, regular resets are far easier than a big rescue mission, a principle that also drives our 15-minute evening reset routine.
The fall-to-winter transition
When cold weather really sets in, you’ll do a lighter version of the swap: bring out heavy coats, snow gear, and warm layers, and store the lighter fall pieces that no longer work. Use the same decision guide. The steps don’t change, only the season labels do.
The spring swap, using the same system
In spring, you’ll repeat the whole process. Because you labeled each bin by child, size, and season, the spring swap feels familiar. Open the grow-into bin, try things on, and use the decision guide to decide what stays, goes, or moves forward. Each time you run the system it gets faster, because the bins are already sorted and the decisions are already made.
Keep one note on your phone with the swap date, your child’s current sizes, the shopping list, and which bins hold what. Six months later you won’t be starting from zero.
A Sample Swap-Day Schedule
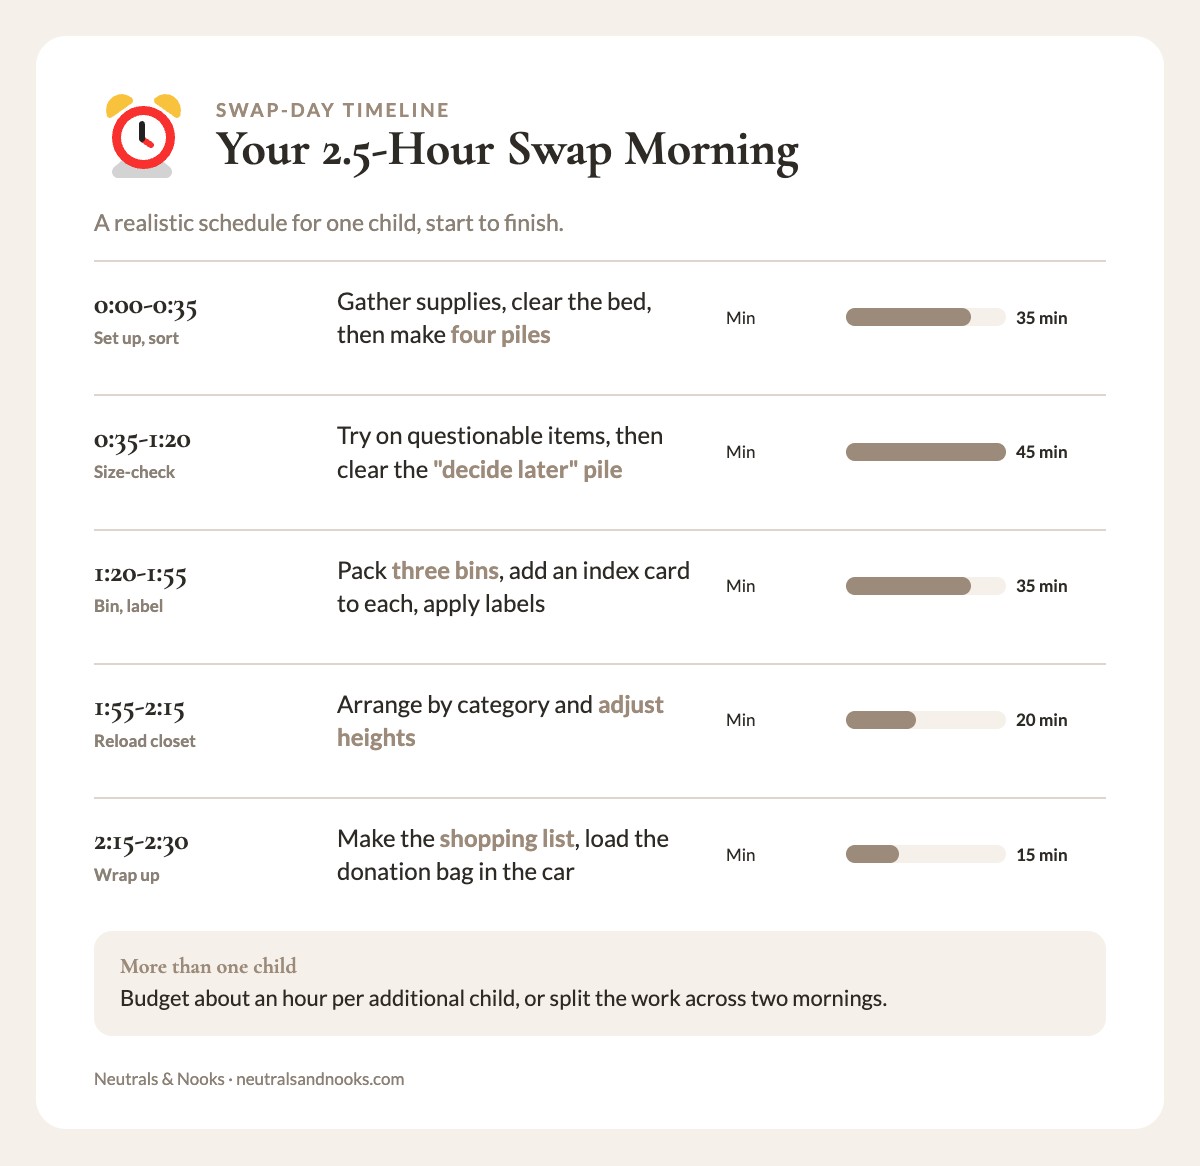
If it helps to see the whole thing laid out, here’s how a typical swap morning unfolds for one child, with realistic time estimates.
| Time | Task | Notes |
|---|---|---|
| 0:00-0:15 | Set up: gather supplies, clear the bed, lay out bins | Do laundry beforehand |
| 0:15-0:35 | Sort: empty closet and drawers, make four piles | Keep moving, use the “decide later” pile |
| 0:35-1:05 | Size-check: try on questionable items, use the decision guide | Involve your child in short bursts |
| 1:05-1:20 | Handle the “decide later” pile | A clearer head now |
| 1:20-1:40 | Bin: pack off-season, grow-into, and hand-me-down bins | Add an index card to each |
| 1:40-1:55 | Label: apply permanent labels | Two sides per bin |
| 1:55-2:15 | Reload the fall closet, adjust heights | Arrange by category |
| 2:15-2:30 | Make the shopping list, load the donation bag in the car | Done |
With two or more children, budget about an hour per additional child, or split the work across two mornings. The first time will take the longest, since you’re building the system as well as running it. After that, expect the process to get noticeably faster.
Common Mistakes and How to Avoid Them
After a few rounds, I’ve found the same pitfalls come up again and again.
- Skipping the wash. Stains and smells set in storage. Always wash first.
- Storing too much. If a bin never gets opened, it might be time to let its contents go.
- Saving clothes “just in case.” Ask whether you’d buy it again today. If not, release it.
- Forgetting the shoes and outerwear. These are the pieces most likely to be the wrong size on the first cold day.
- Labeling with vague words. “Kids’ clothes” tells you nothing. Use name, size, and season.
- Doing it all in one exhausting push. If you’re worn out, stop. Finish the next morning.
- Making every decision alone. A few quick choices from your child build ownership and cut down on complaints later.
- Not planning for the hand-me-downs. If there’s no bin, the clothes pile up in the hall.
Frequently Asked Questions
When is the best time to do a fall closet clean out?
Aim for the window between the first cool mornings and the first truly cold days, usually mid-September through mid-October in most of the US. That leaves time to fix gaps before you need a warm coat. If fall comes late where you live, wait until the weather turns.
How many clothes does a child ages 3-8 actually need for fall?
It depends on how often you do laundry. A good starting point is roughly 5 to 7 long-sleeve tops, 5 to 6 pairs of pants or leggings, 3 to 4 sweaters or sweatshirts, and 4 to 5 pairs of pajamas. Add about a week’s worth of socks and underwear, plus a light jacket and a warm coat. Use the capsule table above and adjust for your laundry schedule and climate.
Should I store clothes my child might grow into, or just buy later?
Save what’s high quality, neutral, and likely to fit within about 12 months, especially coats, boots, and basics. Skip pajamas, which should fit snugly. Let go of anything further away, or anything highly specific to a trend or a character. A single labeled “grow into” bin per child, with a clear size and season, keeps this from getting out of hand.
What’s the best way to store off-season kids’ clothes?
Wash everything first, make sure it’s completely dry, and pack it in lidded bins labeled with the child’s name, size, and season. Fold flat or roll, group by type, and don’t overpack. Store bins somewhere cool and dry, such as a closet shelf, under a bed, or an interior storage room. Garages and attics swing in temperature and moisture, so check those bins now and then. For more storage detail, see our guide to seasonal clothing storage for kids.
How do I get my kid to cooperate with the swap?
Keep their part short and specific. Ask them to pick two or three favorite outfits to definitely keep, hold up items for a quick “wear or too small?” check, and carry the donation bag out. Skip asking for a decision on every item, since too many choices overwhelm younger kids. If they get restless, finish sorting yourself and bring them back for try-ons.
What should I do with the clothes that are too small but still in good shape?
Give each item a destination right away. Pass it to a younger sibling, cousin, or friend, and store it in a labeled hand-me-down bin if it isn’t going right away. Consignment and resale work for quality brands and coats; donation takes the rest. Set a deadline so bags don’t sit in the hallway, and send worn-out items to textile recycling.
How is this different from a regular kids’ closet organization?
Closet organization is about how the closet is laid out: rod height, shelving, hangers, and drawers, so it works day to day. A swap system is the seasonal process of rotating what lives in the closet and what lives in storage. You need both. The layout makes the closet usable, and the swap keeps it from filling up with clothes that don’t fit or don’t suit the season. Our kids’ closet organization guide covers the layout side in depth.
Your Next Step: Start With One Child
Fall closet organization doesn’t need a whole weekend or matching bins. It needs four steps you can repeat every season: sort, size-check, bin, label.
Start with one child and one bed, and take the decision guide one item at a time. The Fall Kids’ Closet Swap Kit on this page puts the guide, labels, capsule list, and schedule in printable form.