Repurposing Furniture for Kids’ Rooms
You can safely repurpose secondhand furniture for your kids' rooms, saving money and adding character. Learn how to choose the best pieces, refinish them safely, and ensure they meet crucial safety standards like lead testing and anchoring.
- Always test pre-1978 painted furniture for lead; skip if untestable.
- Anchor all tall furniture pieces like dressers and bookshelves to a wall stud.
- Never repurpose old, drop-side, or recalled cribs or their parts.
- Choose solid wood pieces with no structural damage; check for wobbles and smooth drawers.
- Use dressers as changing tables, but never leave your baby unattended.
This post contains affiliate links. As an Amazon Associate I earn from qualifying purchases.
A secondhand dresser for $20–75, a weekend and the right safety checks can give a kids’ room more character than a new piece at several times the price. Here is what to buy, how to refinish it safely, and how to make mismatched pieces look like a set.
Safety first: three non-negotiablesSettle these before you buy or paint anything.
- Lead. Any painted piece made before 1978 needs a negative lab or XRF result. If it can’t be tested, skip it for a child’s room. Details are in the refinishing section.
- Anchoring. Every dresser, bookshelf, wardrobe and tall piece gets anchored to a wall stud. The steps are in the anchoring section.
- No cribs. Never repurpose old, drop-side or recalled cribs, or their parts.
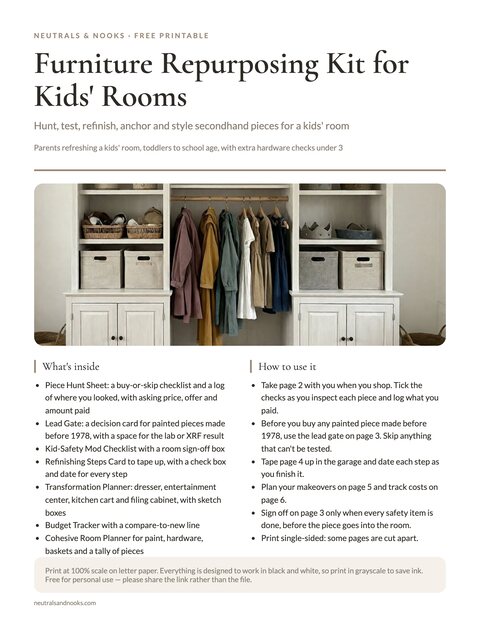
Free printable · 6 pages
Furniture Repurposing Kit for Kids' Rooms
A piece hunt sheet with a where-to-find log, a lead gate and kid-safety checklist, a tape-up refinishing card, four before-and-after makeover cards, a budget tracker and a room planner for making mismatched pieces look like a set.
Free. Your download link appears right here. You'll also join the Monthly Home Reset. Unsubscribe anytime. Privacy
In this article (6 sections)
The Best Furniture Pieces to Repurpose (and Where to Find Them)
The best candidates share three qualities: solid construction (real wood, dovetail joints, or metal frames), a useful basic shape (flat top, shelves, drawers, or an open frame), and no structural damage. Skip anything with a wobbly leg or a cracked frame, because children climb on everything.
Safety first: don’t repurpose cribsDo not repurpose, resell or give away old, drop-side or recalled cribs. Dismantle and dispose of them, and don’t reuse the parts in a child’s room.
| Check before you buy | How | Verdict |
|---|---|---|
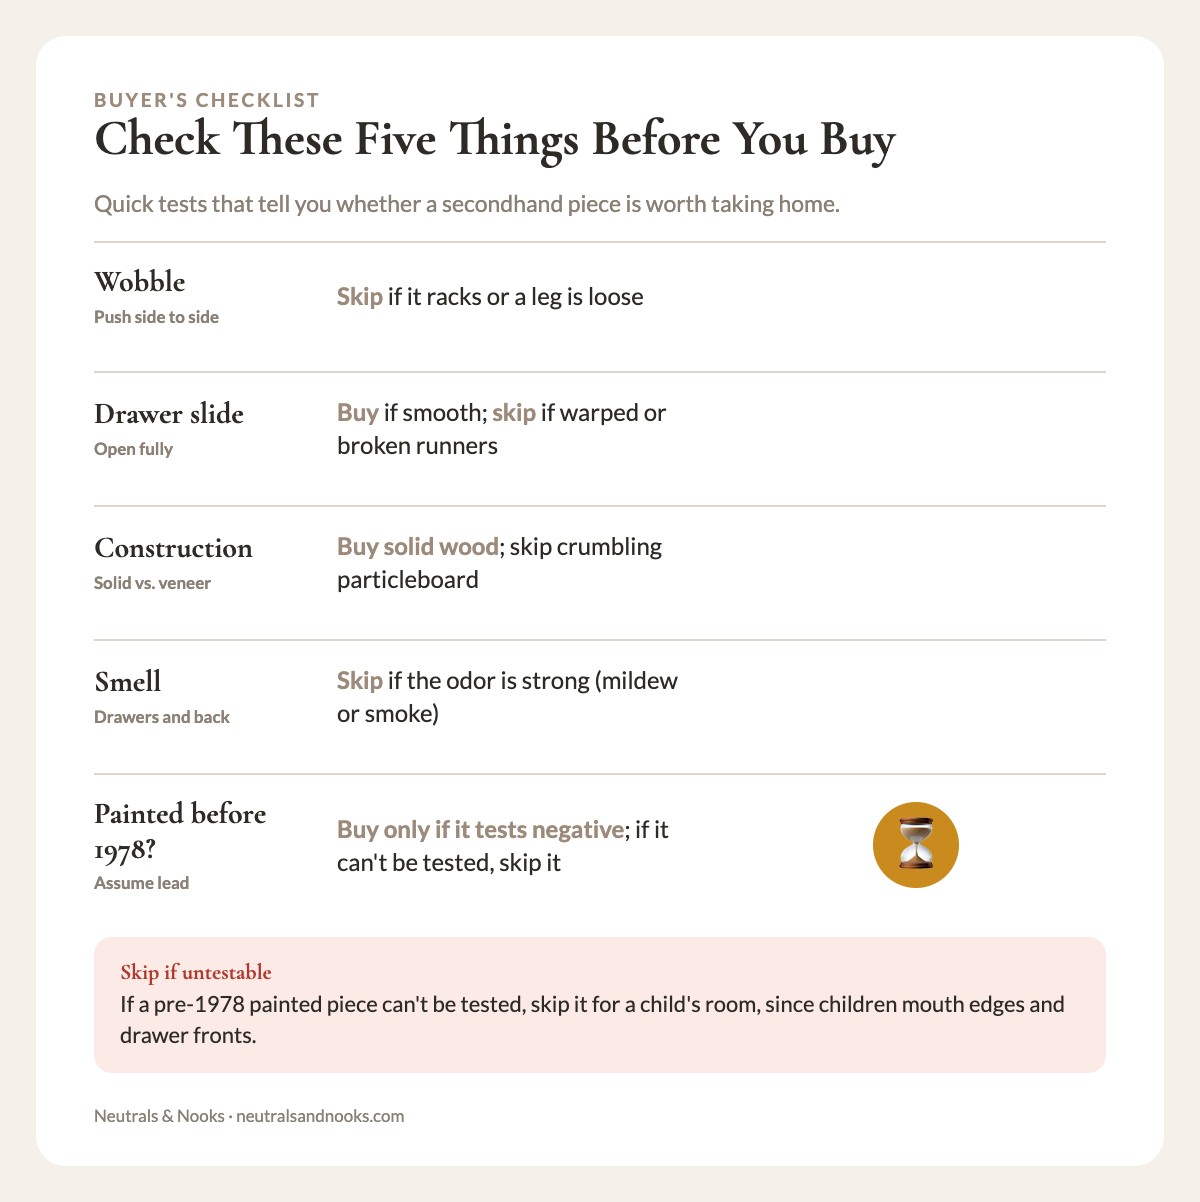
| Wobble | Push the piece side to side and check the legs and frame | Skip if it racks or a leg is loose |
| Drawer slide | Open and close each drawer fully | Buy if smooth; skip if warped or broken runners |
| Construction | Look for solid wood and dovetails versus veneer or particleboard | Buy solid wood; skip crumbling particleboard |
| Smell | Sniff drawers and the back for mildew or smoke | Skip if the odor is strong |
| Painted before 1978? | Assume lead until tested | Buy only if it tests negative. If it can’t be tested, skip it for a child’s room, since children mouth edges and drawer fronts |
Dressers are the most useful piece to repurpose. They show up often on Facebook Marketplace, at estate sales, and at Habitat for Humanity ReStores. Run the checks in the table above before you pay. A sound one looks new with fresh paint and hardware.
Pick a height your child can reach comfortably, so they can open the top drawer themselves. Pull each drawer out and press on the bottom panel and the corner joints. Flimsy bottoms and loose joints won’t survive a loaded drawer. If a piece needs more repair than that, I’d buy new instead.
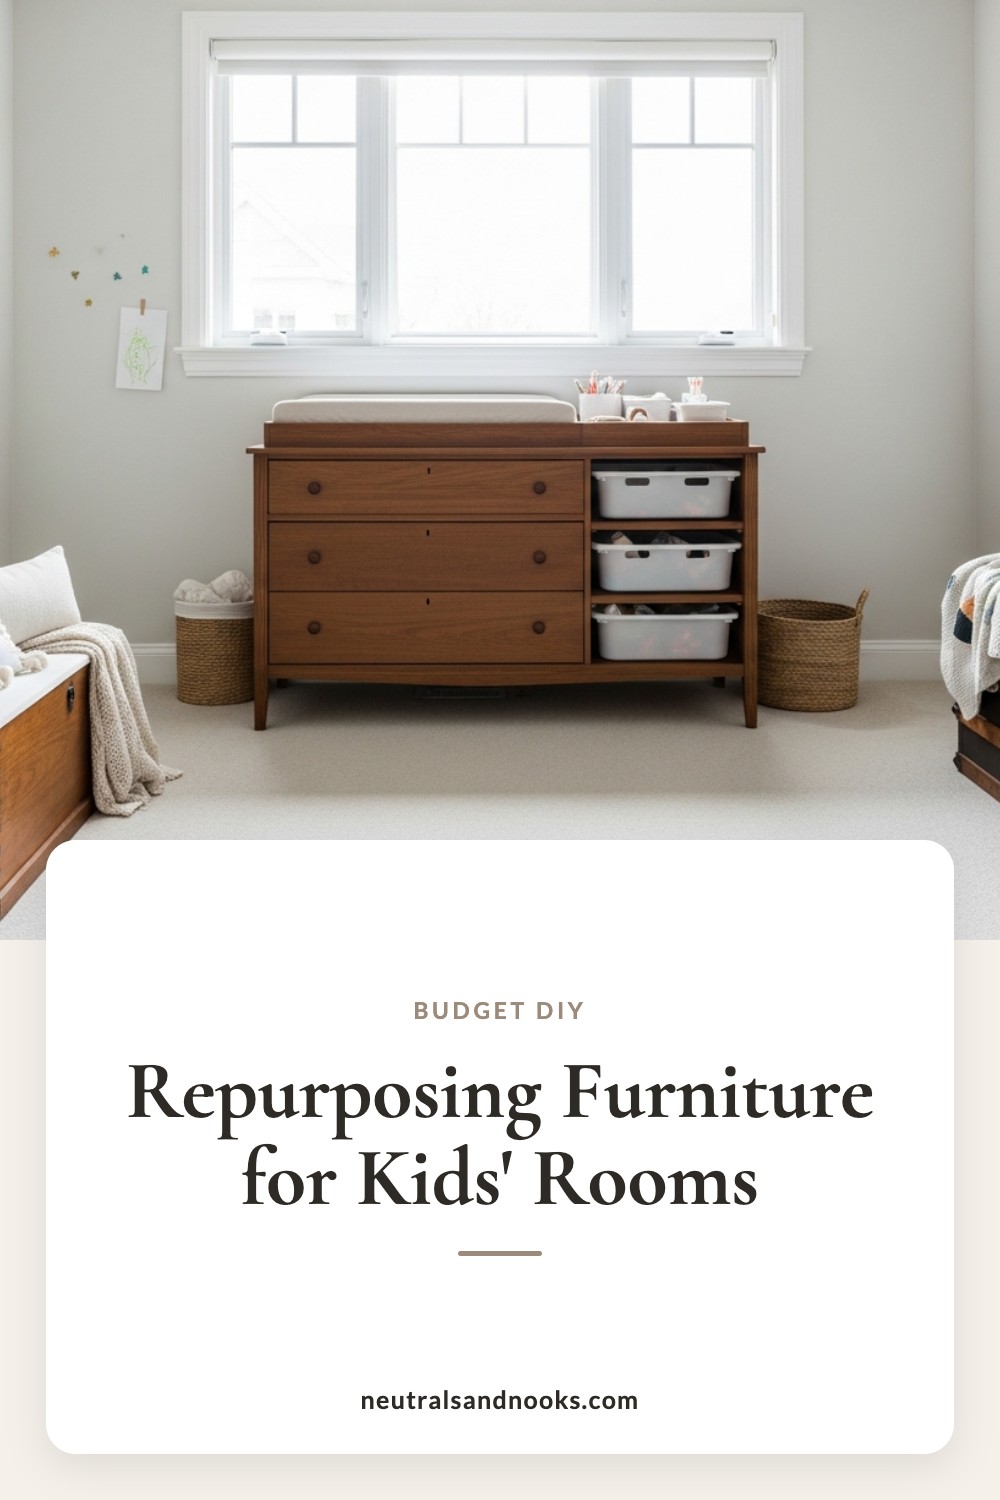
A dresser can also double as a changing table. Add a contoured changing pad that fastens to the top and has a safety strap, and anchor the dresser to a wall stud.
Safety first: changing on a dresserNever leave a baby unattended on a dresser top, even for a moment, and keep one hand on the baby the whole time. The pad and strap are not a substitute for supervision.
Set supplies within your arm’s reach but out of the baby’s reach before you start. Keep the drawers shut while you change, and check that the knobs and pulls are tight.
Bookshelves and hutches are everywhere at thrift stores ($10–40). A narrow bookshelf becomes a bedside table with book display. A spice rack ($3–5 at Goodwill) mounted at kid height works as a picture-book display shelf.
A china hutch becomes open shelving for toys and games once the glass doors are removed. Anchor the hutch to wall studs, and keep heavy items on the bottom shelves.
Safety first: removing glassAll glass comes out before a piece enters a child’s room, or is replaced with shatterproof acrylic. Old furniture glass is often not tempered and breaks into sharp shards, so treat every pane as breakable.
Wear cut-resistant gloves and eye protection, and work away from children. Pull out every glazing point, clip and retainer, then check the frame for leftover slivers or sharp edges. Wrap the panes in cardboard, tape and label the bundle, and dispose of it under your local rules.
Coffee tables and end tables work as kid-height desks, train tables, and LEGO building surfaces. Their low height (16–20 inches) suits toddlers and preschoolers. Remove any glass top or insert, or replace it with shatterproof acrylic, following the glass safety steps above. Round or pad hard corners, and check stability before using one as a play table. Paint and seal a solid wood top so it wipes clean.
| Where to look | Best for | Typical price (example) | Tip |
|---|---|---|---|
| Facebook Marketplace | Dressers, desks, bookshelves | $20–75 for dressers | Negotiate below asking |
| Estate sales | Quality solid wood pieces | $15–50 | Go on the last day for markdowns |
| Habitat ReStore | Cabinets, shelving, tables | $25–60 | Inventory changes often |
| Goodwill and thrift stores | Small accent pieces, baskets, frames, hardware | Low single digits to $40 | Check often |
| Buy Nothing groups | Free furniture from neighbors | Free | Post a wish-list request |
How to Refinish Old Furniture Safely for a Kid’s Room
Safety first: the lead-test decisionTreat any painted piece made before 1978 as suspect, whatever its condition. Swab kits can miss lead, so a negative swab alone is not a go-ahead. Only a negative certified lab or XRF result means you can sand and refinish.
If lead is found, or you can’t test, skip the piece for a child’s room. Intact old paint is still a hazard, because children mouth edges and drawer fronts. Don’t sand, scrape, burn, or route it, and keep children and pregnant people away. If you already own it, follow EPA RRP guidance or hire a certified professional.
I can’t give you a reliable price for lab or XRF testing, so ask a certified lab or inspector for a quote before you buy. It can cost more than a secondhand piece. Your local health department can point you to one.
If the cost doesn’t make sense, take the simpler route. Buy a piece made after 1978, or one in bare wood that has never been painted.
Check stability and joinery before you buy, too. Anything wobbly or hard to anchor is not worth the savings.
Once a piece tests negative, refinishing needs no special skill. This is a safe order of work:
- Settle the lead question. For a pre-1978 painted piece, follow the lead-test decision above before any sanding or scraping.
- Clean. Wipe the piece down with a mild degreaser or a TSP substitute. Use damp disposable rags, never a dry cloth or brush, so no dust is raised. Bag the rags and bin them afterward.
- Sand, only after a negative lead result. Scuff lightly with 120-grit paper so primer grips. A sanding sponge helps on curves. Wet-wipe and HEPA-vacuum the dust afterward.
- Choose low-VOC products. Before you buy primer, paint or topcoat, read the label or SDS of the exact product and tint for VOC g/L. Look for Greenguard Gold or similar certification.
- Prime. Use a water-based stain-blocking primer. Check the label for the wood and stain you are covering.
- Paint two coats. Use a chalk-style or waterborne paint, and follow the recoat time on the can, often 2–4 hours. Sand lightly between coats. If paint peels over a glossy finish, re-prime.
- Topcoat high-use surfaces. Chalk-style paint is porous and soft, so seal tabletops and drawer fronts with a water-based, low-VOC polyurethane. It has its own cure time.
- Replace hardware. New knobs and pulls change a piece completely. I like brass or matte black, on painted and natural wood alike. Ten-packs online are often $12–20.
- Air it out. Let the piece sit in a ventilated garage or porch for at least 48–72 hours, then ventilate the room too.
Safety first: while you workSand outdoors or in a ventilated space, wear an N95 or P100 respirator, and keep children and pets away. If you use real TSP, wear gloves and eye protection, ventilate well, rinse thoroughly, and keep it away from children. An N95 or P100 filters dust only, not solvent fumes. Stick with water-based primer and paint where you can. If you do use oil-based primer or spray paint, work outdoors and wear a half-face respirator with organic-vapor cartridges.
Good to know: timingPaint dries in hours but can take up to about 30 days to fully cure, and odor can linger. Air the piece out for at least 48–72 hours in a garage or porch before it comes in, and ventilate the room. Primer and topcoat times are on the can. Follow the directions, especially for babies and young children.
| Item | Example cost |
|---|---|
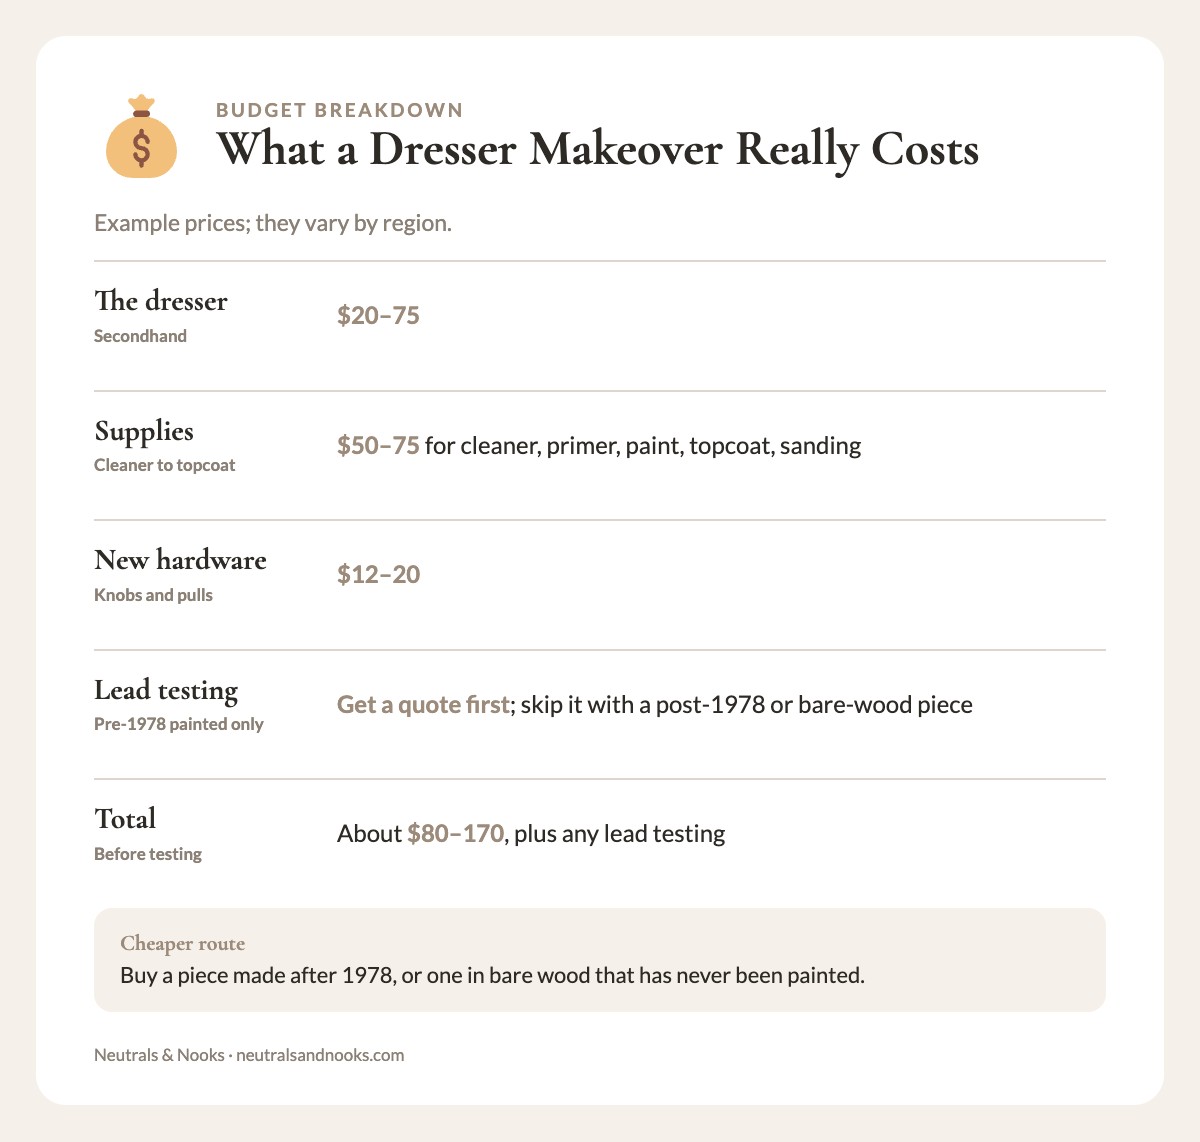
| The dresser itself | $20–75 |
| Supplies (cleaner, primer, paint, topcoat, sanding) | $50–75 |
| New hardware | $12–20 |
| Lead testing (pre-1978 painted pieces) | Get a lab or inspector quote first; skip it with a post-1978 or bare-wood piece |
| Total | About $80–170, plus any lead testing |
All prices in this guide are examples and vary by region. A new kids’ dresser from Pottery Barn Kids or IKEA often costs several times as much, with a less unique result.
Furniture Makeover Ideas for Kids’ Rooms
Each of these pieces needs the anchoring and safety fixes in the next section before it goes into the room.
Dresser to art supply station
A low, wide dresser sorts art supplies by drawer. Markers, crayons, and glue sticks go in the top drawers, and paper, paints, and bulkier supplies in the deep ones below. Add drawer stops. See our art supply organization guide for how to sort what goes inside.
Entertainment center to dress-up wardrobe
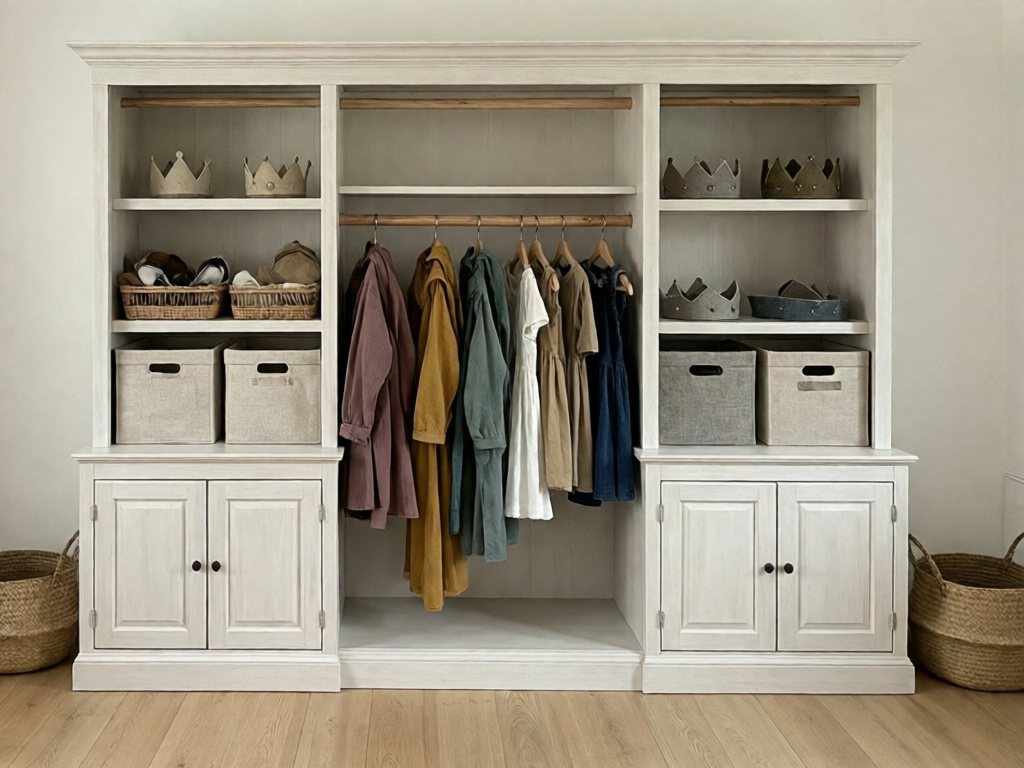
Older entertainment centers designed for boxy TVs have a large central opening that suits hanging dress-up clothes. Remove the adjustable shelves in the center section and fit a low hanging rod across it. Leave any fixed shelf in place, since it may be holding the sides together.
Push on the unit afterward to check it is still rigid. If it racks or wobbles, reinforce it or skip the project. Use the side shelves for accessories, shoes, and costume bins, then paint the whole piece white or a soft pastel.
Secure shelves and doors, and keep heavy items low. Hang costumes within easy reach so kids can pick their own outfits. For more ideas, see our dress-up clothes organization guide.
Safety first: wardrobe rodsThis project suits preschoolers and up. With toddlers in the room, use it only when you are supervising. Anchor the whole unit to a wall stud, since these are deep, heavy pieces.
Set the rod low, at the youngest child’s reach, and don’t treat it as something a child can hang from or climb. Keep costumes with cords, drawstrings, or long straps off the rod, and keep the area cord-free.
Kitchen cart to art station
A secondhand rolling kitchen cart works as an art station. The top is the work surface, the lower shelf holds paper and coloring books, and the drawers hold markers, crayons, and glue sticks.
Use bins or a caddy on the shelf rather than hooks or hanging bags, which invite poking and tangling. Stock blunt-tip child-safe scissors, supervise young children, and avoid cords or long straps. Choose locking casters, and keep the cart stationary when kids lean on it.
Nightstand to reading nook side table
A thrifted nightstand ($5–15) with the bottom shelf intact becomes a bedside reading station. Paint it to match the room and add a cordless LED lamp on top. Choose a rechargeable one with a sealed built-in battery, or one whose battery compartment closes with a screw. Stock the shelf with current favorite books, and add a fabric bin for a stuffed animal or two. It makes a small bedtime station children can use on their own. See our kids’ bookshelf and reading nook guide for more.
Safety first: bedside lampsA corded lamp puts a cord within reach, can be pulled over, and some bulbs get hot. Choose a cordless LED lamp with a stable base, or a wall-mounted lamp out of reach with the cord secured. For children under 3, skip the lamp on the nightstand altogether.
Check the batteries too. Button and coin cells are a serious swallowing hazard for young children. Pick a rechargeable lamp with a sealed built-in battery, or one whose battery compartment closes with a screw, and avoid lamps that run on loose coin cells. Store spare batteries out of reach. If a child swallows a button battery, or you think one might have, get emergency care immediately. Our lighting ideas for kids’ spaces has more options.
Filing cabinet to toy storage
Two-drawer metal filing cabinets ($5–15 at thrift stores or office surplus sales) make sturdy storage. The deep drawers hold LEGO sets, art supplies, puzzles, and board games. Painted matte black with a wooden board on top, one doubles as a side table.
Safety first: filing cabinets tipA filing cabinet can tip forward when more than one loaded drawer is open. Many have an interlock that lets only one drawer open at a time, so test it before you buy and skip any cabinet whose interlock is broken. If yours has no interlock, add a drawer lock and keep it latched. Keep the cabinet stationary and anchored to a wall stud, with the heaviest items in the bottom drawer.
Deburr any sharp edges and test old cabinets for lead before sanding. Brush on a water-based paint where you can. If you spray paint, do it outdoors in a half-face respirator with organic-vapor cartridges, since an N95 or P100 only filters dust. Follow the label for dry and cure time.
| Starting piece | Becomes | Best for | Safety must-do | Skip it if |
|---|---|---|---|---|
| Dresser | Art supply station | Preschool and up | Lead test, anchor to a stud, drawer stops | It tests positive for lead, can’t be tested, or has no solid anchor point |
| Entertainment center | Dress-up wardrobe | Preschool and up, or supervised use | Anchor, low rod at the youngest child’s reach, no cords or drawstrings, heavy items low | The particleboard is crumbling, it wobbles once the shelves are out, or it can’t be anchored |
| Kitchen cart | Art station | Preschool and up, supervised | Locking casters, no hooks or straps | The casters don’t lock or the cart tips when leaned on |
| Nightstand | Reading nook table | Toddlers to school age | Stable base, secure hardware, cordless lamp with a sealed or screw-closed battery compartment (no lamp under 3) | It wobbles or the joints are loose |
| Filing cabinet | Toy storage | School age | Working interlock or drawer lock, anchored, deburred edges | The interlock is broken or the edges are rusted and sharp |
Anchoring and Safety Fixes for Secondhand Furniture
Repurposed pieces often need fixes that new children’s furniture already has built in. Work through these before a piece goes into the room. For the rest of the house, see our baby-proofing guide for the whole home.
| Item | What to know |
|---|---|
| Time | About 30 minutes per piece |
| Anti-tip strap | Rated kit; check its weight rating |
| Drawer stops | $4–8 a set |
| Corner protectors | $6 for a 12-pack |
Safety first: anchor everythingThe federal tip-over standard for new clothing storage (the STURDY rule) applies at 27 inches and taller. That is a rule for new dressers, not a safe height cutoff for other furniture. Secondhand pieces were not built or tested to current stability standards.
Anchor every dresser, bookshelf, wardrobe, and tall piece to a wall stud with rated hardware. Anchor any narrow, top-heavy, or climbable piece too, whatever its height.
The one exception is a low, wide, stable table, such as a coffee table used for play. Press down on each edge and corner. If it tips or rocks, skip it.
Attach the strap to a solid structural member of the furniture, not the thin back panel. Vintage dressers often have a hardboard back stapled on, and a strap screwed only into it will pull out under a child’s weight.
- Find the stud. Use a stud finder, or hardware rated for your wall type if there is none.
- Attach the strap. Fasten it to a solid frame member of the piece. If there is no solid mounting point, reinforce it or pick another piece.
- Mount to the wall. Screw the other end into the stud.
- Pull-test. Tug firmly on the top of the piece. Skipping this step is the mistake I’d most want you to avoid.
- Add drawer stops. Install them so drawers can’t pull out fully.
Drawer safety
If drawers pull out fully and could fall on a child, add drawer stops ($4–8 for a set). Also check that drawers slide smoothly. A drawer that needs force is a stability warning, because yanking can tip the piece.
On clean slides, a rub of paraffin or beeswax helps with minor sticking. Check for warped wood or worn runners too, since wax will not fix those.
Corners and edges
Older furniture often has sharp corners and edges that modern pieces have rounded. This matters most at kid-head height.
- Simplest fix: apply clear corner protectors ($6 for a 12-pack).
- Less visible fix: round the edges with sandpaper or a block plane before painting, on lead-negative pieces only.
- If you use a router: wear eye and ear protection, clamp the piece, and never route lead-painted wood.
Finish safety
Choose low-VOC or zero-VOC paints and finishes, but verify it. VOC content varies by product, line, and tint, so check the label or SDS of the exact product and look for Greenguard Gold or similar.
Let the piece air out in a ventilated garage or porch for at least 48–72 hours before it comes into the child’s room. That is a minimum for odor reduction, not a full cure, which can take up to about 30 days. Keep the room ventilated, especially for babies and young children.
Hardware and small parts
Tighten all knobs and pulls and re-tighten them regularly. Use knobs attached with screws from the inside. Give each a firm tug and replace any that loosen or wobble.
Safety first: under 3For children under 3, test knobs, caps, and screws against a small-parts tester. Testers are inexpensive and sold with baby-proofing supplies. A toilet-paper tube is only a stopgap, and a certified small-parts tester is the reliable check. For under 3, the safest route is one-piece or through-bolted hardware.
Run this final check before a piece goes into the room. The Furniture Repurposing Kit near the top of this page is the printable companion to this guide.
- Anchored to a stud and a solid frame member
- Drawer stops installed
- Corners rounded or padded
- No glass anywhere on the piece
- Hardware passes the small-parts test for under 3
- Piece aired out at least 48–72 hours, room ventilated
- No cords or hooks within reach
- Lamp batteries sealed in or behind a screw-closed compartment
Building a Cohesive Room from Mixed Pieces
Mismatched pieces look intentional when a few things repeat. Color, hardware and containers do most of the work, even across different decades and styles.
Unified color palette: Paint every repurposed piece in the same color family. You do not need the exact same shade. Slight variations add depth and still look cohesive, such as three Benjamin Moore whites: a dresser in White Dove, a bookshelf in Simply White, and a nightstand in Chantilly Lace.
Or paint everything one rich color, such as Sherwin-Williams Evergreen Fog or Benjamin Moore Hale Navy. A color name is not a VOC rating, so confirm the VOC level of the exact product line and tint you buy.
Matching hardware: Use the same knobs and pulls on every piece, even when the styles differ. A mid-century dresser and a farmhouse bookshelf look planned once they share hardware. Brass cup pulls or matte black round knobs work well.
Consistent styling: Use the same baskets, bins, and organizational containers across all your repurposed pieces. Matching IKEA KUGGIS boxes on the bookshelf and in the dresser drawers, or the same woven baskets from Target on every surface, create visual rhythm throughout the room.
Plan on a weekend, plus drying time. If a piece can’t be anchored or tested, buying new is the better call.
Next, learn how to share a kids’ room without clutter. You can also use under-bed space for overflow storage or set up a kids’ closet that kids can manage.
Frequently Asked Questions
Is it safe to repaint old furniture for a nursery?
Yes, once it tests negative for lead. Treat pre-1978 painted pieces as suspect, and go ahead only after a negative lab or XRF result, not a swab alone. Use a low-VOC paint, and air the piece out before it enters the room.
Do I need to anchor a dresser, and how do I do it without studs?
Yes, anchor every dresser. Studs are best, so try a stud finder first. If there is none, use hardware rated for your wall type, such as toggle-style anchors made for anti-tip use. Always fasten to a solid part of the furniture, not the thin back panel.
How long should painted furniture air out?
Plan on at least 48–72 hours in a ventilated space before moving it in. Full cure can take up to about 30 days, so follow the can’s directions and ventilate the room.
What is the safest paint for kids’ furniture?
Choose a water-based, low-VOC paint and check the label or SDS of the exact product and tint. Chalk-style paint is soft, so seal tabletops and drawer fronts with a water-based, low-VOC topcoat and let it cure.
Can you turn a dresser into a changing table?
Yes. Use a contoured changing pad that fastens to the dresser top and has a safety strap, and anchor the dresser to a wall stud. Keep supplies within arm’s reach so one hand stays on the baby, and never leave a baby unattended on it.
Which secondhand furniture should I avoid?
Skip old, drop-side, or recalled cribs, wobbly or structurally damaged pieces, and pre-1978 painted pieces that test positive for lead or that you can’t test.
Neutral Nina
Neutral Nina is an interior design enthusiast and mom of three who proves that beautiful, organized spaces and family life can coexist. She shares practical strategies for creating calm, functional homes that work for kids and grown-ups alike.