Small Pantry Organization Ideas for Families on a Budget
You'll learn how to organize your small pantry (under 4 sq ft) on a budget, with a measure-first plan, shelf-by-shelf zones, and tips for using dollar-store finds. Discover how to purge clutter and maximize space with smart storage solutions.
- Always measure your pantry's width, depth, and height before buying any organizers to ensure they fit.
- Declutter your pantry with a 30-minute purge, sorting items to keep, donate, or toss.
- Use shelf risers or stackable shelves to maximize often-wasted vertical gaps.
- Organize effectively using dollar-store and thrift finds within $10, $25, or $40 tiers.
- Be ruthless about duplicate items in your small pantry to free up valuable space.
This post contains affiliate links. As an Amazon Associate I earn from qualifying purchases.
The first pantry I organized was a 22-inch cupboard beside the fridge. One Tuesday a can of chickpeas rolled out, bounced off my foot, and landed under the stove.
Most pantry advice assumes a walk-in. This post is for the cabinet, narrow closet or shelf unit under about 4 square feet. You’ll get a measure-first plan, a shelf-by-shelf zone map, $10, $25 and $40 budget tiers, a kid snack shelf, and a one-afternoon setup using dollar-store and thrift finds.
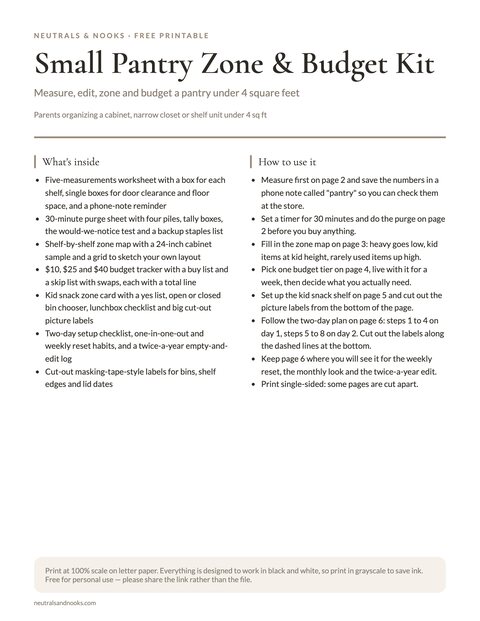
Free printable · 6 pages
Small Pantry Zone & Budget Kit
Fill-in worksheets for measuring a small pantry, a 30-minute purge with a backup staples list, a shelf-by-shelf zone map with a sketch grid, a $10/$25/$40 budget tracker with buy and skip lists, a kid snack zone card with picture labels, a two-day setup checklist, upkeep habits with an empty-and-edit log, and cut-out labels.
Free. Your download link appears right here. You'll also join the Monthly Home Reset. Unsubscribe anytime. Privacy
Working with a bigger space? Start with our family pantry organization system instead.
In this article (17 sections)
- What Counts as a Small Pantry (Measure First)
- Empty Out and Edit Before You Buy
- Set the Budget First: Three Tiers That Work
- Shelf-by-Shelf Small Pantry Zone Map
- Dollar-Store Pantry Organizers: Buy vs. Skip
- Going Vertical: Doors, Walls, and the Space Above
- Decant or Don’t? Small Pantry Rules
- Building the Kid-Friendly Snack Zone
- How to Store Cans, Boxes, and Bags
- Free and Cheap Pantry Labels
- A One-Afternoon Setup Plan
- Cheap Small Pantry Upgrades
- Keeping a Small Pantry Organized
- Common Small-Pantry Mistakes (and Easy Fixes)
- What to Do When the Pantry Is Really Tiny
- Frequently Asked Questions
- Small Pantry Organization on a Budget: Quick Recap
What Counts as a Small Pantry (Measure First)
When I say small pantry, I mean a space with a footprint of roughly 2 feet by 2 feet or less. That could be:
- A single tall kitchen cabinet, 18 to 24 inches wide
- A shallow closet, about 12 inches deep and 30 to 36 inches wide
- A freestanding shelf unit tucked beside the fridge
- A corner cabinet with an awkward shape and a lazy Susan that never turns
The reason to measure before you buy anything is simple: small spaces punish a wrong guess. A bin that is two inches too wide is not “almost fine.” It is a bin that doesn’t fit, and it goes back to the store, or worse, stays in a bag by the door for six months.
The five measurements to take
Grab a tape measure and a scrap of paper. You need:
| Measurement | Why it matters |
|---|---|
| Width of each shelf (inside edge to edge) | Tells you how many bins sit side by side |
| Depth of each shelf | Decides whether you can double-stack rows or need one deep bin |
| Height between shelves | Decides whether you can stack, or need risers |
| Door clearance (if there is a door) | Over-the-door racks can stop a door closing |
| Floor space below the bottom shelf | Often wasted, and the best home for heavy items |
Write the numbers down on your phone as a note called “pantry.” You’ll check it at the store, and it keeps you honest when a cute basket tempts you.
The shelf height trick
Most shelves in small cabinets are spaced for the average cereal box, which means there is often a gap of 4 to 8 inches above your tallest item. That gap is free storage. A shelf riser or a stackable wire shelf turns one layer into two. We’ll get into that in the dollar-store section.
Empty Out and Edit Before You Buy
You can’t organize clutter. You can only rearrange it. So once you’ve measured, the next step is an honest edit.
The 30-minute pantry purge
Set a timer. Pull everything onto the table or counter, then sort into four piles:
- Keep and use weekly. Your real, regular foods.
- Keep but rarely use. Baking supplies, special-occasion items, backups.
- Donate. Unopened, in-date items your family isn’t going to eat. A local food pantry or a neighbor will gladly take them.
- Toss. Stale, moldy, smelly, bug-bitten, or open and forgotten.
Expect a fair share of a small pantry to land in piles three and four. That’s space returned to you without spending a cent.
Good to knowBest-by dates are mostly about quality, so check use-by dates and look at the food itself. Infant formula is the exception: never use it past its use-by date. Toss bulging, leaking or deeply dented cans, and anything with mold, odor or pests.
Duplicates are the silent space thief
In a tiny pantry, a duplicate isn’t a harmless backup. It’s a jar or box taking up a slot another category needs. Be ruthless about doubles of things you can buy any time, like a second box of the same cereal. Keep a backup only for the three or four staples that would genuinely derail dinner if you ran out: maybe pasta, canned tomatoes, rice, and peanut butter.
The “would we notice” test
For anything on the fence, ask: would anyone in this house notice if this vanished for a month? If the answer is no, it’s a donation. Ingredients bought for one recipe six months ago are the usual culprits.
Set the Budget First: Three Tiers That Work
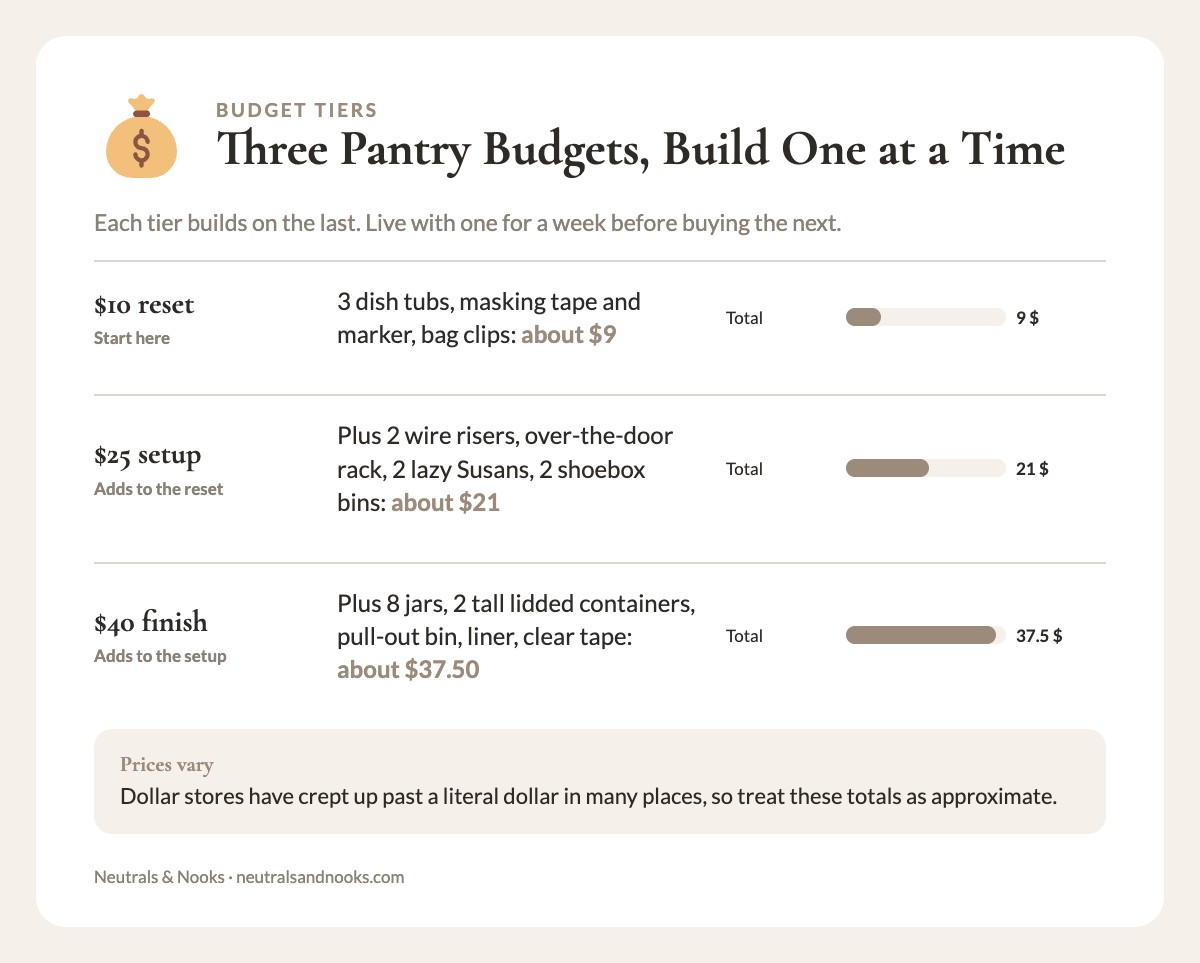
Budget organizing fails when you buy everything at once and then discover half of it is the wrong size. Instead, think in tiers. Do the first tier, live with it for a week, then decide what you actually need.
| Tier | What you buy (approx. dollar-store prices) | Approx. total |
|---|---|---|
| The $10 reset | 3 dish tubs (about $3.75), masking tape and a marker (about $2.50), bag clips (about $2.50) | About $9, under $10 |
| The $25 setup | Everything in the $10 reset, plus 2 wire risers (about $2.50), an over-the-door rack (about $5), 2 lazy Susans (about $2.50), and 2 clear shoebox bins (about $2.50) | About $21, under $25 |
| The $40 finish | Everything in the $25 setup, plus 8 reusable jars (about $10) and 2 tall lidded containers for cereal and flour (about $2.50). Add a handled pull-out bin for the kid snack shelf, a roll of shelf liner, and clear tape for printed labels (about $1.25 each). | About $37.50, under $40 |
Prices vary by store and region, and dollar stores have crept up past a literal dollar in many places. The principle holds: you can set up a small pantry for far less than one set of fancy canisters costs.
What the $10 reset actually looks like
Do the edit above, wipe the shelves, and group the keepers on your counter. Use the three dish tubs to hold the groups that spill: snacks, baking, and pasta or grains. Label with masking tape and a marker. That is the entire first tier, and it solves most of the problem on its own.
Shelf-by-Shelf Small Pantry Zone Map
In a big pantry you can spread out. In a small one, every shelf has one job, decided by height, weight, and who needs to reach it.
Here is the logic behind the map:
- Heavy goes low. It’s safer, and it keeps the cabinet from feeling top-heavy.
- Kid-reachable goes at kid height. If you want children to grab their own snacks, give them a bin they can reach.
- Daily goes at waist to chest height. The easiest-to-reach real estate belongs to what you use every day.
- Rarely used goes up high. Only light items (paper goods, spare cereal) go on the top shelf. A 2 to 5 lb bag of flour goes in a tub on shelf 2 or 3, never above chest height, and big bags stay on the floor.
- Small, loose stuff goes on the door. Packets and spices suit vertical space; with a toddler around, keep them on rows above child reach.
The map
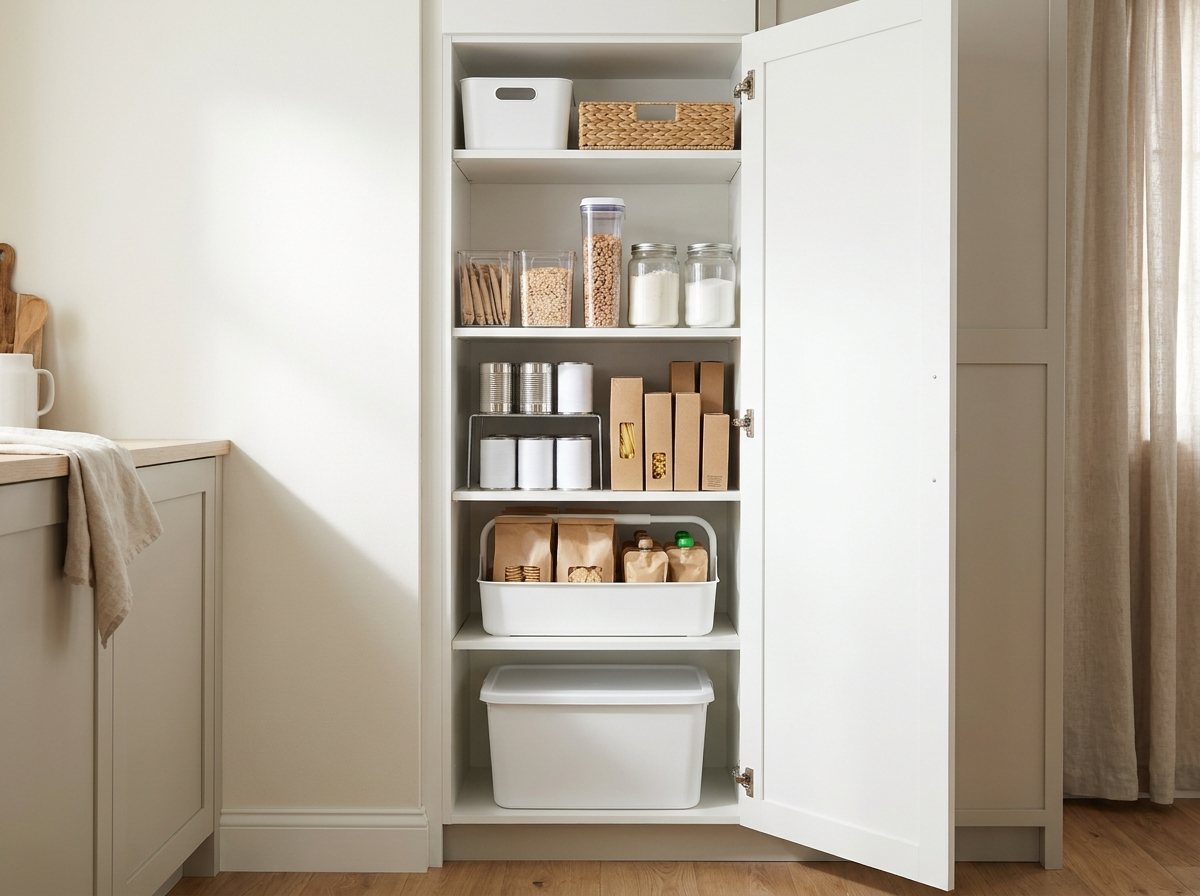
This assumes a cabinet or closet with four shelf levels plus a floor and a door. If you have three shelves, merge the breakfast and dinner zones. If you have five, add a second backup layer.
| Level | Zone name | What lives here | Dollar-store helper |
|---|---|---|---|
| Top shelf (above shoulder height) | Backup and seasonal | Paper goods, spare cereal, holiday baking supplies, other light rarely used items | A lidded shoebox-size bin |
| Shelf 3 (chest to eye) | Breakfast and baking | Cereal, oats, flour, sugar, baking powder, pancake mix | Small clear bins, one tall container for cereal |
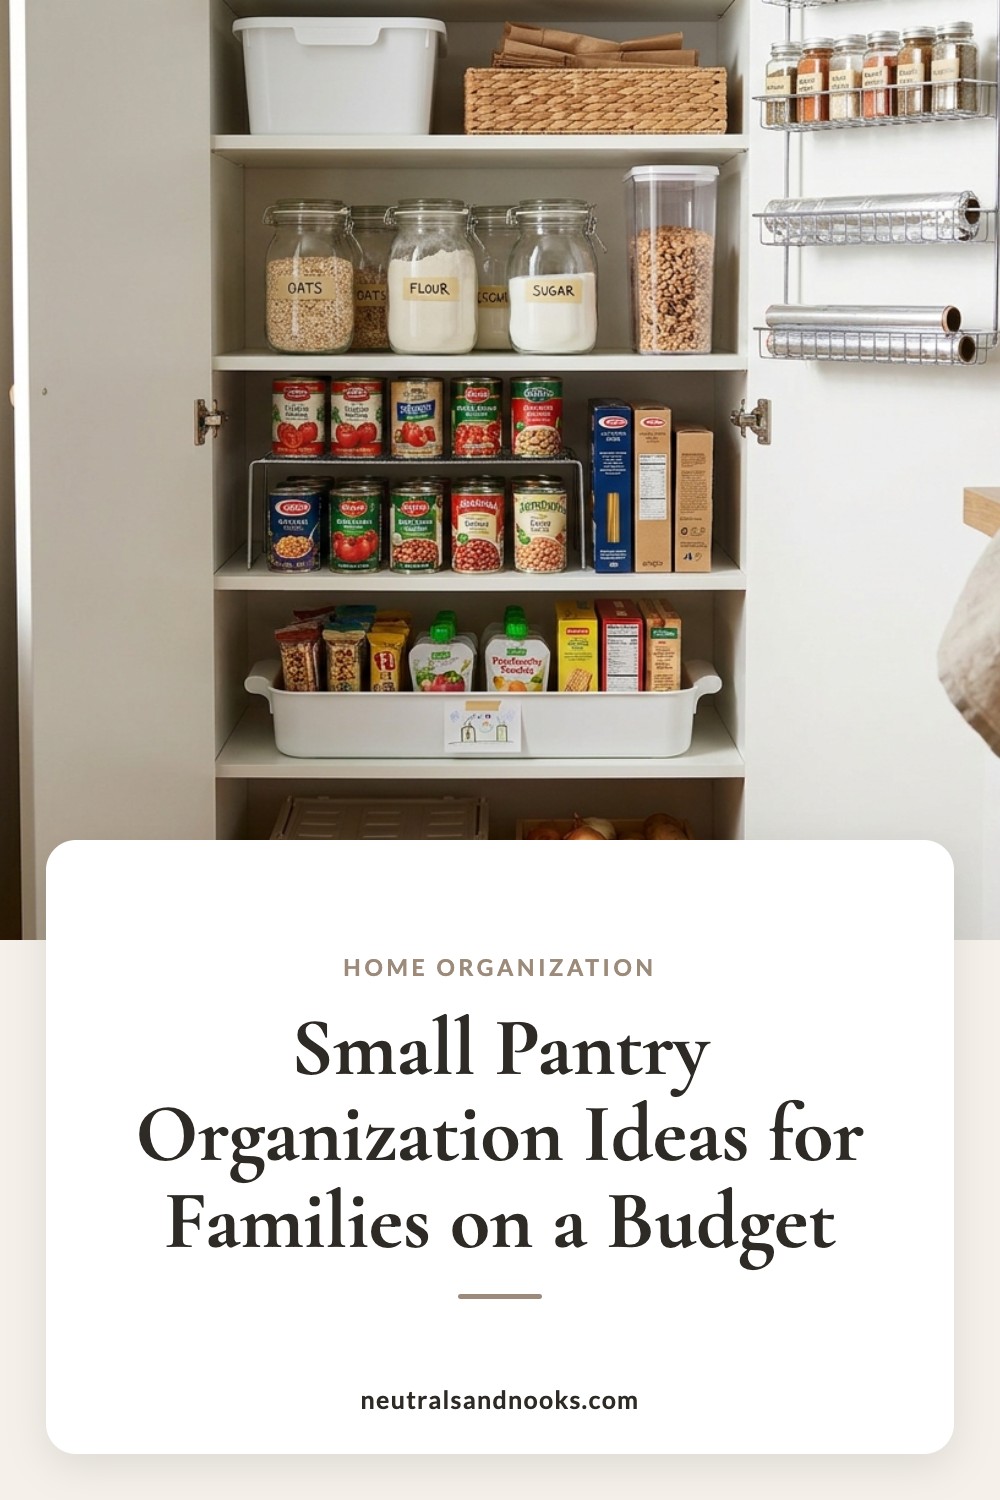
| Shelf 2 (waist) | Dinner builders | Pasta, rice, canned tomatoes, beans, broth, sauces | A tiered can organizer or simple wire riser |
| Shelf 1 (knee to hip, kid reach) | Snack and lunchbox | Soft crackers, fruit pouches, dissolvable puffs (soft fruit cut into small pieces, with grapes and berries quartered lengthwise, lives in the fridge) | An open bin or dish tub with a handle |
| Floor | Heavy and bulky | Big bags of rice, cooking oil, bottled water, potatoes and onions (in separate ventilated containers) | A lidded tub or a milk crate |
| Door | Small and flat | Spices, seasoning packets, tea (foil, wrap and bags go on the top rows) | An over-the-door rack or a few adhesive hooks |
Safety firstAnchor freestanding shelves and tall cabinets to the wall with furniture straps, and keep the heaviest items lowest. Skip tall rolling carts near toddlers, who can pull them over.
Why this order works for families
Think about the rhythm of a family day. The kids grab a snack after school, so that bin lives where small hands can reach it without a stool. You grab pasta and tomatoes at 5:30 pm, so dinner builders sit at waist height. Cereal and baking items get the chest-height shelf, and backups you touch once a month live up high.
When the map matches the rhythm, putting things back is easier than leaving them out.
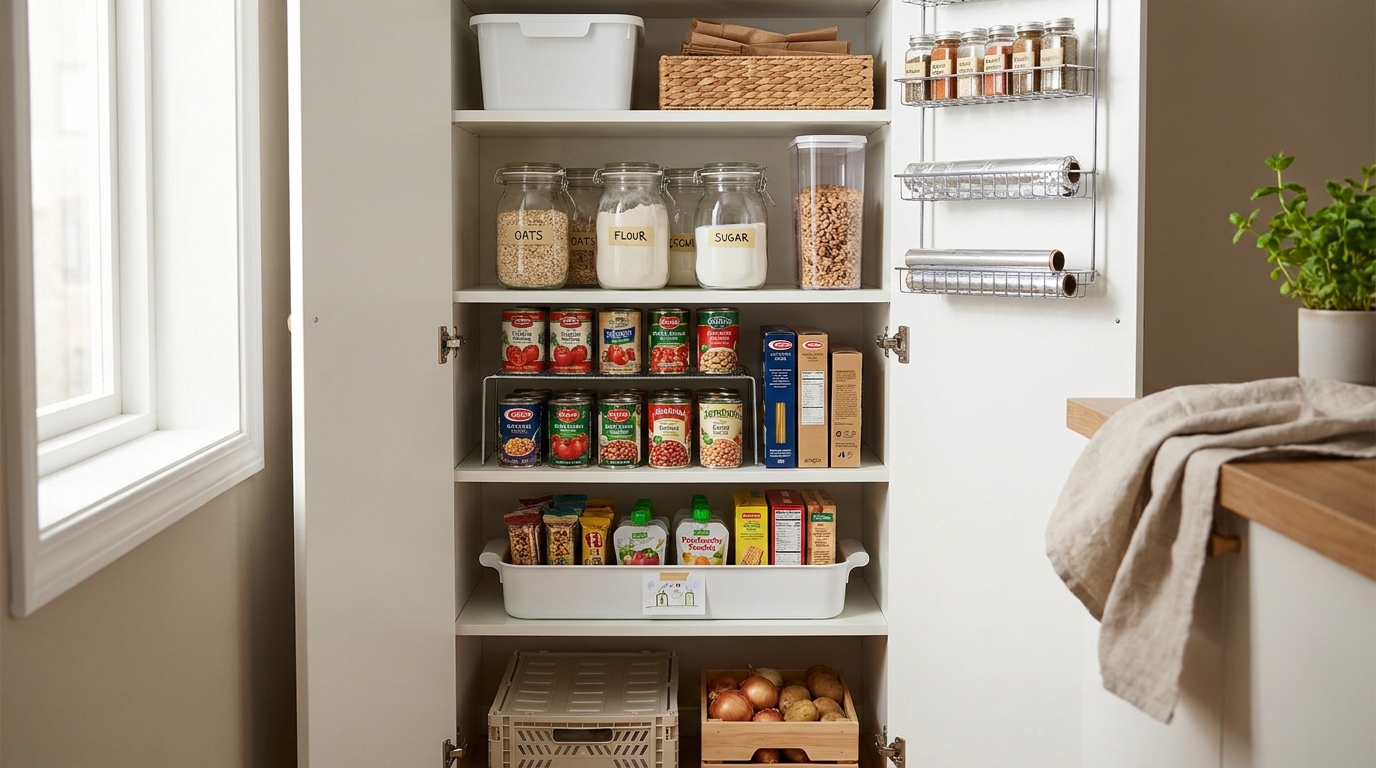
A sample layout for a 24-inch-wide cabinet
Here’s a concrete version. Suppose your cabinet is 24 inches wide, 12 inches deep, and 60 inches tall with four shelves.
- Floor: one lidded tub (about 10 x 14 inches) for oil and a big bag of rice. Keep onions and potatoes in separate ventilated containers in the dark, and discard green or sprouting potatoes.
- Shelf 1 (kid snack): one open bin, roughly 9 x 12 inches, with a handle. Soft crackers and pouches stand upright inside. The bin pulls out like a drawer.
- Shelf 2 (dinner): a two-tier wire riser holding cans in front and boxes of pasta behind. A short jar of rice or lentils at the end.
- Shelf 3 (breakfast and baking): a clear bin for oatmeal packets and pancake mix, a tall container for cereal, and two flour and sugar canisters.
- Top shelf (backup): a lidded bin for spares, plus a flat basket for paper goods.
- Door: a hanging rack with spices and packets on the lower rows (move them up if a toddler can reach them) and foil, wrap and bags on the top rows.
The footprint is only 2 square feet, but four shelves and the door give you far more usable space. It works because the zones are tiny and specific.
Dollar-Store Pantry Organizers: Buy vs. Skip
Dollar stores are where small-space organizing gets affordable. The trick is knowing which items are worth it and which will disappoint you.
Buy these
| Item | Why it works | Best pantry use |
|---|---|---|
| Plastic dish tubs and dish pans | Sturdy, rectangular, easy to wipe | Snack bins, pull-out drawers |
| Wire shelf risers (small) | Doubles shelf space for cans and jars | Dinner builders shelf |
| Over-the-door hooks and racks | Uses vertical space with no drilling | Spices, bags, foil |
| Lazy Susans or turntables | Brings back-of-shelf items forward | Oils, sauces, spice jars |
| Clear plastic shoebox bins | Right size for packets and small bags | Baking, tea, seasoning packets |
| Adhesive hooks | Hang scoops, measuring cups, tote bags | Inside the door |
| Mason jars or reusable jars | Cheap decanting for staples | Rice, oats, lentils, sugar |
| Chip clips and bag clips | Keeps opened bags closed | Everything that comes in a bag |
| Masking tape and a marker | Free, flexible labels | All of it |
| Drawer liners | Protects shelves and quiets cans | Bottom shelf, floor |
Be careful with these
- Flimsy plastic baskets. The thin ones warp when loaded with cans. Test by pressing the sides. If they flex, put only light items in them.
- Decorative baskets sized for a different space. They look lovely online. In your cabinet, they waste inches. Measure first.
- Stackable bins without a locking lip. They slide. Fine on a flat shelf, annoying on a door-adjacent shelf.
- Anything you “might use someday.” The cheapness is the trap. A $1.25 bin you never use still takes space.
Where else to look on a budget
Dollar stores aren’t the only affordable option. Thrift stores often have jars, tins, and wire baskets for pocket change. For direct food contact, stick to clean glass or food-grade plastic, and skip vintage painted tins and rusty baskets. Your own kitchen has candidates too: clean takeout containers, jars from pasta sauce, and the cardboard boxes cereal comes in. If you like the dollar-store approach and want more ideas, we go deeper in our dollar store organization hacks for kids’ stuff, and many of those tricks translate straight to the kitchen.
Going Vertical: Doors, Walls, and the Space Above
A small pantry has little floor but plenty of air. Using it well is the difference between a cabinet that holds a week of groceries and one that holds three days.
The back of the door is your best friend
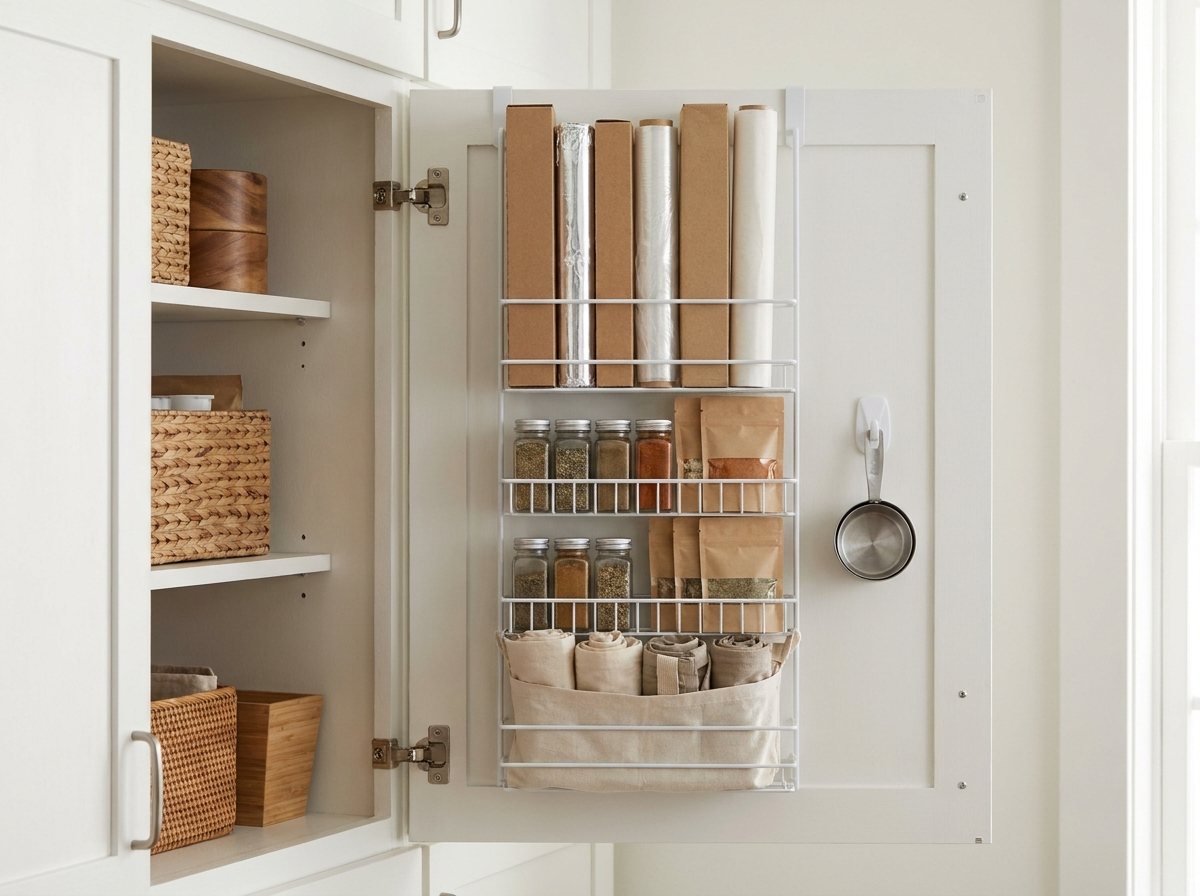
An over-the-door rack gives you three or four extra shelves without touching the interior. Load it with:
- Spice jars and seasoning packets (taco, gravy, oatmeal) on the lower rows
- Foil, plastic wrap, and parchment boxes standing on edge, on the top rows where toddlers can’t reach the cutter strips
- Reusable bags rolled and tucked into a pocket
Safety firstLower door rows sit within toddler reach, and spice jars and packets can spill or become choking hazards. With a toddler in the house, keep every row above their reach, or move spices and packets into a lidded bin on shelf 3. Keep cleaning products and pest baits out of the pantry entirely, or locked up high, away from food and children.
One caution: measure the clearance between the shelves and the door before buying. A rack that bumps your cans stops the door from closing. Slimmer racks, or a row of adhesive hooks holding small mesh bags, work well when you only have an inch or two to spare.
Hooks inside the cabinet walls
Small adhesive hooks on the side wall hold measuring cups, a scoop, a clip with your shopping list, or an apron. They take zero shelf space.
Stacking with risers
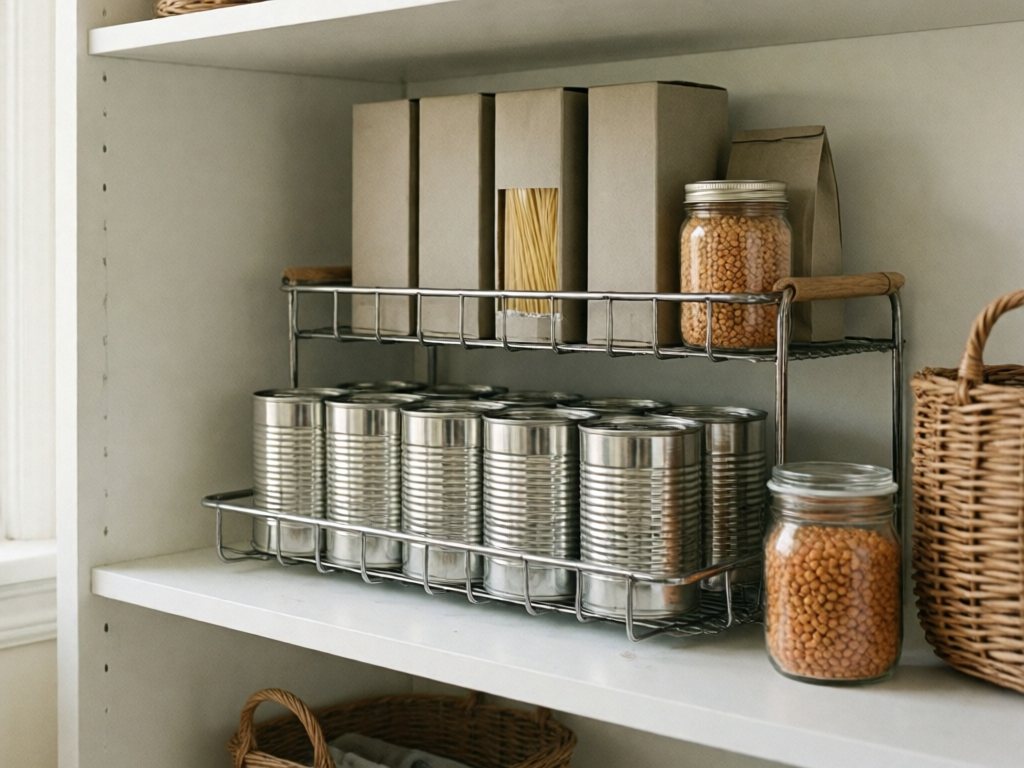
A riser is simply a platform that lifts the back row of items so you can see everything. In a pantry about 12 inches deep, a two-tier riser lets you keep cans in two rows, front low and back high, with every label visible. No more archaeological digs for the diced tomatoes.
The under-shelf basket
Clip-on baskets that hang from the underside of a shelf use dead space between levels. They work well for light, flat things: bags of tortillas, bread, bagel thins, or packets. Don’t use them for heavy items, because they pull the shelf’s edge down.
Decant or Don’t? Small Pantry Rules
Decanting means moving dry goods out of their original packaging and into uniform containers. It looks gorgeous in photos. For a small pantry on a budget, it’s useful for some things and a waste for others.
Worth decanting
- Items that come in awkward bags. Flour, sugar, and rice in floppy bags tip, rip, and leak. A jar or tub holds them neatly.
- Cereal. Boxes crush and go stale. A tall lidded container keeps it fresh and uses a consistent footprint.
- Snacks bought in bulk. Divide a large bag into a bin of smaller ones, or into a bowl for the kids.
- Anything you want to see at a glance. Clear containers show you when you’re low.
Not worth decanting
- Items with cooking instructions you rely on. Rice and pasta boxes tell you the water ratio and timing. Keep that, or snap a photo of the back or tape the instructions inside the lid.
- Foods you use quickly. If a box is gone in a week, decanting adds work with no gain.
- Allergen-labeled items. If someone in your household has an allergy, keep the original packaging with its ingredient list.
- Cans and jars. They already stack and store well.
The cheapest decanting system
You don’t need a matching set. Save glass jars from pasta sauce, pickles, and jam. Soak off the labels in warm soapy water, then rub a bit of cooking oil on any sticky residue. Mismatched jars look tidy when the labels match.
One caution: keep glass at waist height or above, and use plastic at child height (shelf 1 and the floor). If your cooking oil comes in a glass bottle, move it up to shelf 2.
If you want a ready-made label design to print, our pantry label system for busy families has a free set you can tape or stick on.
Building the Kid-Friendly Snack Zone
If you have children, the most important shelf in your pantry is the one they can reach. A good snack zone saves your sanity. A bad one means a toddler eating a whole box of crackers before dinner or a school-age kid asking you for a snack six times an afternoon.
Why it’s worth the space
When children can serve themselves, they build independence and you stop being the snack concierge. The trick is limiting the choices to what you’re happy for them to eat, at the portion you’re happy with.
Safety firstPopcorn, whole nuts, raisins, whole grapes, and hard or chunky bars are choking hazards under age 4. Keep them on a high shelf and serve them with supervision. Good self-serve swaps are dissolvable puffs, soft crackers, fruit pouches, and soft fruit cut into small pieces (grapes and berries quartered lengthwise). Halved grapes are still a choking risk. Keep cut fruit in the fridge, not the pantry.
How to set it up
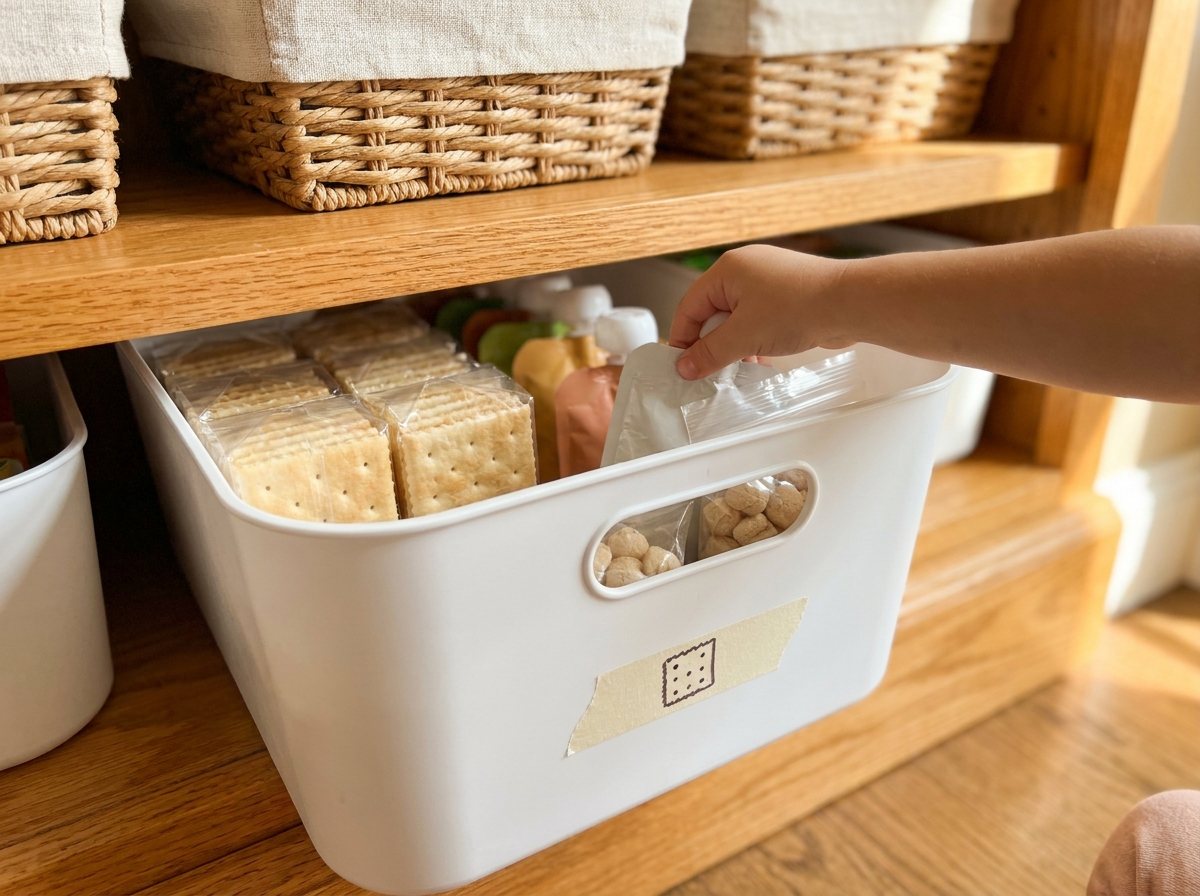
- Choose one low shelf or a pull-out bin. Knee to hip height for small children.
- Fill it with pre-approved items only. Fruit pouches, soft crackers, dissolvable puffs. Soft fruit cut into small pieces (grapes and berries quartered lengthwise) goes in a container on a low fridge shelf. Anything not on the “yes” list stays up high.
- Portion when you can. Divide big bags into small bags or a bowl. A snack-size portion is easier for small hands and keeps the whole bag from vanishing.
- Use a visual cue. A picture label helps pre-readers. Draw a cracker on the bin with a marker or stick on a small picture.
- Set a simple rule. “Pick one from the bin” is easy for a four-year-old to follow.
The open bin vs. the closed bin
Safety firstFor children under about 2, skip the self-serve shelf. An adult hands out snacks, and toddlers eat sitting down with you nearby. Start self-serve once your child can sit and eat safely on their own.
Once self-serve starts, an open bin with a handle is easier for little hands and quicker to restock. A closed bin slows down a child who raids anything visible, but it won’t stop them. Keep the snack zone a shelf higher until the “pick one” rule sticks, then shift it down as they grow.
Lunchbox station
If school lunches are part of your life, add a small tray or bin on the same shelf that holds the lunch-packing essentials: snack bags, a few shelf-stable sides, and the little containers you pack. Packing a lunch becomes a ten-minute job instead of a scavenger hunt. If backpacks and lunchboxes pile up by the door too, our back-to-school drop zone guide gives them a home.
How to Store Cans, Boxes, and Bags
Cans
Cans are heavy, round, and rolling. Left alone, they migrate. Solutions that cost almost nothing:
- A riser or tiered rack so cans in the back are visible above cans in the front.
- A dish tub holding like cans together: all the beans in one, all the tomatoes in another.
- A “first in, first out” habit. New cans go behind older ones. With a rack that tilts forward, they roll to the front on their own.
- Lay them on their side in a bin if the shelf is short. It’s less pretty, but it uses height well.
Boxes
Pasta, cereal, crackers, and mixes. They’re light but bulky.
- Stand them like books. Boxes stored upright with the spines facing out are easier to scan than a pile.
- Use a magazine file or a cut cardboard box as a divider to keep them from slumping.
- Combine half-empty boxes. Two boxes of the same pasta, each a quarter full, become one.
Bags
Chips, tortillas, rice, flour, frozen-turned-pantry items, and everything floppy.
- Clip them shut with chip clips. Open bags go stale and attract pests.
- Use a bin to corral them so they stand up instead of folding over.
- Put the heaviest bags on the floor. Bags stack poorly on high shelves.
Free and Cheap Pantry Labels
Labels are the cheapest tool in your kit and the one that makes organization stick. When everything has a labeled home, family members put things back without asking you where they go.
Free and nearly free options
| Label type | Cost | Best for | Watch out for |
|---|---|---|---|
| Masking tape and marker | Pennies | Bins, shelves, jars | Fades after months; redo twice a year |
| Chalk labels or chalk markers | Low | Glass jars | Smears if wiped |
| Printed paper labels, taped over | Low | Matching look | Taping needs care so they stay flat |
| Index cards in a clear pocket | Low | Shelf edges | Needs a sticky back |
| Picture labels for pre-readers | Free | Kid zones | Keep them simple |
Label the shelf, not just the container
Here’s a small-pantry secret: label the shelf edge too. If a bin gets pulled out and sits on the counter, a label on the shelf shows where it belongs. This takes ten seconds and makes the pantry self-correcting.
Write dates on the lids
For decanted items, add a small date on the lid or the bottom with a marker. It helps you track freshness without squinting at a best-by date on a bag you threw away.
A One-Afternoon Setup Plan
You can do all of this in one afternoon, even with kids around, if you break it into steps. Here’s the sequence I use.
| Step | Time | What you do |
|---|---|---|
| 1. Measure | 10 minutes | Width, depth, height, door clearance |
| 2. Empty and edit | 30 minutes | Pull everything out, sort into four piles |
| 3. Clean | 10 minutes | Wipe shelves, add drawer liners if you have them |
| 4. Group | 15 minutes | Sort keepers into zones on the counter |
| 5. Shop (if needed) | 30 to 45 minutes | Buy only what the zones need, using your measurements |
| 6. Fill the zones | 20 minutes | Heavy to the floor, kid items low, daily items at waist, backups high |
| 7. Label | 15 minutes | Masking tape on bins, shelf edges, and jars |
| 8. Photograph | 2 minutes | Take a picture so you can reset it fast later |
That’s roughly two and a half hours including a shopping trip, and you can split it across two days. Do steps 1 to 4 on one day. Do 5 to 8 the next.
The “zones first, containers second” rule
Group your items on the counter, and then decide what bins you need. You will almost always need fewer than you think.
A word about aesthetics
In that 22-inch cupboard, the bin that finally worked was a shallow dish tub, because anything deeper blocked the door. I love a calm, neutral shelf as much as anyone. But in a small family pantry, function comes first. A white bin full of crackers that your five-year-old can actually reach beats a gorgeous canister that’s up too high. Aim for a restrained palette: white, clear, kraft, and natural wood. That keeps visual noise down in a tiny space, and it costs nothing extra to choose the neutral color when you buy.
Cheap Small Pantry Upgrades
Three cheap tweaks make a small pantry easier to use. The last one comes with a battery warning.
- Keep a small “use first” bin. Near-expiry foods go in one clear tub at eye level. You’ll see them and cook with them.
- Paint or line it. A roll of contact paper or shelf liner brightens a dingy cabinet, and light interiors feel bigger. If you paint, use low-VOC paint, ventilate, let it fully cure before restocking, and don’t sand old paint in pre-1978 housing without lead testing.
- Light it. A plug-in or rechargeable LED light inside the cabinet makes the back visible. You’ll find things faster and use the whole depth.
Safety firstStick-on puck lights often run on button batteries, a serious ingestion hazard. Choose a plug-in or rechargeable light, or one with a screw-secured battery compartment, and keep spare batteries out of reach. If a button battery is swallowed, go to the ER immediately and call poison control (1-800-222-1222 in the US).
Keeping a Small Pantry Organized
Organizing a small pantry takes an afternoon. Keeping it organized takes a few small habits.
One in, one out
When you bring in a new box of something, finish or toss the old one. In a tiny space, this rule isn’t about discipline; it’s about physics. There’s no room for the overflow.
The two-minute weekly reset
Pick a day, right before or after grocery shopping works best, and do a quick pass:
- Push everything to the front and straighten bins.
- Toss anything open and stale.
- Move new groceries behind old ones.
- Restock the snack bin.
- Check what’s running low and add it to the list.
It takes two minutes once the system is in place.
The monthly look
Once a month, glance at the top shelf and the floor. These are the places forgotten things hide. Check dates on backups. Wipe up any crumbs.
Shop with the map
The zone map doubles as a shopping tool. Before you go to the store, check each zone. If the dinner zone is full, you don’t need more pasta. If the snack bin is nearly empty, restock it. The pantry’s limits become a natural budget cap.
Make it a family job
Hand a preschooler a box of crackers and point to the bin with the cracker picture. School-age kids can restock the snack bin on grocery day.
Common Small-Pantry Mistakes (and Easy Fixes)
| Mistake | Why it happens | Easy fix |
|---|---|---|
| Bins too deep for the shelf | Not measuring | Write measurements on your phone |
| Everything crammed into the front | Fear of waste | Leave an inch of breathing room per shelf |
| Heavy items up high | Shelf order unplanned | Move heavy items to the floor zone |
| Too many categories | Over-organizing | Combine to five or six zones at most |
| Decanting everything | Pinterest pressure | Decant only what benefits |
| Never resetting | Busy life | Two-minute weekly reset |
The “too tidy” trap
One more subtle mistake: building a system so precise that it can’t survive a Tuesday. If your pantry only works when it’s perfect, it won’t work for long. Choose open bins over tight lids for daily-use items, and leave a little slack. The point is a system your whole family can keep up.
What to Do When the Pantry Is Really Tiny
Some spaces are smaller than a cabinet. If your pantry is a few shelves, a rolling cart, or a single deep drawer, the same principles apply with a few adjustments.
The single-cabinet pantry
If everything has to fit in one standard cabinet, choose your categories carefully. Keep only what you use weekly. Store the rest elsewhere: a high shelf in the hall closet, under a bed in a lidded bin, or a bottom drawer in the dining room. Bulk backups don’t need to live in the kitchen. If you rent or share a small space, apartment living with kids covers small-space systems that grow with the household, and our fridge and freezer organization guide helps with the cold-food side.
The rolling cart
A narrow rolling cart can act as a pantry in a pinch; lock the wheels, and skip tall carts if a toddler can pull on them. Use the three-tier map: snacks on the lowest tier, dinner builders in the middle, breakfast on top. Add a hook for a small bag or towel. Wheel it into a gap beside the fridge.
The drawer pantry
A deep kitchen drawer works beautifully for snacks, packets, and tea. Use dish tubs or drawer dividers to separate groups. Lay items flat or on edge so you can see every label from above.
The wall pantry
If you have an empty strip of wall, a narrow shelving unit or a set of floating shelves can become a pantry. Keep it to items in clear, uniform containers, since everything is on display. A curtain or a simple panel can hide it if you want a calmer look.
Frequently Asked Questions
How do I organize a really small pantry on a tight budget?
Start with the free steps: empty the pantry, throw out anything expired, wipe the shelves, and group what remains by use (snacks, breakfast, dinner, baking). Then spend a few dollars on the highest-impact items: one or two bins, a shelf riser, and an over-the-door rack. Label everything with masking tape and a marker. That setup usually costs around $10 to $25 and handles most of the problem. Add more only if you find a real gap after a week of living with it.
What are the best dollar-store items for pantry organization?
The most useful are plastic dish tubs (they make excellent pull-out snack bins), small wire shelf risers, over-the-door racks, lazy Susans, clear shoebox-size bins, adhesive hooks, bag clips, and masking tape. Skip thin plastic baskets that warp under weight and any container you haven’t measured against your shelf. Glass jars from your own kitchen work just as well as store-bought canisters.
How do I make a small pantry kid-friendly?
For children under about 2, hand out snacks yourself and skip self-serve. Once your child can sit and eat safely, give them one low shelf or a pull-out bin that holds only snacks you’ve approved. Portion bulk snacks into small bags or bowls, and add a picture label for pre-readers. Keep everything else up higher. This lets kids serve themselves without raiding the whole pantry, and it takes the constant “can I have a snack?” off your plate. Adjust the height and lid style as your children grow.
Should I decant everything into matching containers?
No. Decanting is worth it for floppy bags (flour, sugar, rice), cereal, and bulk snacks. It’s not worth it for items you finish quickly, foods whose packaging includes cooking directions or allergen information, or cans and jars that already stack well. Mismatched jars look tidy as long as the labels are consistent.
How do I stop cans from rolling around and getting lost?
Use a tiered riser or a small wire rack so the back row sits above the front, or group cans by type in dish tubs. Follow first-in, first-out: new cans go behind old ones. If your shelf is short, lay cans on their side in a bin so you can use the height and still see the labels.
How much food should I keep as backup in a small pantry?
Limit backups to three or four true staples that would disrupt dinner if you ran out, such as pasta, canned tomatoes, rice, and peanut butter. Everything else can be bought as needed. Store the backups on the top shelf or the floor so they don’t take up prime space. Because a small pantry has little room for duplicates, extra stock tends to hide and expire.
How often should I reorganize a small pantry?
Give it a two-minute reset once a week, ideally around grocery day, to straighten bins, restock the snack zone, and move new items behind old ones. Do a more thorough check monthly, looking at the top shelf and floor for forgotten or expired items. A full empty-and-edit twice a year, perhaps at the change of seasons, keeps the system from drifting.
Small Pantry Organization on a Budget: Quick Recap
A small pantry isn’t a problem to solve with more stuff. It’s a small, clear system with a place for everything and a few easy habits. Start with the edit, draw your own version of the zone map, and spend a few dollars where it counts. By next week, the chickpeas will stay on their shelf and the kids will know where their snacks live.