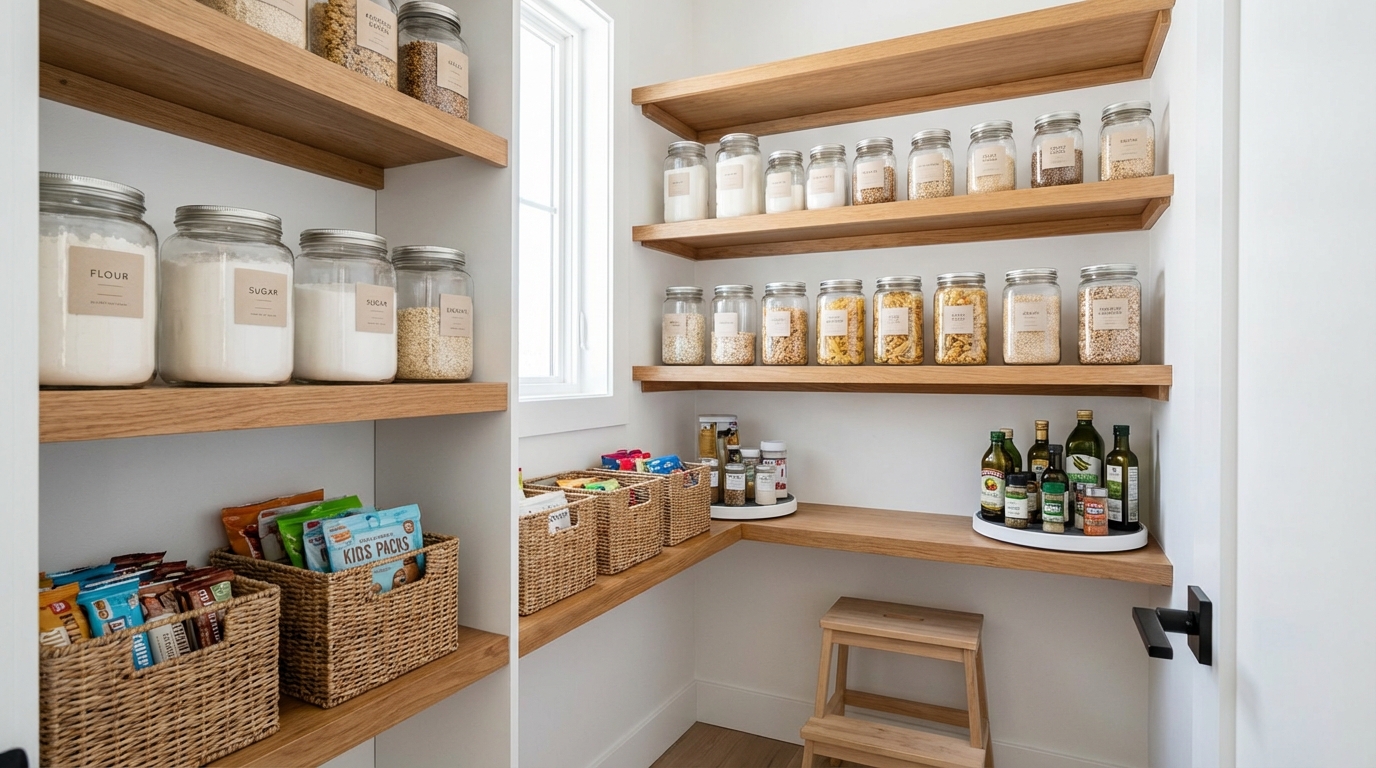
Family Pantry Organization: A Complete System That Actually Works
This guide reveals why your family pantry organization fails and offers a complete, zone-based system. You'll learn to create a sustainable pantry with kid-accessible sections and realistic maintenance routines.
- Recognize your pantry's multi-user nature, with different needs for adults and kids.
- Implement a zone-based organization system tailored for family use.
- Create kid-accessible sections to manage their independent snack access.
- Plan for constant inventory turnover with a flexible, routine-based system.
- Embrace a realistic maintenance schedule to sustain organization.
A family pantry gets opened many times a day by people of different heights and patience levels, so it drifts back to chaos fast. Pretty containers won’t fix that. A system built for how your family really uses the space will.
This guide covers a full clean-out, six activity-based zones, a kid-safe snack shelf, budget container picks and a 5-minute weekly reset. The system flexes instead of breaking, even when the groceries are still on the counter.
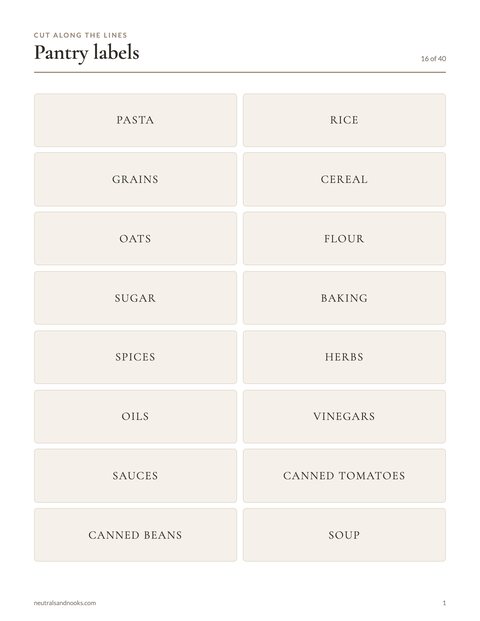
Free printable · 4 pages
Pantry Label Set
Forty printed pantry labels plus twenty blanks, sized for clear bins and jars.
Free. Your download link appears right here. You'll also join the Monthly Home Reset. Unsubscribe anytime. Privacy
In this article (13 sections)
- Why the Family Pantry Is the Hardest Space to Organize
- How to Organize a Family Pantry: Step-by-Step Clean-Out
- Pantry Zones for Families: The Zone-Based System
- Pantry Container Basics: What to Decant and What to Skip
- Budget Pantry Containers: Three Tiers from $45
- Pantry Labels: How to Label Shelves, Bins and Containers
- Kid-Safe Pantry Snack Zone by Age
- The Maintenance System That Prevents Backslide
- Common Pantry Organization Mistakes Families Make
- Tips by Pantry Type
- Connect Your Pantry to Meal Planning and Grocery Lists
- Frequently Asked Questions
- Your Pantry Organization Plan: Where to Start This Weekend
Why the Family Pantry Is the Hardest Space to Organize
If your pantry slid back to chaos within weeks of the last reorganization, you’re not failing. Five pressures work against every family pantry:
- Many users. Adults open it with a plan and kids open it with an appetite, so one undivided space gets disrupted constantly.
- Constant turnover. Groceries come in and meals go out daily, so a system must flex rather than freeze.
- Huge variety. Boxes, bags, cans, jars, pouches and spice bottles share very little square footage.
- Bulk buying. A 48-count box of granola bars fits no shelf neatly.
- Different heights. The top shelf is invisible to kids and the bottom shelf is hard on your back.
A system built around these five pressures holds up better than a pretty one.
How to Organize a Family Pantry: Step-by-Step Clean-Out
Every effective pantry system begins with a full clean-out, not a rearrange. You can’t organize a space you can’t see, and you can’t see a space that’s full.
Block 45 to 90 minutes, and expect the longer end if the pantry is packed. Set younger kids up with an activity, or let school-age kids sort sealed items. Clear a counter or table nearby to spread everything out.
Step 1: Remove Everything
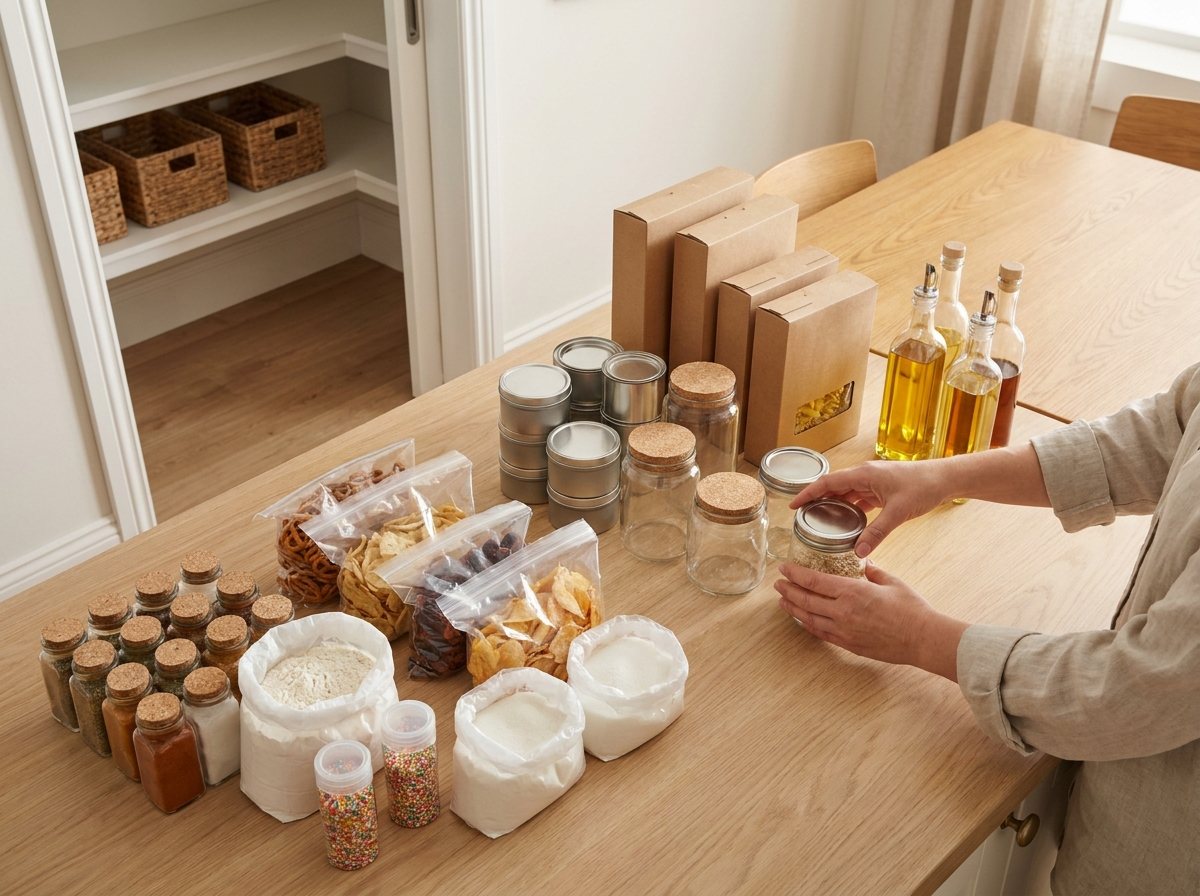
Every single item comes out. Every can from the back corner. Every bag of chips wedged behind the cereal. Every mystery spice you’ve had since your first apartment. Put it all on the counter or table, grouped loosely as you go:
- Cans and jars
- Boxes and dry goods
- Snacks and treats
- Baking supplies
- Breakfast items
- Spices and seasonings
- Oils, vinegars, condiments
- “What even is this?”
Step 2: Clean the Empty Pantry
Wipe every shelf with a food-safe cleaner and let it dry before restocking. Sweep the floor and check for worn shelf liner.
Adults handle anything moldy, spoiled or glass; kids can sort sealed items only. Note your shelf count, adjustable heights, dead corners, door-back space and lighting.
Even shelf spacing rarely suits a family, so check whether your shelf heights are right. We’ll adjust them in the zone setup.
Step 3: Sort and Purge (Gently)
Now look at what you extracted. You’re going to sort into four categories:
| Category | What Goes Here | Action |
|---|---|---|
| Keep — use regularly | Items you use at least once a month | These get prime pantry real estate |
| Keep — use occasionally | Specialty items, holiday baking supplies, backup stock | These go on high or low shelves |
| Donate or give away | Unexpired items you won’t use, duplicates, things the kids outgrew | Bag them up today |
| Toss | Expired items, stale goods, anything opened and forgotten | Trash or compost |
A note on the “less aggressive decluttering” approach: You don’t need to get rid of everything you haven’t used in 30 days. That advice never made sense for pantries. Baking supplies might sit for weeks between uses and still be essential. Holiday ingredients have a season. Pantry organization isn’t about minimalism. It’s about intentional placement. Everything you keep needs a home. If it has a home, it’s not clutter. If it doesn’t, it becomes clutter regardless of how useful it is.
Step 4: Take Inventory and Measure
Before putting anything back, record these numbers. You’ll need them when choosing containers.
- Shelf width and depth
- Height between shelves
- Number of shelves
- Door-back depth
- A phone photo of each grouped pile
That inventory becomes your container shopping list and your zone plan.
Pantry Zones for Families: The Zone-Based System
This is the core of the system. Instead of organizing by category or alphabetically, you’ll build activity-based zones. Each zone matches how your family actually uses the pantry, not how a store shelves its stock.
Why Zones Work Better Than Categories
Category-based organization puts all the cans together, all the boxes together and all the bags together. That breaks down at dinnertime. For spaghetti, you need pasta from the box shelf, sauce from the can shelf and garlic bread mix from the bag shelf. That’s three stops for one meal.
Zones group food by how you use it. Everything for dinner prep lives in one zone: pasta, sauce, canned tomatoes, rice, dried beans and broth. Fewer decisions and fewer steps per pantry visit matter most when you’re cooking with a toddler wrapped around your leg.
The Six Family Pantry Zones
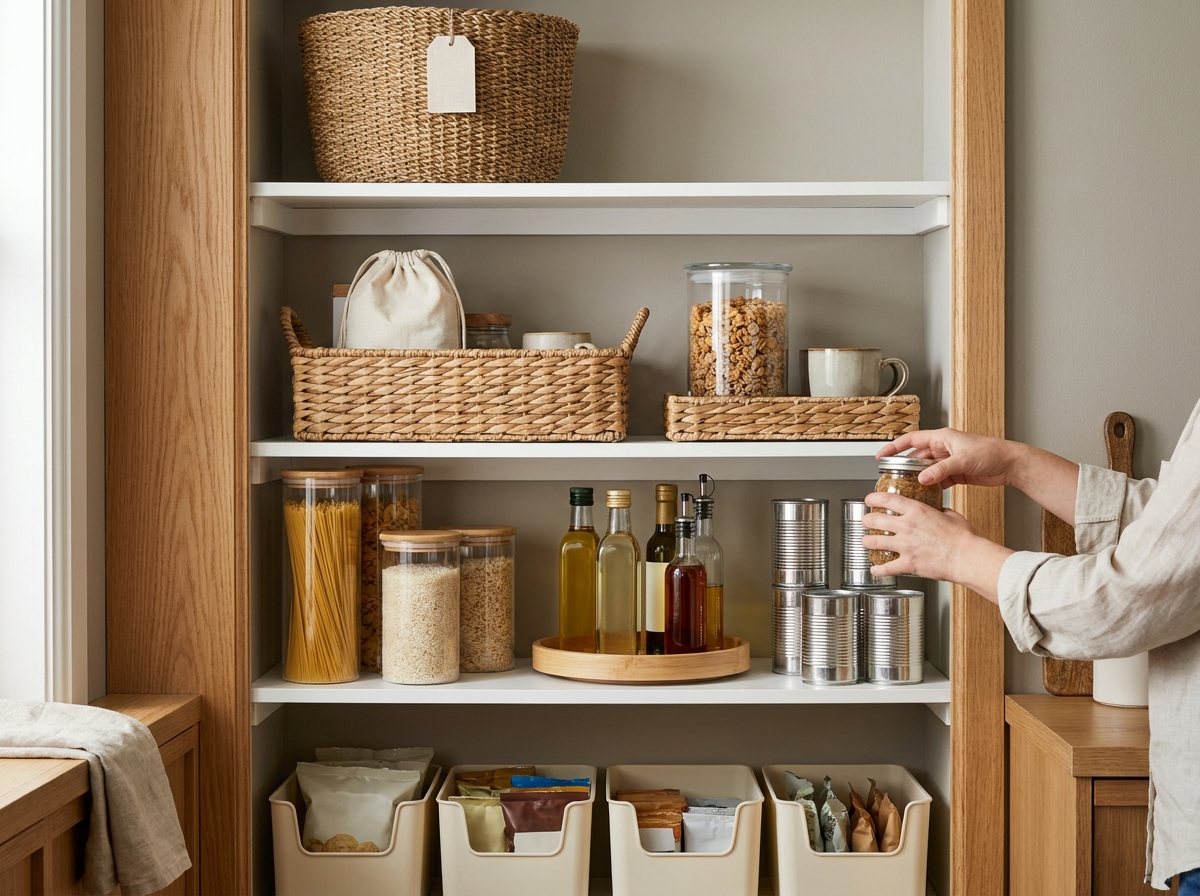
These six zones are my starting frame. Adjust them to how your family eats.
| Zone | Where | What lives here | Kid access |
|---|---|---|---|
| 1. Dinner staples | Middle shelves, eye level | Pasta, rice, canned tomatoes, sauces, oils | Adult |
| 2. Breakfast | Upper-middle shelf | Cereal, oatmeal, pancake mix, syrup | Adult; kids 5+ when an adult hands the breakfast basket down |
| 3. Snacks | Lowest shelf | Soft crackers, soft nut-free bars, pouches | Kid-safe soft snacks (ages 3+ self-serve, adult within sight) |
| 4. Baking | Upper shelves | Flour, sugar, extracts, sprinkles | Adult only |
| 5. Canned goods and backup | Lower-middle shelf | Backup cans, broth, bulk extras | Adult only |
| 6. Special items and overflow | Top shelf, door back | Specialty items, party supplies, pet food | Adult only |
Worked Layout for a 5-Shelf Reach-In Pantry
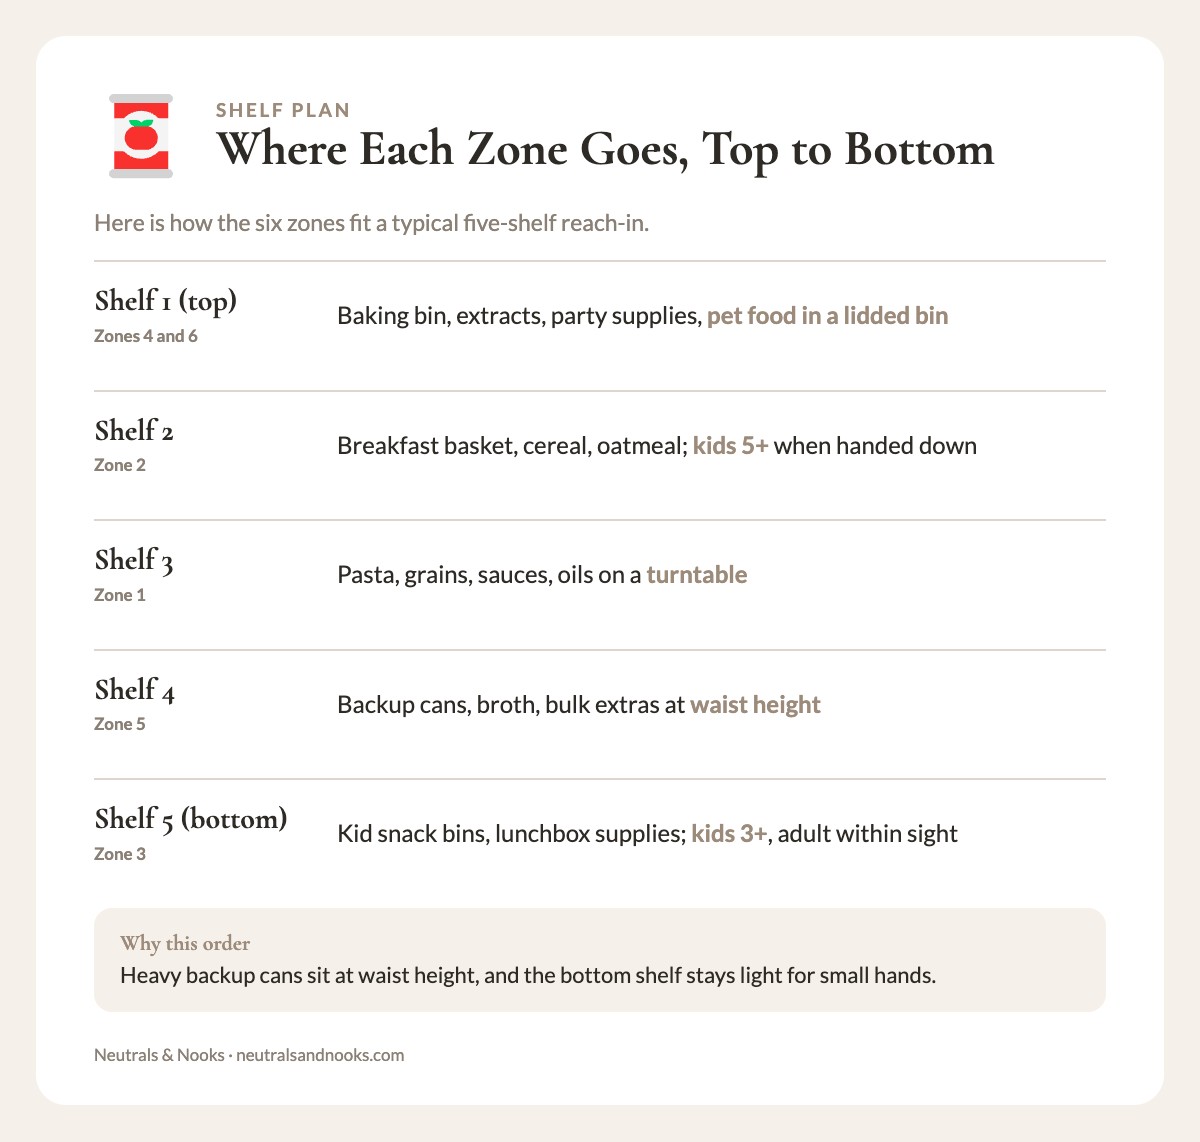
Here’s how the six zones fit a typical five-shelf reach-in. Heavy backup cans sit at waist height, and the bottom shelf stays light for small hands.
| Shelf (top to bottom) | Zone | What sits here | Who reaches it |
|---|---|---|---|
| 1 (top) | Zones 4 and 6 | Baking bin, extracts, party supplies, pet food in a lidded bin | Adults |
| 2 | Zone 2 | Breakfast basket, cereal, oatmeal | Adults; kids 5+ when the basket is handed down |
| 3 | Zone 1 | Pasta, grains, sauces, oils on a turntable | Adults |
| 4 | Zone 5 | Backup cans, broth, bulk extras | Adults |
| 5 (bottom) | Zone 3 | Kid snack bins, lunchbox supplies | Kids 3+ (adult within sight while they eat) |
Zone 1: Dinner Staples (Middle Shelves, Eye Level)
This is your prime real estate — the shelves between hip and shoulder height. It gets the most-used category because you access it daily, usually under time pressure.
What lives here:
- Pasta, rice, grains, and noodles
- Canned tomatoes, beans, broth, and soups
- Unopened sauces (pasta sauce, soy sauce, curry paste, salsa); once opened, store them as the label directs
- Cooking oils and vinegars
- Dried herbs frequently used in cooking
- Tortillas and wraps, only if the package says shelf-stable (otherwise, store them as the label directs)
Container strategy: Tall, clear containers for pasta and grains. A turntable (lazy Susan) for oils and sauces — one spin and you see everything. Cans stacked or in a can organizer rack.
Zone 2: Breakfast and Morning Essentials (Upper-Middle Shelf)
Breakfast is rushed and everyone is half-awake. Keep breakfast items visible, reachable and grouped together, so nobody starts the day with a scavenger hunt.
What lives here:
- Cereal and oatmeal
- Pancake and waffle mix
- Syrup, honey (see the safety note below), and nut butters (spread thinly for toddlers, never served as a spoonful)
- Coffee, tea, and hot chocolate
- Granola (clusters and nut-containing mixes go on an adult shelf if a child under 4 is in the home)
- Dried fruit for topping (adult shelf if a child under 4 lives with you)
Safety firstNever give honey to a child under 12 months. It can cause infant botulism.
Container strategy: Keep cereal in large clear canisters or in its original box inside a labeled bin. Add a pull-out “breakfast basket” that holds pancake mix, syrup and toppings together. On Saturday morning, pull the whole basket out. Kids 5+ can use it once an adult hands it down.
Bread and bagels aren’t long-term pantry items. Keep them in a bread box or counter bin and use them by the package date.
Zone 3: Snacks (Lowest Shelf — Kid-Accessible)
This zone gets its own detailed section below. Soft, age-appropriate snacks live low; choking-hazard foods do not.
Kids 3 and up can self-serve here, with an adult within sight while they eat. For 1-2 year olds, an adult retrieves and serves. With a child under 4 in the home, hazard foods stay on an adult shelf; the full list is in the snack zone section below.
What lives here:
- Soft crackers and puffs (pretzels and chips go on an adult shelf until age 4+)
- Soft, nut-free granola bars (gummy or chewy fruit snacks go in the parent-controlled treat spot)
- Sealed, soft snack portions
- Unopened applesauce pouches and fruit cups (opened ones go in the fridge)
- After-school snack rotation
Zone 4: Baking Supplies (Upper Shelves or a Dedicated Section)
Baking supplies get used in bursts: a weekend baking session, holiday cookies, a birthday cake. They don’t need prime real estate. They do need to live together, so you can see at a glance whether you have what a recipe calls for.
What lives here:
- Flour (all-purpose, whole wheat, specialty)
- Sugars (white, brown, powdered)
- Baking soda and baking powder
- Vanilla extract and other extracts (they contain alcohol; keep them high, which is why this zone sits up top)
- Chocolate chips, sprinkles, and decorating supplies
- Muffin and cake mixes
- Cocoa powder
- Cornstarch
Container strategy: Matching canisters for flour and sugar (label them clearly — nobody wants to mix up salt and sugar). One “baking bin” or basket holds the small items, like extracts, baking soda and sprinkles. It keeps them from scattering across the shelf.
Zone 5: Canned Goods and Backup Stock (Lower-Middle Shelf, Above the Kid Shelf)
This is your pantry’s warehouse zone. Items here are heavy and used less often. Keeping them around waist height means you never lift a stack of cans to eye level.
What lives here:
- Backup cans and jars beyond what’s in Zone 1
- Canned vegetables and fruits
- Canned tuna, chicken, and other proteins
- Extra broth and stock
- Bulk backup items (extra pasta, rice, or sauce bought on sale)
Container strategy: A can organizer rack that rolls cans forward (first in, first out) earns its spot here. Or stack by type, with all the black beans together and all the diced tomatoes together. Add a shelf-edge label for each type so cans don’t get shoved wherever they fit.
Zone 6: Special Items and Overflow (Top Shelf and Door Back)
Every pantry needs a home for the things that don’t fit the other five zones. Without one, odds and ends creep into every other zone.
What lives here:
- Specialty ingredients (coconut milk, tahini, specialty flours)
- Party and entertaining supplies (napkins, candles, paper plates), on high shelves or in closed bins
- Pet food and treats (in a lidded bin on a high shelf, out of children’s reach)
- Reusable bags
- Seasonal items (holiday baking, summer drink mixes)
- Overflow from a recent bulk buy that hasn’t been decanted yet
Container strategy: Large labeled bins, one per sub-category. “Party supplies,” “Specialty baking,” “Pet.” Items you rarely access go highest; items accessed weekly go lowest within this zone. Candles, pet food and small decorations stay high or in closed bins, out of children’s reach.
Zone Layout by Pantry Type
Where each zone physically lives depends on your pantry’s configuration:
| Pantry Type | Prime Real Estate | Best for Zones 1-2 | Best for Zones 3/5 | Best for Zone 4/6 |
|---|---|---|---|---|
| Walk-in pantry | Shelves at eye level on entry wall | Eye-level shelves, both sides | Lower shelves, deeper shelves | Upper shelves, back wall |
| Reach-in pantry (single door) | Middle shelves | Middle 2 shelves | Bottom shelf (Zone 3), shelf above it (Zone 5), door back | Top shelf |
| Cabinet pantry (multiple cabinets) | Most-used cabinet | Primary cabinet, mid-shelves | Secondary cabinet or lower shelves | Least-used cabinet |
| Open shelving | Eye-level shelf | Center shelves | Lowest shelf | Highest shelf, or a basket on any shelf |
Pantry Container Basics: What to Decant and What to Skip
Zones come first, containers second. Once your zones are mapped, the right containers make them easy to see and maintain. The wrong ones waste money and space.
The Container Philosophy
You do not need to decant everything. Decanting is optional. Moving every item into a matching container takes time, and it throws away the cooking instructions and nutrition info. It also adds washing and refilling to your week, and that habit is usually the first to slip.
Here’s what actually deserves a container:
- Items you buy in bulk and need to portion: A 10-pound bag of rice goes into a container. A single box of pasta does not.
- Items in flimsy packaging that doesn’t reseal: Bags of flour, sugar, chips that come in bags without zippers, loose tea.
- Items you want to see at a glance: When flour, sugar, oats, and rice are in clear containers, you know your inventory without opening anything.
- Items in the snack zone: Open bins and easy-open containers suit small hands. They’re easier to open and close than crinkly bags and boxes.
Leave everything else in its original packaging and organize it with bins and baskets. A basket labeled “pasta” can hold three boxes of different shapes. That beats three separate containers you have to wash, refill and label.
Budget Pantry Containers: Three Tiers from $45
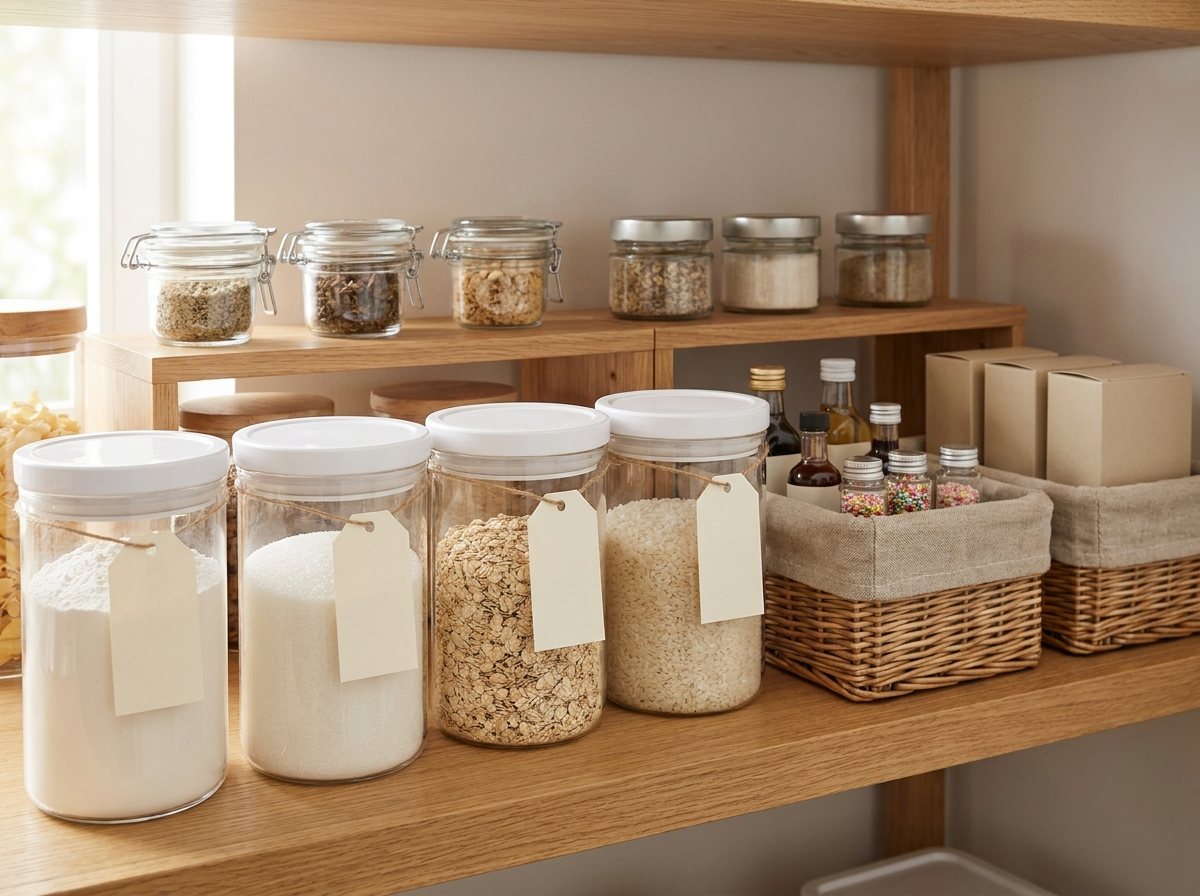
Budget Tier: About $45-70
You can build a working pantry system for about $45-70. This tier uses bins, baskets and a few key containers, not a complete matching set.
| Item | Approx. Cost | Where to Get It | Use |
|---|---|---|---|
| Clear stackable bins, set of 6 | $10-15 | Dollar Tree, Target | Zone grouping for snacks, breakfast items, baking |
| Large clear canisters, set of 4 | $12-18 | Walmart, Amazon | Flour, sugar, rice, oats |
| Turntable/lazy Susan, 2-pack | $8-12 | Amazon, HomeGoods | Oils, sauces, spices |
| Shelf labels (chalkboard or adhesive) | $5-8 | Amazon, craft store | Zone and bin labeling |
| Can organizer rack | $8-12 | Amazon, Target | Canned goods zone |
| Basket or bin for snack zone | $3-5 | Dollar Tree | Kid-accessible snack station |
Total: approximately $46-70. This gives you the bones of a functional zone system. Everything is grouped, labeled, and accessible. It won’t win a magazine photoshoot, but it will work — and working beats beautiful every single time.
For more ideas on making budget organization look polished, check out how to make cheap organization look expensive.
Mid-Range Tier: About $100-160
This tier adds aesthetic consistency and a few quality-of-life upgrades.
| Item | Approx. Cost | Where to Get It | Use |
|---|---|---|---|
| Matching canister set, 8-10 pieces | $30-50 | Amazon, The Container Store, IKEA | All bulk dry goods |
| Woven or fabric-lined baskets, set of 4-6 | $20-30 | Target (Brightroom), HomeGoods | Zone grouping with visual warmth |
| Shelf risers, set of 2-3 | $10-15 | Amazon | Doubling visible surface area |
| Label maker (rechargeable) | $15-25 | Amazon (DYMO, Brother P-Touch) | Clean, consistent labeling |
| Door-back organizer rack | $15-25 | Amazon, Target | Spices, small items, foil/wrap |
| Clear drawer-style bins for deep shelves | $10-15 | The Container Store, Amazon | Pull-out access for deep pantries |
Total: approximately $100-160. This tier creates a pantry that looks intentional and cohesive. The matching containers and coordinated baskets give it that “Neutrals and Nooks” feel — calm, clean, not trying too hard.
Investment Tier: About $155-285
For the family that wants a pantry transformation — the kind where you open the doors and exhale.
| Item | Approx. Cost | Where to Get It | Use |
|---|---|---|---|
| Premium canister system (OXO POP, mDesign) | $50-100 | Amazon, The Container Store | Complete dry goods storage with airtight seals |
| Custom-fit shelf inserts or adjustable shelving | $30-50 | The Container Store, hardware store | Maximized vertical space |
| Coordinated basket set (seagrass, rattan, or linen) | $30-50 | Target, West Elm, Pottery Barn | Beautiful zone containers |
| Spice drawer insert or mounted rack system | $20-40 | Amazon, IKEA | Complete spice visibility |
| LED puck lights (USB, hardwired, or screw-secured battery compartment) | $10-20 | Amazon | Illuminating dark shelves |
| Professional-style labels (clear with white text, or embossed) | $15-25 | Etsy, Amazon | The finishing touch |
Total: approximately $155-285. This is the full transformation. But I want to be clear: a $50 pantry with good zones will outperform a $300 pantry with no system. Containers are the finish line, not the starting line.
To stretch your budget further, see these dollar store organization finds. Bins, baskets and turntables hold up especially well in a pantry.
Pantry Labels: How to Label Shelves, Bins and Containers
Good to knowOur Pantry Label Set printable gives you ready-made zone and bin labels to use with this system.
Labels do two jobs in a family pantry. They tell everyone where things go, which curbs the “shove it wherever” habit. They also tell everyone what things are. White powder in a clear jar could be flour, sugar, powdered sugar, baking soda or cornstarch.
Labeling best practices:
- Label the shelf or bin, not just the container. When a container is out for refilling, the shelf label still shows what belongs there. That’s what keeps the system running on busy weeks.
- Use words, not just icons. Words are clearer than pictures for anyone who reads. If you have pre-readers, put a simple picture next to the word.
- Be specific enough to be useful, broad enough to be flexible. “Pasta” beats “Penne Rigate,” because it still works when you switch shapes. “Soft Snacks” beats “Fruit Pouches,” because it still works when the rotation changes.
- Choose a labeling method you’ll maintain. A label maker makes clean, consistent labels you can reprint in seconds. Chalkboard tags look lovely, but they need steady handwriting and a working chalk pen. Clear labels with white text look modern. Pick the one you’ll actually redo when a label peels off or a zone changes.
Kid-Safe Pantry Snack Zone by Age
Safety firstWith a child under 4 in the home, keep choking-hazard foods on an adult-controlled high shelf, never in the low kid zone. That means whole nuts, popcorn, trail mix, hard pretzels and chips, whole grapes, hard or chewy dried fruit and hard candy. Offer them only with supervision, and keep a grown-up within sight whenever young children eat. Keep extracts, candles, pet food, small decorations and button-battery lights out of children’s reach too. Anchor any freestanding shelving to the wall, with heavy items on the bottom shelves.
Our guide to creating a toddler-friendly kitchen rests on one idea: children often do better when they can reach what they’re allowed to use. The pantry works the same way. A kid zone isn’t unlimited snack access. It’s a small, defined area of independence inside a structured system.
| Keep high (with a child under 4) | Fine on the low shelf |
|---|---|
| Whole nuts, popcorn, trail mix | Soft crackers and puffs |
| Hard pretzels and chips | Sealed fruit pouches |
| Whole grapes, hard or chewy dried fruit | Soft, nut-free bars |
| Hard candy | Lunchbox extras (napkins, reusable containers) |
The Low-Shelf Snack Station
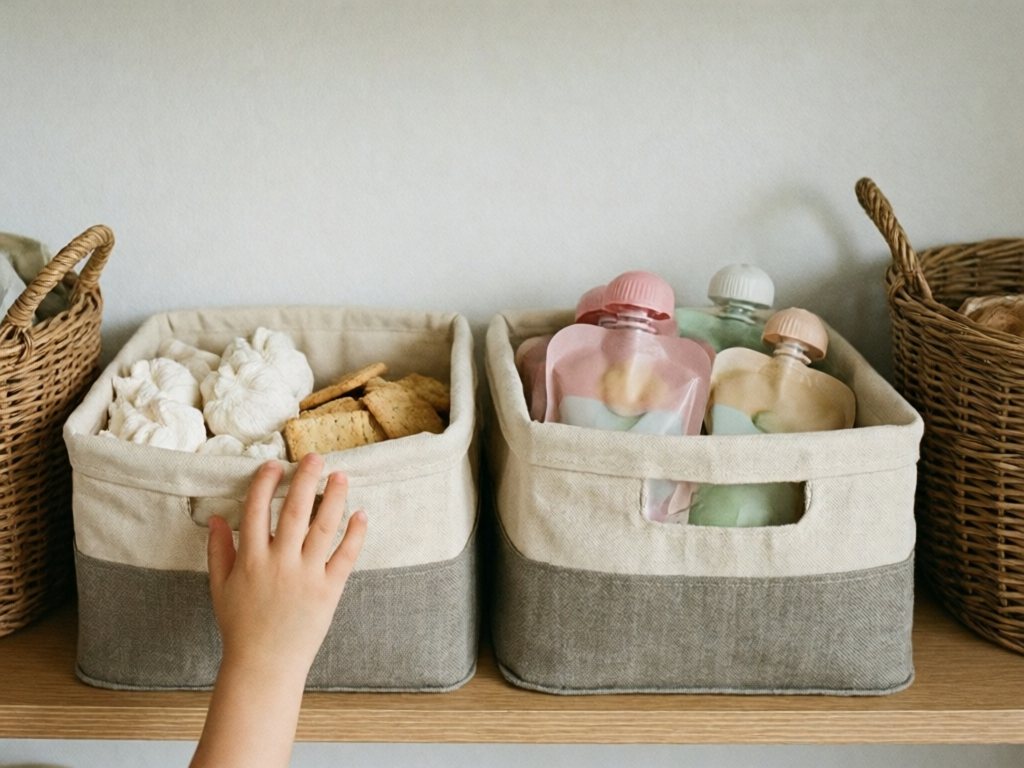
Dedicate the lowest shelf of your pantry to kid-accessible items. This is their territory. Everything here is pre-approved, sensibly portioned and easy to open.
What the kid zone includes:
- Snack bins (2-3): One for crackers and puffs, one for fruit pouches and soft bars, one for lunchbox extras. Everything in them is soft, nut-free and pre-approved. Use open-top bins that small hands can reach into without pulling the whole bin off the shelf.
- Lunchbox supplies: If your kids pack lunch, a bin with reusable containers and napkins at their height lets them help pack their own lunch. With a child under 3 in the home, keep plastic bags on an adult shelf.
- Water bottles and snack containers: Their own water bottles, stored where they can grab them independently.
What the kid zone does NOT include:
- Treats and dessert items (those stay in a separate, parent-controlled location)
- Items that need cooking or adult prep (dry pasta, flour, baking mixes; flour and dry mixes should never be eaten raw)
- Choking hazards for children under 4 (see the table above)
Setting Snack Boundaries Without Being the Snack Police
After school, kids go to their zone, choose a snack and close the bin. Before packing lunch, they grab from their lunch bin. The zone works best with clear, simple rules:
- You can have one snack from your zone between meals. This prevents all-day grazing while honoring their autonomy.
- When a bin is empty, tell a grown-up. This teaches inventory awareness and prevents the “there’s nothing to eat” meltdown.
- Close the bin, close the door. The maintenance habit starts early.
- If you want something NOT in your zone, ask. This preserves your ability to manage treats and special items without locking the whole pantry.
Age-Based Access Levels
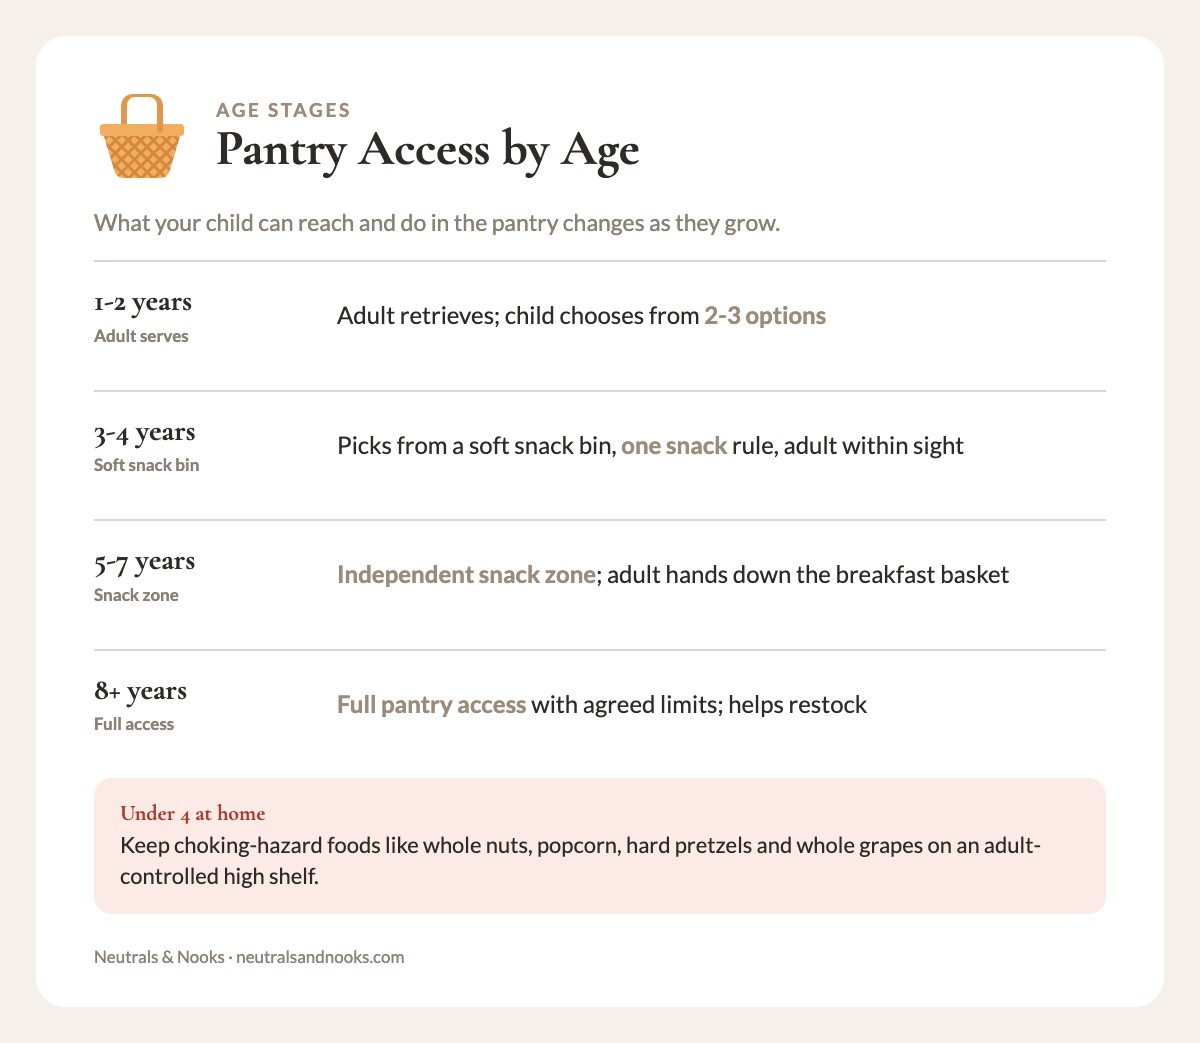
| Age | Access Level | Zone Setup |
|---|---|---|
| 1-2 years | Adult retrieves, child chooses from 2-3 options | Adult retrieves and serves. Keep only soft, safely sized foods on the low shelf, or nothing edible there yet; hazard foods stay out of reach |
| 3-4 years | Independent choice from a bin of soft, age-appropriate snacks with a one-snack rule; a grown-up within sight while they eat | Lowest shelf, 3 bins (crackers and puffs, fruit pouches and soft bars, lunchbox extras), in easy-open containers |
| 5-7 years | Independent snack zone + can help with breakfast zone | Bottom shelf snack bins. An adult hands the pull-out breakfast basket down |
| 8+ years | Full pantry access for meals and snacks with agreed limits | All shelves reachable, participates in meal prep retrieval, helps restock |
Safety firstWith a baby or toddler in the home, add a childproof latch to the pantry door if the low shelf is reachable. Keep plastic bags, cleaning items, extracts and pet food out of reach.
TipInvolve your kids in the weekly snack restock. Let them choose which items fill their bins from a parent-approved list. Ownership of the selection process can help reduce complaints about “there’s nothing good.”
The Maintenance System That Prevents Backslide
The clean-out is satisfying and the zones are logical. Without a routine, though, your pantry will drift back within a month or two. My own pantry slid back within six weeks the first time I skipped the reset. The maintenance is the system.
You don’t need a big periodic overhaul if you build these habits into your weekly and monthly rhythms.
| Routine | Time | When | Top tasks |
|---|---|---|---|
| Weekly reset | 5 min | Grocery day, before you shop | Return displaced items, pull expired items from one zone, restock snacks |
| Monthly check | 20 min | First of the month | Check zones for drift, review containers, review the kid zone |
| Seasonal deep-clean | 45-60 min | 4 times a year | Full wipe-down, check all dates, reassess zones |
The 5-Minute Weekly Reset (Pick a Day, Any Day)
Choose one day a week. Grocery day works well if you do the reset just before you shop. Set a timer for five minutes. You’re not reorganizing; you’re maintaining.
Weekly reset checklist:
- Return any displaced items to their zones (things that got put back wrong)
- Pull expired items (check one zone per week on rotation; don’t check everything every week)
- Restock the kid snack zone from backup supplies
- Take a quick inventory photo for your grocery list
That’s it. Five minutes. The goal is preventing accumulation, not performing a deep clean. When you do this weekly, the pantry never gets bad enough to need a full reorganization. It’s the same idea behind the 10-minute tidy approach to decluttering: small, steady effort beats the occasional marathon session.
The 20-Minute Monthly Check (First of the Month)
Once a month, go a level deeper. This takes about 20 minutes and addresses the slow drift that weekly resets can’t catch.
Monthly check tasks:
- Check all zones: are items still in the right zones, or has migration happened?
- Assess container condition: any cracked lids, stained bins, peeling labels?
- Review the kid zone: are the snack options still age-appropriate? Has your child outgrown any current setup?
- Check backup stock levels: do you need to restock bulk items?
- Wipe all shelf surfaces and crumbs (pull bins forward, wipe behind)
- Flatten and recycle spare boxes and packaging
- Adjust any shelf heights that aren’t working
- Update your inventory list or grocery app if you use one
The Seasonal Deep-Clean (4 Times a Year)
Quarterly, align a pantry deep-clean with the seasons. It pairs naturally with a broader spring cleaning routine or a seasonal reset.
Seasonal deep-clean tasks:
- Full shelf wipe-down (remove all items, clean shelves, replace)
- Check all expiration dates across the entire pantry
- Rotate seasonal items (summer drink mixes forward in May, baking supplies forward in November)
- Reassess zones — has your family’s eating pattern shifted? New dietary needs? A child who aged into a new access level?
- Replace any worn containers, bins, or labels
- Donate unexpired items you know you won’t use
Time investment: 45 to 60 minutes, four times a year. That’s roughly three to four hours annually for the deep cleans, on top of the quick weekly and monthly routines.
Getting the Family on Board
A pantry system only works if everyone uses it. One person often ends up doing most of the upkeep, so build the system so anyone can follow it.
- Labels do the training for you. A clearly labeled shelf doesn’t require you to explain where the crackers go. The label says it. Done.
- Make the right thing the easy thing. Put pasta on the shelf where people would naturally reach for it, near the sauces at a convenient height.
- Give your partner ownership of a zone. If one person manages the dinner staples zone and the other manages snacks and breakfast, each person has investment in their area.
- Kids maintain the kid zone. Part of having snack independence is having snack responsibility. A three-year-old can close a bin and push it back on the shelf. Expect it.
Common Pantry Organization Mistakes Families Make
These are the mistakes that come up most often when families set up a pantry.
Mistake 1: Buying Containers Before Planning Zones
The container aisle at Target is seductive. Those matching sets, those clean lines, that promise of order. Without measurements and a zone plan, though, you end up with the wrong size, shape or quantity. Measure first. Plan second. Buy third.
Mistake 2: Over-Decanting
Cereal in its own box is fine. Decant only what the container guide above says benefits from it.
Mistake 3: Ignoring the Door
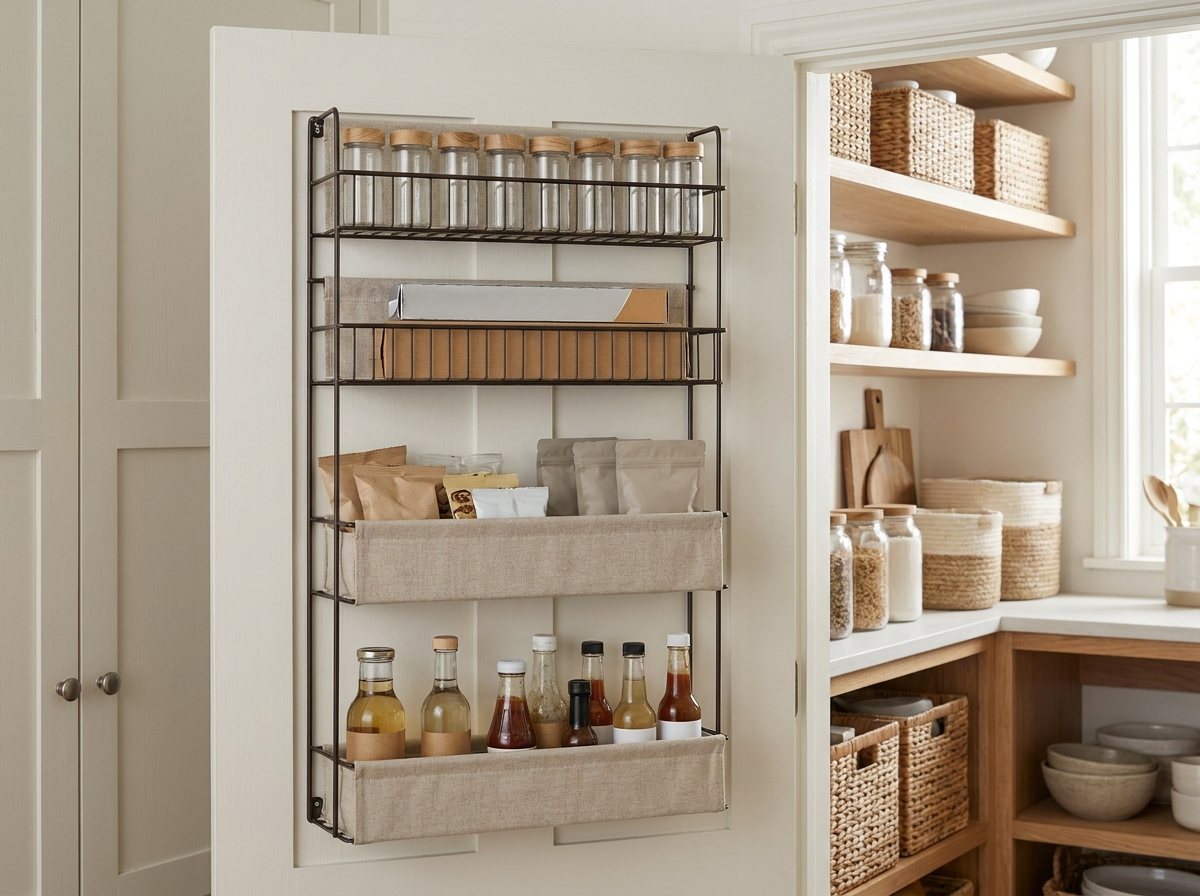
The back of your pantry door is prime real estate that most families waste entirely. A door-mounted organizer can hold spices, foil and wrap, small snack packets, or frequently used condiments. It’s essentially a free extra shelf.
Mistake 4: Putting Kids’ Stuff on High Shelves
If your child’s snacks are on a shelf they can’t reach, you’ve guaranteed two things. They’ll ask you for snacks constantly, and they’ll eventually try to climb the shelves. Neither outcome is good. Kid-safe items go low. Always. Choking-hazard foods and anything unsafe for young children stay high.
Mistake 5: No Maintenance Routine
Skip the weekly reset and even a beautiful pantry drifts within weeks. Start the routine the same week you organize.
Mistake 6: Organizing for the Pantry You Wish You Had
A four-shelf reach-in can’t be organized like a walk-in. Baking supplies in a bin on the top shelf are fine. Function comes first; the look comes from consistency and cleanliness.
Mistake 7: Overfilling Bins and Shelves
A bin stuffed to the brim is hard for small hands to use and easy to tip. Leave a little room on every shelf so items go back without a fight.
Mistake 8: Making It Too Precious
If your family is afraid to touch the pantry, the system is too rigid. Kids should feel free to grab from their zone, and adults should be able to toss groceries into the right general area. The system’s job is to make “close enough” good enough between resets.
Tips by Pantry Type
The zone table above shows where each zone lives. These tips cover what each layout needs on top of that.
- Walk-in: Give each wall a zone purpose, with daily zones near the entry and backup stock at the back. Add a motion-activated LED strip if it’s dark. Keep any step stool adult-only, heavy items low, and freestanding shelving anchored to the wall.
- Reach-in: Use the door back for a mounted organizer and give the middle two shelves to daily zones. Shelf risers and pull-out bins keep deep shelves from swallowing food. Overflow can live in a nearby kitchen cabinet.
- Cabinet: Make one cabinet the primary pantry and another the secondary. Use a low cabinet or drawer near the dining area as the kid zone. Turntables help in corners. A slim freestanding unit, such as an IKEA KALLAX, can add space. Anchor it to the wall and keep heavy items on the bottom shelves.
If you’re working with a small kitchen overall, our guide to small kitchen organization with kids covers the rest of the room.
Connect Your Pantry to Meal Planning and Grocery Lists
Let your zones mirror your meal plan. When you pick Monday’s dinner and check the Dinner Staples zone, you see what you have and what you need. No more buying a third bottle of soy sauce.
Photograph each zone during your weekly reset and use the photos as your grocery list. A family command center is a good home for that list, the meal plan and the pantry inventory.
The same zone thinking works beyond the kitchen. See our guides to mudroom cubbies for multiple kids and garage organization for families.
Neutral Nina
Neutral Nina is an interior design enthusiast and mom of three who proves that beautiful, organized spaces and family life can coexist. She shares practical strategies for creating calm, functional homes that work for kids and grown-ups alike.
Frequently Asked Questions
How often should I completely reorganize my pantry?
Almost never, if you keep up the weekly reset and monthly check. The seasonal deep-clean handles drift. A full redo is only worth it after a big change in family size, diet or shelving, or a move. More than one a year means the routine needs attention.
What’s the best way to handle a Costco or bulk-buy haul?
Separate “active stock” from “backup stock.” Put the active amount into your zones right away, refilling the snack bins and baking canisters. The rest goes to Zone 6, a high shelf, or a basement or garage rack. Active zones stay tidy, and backup stock waits elsewhere.
Should I use airtight containers for everything?
No. Use airtight containers for flour, sugar, rice and opened dry goods, which go stale or attract pests. Skip them for canned goods, sealed packages, oils and vinegars, and keep cereal in its box with a clip.
How do I deal with a partner who won’t follow the system?
Make the system easier to follow than to ignore. Label everything, and use bins big enough that items don’t need perfect placement. Then pick your battles: granola bars in the breakfast zone instead of the snack zone means the system is working well enough.
What about pantry organization with food allergies in the family?
Food allergies make zoning even more important. Store allergen-containing foods in sealed containers on their own shelf or in their own bin. That limits cross-contact from crumbs, shared scoops and opened packages. Keep only allergen-free snacks in the kid zone.
Bright labels help everyone spot allergen bins, but they don’t replace reading the ingredient label every time you buy or serve something. Follow your child’s allergist’s plan, keep any prescribed emergency medication accessible to adults, and talk with your allergist if your family manages serious allergies. Safety overrides any design consideration.
My pantry is dark and deep. How do I organize the back of shelves?
Use clear pull-out bins and turntables to bring back items forward, and shelf risers so nothing hides behind something else.
For light, add USB or hardwired LED puck lights or a motion-activated strip under the shelf above. If you choose battery lights, pick screw-secured battery compartments and keep button batteries out of children’s reach. If a battery may have been swallowed, seek emergency care immediately.
How do I get my kids to actually maintain their pantry zone?
After a snack, kids close the bin and push it back before they go play. Kids 3 and up can do this, and older kids can help restock. A four-year-old closing a bin is a win.
Your Pantry Organization Plan: Where to Start This Weekend
The goal is not a perfect pantry. It’s a system that’s easy to maintain and hard to break, brought back to baseline by a five-minute weekly reset. Start this weekend with the clean-out, and map your zones on paper before you buy a single container.