Car Organization for the School Carpool Pickup Line
Learn to create an efficient car organization system for school carpool pickups, focusing on safety and quick handoffs. You'll discover how to set up four car zones and manage items like backpacks, snacks, and permission slips for children aged 3-8.
- Prioritize safety: Ensure children load/unload curb side, are properly buckled, and bags are secured.
- Implement four car zones: Designate zones for handoffs, kid-reach items, backpacks, and reserve supplies.
- Use a strapped handoff caddy: Organize school papers and small items for quick transfers once you're parked.
- Manage tasks while parked: Handle papers, phones, and snacks only when the car is stopped and out of the pickup line.
- Keep bags contained: Store backpacks in the trunk or a strapped bin, never loose or under the driver's seat.
This post contains affiliate links. As an Amazon Associate I earn from qualifying purchases.
In a lot of pickup lines, a water bottle rolls, a signed permission slip slides out of sight beside the console, and an unzipped backpack sheds a folder and a mitten. The car usually isn’t messy. It just has no system for the ninety-second handoff, and that’s the part I want to help you fix.
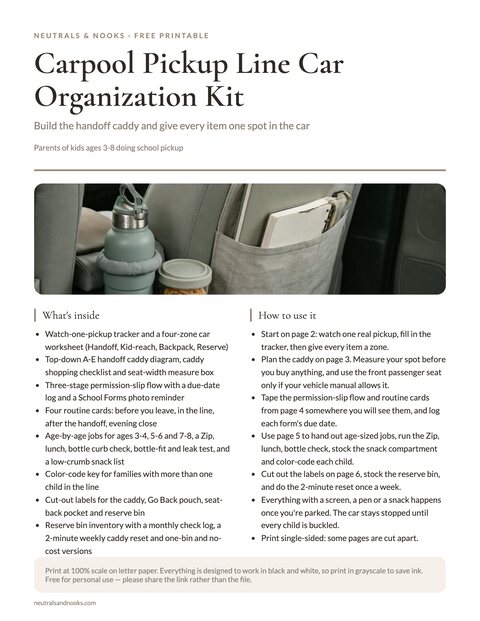
Free printable · 6 pages
Carpool Pickup Line Car Organization Kit
A watch-one-pickup tracker, four-zone car worksheet, handoff caddy planner, permission-slip flow and due-date log, age-by-age jobs, color-code key, snack and bottle checklists, cut-out caddy labels, a reserve bin inventory and four routine cards.
Free. Your download link appears right here. You'll also join the Monthly Home Reset. Unsubscribe anytime. Privacy
This guide covers pickup safety, four car zones, a strapped-in handoff caddy, and systems for backpacks, snacks and permission slips for ages 3 to 8. Where your school lets you step out, the curb part is short: child in, bag in its bin, everyone buckled. In a stay-seated line with a harnessed child, park and walk up instead. Everything else waits until you’re parked.
For general car tidiness, see our family car organization guide.
In this article (14 sections)
- Carpool Line Car Safety Rules
- The Four Zones of a Pickup-Ready Car
- Handoff Caddy: Layout and Setup for Pickup Paper
- Permission Slips: Never Lose One Again
- Backpacks: Where They Go and Why It Matters
- Water Bottles, Snacks, and the Kid-Reach Zone
- Age-by-Age: What Each Child Needs (Ages 3 to 8)
- Multiple Kids, One Pickup Line
- The Reserve Zone: Trunk Basics
- Daily Pickup Routine Checklist
- Common Mistakes (and Simple Fixes)
- A Budget-Friendly and Minimal Version
- Frequently Asked Questions
- Where to Start This Week
Carpool Line Car Safety Rules
Safety first
Seating and buckling
- Children load and unload on the curb side only.
- All children under 13 ride in the back seat, per AAP and NHTSA guidance.
- The car stays stopped until every child is buckled, and an adult buckles every harnessed child (in a stay-seated line, park and walk up).
- Secure the car every time you leave the driver’s seat, at the curb or at a parked stop. Put it in park, set the parking brake, turn the engine off and take the key or fob with you.
- A child who has outgrown the harness and rides in a booster may buckle themselves while the car is stopped. An adult always checks the belt fit by hand: at the curb if you can step out, or at the first legal stop just outside the line. If a child can’t buckle correctly alone, buckle them yourself once parked.
- Use a harnessed car seat until your child reaches the seat’s height or weight limit for the harness, then a belt-positioning booster until the adult belt fits: lap belt low across the upper thighs, shoulder belt across the chest and shoulder. Follow your car seat manual, your local law and current AAP and NHTSA guidance.
Bags and loose items
- Bags never ride loose. For the drive, the backpack goes in the cargo area or trunk. At the curb it can wait in a holding bin held by an empty seat’s belt, away from children’s feet and never attached to a car seat.
- Nothing loose goes under the driver’s seat, and a child never unbuckles to reach anything.
Parked-only tasks
- Paper, phones and snacks wait until you’re parked out of the line. Kids eat only while the car is parked and an adult is watching.
- Never leave a child alone in a parked car, even briefly. Take them with you, or do the paper and bag tasks at home.
The Four Zones of a Pickup-Ready Car
The pickup line is a transfer point, where things move both ways under time pressure. You don’t need more storage. You need a landing zone for each kind of item, placed where hands naturally reach.
A simple way to run the car is four zones. Each has one job.
| Zone | Location | Job | What lives here |
|---|---|---|---|
| Handoff zone | Rear floor at an empty seat, or the center console | Hold school paper and small items once you’re parked | Handoff caddy, permission-slip folder |
| Kid-reach zone | Seat-back and door pocket on child’s side | Items your child can reach while buckled, without leaning or unbuckling | Water bottle, one quiet toy (snacks come from the caddy, parked only) |
| Backpack zone | Cargo area or trunk for the drive; a strapped holding bin at an unoccupied rear seat for the curb | Keep the bag contained and out of the footwell your child’s feet use | Backpack, lunchbox |
| Reserve zone | Trunk or cargo area (never under the driver’s seat) | Things you need occasionally | Spare clothes, wipes, umbrella, emergency kit |
Before You Buy Anything, Watch One Pickup
Spend one pickup just watching. Notice where the backpack goes in the first three seconds, where the water bottle ends up, and who is holding the paper.
In most cars the backpack lands on the floor, the bottle lands wherever, and the paperwork lands in the front passenger seat or the driver’s lap. That’s your clue: paper needs one catch spot. The caddy below makes it land there on purpose.
Handoff Caddy: Layout and Setup for Pickup Paper
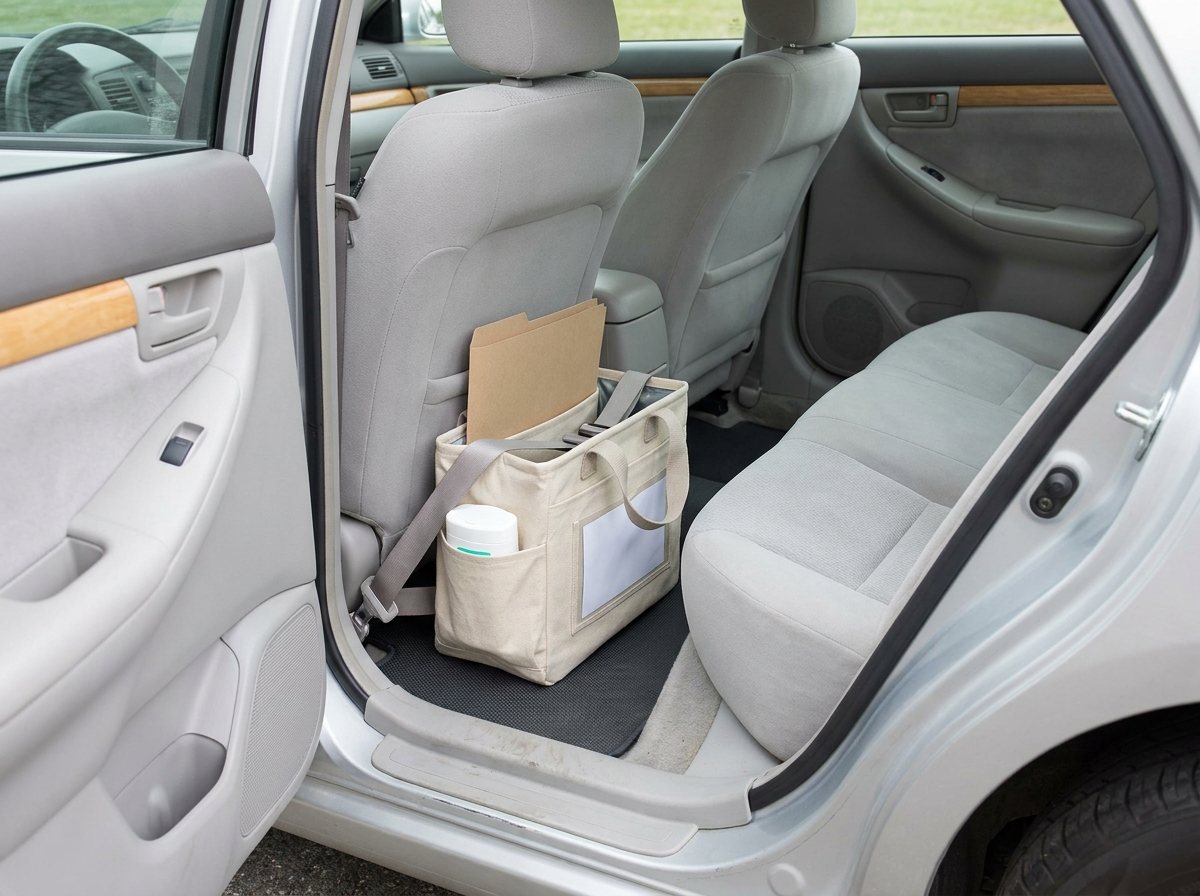
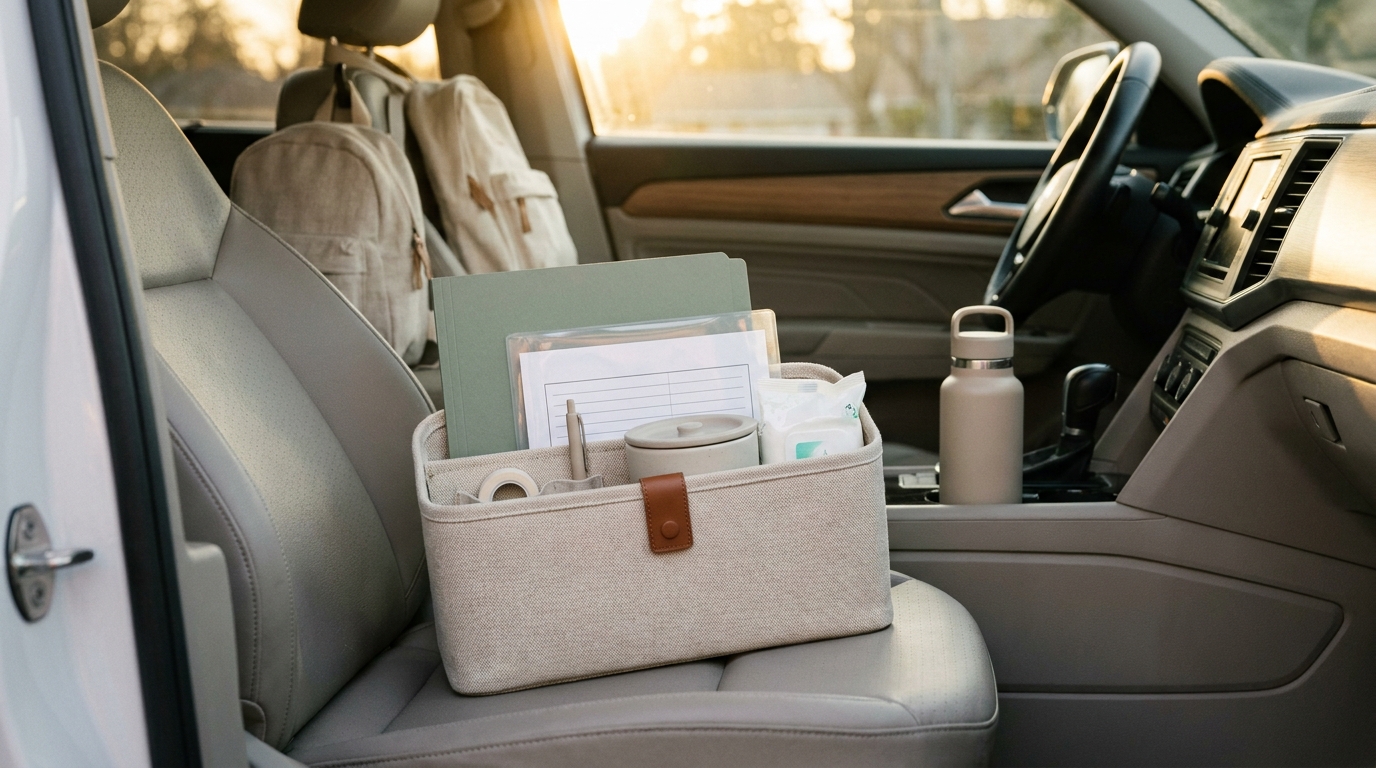
The handoff caddy is a single, structured container with a defined compartment for each thing you manage once you’re parked: paper, tools, snacks and trash.
Default spot: the rear floor at an empty seating position, or the center console if it fits. Set it on a non-slip mat and hold it with a strap, or thread the empty seat’s belt through the handles.
You only handle the caddy while parked, so it doesn’t need to sit within arm’s reach. Keep it off the front passenger seat.
To be honest, if you only do one short pickup a week, a caddy is overkill. One folder zipped inside the backpack will do.
What to Look For in a Caddy
You want something that:
- Stays upright. Choose a soft-sided shape with a flexible base that holds its form. Floppy totes collapse and spill.
- Has at least three compartments. More than five gets fussy.
- Fits its spot. Measure the floor space or console before buying. A caddy about 12 to 14 inches wide usually sits on the rear floor without sliding. A console may need something narrower.
- Stays put. A non-slip mat underneath stops sliding on turns. A strap, or a seatbelt through the handles, keeps the caddy from flying in a sudden stop. Use both.
- Wipes clean. Canvas with a coated interior, felt with a wipeable liner, or simple silicone all work. Avoid anything you can’t spot-clean, because juice happens.
Safety firstKeep the caddy soft-sided, light and strapped in. Nothing hard or heavy rides loose in the cabin. Stow pens and clips in a closed pouch.
For a neutral look that suits the rest of your home, oatmeal canvas, warm gray felt, or natural cork all read as calm rather than cluttered. A caddy you like looking at is a caddy you’ll keep using.
The Compartment Layout
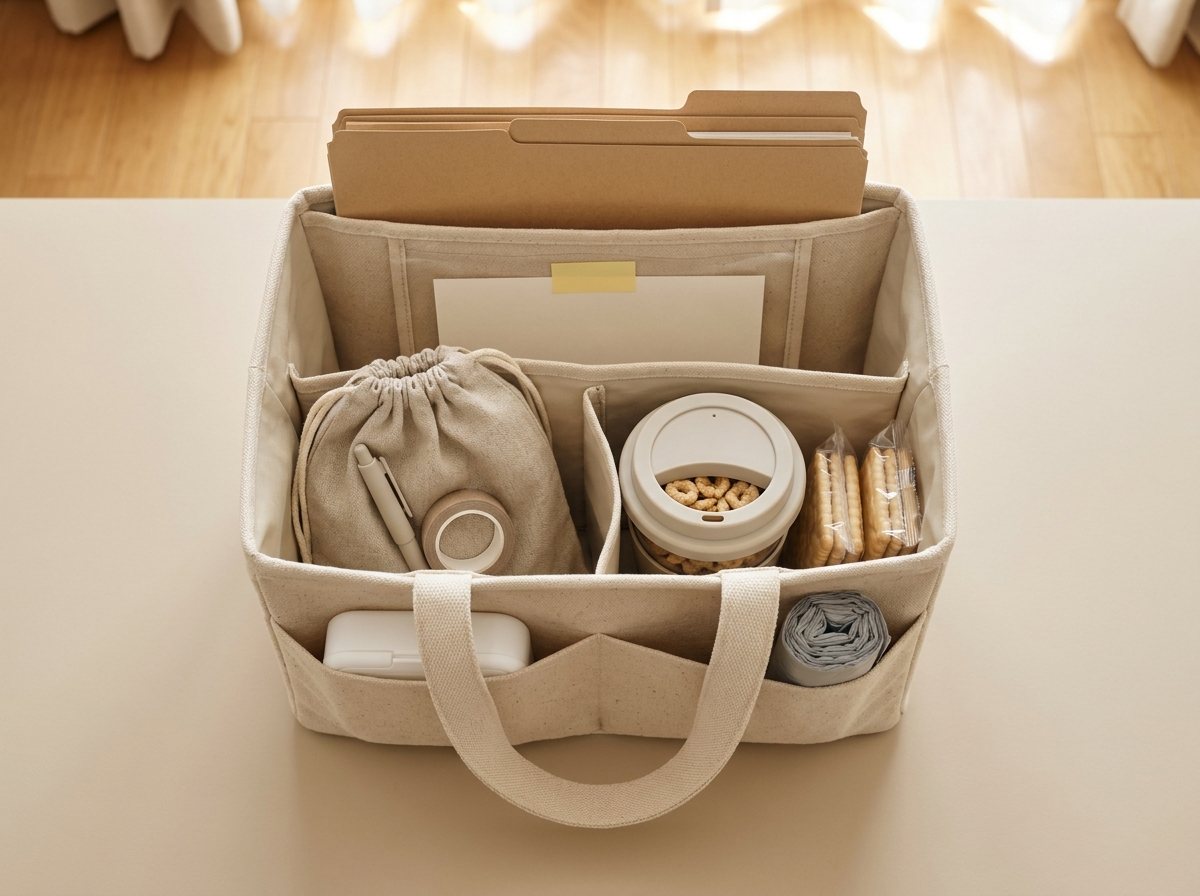
Here’s a suggested layout with five compartments.
| Compartment | What goes in | Job |
|---|---|---|
| A. Today Folder (tall back pocket) | Folders, flyers, graded work | Catch all incoming paper |
| B. Sign & Send (clear sleeve) | Forms needing a signature, payment or reply | Keep deadlines visible |
| C. Tools | Pen, tape, sticky notes, binder clip | Fix and mark paper |
| D. Snack reserve | Two or three shelf-stable snacks | Snacks you hand out once parked |
| E. Trash & wipes (open front pocket) | Wipes, lined mini trash bag | Contain mess as it happens |
A. Today Folder. This is where paper arrives. A folder, flyer, or graded sheet goes here without any sorting. One motion, one destination. You sort at home.
B. Sign & Send. Anything that needs your signature or action, such as a permission slip or a form with a deadline, goes in the clear sleeve so you can see it. Visible beats buried. A bright tab or colored sleeve helps you spot it at home or once you’re parked. Don’t read or sign paperwork while the car is moving, even at a red light.
C. Tools. A capped pen, a small roll of washi or painter’s tape, a pad of sticky notes, and a binder clip, kept in a closed pouch. The pen lets you sign a form once you’re parked. The sticky note lets you jot “return by Thurs” on a flyer. The tape fixes a ripped slip, and the clip holds a stack together.
D. Snack reserve. Two or three shelf-stable snacks, such as dry cereal or crackers, restocked weekly. This compartment is for you to dispense once the car is parked, not for kids to rummage through. (More on snacks below.)
E. Trash and wipes. An open front pocket with a small container of wipes and a lined mini-bag for trash. Wrappers, peels, and used wipes go in right away so nothing ends up under a seat.
How the Handoff Works, Step by Step
Steps 1 to 3 happen at the curb. The rest wait until you’re parked.
- Pull forward and stop fully. Your child comes to the curb-side rear door.
- Bag in the bin. Your child sets the zipped backpack in the strapped holding bin on the way in. In a stay-seated line, this is the only bag move at the curb.
- Buckle before you move.
- Step-out line: secure the car, then buckle the harness or check the booster belt by hand.
- Stay-seated line: a booster rider buckles while you watch, and you hand-check at step 5. A harnessed child means park and walk up (skip steps 1-3).
- Leave the paper alone. Folders and slips stay zipped in the backpack while you’re in the line.
- Pull out and park. Stop at the first legal spot just outside the line, in a lot or on a side street. Secure the car, then check every buckle and belt fit by hand.
- Get the folder. From the open rear door, take the folder out of the backpack while your child stays buckled.
- Move the backpack. Put it in the cargo area or trunk for the drive.
- Take, drop. Paper goes into A (Today Folder) without sorting. Slips needing action go to B. Sign them now or at home.
- Drive. The water bottle is within reach, any snack was eaten while parked, and no one has been rushed.
The Weekly Caddy Reset (Two Minutes)
Once a week, ideally Friday or Sunday, empty compartment A and sort what’s inside:
- Keep, scan, or file the artwork and graded work.
- Move anything with a date to your calendar or command center.
- Toss flyers that are expired.
- Return signed slips to the backpack for the next school day.
If your household has a central hub where dates and forms live, this is where the caddy hands off to it. The family command center ideas guide shows how to set up a wall or counter spot so the caddy contents have a clear next stop.
Permission Slips: Never Lose One Again
A permission slip with a deadline is the highest-stakes object in the car, and the easiest to lose.
The Three-Stage Slip Flow
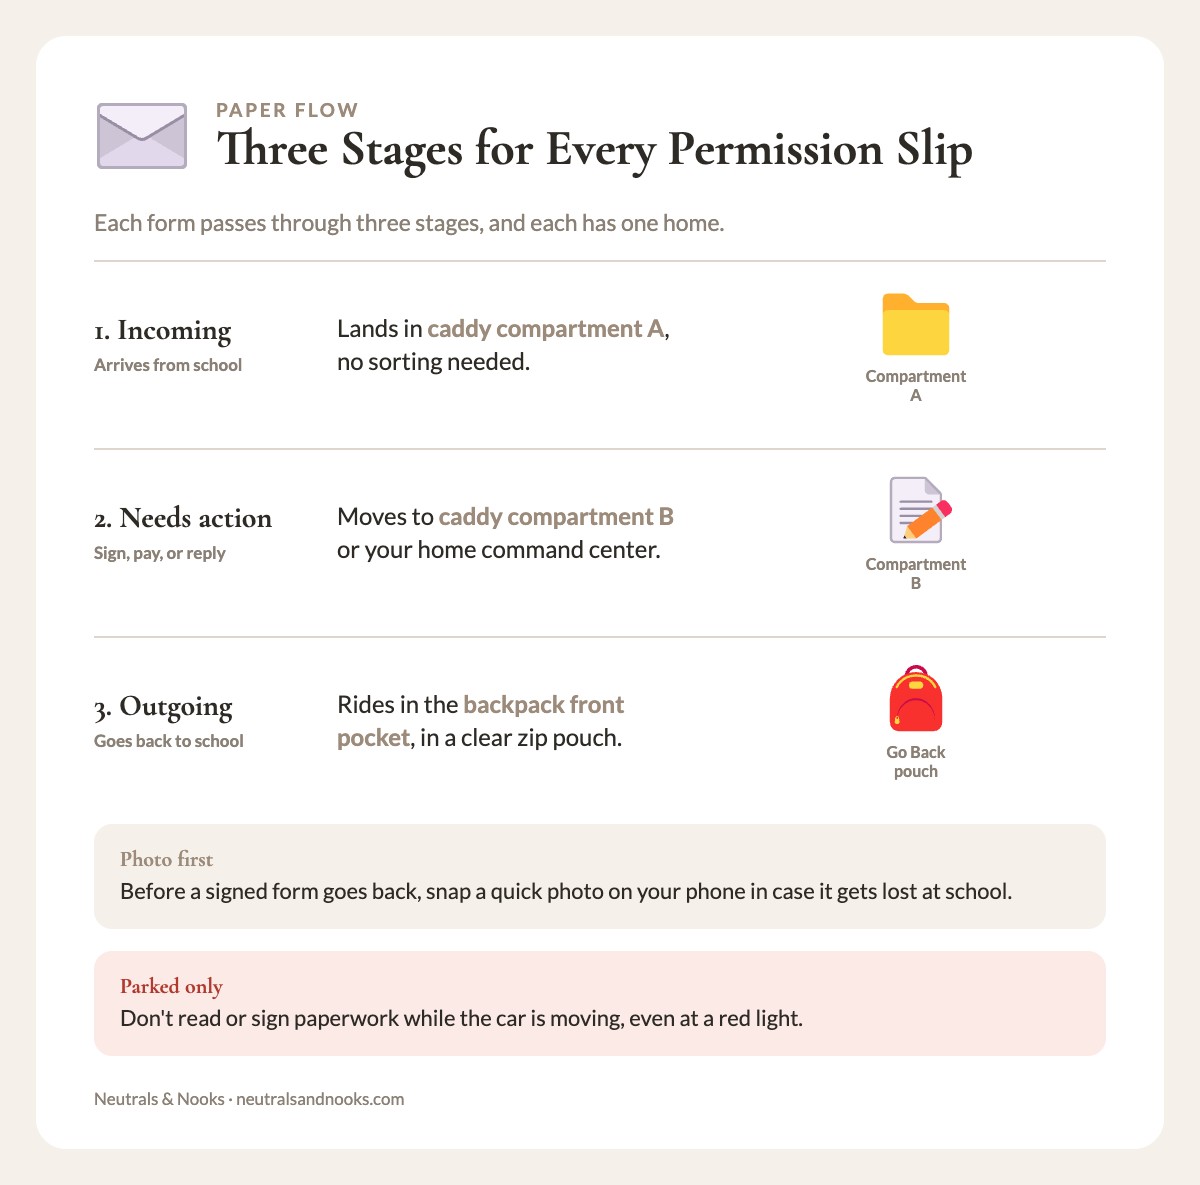
Every form passes through three stages, and each one has a home.
| Stage | Where it lives | Action |
|---|---|---|
| Incoming | Caddy compartment A | Arrives from school |
| Needs action | Caddy compartment B or home command center | Sign, pay, or reply |
| Outgoing | Backpack front pocket (a clear zip pouch) | Goes back to school |
A clear zip pouch in the front pocket of the backpack does most of the work. Make it the “Go Back” pouch, and teach your child that anything in the pouch goes to the teacher. For ages 5 to 8, this becomes their own responsibility. For ages 3 to 4, you tuck the form in yourself and say “it’s in the Go Back pouch.”
Date It at Your First Parked Stop
- Park. Use your first parked stop outside the line.
- Date the form. Grab the sticky note and write the due date in large numbers on the form itself.
- Add it to your calendar. Enter the date before you pull away.
- Drive. Phone down, paper back in the caddy.
If there’s nowhere to park near school, do this in your driveway before you go inside. Once you’re through the door, the day takes over.
Photograph Before You Send
Before a signed form goes back, snap a quick photo on your phone. If it gets lost at school (it happens), you have a copy. Create an album called “School Forms” and you’ll never hunt through your camera roll again.
What About the Pile at Home?
If incoming paper is overwhelming even after the caddy, the root issue is volume. For a simple way to sort and store what comes home from school, see the kids’ artwork and school papers sorting system. It pairs well with the weekly caddy reset.
For the home end of the morning handoff, the back-to-school drop zone gives backpacks and forms a landing spot at the door.
Backpacks: Where They Go and Why It Matters
The backpack is the biggest object your child brings in, and where it lands determines whether the rest of the system works.
The Problem With Floor Backpacks
On the floor, a backpack tips over, spills, and blocks the footwell your child’s feet use. Kids then lean or unbuckle to reach it.
Better Options
| Option | Best for | Safety note |
|---|---|---|
| 1. Cargo area or trunk (the default) | All bags, whole drive. Full back row: load at the curb if allowed, or park and walk up. | An adult loads it, using tie-down points if your car has them. Keeps weight away from small passengers. |
| 2. Strapped holding bin (curb only, or fallback) | Curb to parked stop; a light bag for the drive if cargo is full (heavy bags always move) | Soft-sided, open-top bin in an empty seat’s footwell, held by that seat’s buckled belt; never where feet go |
Safety firstThe bin never sits in a footwell a child’s feet use. Never secure a bag or bin with a car seat’s belt, harness, tether or lower anchors, or with the belt a child is wearing. Don’t hang heavy items from headrests.
Whichever option fits your car, the backpack lands in the same spot at the curb, every day. My own preference is the trunk for every drive, with the holding bin only as the bridge from curb to parked stop.
Backpack Pre-Check at the Curb
Before the car even moves, run a three-second check:
- Zipper closed?
- Lunchbox inside or in the bin?
- Water bottle in its slot?
This takes less time than it sounds, and it prevents the spilled-contents scenario. For older kids, make it a spoken ritual: “Zip, lunch, bottle.” They’ll start doing it without being asked.
Water Bottles, Snacks, and the Kid-Reach Zone
The kid-reach zone is where your child gets a little autonomy. They can reach their water bottle and quiet item while buckled, without asking you to turn around.
Snacks aren’t stored here; they come from the caddy.
Water Bottle Holders
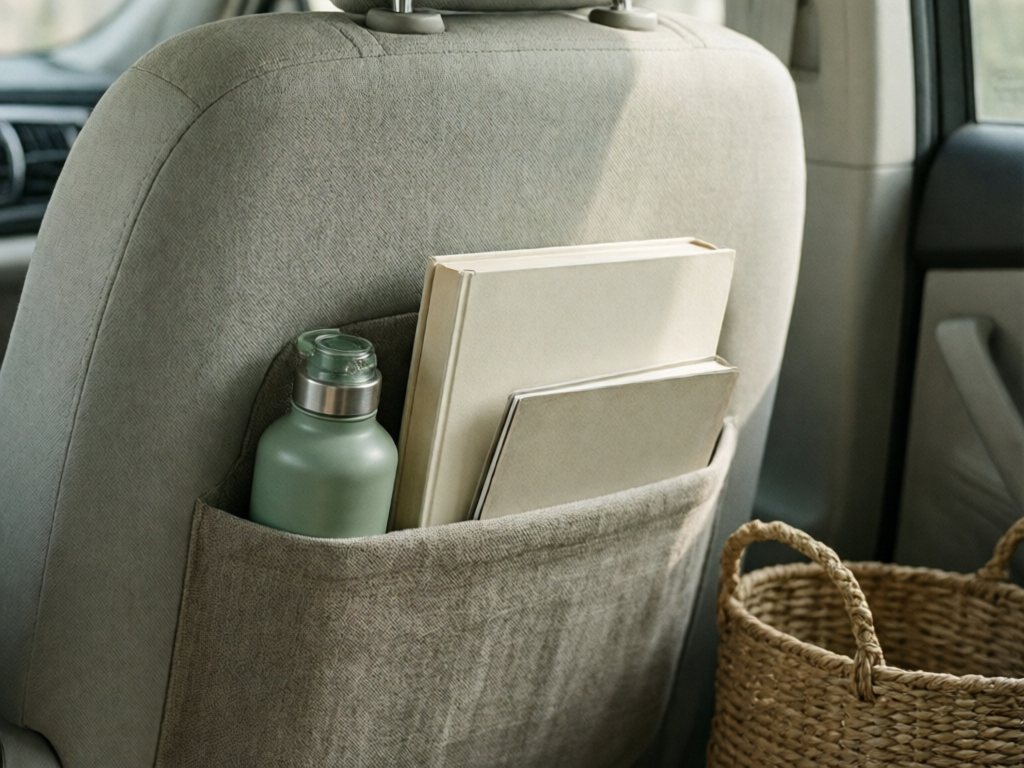
A bottle with nowhere to sit becomes a rolling hazard. Solve it with a dedicated slot:
- Cup holder in the door or console. Check the diameter. Many insulated bottles are too wide.
- Seat-back pocket with a bottle sleeve. Good for narrow bottles.
- Adjustable cup-holder expander. A silicone expander fits wide bottles into standard holders.
Choose a bottle that doesn’t leak when tipped. Test it at home by filling it, closing it, and turning it upside down over the sink. A leaker in the car is a ruined seat.
Snack Systems That Don’t Make Crumbs
Snack rules that keep a car clean:
- Choose low-crumb, low-sticky foods. Shelf-stable options such as dry cereal in a lidded cup or crackers need no cooling.
- Fresh options like apple pieces or cheese travel in an insulated bag with an ice pack. Toss perishables left out more than 2 hours, or 1 hour when it is 90°F or hotter.
- Only sealed, shelf-stable snacks live in the caddy, in compartment D rather than a loose bag your child rummages in. Anything fresh comes from the insulated bag and goes back inside with you.
- Use lidded containers or silicone snack cups instead of open bags.
- Keep the car set separate from the home pantry and swap it weekly. In hot weather bring it inside, and replace anything left in the heat or gone soft or stale.
TipFor children under 4, skip whole grapes, whole cherry tomatoes, whole nuts, popcorn, hard candy, raw carrot rounds and hot dog rounds. Quarter grapes and cherry tomatoes lengthwise, cut apple into thin or very small pieces, and cut cheese into small pieces. Ask your pediatrician what suits your child’s age and abilities.
Safety firstKids eat only while the car is parked and an adult is watching. A driver can’t see or respond to choking, so snacks wait until you are stopped.
If you run snacks and lunches from a pantry system at home, see the family pantry organization system. A stocked “car snack” bin in the pantry makes weekly restocking a thirty-second job.
One Quiet Item Per Child
Each child gets one quiet item that stays in the car. Keep it soft or lightweight: a board book or soft toy for ages 3 to 4, and a paperback, a soft-cover sketch pad with a few crayons in a zipped pouch, or a soft fidget for ages 5 and up. Keep sharp pencils away from under-4s. Store the item in the seat-back pocket. More than one item and the backseat becomes a toy bin.
Age-by-Age: What Each Child Needs (Ages 3 to 8)
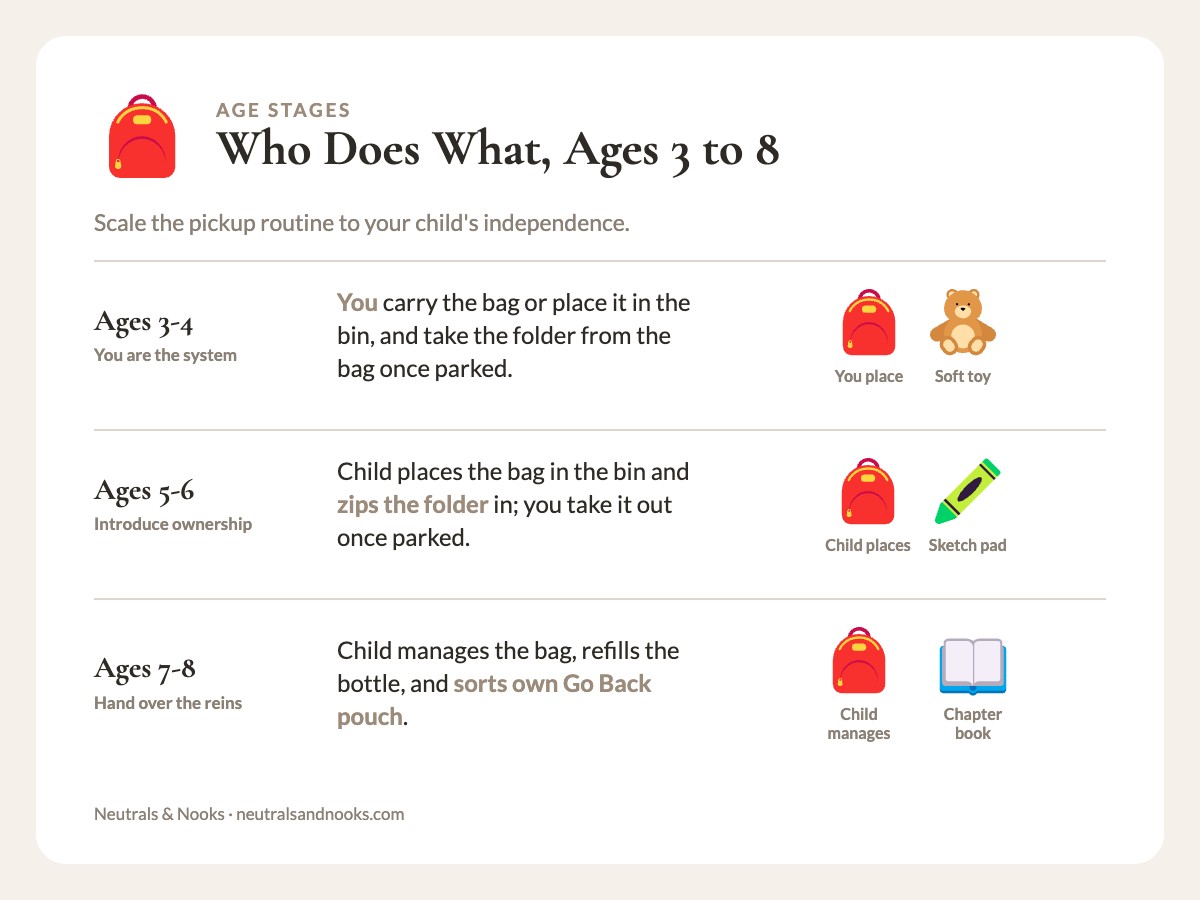
| Age | Independence level | Backpack | Water bottle | Paper handoff | Quiet item |
|---|---|---|---|---|---|
| 3-4 | Needs help for almost everything | You carry or place in bin | Straw cup or easy-open bottle in cup holder | You take the folder from the bag once parked | Board book or soft toy |
| 5-6 | Can handle some steps | Child places in bin | Child takes bottle from holder | Child zips the folder into the bag; you take it out once parked | Soft-cover sketch pad, crayons in a zipped pouch |
| 7-8 | Mostly independent | Child manages bag and zips it | Child refills and replaces | Child sorts own “Go Back” pouch | Paperback book or soft-cover journal |
For Ages 3 to 4: You Are the System
At this age, don’t expect your child to remember anything. Make your part smooth. Keep the caddy ready, the backpack bin open, and snacks pre-portioned, and buckle or check the harness every time. Praise helpful actions (“Thank you for carrying your backpack!”) without making it a test.
For Ages 5 to 6: Introduce Ownership
This is the sweet spot for building habits. Give them one job in the handoff: “You put the backpack in its bin, and I’ll get the folder when we park.” Use a simple visual card taped to the seat-back showing three icons: backpack, bottle, folder. Kids at this age love checking things off.
For Ages 7 to 8: Hand Over the Reins
Older kids can run most of the routine. Let them manage their own “Go Back” pouch, restock their quiet item, and report anything that needs your attention: “There’s a form in my folder due Friday.” Your role shifts to checking and encouraging, not doing.
Multiple Kids, One Pickup Line
If you have two or three children climbing in at once, the system needs a few adjustments.
- Assign back-seat spots. Give each child a fixed rear spot (curb-side, middle or far side) and their own seat-back pocket, and load everyone through the curb-side rear door. Fewer arguments when ownership is clear.
- Color-code. A different color pouch or sleeve per child for paperwork. Child one is sage, child two is oat, child three is clay. When the folder lands in the caddy, you can see whose it is at a glance.
- One folder per child, one caddy. Keep the caddy shared, but give each child their own “Today Folder” divider within compartment A.
- Stagger the handoff. If your children come out in different grades at different times, handle the oldest first (they need less) so you can focus on the youngest when they arrive.
- Full back row? Skip the floor bin. With no empty seat, there’s nowhere to strap a bin. Load bags into the cargo area at the curb if allowed, or park and walk up.
If you’re building a coordinated system for several children, the sizing and labeling logic in mudroom cubbies for multiple kids translates directly to the car.
The Reserve Zone: Trunk Basics
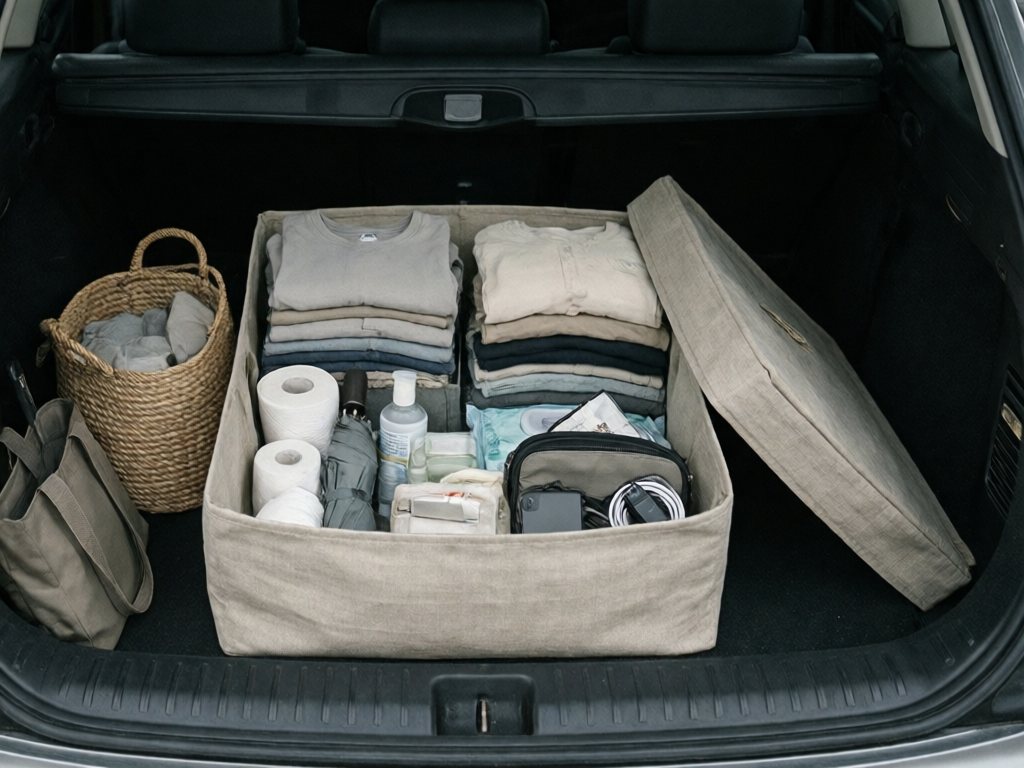
The reserve zone holds the things you need occasionally, kept out of the way.
Reserve items stay in the trunk or cargo area only, in a lidded bin that is strapped down or wedged so it can’t slide. Hard items like a charger or first-aid pouch don’t belong loose in the cabin.
Never store anything under the driver’s seat, where it can slide under the pedals.
A small lidded bin works well. A good starter kit:
- A spare set of clothes per child (season-appropriate; swap them at the change of seasons).
- A roll of paper towels or a few cloths.
- A compact umbrella.
- Hand sanitizer and wipes.
- A basic first-aid pouch.
- A foldable tote for unexpected finds (a plant from the school sale, a project too big for a backpack).
- A phone charger and a spare cable.
Give the bin a ten-minute check on the first of each month. Replace anything used, and rotate the clothes if they’ve been outgrown.
For seasonal items like boots, mittens, and sunhats, a rotation system keeps the bin from ballooning. The same logic from seasonal gear rotation applies on a smaller scale: one season in the car, one in storage.
Daily Pickup Routine Checklist
Here’s the routine in three beats.
Beat 1: Before You Leave the House (Morning)
- Caddy is stocked: snacks in, tools present, trash emptied.
- Signed forms are in the child’s “Go Back” pouch.
- Water bottles filled and in their holders.
- Backpack zone is clear and ready.
Beat 2: In the Line (Afternoon)
- Wait in the line, engine on or off as your school requires. Eyes up, hands free.
- Leave the caddy alone. The stock check and trash clear-out happened this morning.
- Run curb steps 1 to 3 above.
- Snacks, paper and phone tasks wait until you’re parked.
Beat 3: After the Handoff (Drive Home)
- Buckles checked by hand and the bag secured.
- Paper is in the caddy, the backpack is in the cargo area and any due date is on your calendar.
- You drive. Say anything time-sensitive out loud (“Don’t forget, field trip form due Wednesday”) so your brain files it.
The Evening Close
When you get home, the caddy comes inside. Spend two minutes sorting what’s in compartments A and B, then put the caddy by the door for the morning. This connects neatly to a broader evening routine; the 15-minute evening reset is a good place to fit the caddy check alongside the rest of your tidy-up.
Common Mistakes (and Simple Fixes)
| Mistake | Why it happens | Fix |
|---|---|---|
| Caddy becomes a junk drawer | Too many compartments or no weekly reset | Cap at five compartments; empty compartment A every week |
| Kids skip the backpack spot | It’s awkward to reach or not obvious | One fixed curb spot and a picture card |
| Forms still get lost | They land in the wrong place | Only one place for incoming paper (compartment A) |
| Snacks spill | Open bags or sticky foods | Lidded cups; low-crumb foods only |
| Backpack falls on the floor | No fixed spot | Cargo area or trunk for the drive; strapped holding bin at the curb, same every day |
| Caddy slides around | Smooth surface and no strap | Non-slip mat underneath, plus a strap or a seatbelt through the handles |
| Reserve bin overflows | Items added but never removed | Monthly check, one in/one out |
If something keeps failing, resist adding more gear. Instead, ask which handoff step is breaking, and fix that step.
A Budget-Friendly and Minimal Version
You don’t need to buy a lot of new things. If you prefer to work with what you have, here’s a stripped-down version.
The one-bin version:
- A soft-sided small basket or bin, strapped in on the rear floor or console.
- Two folders: one for incoming, one for “sign and send” (label with tape).
- A pen clipped inside.
- A small pouch for wipes and a snack.
The no-cost version:
- Use an existing light tote bag that holds its shape.
- Cut two pieces of cardboard to make dividers.
- Reuse a zip pouch from your drawer for the “Go Back” pouch.
- Use a cloth napkin or hand towel as a mat under the caddy.
A simple soft-sided bin does the job if you use it consistently.
Keeping the Look Calm
Three small choices keep the car visually quiet:
- Stick to a limited palette. Oat, charcoal, and natural wood tones look cohesive and calm.
- Keep surfaces clear. The dashboard and console should hold nothing loose.
- Hide the practical stuff. Put the reserve items in a lidded bin so they’re out of sight.
Frequently Asked Questions
What’s the best way to organize a car for kids during school pickup?
Think in zones rather than gear. Paper goes in a strapped-in handoff caddy, and the backpack rides in the cargo area, with a strapped holding bin for the curb. The water bottle gets a cup holder or pocket, and spare supplies go in a small reserve bin in the trunk. Each item gets one spot. Start with just the caddy and the backpack spot; add the rest if you need them.
How do I stop losing permission slips and school forms?
Give every form a three-step path. It arrives in one compartment of your caddy and moves to a “sign and send” sleeve if it needs action. It goes back to school in a clear zip pouch in the backpack. Once you’re parked, write the due date on the form and add it to your calendar. Take a quick photo of signed forms before sending them back.
Where should the backpack go in the car?
For the drive, it rides in the cargo area or trunk, on the tie-down points if your car has them. At the curb, it can wait in a holding bin held by an empty seat’s belt, away from children’s feet, until you park.
What snacks are best for the car after school?
Choose low-crumb, low-sticky foods in lidded containers. Shelf-stable dry cereal or crackers need no cooling, and fresh foods like apple or cheese need an insulated bag with an ice pack. For children under 4, quarter grapes lengthwise and cut apple and cheese small, and ask your pediatrician what suits your child. Kids eat only while the car is parked and an adult is watching.
How can I get my 5-year-old to help with the car routine?
Give them one small, clear job, such as putting their backpack in its bin or checking that it’s zipped. A simple picture card on the seat-back showing backpack, bottle, and folder gives them a visual checklist. Kids this age love ownership and praise, so thank them for specific actions. Add one new job at a time once the first is automatic.
How do I handle pickup with more than one child?
Give each child a fixed rear seat, a seat-back pocket and a color-coded folder or pouch, and load everyone through the curb-side rear door. Share one caddy with a divider per child in the Today Folder compartment. If children come out at different times, handle the older child first, since it’s quicker.
How often should I reset the car organization system?
Do a two-minute caddy reset once a week to sort paper and refill snacks, and a ten-minute check on the reserve bin once a month to swap clothes and replace supplies. Adjust whenever the seasons change or your child’s school routine shifts. Small, regular resets are far more effective than an occasional big clean-out.
Where to Start This Week
The ninety-second handoff won’t get longer, but what happens around it can change: where the bag lands, where the paper goes once you’re parked, what’s within a small hand’s reach.
Start with the caddy this week, then add the backpack spot and one piece at a time. I’d give it about a week before the routine feels automatic, and some afternoons will still go sideways.